2017 Acura RDX heating
[x] Cancel search: heatingPage 3 of 449

Contents
This owner’s manual should be considered a permanent part of the
vehicle and should remain with the vehicle when it is sold.
This owner’s manual covers all models of your vehicle. You may find
descriptions of equipment and features that are not on your
particular model.
Images throughout this owner’s manual (including the front cover)
represent features and equipment that are available on some, but
not all, models. Your particular mo del may not have some of these
features.
This owner’s manual is for vehicles sold in the United States and
Canada.
The information and specifications in cluded in this publication were
in effect at the time of approval for printing. Honda Motor Co., Ltd.
reserves the right, however, to discontinue or change specifications
or design at any time without notice and without incurring any
obligation.2 Safe Driving P. 23
For Safe Driving P. 24 Seat Belts P. 29 Airbags P. 37
2Instrument Panel P. 65
Indicators P. 66 Gauges and Multi-Information Display P. 93
2Controls P. 117
Setting the Clock P. 118 Locking and Unlocking the Doors P. 119
Opening and Closing the Moonroof P. 143
Adjusting the Seats P. 162
2Features P. 185
Audio System* P. 186 Audio System Basic Operation* P. 190
HomeLink ® Universal Transceiver P. 222
2 Driving P. 255
Before Driving P. 256 Towing a Trailer P. 261
Parking Your Vehicle P. 330Multi-View Rear Camera P. 338
2Maintenance P. 343
Before Performing Maintenance P. 344 Maintenance MinderTM P. 347
Checking and Maintaining Wiper Blades P. 370
Climate Control System Main tenance P. 386 Cleaning P. 387
2Handling the Unexpected P. 393
Tools P. 394 If a Tire Goes Flat P. 395
Overheating P. 418 Indicator, Coming On/Blinking P. 420
2Information P. 429
Specifications P. 430 Identification Numbers P. 432
Emissions Testing P. 435 Warranty Coverages P. 437
Page 20 of 449

Quick Reference Guide
19
Handling the Unexpected (P 393)
Flat Tire (P 395)
● Park in a safe location and repair the flat
tire using the tire repair kit.
● Park in a safe location and replace the
flat tire with the comp act spare tire in the
cargo area.
Indicators Come On (P 420)
● Identify the indica tor and consult the
owner’s manual.
Vehicles with tire repair kit
Vehicles with a compact spare tire
Engine Won’t Start (P 412)
● If the battery is dead, jump start using a
booster battery.
Blown Fuse (P 424)
● Check for a blown fuse if an electrical
device does not operate.
Overheating (P 418)
● Park in a safe location. If you do not see
steam under the hood, open the hood,
and let the engine cool down.
Emergency Towing (P 427)
● Call a professional towing service if you
need to tow your vehicle.
Page 84 of 449

83
uuIndicators uMulti-Information Display Warning and Information Messages
Continued
Instrument Panel
*1:On the left: Models wi thout full color display
On the right: Models with full color display
Message*1ConditionExplanation
●Appears when the scheduled maintenance is
due soon.
●Consequently, SERVICE DUE NOW /
Maintenance Due Soon and SERVICE PAST
DUE /Maintenance Past Due follow.2Maintenance Minder Messages on the
Multi-Information Display P. 348
●Appears when the engine coolant
temperature gets abnormally high.
2Overheating P. 418
●Appears when there is a problem with the
power tailgate system.●Manually open or close the power tailgate.●Have the vehicle checked by a dealer.
—
U.S.U.S.
Canada
Page 94 of 449

93
Instrument Panel
Gauges and Multi-Information Display
Gauges
Gauges include the speedometer, tachometer, fuel gauge, and related indicators.
They are displayed when the power mode is in ON.
Displays your driving speed in mph (U.S.) or km/h (Canada).
Shows the number of engine revolutions per minute.
Displays the amount of fuel left in the fuel tank.
Displays the temperature of the engine coolant.
■Speedometer
■Tachometer
■Fuel Gauge
■Temperature Gauge
1Fuel Gauge
NOTICE
You should refuel when the reading approaches .
Running out of fuel can cause the engine to misfire,
damaging the cata lytic converter.
The actual amount of remain ing fuel may differ from
the fuel gauge reading.E
1 Temperature Gauge
NOTICE
Driving with the temperat ure gauge pointer in the
upper zone can cause serious engine damage. Pull
safely to the side of th e road and allow engine
temperature to return to normal.
2 Overheating P. 418
Page 156 of 449

155
uuOperating the Switches Around the Steering Wheel uRear Defogger/Heated Door Mirror Button
Controls
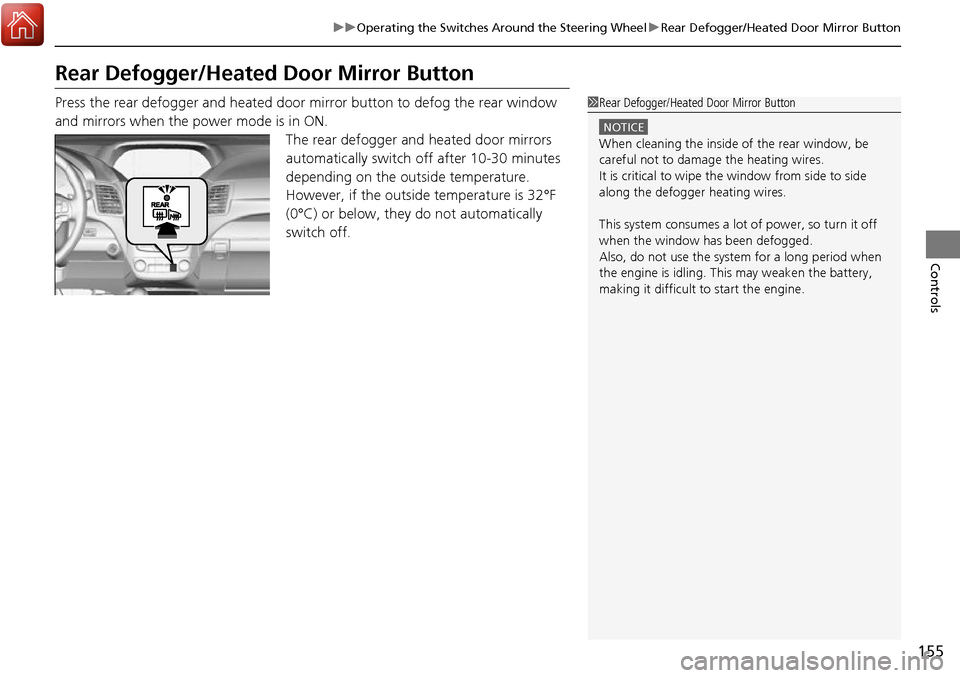
Rear Defogger/Heated Door Mirror Button
Press the rear defogger and heated door mirror button to defog the rear window
and mirrors when the power mode is in ON.
The rear defogger and heated door mirrors
automatically switch off after 10-30 minutes
depending on the outside temperature.
However, if the outside temperature is 32°F
(0°C) or below, they do not automatically
switch off.1 Rear Defogger/Heated Door Mirror Button
NOTICE
When cleaning the inside of the rear window, be
careful not to damage the heating wires.
It is critical to wipe the window from side to side
along the defogger heating wires.
This system consumes a lot of power, so turn it off
when the window has been defogged.
Also, do not use the system for a long period when
the engine is idling. This may weaken the battery,
making it difficult to start the engine.
Page 375 of 449

374
Maintenance
Checking and Maintaining Tires
Checking Tires
To safely operate your vehicle, your tires must be of the proper type and size, in
good condition with adequate tread, and properly inflated.
■Inflation guidelines
Properly inflated tires provide the best combination of handling, tread life, and comfort.
Refer to the driver’s doorjamb label or spec ification’s page for the specified pressure.
Underinflated tires wear unevenly, adversely affect handling and fuel economy, and
are more likely to fail from overheating.
Overinflated tires make your vehicle ride harshly, are more prone to road hazards,
and wear unevenly.
Every day before you drive, look at each of the tires. If one looks lower than the
others, check the pressure with a tire gauge.
At least once a month and before long trip s, use a gauge to measure the pressure in
all tires, including the spare. Even tires in good condition can lose 1 to 2 psi (10 to
20 kPa, 0.1 to 0.2 kgf/cm
2) per month.
■Inspection guidelines
Every time you check inflation, also examine the tires and valve stems.
Look for:
• Bumps or bulges on the side or in the tread. Replace the tire if you find any cuts,
splits, or cracks in the si de of the tire. Replace it if you see fabric or cord.
• Remove any foreign objects and inspect for air leaks.
• Uneven tread wear. Have a deal er check the wheel alignment.
• Excessive tread wear.
2 Wear Indicators P. 379
•Cracks or other damage around valve stem.
1Checking Tires
Measure the air pressure when tires are cold. This
means the vehicle has been parked for at least three
hours, or driven less than 1 mile (1.6 km). If
necessary, add or releas e air until the specified
pressure is reached.
If checked when hot, tire pressure can be as much as
4–6 psi (30–40 kPa, 0.3–0.4 kgf/cm
2) higher than if
checked when cold.
Have a dealer check the tires if you feel a consistent
vibration while driving. Ne w tires and any that have
been removed and reinst alled should be properly
balanced.
3WARNING
Using tires that are excessively worn or
improperly inflated can cause a crash in
which you can be seriously hurt or killed.
Follow all instruction s in this owner’s
manual regarding ti re inflation and
maintenance.
Page 394 of 449

393
Handling the Unexpected
This chapter explains how to handle unexpected troubles.
ToolsTypes of Tools .................................. 394
If a Tire Goes Flat Changing a Flat Tire
*....................... 395
Temporarily Repair ing a Flat Tire*..... 401
Engine Does Not Start Checking the Engine ........................ 412
If the Keyless Access Remote Battery is Weak ............................................. 413
Emergency Engine Stop ................... 414
Jump Starting .................................... 415
Shift Lever Does Not Move .............. 417Overheating
How to Handle Overheating............. 418
Indicator, Coming On/Blinking
If the Low Oil Pressure Indicator Comes On ............................................. 420
If the Charging System Indicator Comes
On ................................................. 420
If the Malfunction Indicator Lamp Comes On or Blinks ................................... 421
If the Brake System Indicator (Red) Comes On .................................................... 422
If the Electric Power Steering (EPS) System
Indicator Comes On............................ 422
If the Low Tire Pressure/TPMS Indicator Comes On or Blinks ....................... 423
Fuses Fuse Locations ................................. 424
Inspecting and Changing Fuses ........ 426
Emergency Towing ........................... 427
When You Cannot Open the Tailgate..... 428
* Not available on all models
Page 419 of 449

418
Handling the Unexpected
Overheating
How to Handle Overheating
Overheating symptoms are as follows:
•The temperature gauge needle is at the mark or the engine suddenly loses
power.
• Steam or spray comes out of the engine compartment.
■First thing to do
1. Immediately park the vehicle in a safe place.
2. Turn off all accessories and turn on the hazard warning lights.
u No steam or spray present: Keep the engine running and open the hood.
u Steam or spray is present: Turn off the engine and wait until it subsides.
Then, open the hood.
1 How to Handle Overheating
NOTICE
Continuing to drive with the temperature gauge
needle at the mark may damage the engine.
3WARNING
Steam and spray from an overheated
engine can seriously scald you.
Do not open the hood if steam is coming
out.
H
H