2017 Acura NSX light
[x] Cancel search: lightPage 39 of 116

72 || 73
VEHICLE CONTROLSVEHICLE CONTROLS
Adjusting the Mirrors
Adjust the angle of the mirrors for the best visibility when you are sitting in the correct driving
position.
n Automatic Dimming Rearview Mirror
When driving after dark, the
automatic dimming function
reduces the glare in the rearview mirror (and power door
mirrors) from headlights behind you.
The function cancels when the transmission is in Reverse (R).
n Power Door Mirrors
Adjust the power door
mirrors using the switches on the driver’s door when the vehicle is on.
L/R selector switch: Select the left or right mirror. After
adjusting the mirror, return the switch to the center position.
Mirror position adjustment switch: Press the switch left,
right, up, or down to move the mirror.
SwitchSelector
Switch Adjustment
n Reverse Tilt Door Mirrors
The selected door mirror can tilt downward when you shift to Reverse (R), improving
visibility on the selected side of the vehicle while reversing. The mirror returns to its original
position when you shift out of Reverse.
Models with driving position memory system
Either side mirror can tilt by moving the selector switch to the
appropriate side.
Slide the selector switch to left
or right to tilt down either side
door mirror.
Models without driving position memory system
The passenger-side door mirror can tilt downward by moving
the selector switch to the right.
Selector Switch
Page 40 of 116

74 || 75
VEHICLE CONTROLSVEHICLE CONTROLS
HomeLink® Universal Transceiver
Program your vehicle to operate up to three remote-controlled devices around your home—
such as garage doors, lighting, or home security systems—using the buttons on the ceiling.
Red Indicator
n Training a Button
Park near the system
you want to program, and follow the instructions in the flowchart.
To retrain a button or erase codes, see the Owner’s Manual on the Owner Information CD
or visit owners.acura.com (U.S.) or www.myacura.ca (Canada). If you need help, call (800)
355-3515 or visit www.homelink.com.
Press and hold the button on the r emote
and the HomeLink button at the same
time. Then, while continuing to hold the
HomeLink button, press and r elease the
button on the remote every 2 seconds.
Does the LED blink at a f ast er ra te within 20 seconds ?
Press and hold the
HomeLink button
again. Training
complete
YES
NO
HomeLink indicator
�ashes for 2 seconds,
then r emains on. HomeLink LED
r
emains on.YES
NO
YES
NO
Position the remote transmitter
1–3 inches (3–8 cm) from the
HomeLink button you want to program.1
Press and hold the desired HomeLink
button and the button on the remote
transmitter.
Does the HomeLink indicator (LED) blink at a f aster
rate after about 10 seconds ?
2
a
The remote has a rolling code. Press
the “learn” button on the remote-
controlled device (e.g., garage door
opener).
Press the programmed HomeLink
button again; the remote-controlled
device should operate. Within 30 seconds, press and hold the
programmed HomeLink button for 2
seconds.a
Press and hold the programmed
HomeLink button for about a second.
Does the devic e (garage door opener) work ?
3
b
4
5
HomeLink® is a registered trademark of Gentex Corporation.
Page 43 of 116

80 || 81
AUDIO AND CONNECTIVITYAUDIO AND CONNECTIVITY
iPod and iPhone are trademarks of Apple, Inc.
Applicable laws may prohibit the operation of handheld electronic devices while operating a vehicle.
AUDIO AND CONNECTIVITY
Learn how to operate the vehicle’s audio system.
Basic Audio Operation
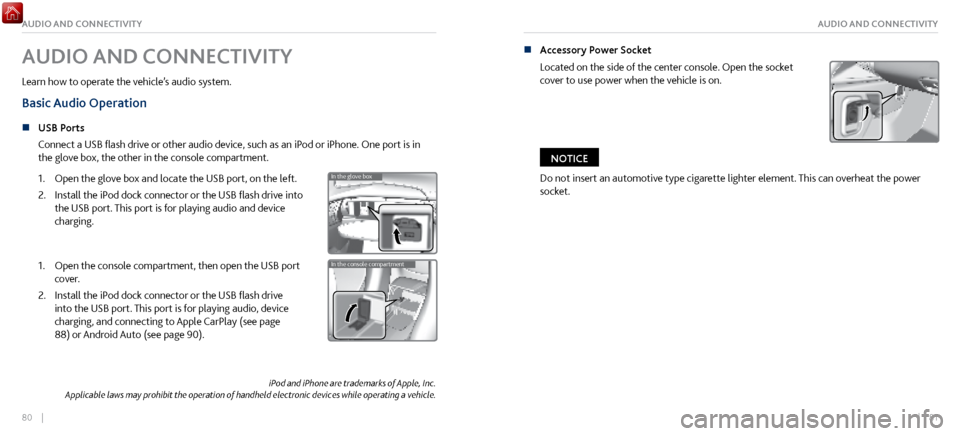
n USB Ports
Connect a USB
flash drive or other audio device, such as an iPod or iPhone. One port is in
the glove box, the other in the console compartment.
1.
Open the glove bo
x and locate the USB port, on the left.
2.
Install the iPod dock connector or the
USB flash drive into
the USB port. This port is for playing audio and device
charging.
In the glove bo x
In the console compartment1. Open the console compartment, then open the USB port
cover.
2.
Install the iPod dock connector or the
USB flash drive
into the USB port. This port is for playing audio, device
charging, and connecting to Apple CarPlay (see page
88) or Android Auto (see page 90).
In the glove bo x
In the console compartment
n Accessory Power Socket
Located on the side of the center
console. Open the socket
cover to use power when the vehicle is on.
Do not insert an automotive type cigarette lighter element. This can overheat the power
socket.
NOTICE
Page 54 of 116

102 || 103
n Talk Button Tips
•
For a list of phone-related
voice commands, see page 220.
•
When using the Talk button,
wait until you hear a beep before speaking.
•
To bypass the system pr
ompts, simply press the Talk button again to say your command.
•
When the Talk button is pr
essed, all available voice commands are highlighted in yellow.
•
Speak in a clear, natural voice.
•
Reduce all background noise.
•
Adjust the dashboar
d and side vents away from the microphone in the ceiling.
•
Close the windows.
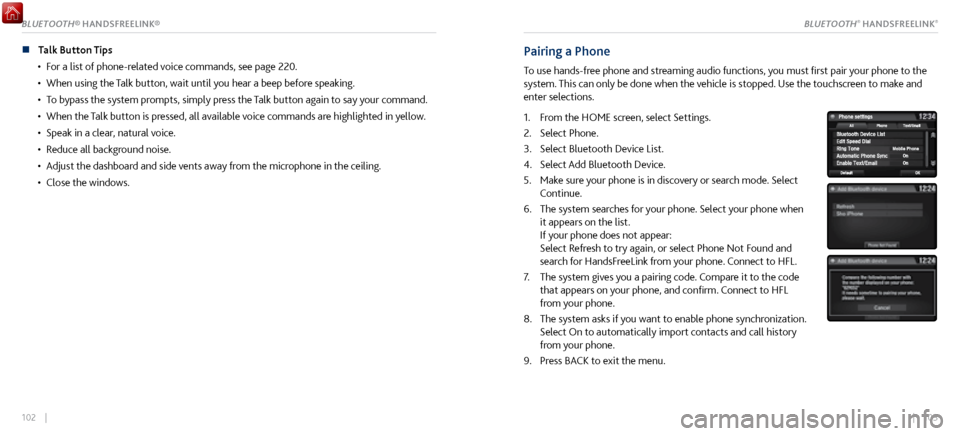
Pairing a Phone
To use hands-free phone and streaming audio functions, you must first pair your phone to the
system. This can only be done when the vehicle is stopped. Use the touchscreen to make and
enter selections.
1.
From the HOME scr
een, select Settings.
2.
Select Phone.
3.
Select Bluetooth Device List.
4.
Select Add Bluetooth Device.
5.
Make sure y
our phone is in discovery or search mode. Select
Continue.
6.
The system searches for y
our phone. Select your phone when
it appears on the list.
If your phone does not appear:
Select Refresh to try again, or select Phone Not Found and
search for HandsFreeLink from your phone. Connect to HFL.
7.
The system gives you a pairing code.
Compare it to the code
that appears on your phone, and confirm. Connect to HFL
from your phone.
8.
The system asks if you want
to enable phone synchronization.
Select On to automatically import contacts and call history
from your phone.
9.
Press BACK to exit
the menu.
BLUETOOTH® HANDSFREELINK®BLUETOOTH® HANDSFREELINK®
Page 60 of 116

114 || 115
NAVIGATIONNAVIGATION
NAVIGATION*
Learn how to enter a destination and operate the navigation system.
Basic Navigation Operation
A real-time navigation system uses GPS and a map database to show your current location and
help guide you to a desired destination. You can operate the system using voice commands or
the system controls.
To reduce the potential for driver distraction, certain manual functions may be inoperable or
grayed out while the vehicle is moving. Voice commands are always available.
n
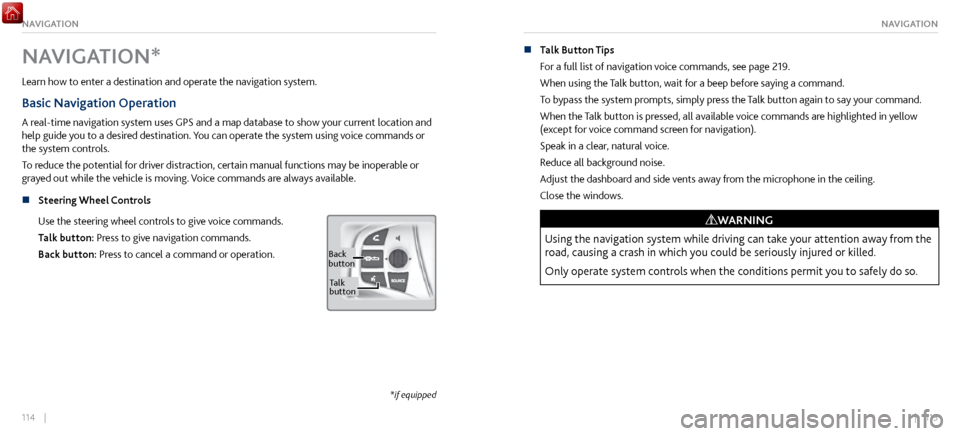
Steering Wheel Controls
Use
the steering wheel controls to give voice commands.
Talk button: Press to give navigation commands.
Back button: Press to cancel a command or operation.
Back
button
Ta lk
button
*if equipped
n Talk Button Tips
For a full list
of navigation voice commands, see page 219.
When using the Talk button, wait for a beep before saying a command.
To bypass the system prompts, simply press the Talk button again to say your command.
When the Talk button is pressed, all available voice commands are highlighted in yellow
(except for voice command screen for navigation).
Speak in a clear, natural voice.
Reduce all background noise.
Adjust the dashboard and side vents away from the microphone in the ceiling.
Close the windows.
Using the navigation system while driving can take your attention away from the
road, causing a crash in which you could be seriously injured or killed.
Only operate system controls when the conditions permit you to safely do so.
WARNING
Page 65 of 116

124 || 125
DRIVINGNAVIGATION
n Traffic
View traffic flow and incidents in select metr
o areas. Traffic alerts are accompanied by an
audible beep. Pop-up messages and traffic information can be viewed when you are on the
map screen. You can also select traffic to avoid. Traffic coverage is limited in Canada.
Viewing traffic
1.
From the map scr
een, select the traffic icon.
2.
Select Traffic Conditions.
3.
Traffic icons are shown on
the map. Select the magnifying
glass icon to display a full list of traffic delays.
To mute traffic alerts and voice guidance: From the map screen, press MENU. Select Mute.
To lower voice guidance volume, see page 117.
Avoiding traffic on your route
1.
From the map scr
een, select the traffic icon.
2.
Select Traffic on R
oute.
3.
Select an incident to avoid fr
om the list.
4. Select the menu icon.
5.
Select Avoid.
DRIVING
Learn about preparation for driving and other features.
Before Driving
n Break In
Avoid har d braking for the first 200 miles (300 km). You should also follow this
recommendation when the brake pads are replaced.
n
Exterior Checks
Make sure ther
e are no obstructions on the windows, door mirrors, exterior lights, or other
parts of the vehicle.
Remove any frost, snow, or ice.
Make sure the hood and hatch are securely closed.
Heat from the engine and exhaust can ignite flammable materials in the engine
compartment, causing a fire. If you’ve parked your vehicle for an extended period, inspect
and remove any debris that may have collected, such as dried grass and leaves that have
fallen or have been carried in for use as a nest by a small animal. Also check for leftover
flammable materials after you or someone else has performed maintenance on your vehicle.
Make sure the tires are in good condition.
Make sure there are no people or objects behind or around the vehicle.
Page 67 of 116

128 || 129
DRIVINGDRIVING
Load Limits Example
Example1 Max Load 507 lbs
(230 kg) 100 lbs
Passenger Weight
150 lbs x 1 + 257 lbs = 407 lbs (68 kg x 1 + 117 kg = 185 kg) (45 kg) Max Cargo Weight
Example2 Max Load (230 kg)507 lbs
100 lbs
(45 kg)
Pass
enger Weight
150 lbs x 2 + 107 lbs = 407 lbs (68 kg x 2 + 49 kg = 185 kg) Max Cargo Weight
Overloading or improper loading can affect handling and stability and cause a crash
in which you can be hurt or killed.
Follow all load limits and other loading guidelines in this guide.
WARNING
The headlight aim on your vehicle was set by the factory and does not need to be adjusted.
However, if you regularly carry heavy items in the cargo area, have the aiming readjusted at
your authorized Acura NSX dealer or by a qualified technician.
5.
Determine the combined weight of luggage and car
go being loaded on the vehicle. That
weight may not safely exceed the available cargo and luggage load capacity calculated in
step 4.
6.
If your vehicle
will be towing a trailer, load from your trailer will be transferred to your
vehicle. Consult the Owner’s Manual to determine how this reduces the available cargo and
luggage load capacity of your vehicle.
In addition, the total weight of the vehicle, all occupants, accessories, cargo, and
trailer tongue load must not exceed the Gross Vehicle Weight Rating (GVWR) or the
Gross Axle Weight Rating (GAWR). Both are on a label on the driver’s doorjamb.
Label Example
Your vehicle is not designed to tow a trailer. Attempting to do so can void your warranties.
Page 68 of 116

130 || 131
DRIVINGDRIVING
Starting to Drive
The keyless access system allows simple push-button start.
n
Before Starting the Engine
Check
that the parking brake is applied (pull up on the switch
and look for the indicator light), then depress the brake pedal.
Keep your foot firmly on the brake pedal when starting the
engine.
The engine will be harder to start in cold weather and in
thinner air found at altitudes above 8,000 feet (2,400
m). When starting the engine in cold weather, turn off all
electrical accessories such as the lights, climate control
system, and rear defogger in order to reduce battery drain.
The vehicle will not start if the High Voltage battery
temperature drops below -4F (-20C). Plan your driving and
storage appropriately if you expect this to happen.
Brake pedal
n Changing the Power Mode
Accessory
or On mode: Press the ENGINE START/STOP
button once without pressing the accelerator pedal for
Accessory mode. Press it again for On mode.
Starting the power system: Make sure the parking brake
is applied. Then, press the brake pedal while you press
the ENGINE START/STOP button once. Do not press the
accelerator.
•
When IDS is in QUIET mode: Whether the engine starts
depends on the
engine temperature and the charge in the
High Voltage batteries.
•
When IDS is in SPORT mode: The engine
will start.
Turning the power system off: Select Park (P), then press
the ENGINE START/STOP button.