Page 25 of 369
24
System Setup
Voice Control System
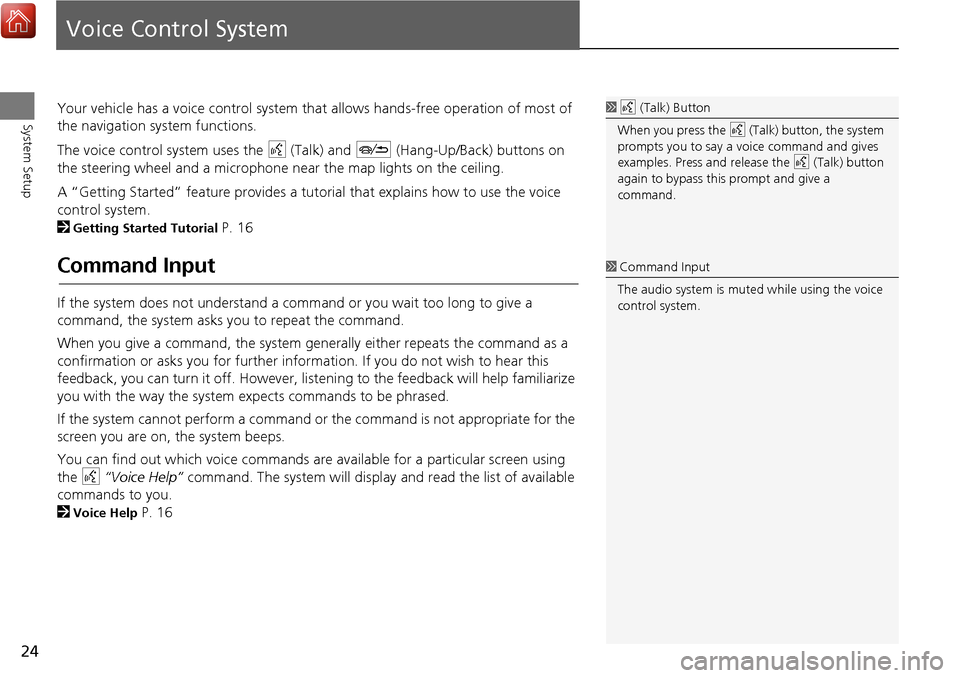
Your vehicle has a voice control system that allows hands-free operation of most of
the navigation system functions.
The voice control system uses the d (Talk) and J (Hang-Up/Back) buttons on
the steering wheel and a microphone near the map lights on the ceiling.
A “Getting Started” feature provides a tutorial that explains how to use the voice
control system.
2
Getting Started Tutorial P. 16
Command Input
If the system does not understand a command or you wait too long to give a
command, the system asks y ou to repeat the command.
When you give a command, the system ge nerally either repeats the command as a
confirmation or asks you for further informa tion. If you do not wish to hear this
feedback, you can turn it off. However, list ening to the feedback will help familiarize
you with the way the system ex pects commands to be phrased.
If the system cannot perform a command or the command is not appropriate for the
screen you are on, the system beeps.
You can find out which voice commands are available for a particular screen using
the d “Voice Help” command. The system will display and read the list of available
commands to you.
2
Voice Help P. 16
1 d (Talk) Button
When you press the d (Talk) button, the system
prompts you to say a voice command and gives
examples. Press and release the d (Talk) button
again to bypass this prompt and give a
command.
1 Command Input
The audio system is muted while using the voice
control system.
Page 31 of 369
30
Interface SettingsClock Adjustment
System Setup
Clock Adjustment
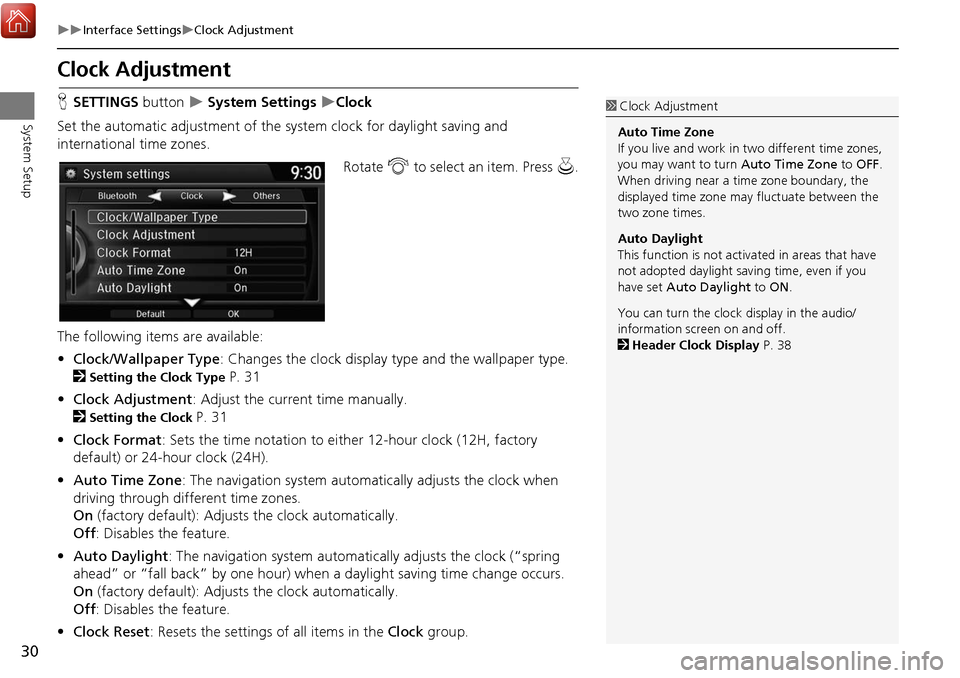
HSETTINGS button System Settings Clock
Set the automatic adjustment of the system clock for daylight saving and
international time zones.
Rotate i to select an item. Press u .
The following item s are available:
• Clock/Wallpaper Type : Changes the clock display type and the wallpaper type.
2
Setting the Clock Type P. 31
• Clock Adjustment : Adjust the current time manually.
2
Setting the Clock P. 31
• Clock Format : Sets the time notation to either 12-hour clock (12H, factory
default) or 24-hour clock (24H).
• Auto Time Zone : The navigation system automati cally adjusts the clock when
driving through different time zones.
On (factory default): Adjust s the clock automatically.
Off : Disables the feature.
• Auto Daylight : The navigation system automati cally adjusts the clock (“spring
ahead” or “fall back” by one hour) when a daylight saving time change occurs.
On (factory default): Adjust s the clock automatically.
Off : Disables the feature.
• Clock Reset : Resets the settings of all items in the Clock group.
1Clock Adjustment
Auto Time Zone
If you live and work in two different time zones,
you may want to turn Auto Time Zone to OFF.
When driving near a time zone boundary, the
displayed time zone ma y fluctuate between the
two zone times.
Auto Daylight
This function is not activated in areas that have
not adopted daylight saving time, even if you
have set Auto Daylight to ON .
You can turn the clock display in the audio/
information screen on and off.
2 Header Clock Display P. 38
Page 38 of 369
37
Interface SettingsBackground Color
System Setup
Background Color
HSETTINGS button System Settings Others Background Color
Changes the background color of the audio/information screen and the On Demand
Multi-Use Display
TM. Rotate i to select a desired color.
Press u.
Page 39 of 369
38
Interface SettingsHeader Clock Display
System Setup
Header Clock Display
HSETTINGS button System Settings Others Header Clock Display
Selects whether the clock display comes on. Rotate i to select an option. Press
u .
The following option are available:
• On (factory default): The system displa ys the clock in the audio/information
screen.
• Off : Disables the feature.
Page 67 of 369
66
GuidanceNon-map screens
System Setup
Non-map screens
HSETTINGS button Navi Settings Guidance Non-map screens
The navigation system temporarily interrupts the screen display to view the guidance
screen as you approach a guidance point.
Rotate i to select an option. Press
u .
The following options are available:
• On : The guidance screen interrupts other mode screens (e.g., audio, phone, etc,
except the rear view camera mode).
• Off (factory default): Disables the feature.
Page 142 of 369
141
Audio
This section describes how to operate the audio system. You can play
music from a wide array of media s ources, and control the audio system
using the audio buttons, the Interface Dial, or voice control.
Audio System .................................................. 142
About Your Audio System .............................. 142
USB Ports ....................................................... 143
Auxiliary Input Jack ......... .......................... ..... 145
Audio System Theft Protection ....................... 146
Setting Audio Shortcuts ................................. 147
Customizing Audio Source ............................. 148
Audio Remote Controls .................................. 149
Steering Wheel Controls ................................ 149
Audio Settings ................................................. 150
Adjusting the Sound ...................................... 152
Playing FM/AM Radio ..................................... 154
Selecting FM/AM Mode.................................. 154
Audio Screen Control ..................................... 154
Audio Menu .................................................. 157
Playing SiriusXM
® Radio ................................. 159
Selecting SiriusXM® Mode .............................. 159
Audio Screen Control ..................................... 159 Audio Menu ................................................... 173
SiriusXM
® Radio Service .................................. 176
Playing a Disc ................................................... 177
Selecting Disc Mode ....................................... 177
Audio Screen Control ..................................... 178
Audio Menu ................................................... 179
Recommended CDs ........................................ 182
Playing Hard Disc Drive (HDD) Audio ............ 184
Selecting HDD Mode ...................................... 184
Recording a Music CD to HDD........................ 185
Audio Screen Control ..................................... 186
Audio Menu ................................................... 187
Playing an iPod ................................................ 196
Selecting iPod Mode....................................... 197
Audio Screen Control ..................................... 198
Audio Menu ................................................... 200
Song By Voice
TM (SBV) .................................... 203 Playing Internet Radio
.................................... 208
Selecting Internet Radio Mode ....................... 208
Aha
TM Radio Menu ......................................... 209
Playing a USB Flash Drive ............................... 211
Selecting USB Mode....................................... 212
Audio Screen Control..................................... 213
Audio Menu .................................................. 214
Playing Bluetooth
® Audio............................... 217
Selecting Bluetooth® Audio Mode.................. 217
Audio Screen Control..................................... 218
Page 143 of 369
142
Audio
Audio System
About Your Audio System
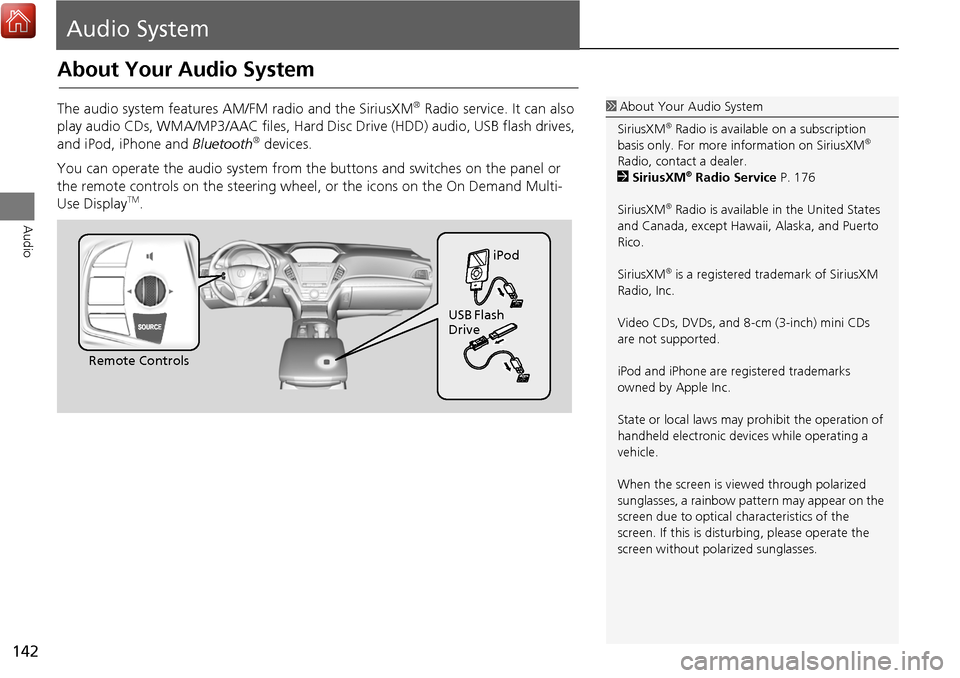
The audio system features AM/FM radio and the SiriusXM® Radio service. It can also
play audio CDs, WMA/MP3/AAC fi les, Hard Disc Drive (HDD) audio, USB flash drives,
and iPod, iPhone and Bluetooth
® devices.
You can operate the audio system from the buttons and switches on the panel or
the remote controls on the steering wheel, or the icons on the On Demand Multi-
Use Display
TM.
1 About Your Audio System
SiriusXM
® Radio is available on a subscription
basis only. For more information on SiriusXM®
Radio, contact a dealer.
2 SiriusXM
® Radio Service P. 176
SiriusXM
® Radio is available in the United States
and Canada, except Hawa ii, Alaska, and Puerto
Rico.
SiriusXM
® is a registered trademark of SiriusXM
Radio, Inc.
Video CDs, DVDs, and 8-cm (3-inch) mini CDs
are not supported.
iPod and iPhone are registered trademarks
owned by Apple Inc.
State or local laws may prohibit the operation of
handheld electronic devices while operating a
vehicle.
When the screen is vi ewed through polarized
sunglasses, a rainbow pattern may appear on the
screen due to optical characteristics of the
screen. If this is distur bing, please operate the
screen without polarized sunglasses.
Remote Controls iPod
USB Flash
Drive
Page 144 of 369
143
Audio SystemUSB Ports
Audio
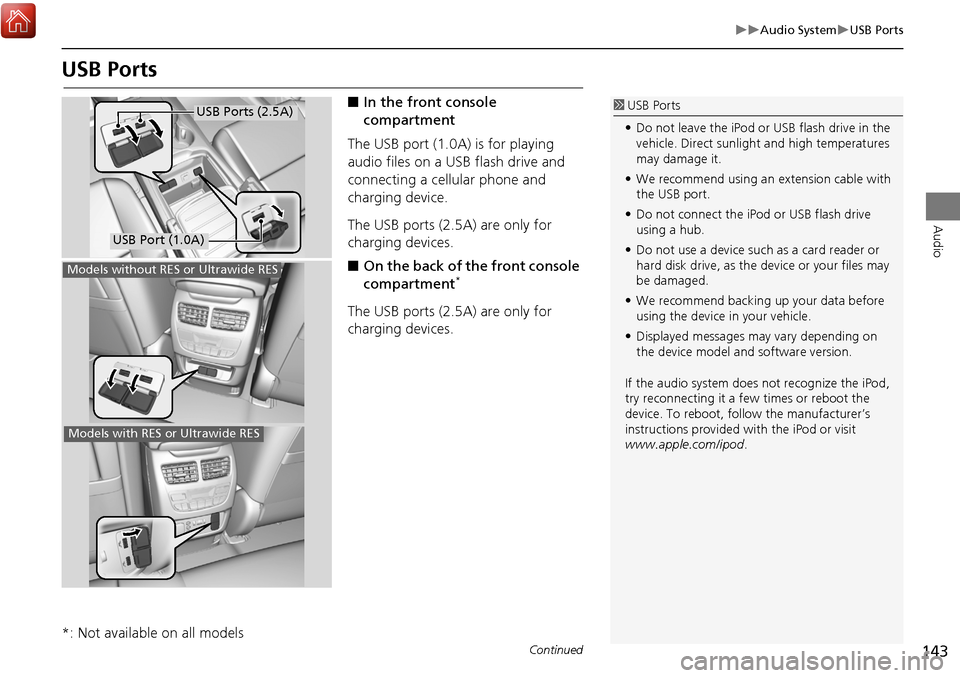
USB Ports
■In the front console
compartment
The USB port (1.0A) is for playing
audio files on a USB flash drive and
connecting a cellular phone and
charging device.
The USB ports (2.5A) are only for
charging devices.
■ On the back of the front console
compartment
*
The USB ports (2.5A) are only for
charging devices.
*: Not available on all models
1 USB Ports
• Do not leave the iPod or USB flash drive in the
vehicle. Direct sunlight and high temperatures
may damage it.
• We recommend using an extension cable with
the USB port.
• Do not connect the iPod or USB flash drive
using a hub.
• Do not use a device such as a card reader or
hard disk drive, as the device or your files may
be damaged.
• We recommend backing up your data before
using the device in your vehicle.
• Displayed messages may vary depending on
the device model a nd software version.
If the audio system does not recognize the iPod,
try reconnecting it a few times or reboot the
device. To reboot, foll ow the manufacturer’s
instructions provided with the iPod or visit
www.apple.com/ipod.
USB Port (1.0A)
USB Ports (2.5A)
Models without RES or Ultrawide RES
Models with RES or Ultrawide RES
Continued