2017.5 OPEL MOVANO_B instrument panel
[x] Cancel search: instrument panelPage 116 of 261

114LightingWhen the doors are closed, the
courtesy light extinguishes after a
delay or immediately after the ignition
is switched on.
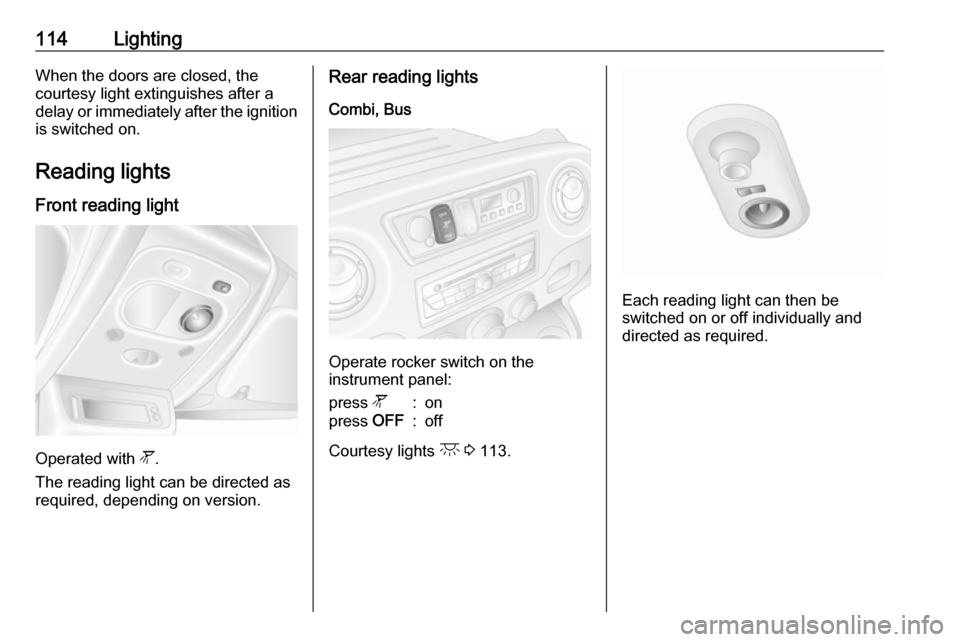
Reading lights Front reading light
Operated with l.
The reading light can be directed as
required, depending on version.
Rear reading lights
Combi, Bus
Operate rocker switch on the
instrument panel:
press l:onpress OFF:off
Courtesy lights c 3 113.
Each reading light can then be
switched on or off individually and
directed as required.
Page 120 of 261

118Climate control● Cooling A/C on.
● Air recirculation system u on.
● Set air distribution control to M.
● Set temperature control to coldest level.
● Set fan speed to highest level.
● Open all air vents.
Demisting and defrosting the
windows
● Switch cooling A/C on.
● Set temperature control to warmest level.
● Set fan speed to highest level.
● Set air distribution control to V.
● Switch on heated rear window Ü.
● Open side air vents as required and direct them towards door
windows.
● For simultaneous warming of the
foot well, set air distribution
control to J.Note
If V is pressed while the engine is
running, an Autostop will be inhibited
until V is pressed again.
If V is pressed while the engine is
in an Autostop, the engine will restart automatically.
Stop-start system 3 136.
Electronic climate control systemControls for: ● temperature
● air distribution ( ï or î) and
menu selection
● fan speed xAUTO:automatic modeu:air recirculationV:demisting and defrostingÜ:heated rear window,
heated exterior mirrorsA/C OFF:switch off air conditioning
Heated rear window, heated exterior
mirrors Ü 3 41, 3 37.
Heated seats ß 3 50.
The preselected temperature is
automatically regulated. In automatic
mode, the fan speed and air
distribution automatically regulate the
air flow.
The system can be manually adapted by use of air distribution and air flowcontrols.
The electronic climate control system
is only fully operational when the
engine is running.
For correct operation, do not cover
the sensor on the instrument panel.
Page 126 of 261

124Climate controlControl unitsThe timer or remote control unit turns
the system on and off, and is used to
programme specific departure times.
Timer (Type A)1 Display:Displays preset, current
time or preset time,
temperature, Y, Ö and x2 l:Adjusts values up3 7:Long press: switch
heater on, short press:
turns display on or
confirms selection4 k:Adjusts values down5 d:Long press: switch
heater off, short press:
turns display on or exit
menu
Remote control (Type A)
1 Display:Displays preset, current
time or preset time,
temperature, Z, Ü , Y ,
Ö and x2 7:Long press: switch heater on,
short press: turns display on
or confirms selection3 l:Adjusts values up4 d:Long press: switch heater off,
short press: turns display on
or exit menu5 k:Adjusts values down
If no buttons are pressed within
ten seconds the display automatically
turns off.
Remote control (Type A) fault
displays
INIT:automatic detection –
wait until automatic
detection is finishedNO
SIGNAL:no signal –
check heater fuseZ:poor signal –
move closerÜ:battery low –
replace batteryY:heater fault –
consult workshopAdd, AddE:system in learning
mode
Teach remote control (Type A)
If the vehicle battery is reconnected,
the LED in the instrument panel
button illuminates and the system
Page 128 of 261

126Climate controlManual control
Depending on version, the auxiliary
heater can also be switched on for the
last duration time or the default
duration 30 minutes, or cut-off
immediately, using the button on the
instrument panel. The LED in the
button confirms operation.
Battery replacement
Replace the battery when the range
of the remote control is reduced or
when the battery charge symbol
flashes.
Open the cover and replace the
battery (Type A: CR 2430, Type B:
2CR 11108, or equivalent), ensuring
the new battery is correctly installed
with the positive ( <) side facing the
positive terminals. Replace the cover
securely.
Dispose of old batteries in
accordance with environmental
regulations.
Batteries do not belong in household
waste. They must be disposed of at
an appropriate recycling collection
point.
Operation (Type A)
Heating Y
Select Y in the menu bar and press
G to confirm. The predetermined
heating duration, e.g. L 30, flashes in
the display. The factory setting is 30 minutes.
Adjust the heating duration using k
or l and confirm. The value can be
set from ten to 120 minutes. Due to
the power consumption, note the
heating duration.
To switch off, select Y in the menu bar
again and press d.
Ventilation x
Select x in the menu bar and press
G to confirm.
Adjust the ventilation duration using k or l and confirm. The value can
be set from ten to 120 minutes. Due
to the power consumption, note the
heating duration.
To switch off, select x in the menu bar
again and press d.
Programming P
Up to three preset departure times
can be programmed, either during
one day or over one week.
● Select P in the menu bar and
press G to confirm.
● Select desired preset memory number P1, P2 or P3 and
confirm.
Page 141 of 261

Driving and operating139Bus
The engine is restarted automatically
when operating the power sliding
door switch on the instrument panel
during an Autostop.
Sliding door 3 28.
Restart of the engine by the stop- start system
If one of the following conditions occurs during an Autostop, the
engine may be restarted
automatically by the stop-start
system. Control indicator Ï will flash
green in the instrument cluster during an automatic engine restart.
● the vehicle battery is discharged
● the ambient temperature is too low
● the defrosting function is activated
● the brake vacuum is not sufficient
● the brake pedal is operated repeatedly
● the vehicle starts to moveAn automatic engine restart may not
be possible if a door or the bonnet is
open.
If an electrical accessory, e.g. a
portable CD player, is connected to
the power outlet, a brief power drop during restart might be noticeable.
If the Infotainment system is active,
audio sound may briefly be reduced
or interrupted during the restart.
Fault
If control indicator Ï illuminates
yellow, or the LED illuminates in
deactivation button Î without first
being pressed to deactivate the
system, there is a fault in the stop-
start system 3 100. A corresponding
message also appears in the Driver
Information Centre 3 102.
Seek the assistance of a workshop. Warning chimes 3 103.Parking9 Warning
● Do not park the vehicle on an
easily ignitable surface. The
high temperature of the
exhaust system could ignite the
surface.
● Always apply parking brake without pressing release
button. Apply as firmly as
possible on a downhill slope or
uphill slope. Depress brake
pedal at the same time to
reduce operating force.
● Switch off the engine.
● If the vehicle is on a level surface or uphill slope, engage
first gear. On an uphill slope,
turn the front wheels away from
the kerb.
If the vehicle is on a downhill
slope, engage reverse gear.
Turn the front wheels towards the kerb.
Page 159 of 261

Driving and operating1579Warning
Do not let this special safety
feature tempt you into taking risks
when driving.
Adapt speed to the road
conditions.
Control indicator b 3 99.
Trailer stability assist (TSA) 3 172.
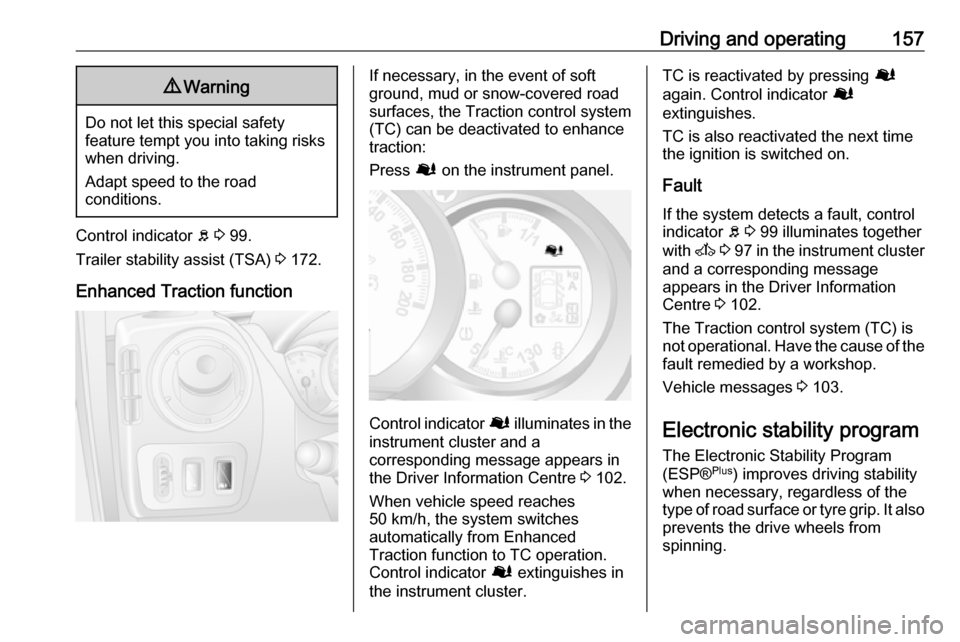
Enhanced Traction function
If necessary, in the event of soft
ground, mud or snow-covered road
surfaces, the Traction control system
(TC) can be deactivated to enhance
traction:
Press Ø on the instrument panel.
Control indicator Ø illuminates in the
instrument cluster and a
corresponding message appears in
the Driver Information Centre 3 102.
When vehicle speed reaches 50 km/h, the system switches
automatically from Enhanced
Traction function to TC operation.
Control indicator Ø extinguishes in
the instrument cluster.
TC is reactivated by pressing Ø
again. Control indicator Ø
extinguishes.
TC is also reactivated the next time
the ignition is switched on.
Fault
If the system detects a fault, control indicator b 3 99 illuminates together
with A 3 97 in the instrument cluster
and a corresponding message
appears in the Driver Information
Centre 3 102.
The Traction control system (TC) is
not operational. Have the cause of the fault remedied by a workshop.
Vehicle messages 3 103.
Electronic stability program
The Electronic Stability Program
(ESP® Plus
) improves driving stability
when necessary, regardless of the
type of road surface or tyre grip. It also
prevents the drive wheels from
spinning.
Page 160 of 261

158Driving and operatingAs soon as the vehicle starts to
swerve (understeer/oversteer),
engine output is reduced and the wheels are braked individually. This
considerably improves the driving
stability of the vehicle on slippery road
surfaces.
ESP® Plus
is operational as soon as
the ignition is switched on and control
indicator b extinguishes in the
instrument cluster. A corresponding
message also appears in the Driver
Information Centre 3 102.
When ESP® Plus
comes into action b
flashes.9 Warning
Do not let this special safety
feature tempt you into taking risks
when driving.
Adapt speed to the road
conditions.
Control indicator b 3 99.
Trailer stability assist (TSA) 3 172.
Enhanced Traction function
If necessary, in the event of soft
ground, mud or snow-covered road
surfaces, ESP® Plus
can be
deactivated to enhance traction:
Press Ø on the instrument panel.
Control indicator Ø illuminates in the
instrument cluster and a
corresponding message appears in
the Driver Information Centre 3 102.
When vehicle speed reaches
50 km/h, the system switches
automatically from Enhanced
Traction function to ESP® Plus
operation. Control indicator Ø
extinguishes in the instrument cluster.
ESP® Plus
is reactivated by pressing
Ø again. Control indicator Ø
extinguishes.
ESP® Plus
is also reactivated the next
time the ignition is switched on.
Page 165 of 261

Driving and operating163Speed limiter
Maximum speed limiter In accordance with local or national
regulations, the vehicle may be
equipped with a fixed maximum
speed limiter that cannot be disabled.
If equipped, a warning label indicating the fixed maximum speed limit (90 to
130 km/h) is located on the
instrument panel.
Deviations from the maximum speed
limit may occur briefly when driving
downhill, for physical reasons.
A warning buzzer may sound for
ten seconds if the vehicle briefly
exceeds the set limit.
Vehicles also equipped with cruise
control speed limiter: the maximum
speed cannot be exceeded by
depressing the accelerator pedal
firmly beyond the point of resistance.
Cruise control speed limiter 3 159.Parking assist9 Warning
It is the driver who bears full
responsibility for the parking
manoeuvre.
Always check the surrounding
area while reversing and using the rear parking assist system.
The parking assist makes reverse
parking easier by measuring the
distance between the rear of the
vehicle and obstacles.
The system consists of four ultrasonic parking sensors in the rear bumper.
Note
Attached parts in the detection area
cause system malfunction.
Activation
When reverse gear is engaged, the
system switches itself on
automatically. Readiness for
operation is indicated by a brief
acoustic signal.
An obstacle is indicated by buzzers.
The interval between the buzzers
becomes shorter as the vehicle gets
closer to the obstacle. When the
distance is less than 30 cm, the buzzer is continuous.