Page 41 of 263

Keys, doors and windows39
If any of these requirements are
not fulfilled, a warning chime
sounds and a message appears
in the Driver Information Centre
when the switch is actuated and the soft top will not open or close.
● There must be no objects in front
of the rear window or in the pivotarea of the soft top and the softtop lid.
If the automatic drive is not operational when the soft top is open, execute a manual closing process,
see the following instructions in
"Manual closing in the event of a
system fault".
General hints
Note
● Always actuate the operation switch until the acoustic signal
sounds or the hazard warning flashers illuminate, to ensure that
the soft top is completely opened or closed.
● The soft top can be held in an intermediate position to facilitate
cleaning of hood spaces and
gaskets. Release the switch in
the centre console during
operation to stop soft top
movement in intermediate
position for a maximum of
7 minutes when ignition is on.
After this time a warning chime
sounds, the hydraulic pressure in
the system decreases and the
soft top can start to move by
itself.
● Do not open the soft top if it is wet,
frozen or dirty.
● Activating the soft top on uneven
ground can lead to malfunctions
and damage.
● Vehicle care 3 230.Manual closing in the event of a
system fault
In case of malfunction of the electro-
hydraulic actuation, the opened soft
top can be closed manually.
A warning chime sounds and a
message appears in the Driver
Information Centre.
Page 42 of 263

40Keys, doors and windowsCaution
We strongly advise performingmanual closing of the soft top with two persons.
Manual operation of the soft top is permitted only for closing.
Read the following description
completely before starting to
operate.
Do not perform the manual closing with the vehicle parked on
downhill gradient or inclines.
Remove the large wind deflector
before starting to operate.
After closing, have the soft top
repaired by a workshop.
Prepare the following tools which are
required for manual operation:
● allen key with 4 mm hexagon on the long side and 6 mm hexagon
on the short side, located in the
glovebox
● two strings, located in the glovebox
● screwdriver, located in the tool box in the load compartment
3 210
1. Switch off ignition.
2. Open the boot lid and remove the
screwdriver from the tool box.3. On the inside of the upper load
compartment edge is a lever for
releasing the soft top lid. Locate
the lever and unlatch by swivelling the lever downwards.
Note
The boot lid cannot be opened from
next step on.
Remove the screwdriver from the
toolbox for further operation. It is
possible that the load compartment
cannot be opened until the vehicle is
at a workshop. Therefore remove
any required objects from the load
compartment.
4. Close boot lid.
Page 55 of 263

Seats, restraints53Lift release lever and fold backrest
forwards. The seat slides
automatically forwards to the stop.
To restore, lift backrest to upright
position and engage. The seat slides
automatically backwards to the
original position.
In case the head restraint of the
folded backrest is blocked by the
upper windscreen frame, allow the
seat to move backwards or
downwards slightly 3 53, or set
head restraint to lowest position
3 47.
Safety function
If the power seat encounters
resistance while sliding forwards or
rearwards, it is immediately stopped
and moved in the opposite direction.
Note
Do not sit on the seat while seat is
moving.
Power disconnection
If seat remains in forward position
with opened door for more than
10 minutes, power adjustment isdisconnected. In this event, close and
open the door or switch on ignition and operate power adjustment again.
Overload
If the folding function is electrically
overloaded, the power supply is
automatically cut-off for a short time.
Power seat adjustment9 Warning
Care must be taken when
operating the power seats. There
is a risk of injury, particularly for
children. Objects could become
trapped.
Keep a close watch on the seats
when adjusting them. Vehicle
passengers should be informed
accordingly.
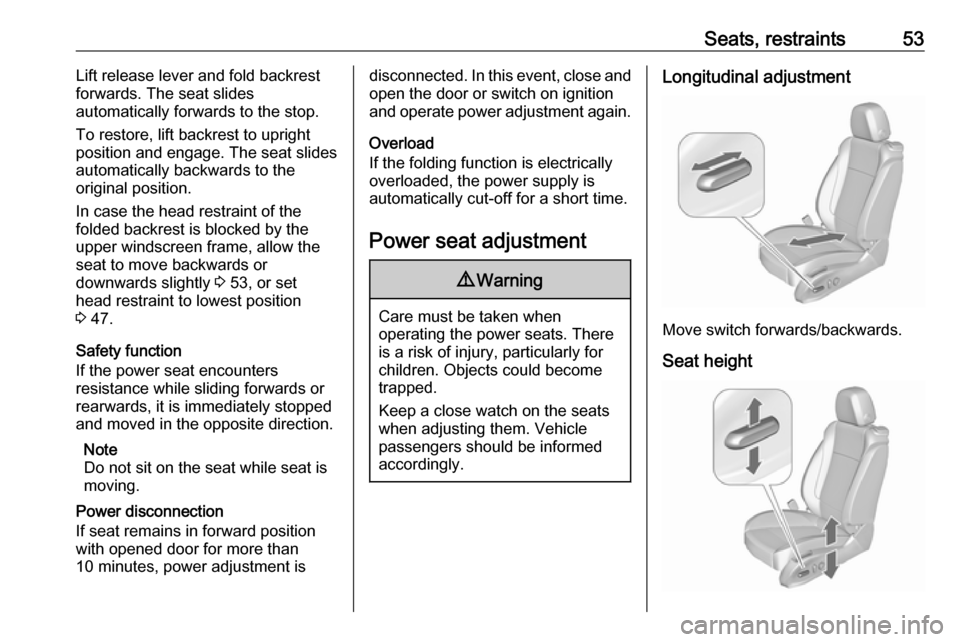
Longitudinal adjustment
Move switch forwards/backwards.
Seat height
Page 57 of 263
Seats, restraints55Armrest
The armrest can be slid forwards by
10 cm. Under the armrest there is a
storage compartment.
Armrest storage 3 72.
Heating
Adjust heating to the desired setting
by pressing ß for the respective seat
one or more times. The lighting LEDs in the button indicate the setting.
Prolonged use of the highest setting
for people with sensitive skin is not
recommended.
Seat heating is operational when engine is running.
Seat heating is also operational
during an Autostop.
Stop-start system 3 138.
Ventilating
Adjust ventilation to the desired
setting by pressing A for the
respective seat one or more times.
The lighting LEDs in the button
indicate the setting.
Ventilated seats are operational with
ignition on.
Seat ventilation is also operational
during an Autostop.
Stop-start system 3 138.
Page 58 of 263

56Seats, restraintsSeat belts
The seat belts are locked during hardacceleration or deceleration of the
vehicle holding the occupants in the
seat position. Therefore the risk of
injury is considerably reduced.
9 Warning
Fasten seat belt before each trip.
In the event of an accident, people
not wearing seat belts endanger their fellow occupants and
themselves.
Seat belts are designed to be used by only one person at a time. Child
restraint system 3 64.
Periodically check all parts of the belt
system for damage, soiling and
proper functionality.
Have damaged components replaced by a workshop. After an accident,
have the belts and triggered belt
pretensioners replaced by a
workshop.
Note
Make sure that the belts are not
damaged by shoes or sharp-edged objects or trapped. Prevent dirt from getting into the belt retractors.
Seat belt presenter
The seat belt presenter is a comfort feature that enables the front
passengers to fasten the seat belts
conveniently by bringing the belts to
the front.
The presenter comes out when:
● The respective door is closed and ignition is switched on.
● The ignition is on and the door is closed.
The presenter retracts when: ● The respective door is opened again.
● The key is removed from ignition switch.
● The respective latch plate is inserted into the buckle.
Page 64 of 263

62Seats, restraintskaitstud iste, sest see võib
põhjustada LAPSE SURMA või
TÕSISE VIGASTUSE.
MT: QATT tuża trażżin għat-tfal li
jħares lejn in-naħa ta’ wara fuq sit
protett b’AIRBAG ATTIV quddiemu;
dan jista’ jikkawża l-MEWT jew
ĠRIEĦI SERJI lit-TFAL.
GA: Ná húsáid srian sábháilteachta
linbh cúil RIAMH ar shuíochán a
bhfuil mála aeir ag feidhmiú os a
chomhair. Tá baol BÁIS nó GORTÚ
DONA don PHÁISTE ag baint leis.
Beyond the warning required by
ECE R94.02, for safety reasons
never use a forward-facing child
restraint system on the passenger
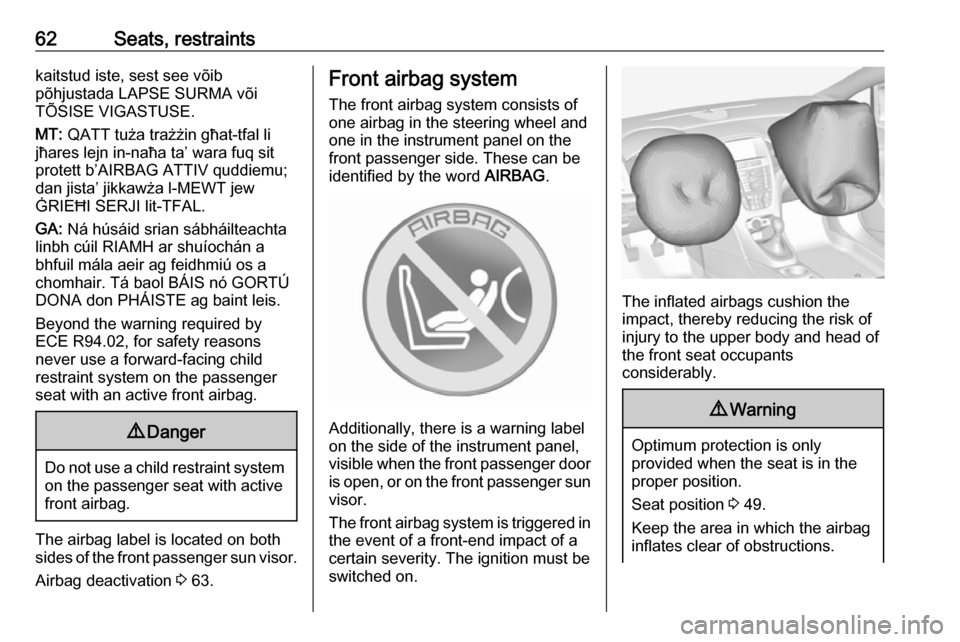
seat with an active front airbag.9 Danger
Do not use a child restraint system
on the passenger seat with active
front airbag.
The airbag label is located on both
sides of the front passenger sun visor.
Airbag deactivation 3 63.
Front airbag system
The front airbag system consists of
one airbag in the steering wheel and
one in the instrument panel on the
front passenger side. These can be
identified by the word AIRBAG.
Additionally, there is a warning label
on the side of the instrument panel,
visible when the front passenger door
is open, or on the front passenger sun
visor.
The front airbag system is triggered in the event of a front-end impact of a
certain severity. The ignition must be
switched on.
The inflated airbags cushion the
impact, thereby reducing the risk of
injury to the upper body and head of
the front seat occupants
considerably.
9 Warning
Optimum protection is only
provided when the seat is in the
proper position.
Seat position 3 49.
Keep the area in which the airbag
inflates clear of obstructions.
Page 65 of 263

Seats, restraints63Fit the seat belt correctly and
engage securely. Only then is the
airbag able to protect.
Side airbag system
The side airbag system consists of an
airbag in each front seat backrest.
This can be identified by the word
AIRBAG .
The side airbag system is triggered in the event of a side impact of a certain
severity. The ignition must be
switched on.
The inflated airbags cushion the
impact, thereby reducing the risk of
injury to the head and upper body in
the event of a side-on collision
considerably.
9 Warning
Keep the area in which the airbag
inflates clear of obstructions.
Note
Only use protective seat covers that
have been approved for the vehicle.Be careful not to cover the airbags.
Airbag deactivation
The front passenger airbag system
must be deactivated if a child restraint
system is to be fitted on this seat. The side airbags, the belt pretensioners
and all driver airbag systems will
remain active.
The front passenger airbag system
can be deactivated via a key-
operated switch on the right side of the instrument panel.
Page 66 of 263

64Seats, restraintsUse the ignition key to choose the
position:* OFF:front passenger airbag is
deactivated and will not
inflate in the event of a
collision. Control indicator
* OFF illuminates
continuously in the centre
console. A child restraint
system can be installed in
accordance with the chart
Child restraint installation
locations 3 66. No adult
person is allowed to occupy the front passenger seat.V ON:front passenger airbag is
active. A child restraint
system must not be
installed.9 Danger
Risk of fatal injury for a child using
a child restraint system on a seat
with activated front passenger
airbag.
Risk of fatal injury for an adult
person on a seat with deactivated
front passenger airbag.
If the control indicator V illuminates,
the front passenger airbag system will inflate in the event of a collision.
If both control indicators are
illuminated at the same time, there is
a system failure. The status of the
system is not discernible, therefore
no person is allowed to occupy the
front passenger seat. Contact a
workshop immediately.
Change status only when the vehicle
is stopped with the ignition off.
Status remains until the next change.
Control indicator for airbag
deactivation 3 90.
Child restraints
Child restraint systems
We recommend the following child
restraint systems which are tailored
specifically to the vehicle:
● Group 0, Group 0+
OPEL Baby cradle, with or
without ISOFIX base, for children
up to 13 kg
● Group I
OPEL Duo, Britax Römer King,
for children from 9 kg to 18 kg
● Group II, Group III
OPEL Kid, OPEL Kidfix, for
children from 15 kg up to 36 kg
When a child restraint system is being
used, pay attention to the following
usage and installation instructions
and also those supplied with the child restraint system.
Always comply with local or national
regulations. In some countries, the
use of child restraint systems is
forbidden on certain seats.