2016 YAMAHA XJR 1300 clutch
[x] Cancel search: clutchPage 43 of 98

Operation and important ri din g points
5-2
5
d
icator li ght remains on, see pa ge
3-4 for the correspon din g warnin g
an d in dicator li ght circuit check.
2. Shift the transmission into the
neutral position. The neutral indi-
cator light should come on. If not,
ask a Yamaha dealer to check the
electrical circuit.
3. Start the engine by pushing the start switch.
If the engine fails to start, release
the start switch, wait a few sec-
onds, and then try again. Each
starting attempt should be as
short as possible to preserve the
battery. Do not crank the engine
more than 10 seconds on any one
attempt.NOTICE
ECA11043
For maximum en gine life, never ac-
celerate har d when the en gine is
col d!
EAU16673
Shiftin gShifting gears lets you control the
amount of engine power available for
starting off, accelerating, climbing hills,
etc.
The gear positions are shown in the il-
lustration.TIPTo shift the transmission into the neu-
tral position, press the shift pedal down
repeatedly until it reaches the end of its
travel, and then slightly raise it.
NOTICE
ECA10261
Even with the transmission in
the neutral position, d o not
coast for lon g period s of time
with the en gine off, an d d o not
tow the motorcycle for lon g d is-
tances. The transmission is
properly lu bricated only when
the en gine is runnin g. Ina de-
quate lu brication may d amage
the transmission.
Always use the clutch while
chan gin g g ears to avoi d d am-
a g in g the en gine, transmission,
an d d rive train, which are not
d esi gne d to withstan d the
shock of force d shiftin g.
1. Shift pedal
2. Neutral position
1
N
2 3
4
5
1
2
U2PNE1E0.book Page 2 Monday, December 28, 2015 11:03 AM
Page 49 of 98

Periodic maintenance an d a djustment
6-4
6
EAU1770M
General maintenance an d lu brication chartNO. ITEM CHECK OR MAINTENANCE JOB ODOMETER READING
ANNUAL
CHECK
1000 km
(600 mi) 10000 km
(6000 mi) 20000 km
(12000 mi) 30000 km
(18000 mi) 40000 km
(24000 mi)
1 Air filter element •Replace. √
2 *Clutch • Check operation, fluid level and
vehicle for fluid leakage. √√√√√
3 *Front brake • Check operation, fluid level and
vehicle for fluid leakage. √√√√√√
• Replace brake pads. Whenever worn to the limit
4 *Rear brake • Check operation, fluid level and
vehicle for fluid leakage. √√√√√√
• Replace brake pads. Whenever worn to the limit
5 *Brake hoses • Check for cracks or damage.
• Check for correct routing and
clamping. √√√√√
• Replace. Every 4 years
6 *Brake fluid • Change. Every 2 years
7 *Wheels • Check runout and for damage. √√√√
8 *Tires • Check tread depth and for dam-
age.
• Replace if necessary.
• Check air pressure.
• Correct if necessary. √√√√√
9 *Wheel bearin gs • Check bearings for looseness or
damage. √√√√
U2PNE1E0.book Page 4 Monday, December 28, 2015 11:03 AM
Page 50 of 98

Periodic maintenance an d a djustment
6-5
6
10 *Swin garm • Check operation and for exces-
sive play. √√√√
• Lubricate with lithium-soap- based grease. Every 50000 km (30000 mi)
11 Drive chain • Check chain slack, alignment and
condition.
• Adjust and lubricate chain with a special O-ring chain lubricant
thoroughly. Every 1000 km (600 mi) and after washing the motorcycle, riding in the rain or
riding in wet areas
12 *Steerin g b earin gs • Check bearing play and steering
for roughness. √√√√√
• Lubricate with lithium-soap- based grease. Every 20000 km (12000 mi)
13 *Chassis fasteners • Make sure that all nuts, bolts and
screws are properly tightened. √√√√√
14 Brake lever pivot
shaft • Lubricate with silicone grease.
√√√√√
15 Brake ped
al pivot
shaft • Lubricate with lithium-soap-
based grease. √√√√√
16 Clutch lever pivot
shaft
• Lubricate with silicone grease.
√√√√√
17 Shift ped
al pivot
shaft • Lubricate with lithium-soap-
based grease. √√√√√
18 Si destan d • Check operation.
• Lubricate with lithium-soap-
based grease. √√√√√
19 *Sidestan d switch • Check operation. √√√√√√
NO. ITEM CHECK OR MAINTENANCE JOB
ODOMETER READING
ANNUAL
CHECK
1000 km
(600 mi) 10000 km
(6000 mi) 20000 km
(12000 mi) 30000 km
(18000 mi) 40000 km
(24000 mi)U2PNE1E0.book Page 5 Monday, December 28, 2015 11:03 AM
Page 52 of 98

Periodic maintenance an d a djustment
6-7
6
Hydraulic brake and clutch service
• Regularly check and, if necessary, correct the brake fluid and clutch fluid levels.
• Every two years replace the internal components of the brake master cylinders and calipers as well as clutch master and release cylinders, and change the brake and clutch fluids.
• Replace the brake and clutch hoses every four years and if cracked or damaged.
U2PNE1E0.book Page 7 Monday, December 28, 2015 11:03 AM
Page 57 of 98

Periodic maintenance an d a djustment
6-12
6
13. Install the engine oil filter element
cover (together with the spring,
washer and oil filter element) by
aligning the projection on the cov-
er with the slot in the crankcase,
and then tightening the bolt to the
specified torque.
14. Install the oil filter element drain screw and its new gasket, and
then tighten the screw to the
specified torque. 15. Install the drive sprocket cover by
placing it in the original position
and installing the bolts.
16. Install the engine oil drain bolt and its new gasket, and then tighten
the bolt to the specified torque.
17. Refill with the specified amount of the recommended engine oil, and
then install and tighten the oil filler
cap.
TIPBe sure to wipe off spilled oil on any
parts after the engine and exhaust sys-
tem have cooled down.NOTICE
ECA11621
In or der to prevent clutch slip-
pa ge (since the en gine oil also
lu bricates the clutch), do not
mix any chemical additives. Do
not use oils with a diesel speci-
fication of “CD” or oils of a hi gh-
er quality than specifie d. In
a dd ition, do not use oils la bele d
“ENERGY CONSERVING II” or
hi gher.
Make sure that no forei gn mate-
rial enters the crankcase.18. Start the engine, and then let it idle for several minutes while checking
it for oil leakage. If oil is leaking,
immediately turn the engine off
and check for the cause.
1. Projection
2. SlotTightenin g torque:
Oil filter element cover bolt: 15 Nm (1.5 m·kgf, 11 ft·lbf)
Tightenin g torque:
Oil filter element drain screw:
7 Nm (0.7 m·kgf, 5.1 ft·lbf)
Ti ghtenin g torque:
Engine oil drain bolt: 43 Nm (4.3 m·kgf, 31 ft·lbf)
Recommen ded en gine oil:
See page 8-1.
Oil quantity: Without oil filter element replace-
ment:
2.80 L (2.96 US qt, 2.46 Imp.qt)
With oil filter element replacement: 3.15 L (3.33 US qt, 2.77 Imp.qt)
U2PNE1E0.book Page 12 Monday, December 28, 2015 11:03 AM
Page 63 of 98

Periodic maintenance an d a djustment
6-18
6
EAU21963
Cast wheelsTo maximize the performance, durabil-
ity, and safe operation of your vehicle,
note the following points regarding the
specified wheels.
The wheel rims should be
checked for cracks, bends, warp-
age or other damage before each
ride. If any damage is found, have
a Yamaha dealer replace the
wheel. Do not attempt even the
smallest repair to the wheel. A de-
formed or cracked wheel must be
replaced.
The wheel should be balanced
whenever either the tire or wheel
has been changed or replaced. An
unbalanced wheel can result in
poor performance, adverse han-
dling characteristics, and a short-
ened tire life.
EAU22074
Clutch leverSince this model is equipped with a hy-
draulic clutch, adjusting the clutch le-
ver free play is not needed. However, it
is necessary to check the clutch fluid
level and check the hydraulic system
for leakage before each ride. (See page
6-20.) If the clutch lever free play does
become excessive, and shifting be-
comes rough or clutch slippage oc-
curs, causing poor acceleration, there
may be air in the clutch system. If there
is air in the hydraulic system, have a
Yamaha dealer bleed the system be-
fore operating the motorcycle.
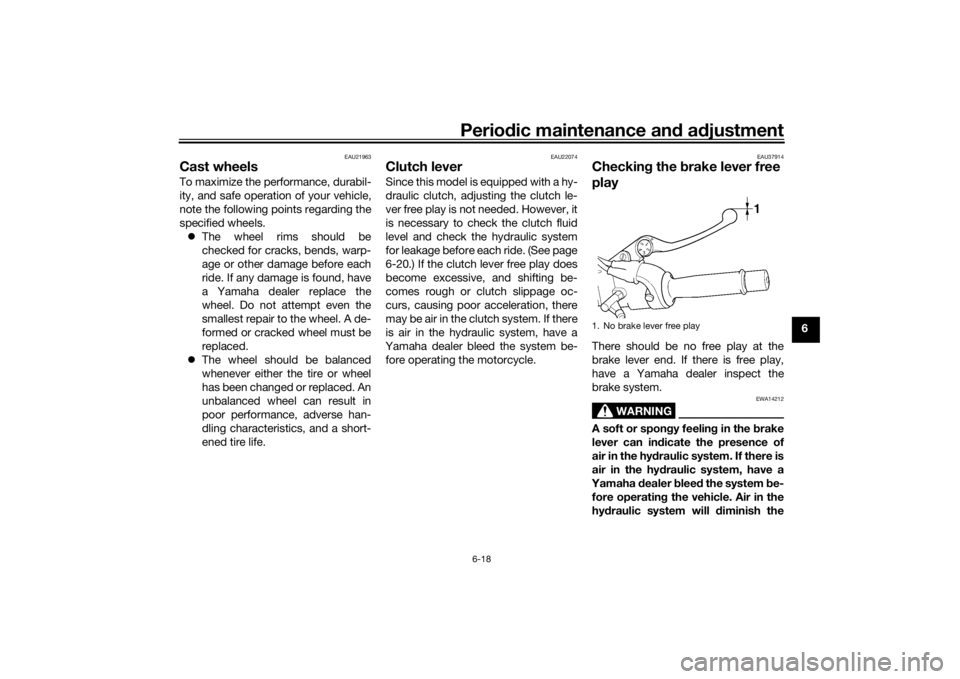
EAU37914
Checkin g the brake lever free
playThere should be no free play at the
brake lever end. If there is free play,
have a Yamaha dealer inspect the
brake system.
WARNING
EWA14212
A soft or spon gy feelin g in the b rake
lever can in dicate the presence of
air in the hy draulic system. If there is
air in the hy draulic system, have a
Yamaha dealer blee d the system be-
fore operatin g the vehicle. Air in the
hy draulic system will diminish the1. No brake lever free play
1
U2PNE1E0.book Page 18 Monday, December 28, 2015 11:03 AM
Page 65 of 98

Periodic maintenance an d a djustment
6-20
6
The front and rear brake pads must be
checked for wear at the intervals spec-
ified in the periodic maintenance and
lubrication chart. Each brake pad is
provided with a wear indicator groove,
which allows you to check the brake
pad wear without having to disassem-
ble the brake. To check the brake pad
wear, check the wear indicator
grooves. If a brake pad has worn to the
point that the wear indicator groove
has almost disappeared, have a
Yamaha dealer replace the brake pads as a set.
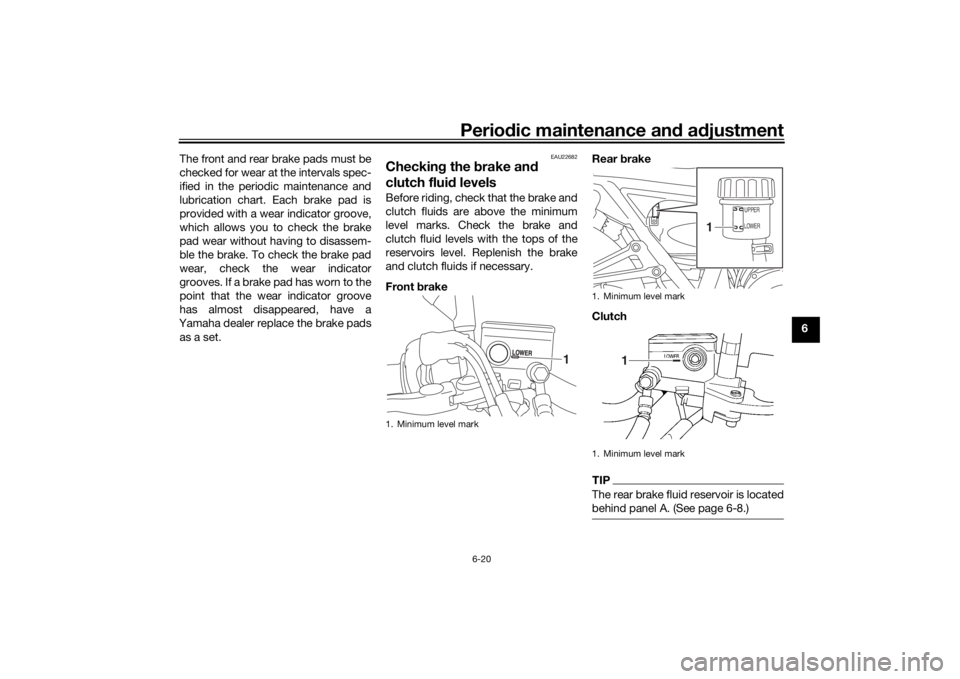
EAU22682
Checkin g the brake an d
clutch flui d levelsBefore riding, check that the brake and
clutch fluids are above the minimum
level marks. Check the brake and
clutch fluid levels with the tops of the
reservoirs level. Replenish the brake
and clutch fluids if necessary.
Front brake Rear
brake
Clutch
TIPThe rear brake fluid reservoir is located
behind panel A. (See page 6-8.)
1. Minimum level mark
1
1. Minimum level mark
1. Minimum level mark
UPPER
LOWER
1
1
U2PNE1E0.book Page 20 Monday, December 28, 2015 11:03 AM
Page 66 of 98

Periodic maintenance an d a djustment
6-21
6
WARNING
EWA16001
Improper maintenance can result in
loss of b raking a bility or clutch oper-
ation. O bserve these precautions:
Insufficient brake or clutch flui d
may allow air to enter the brake
or clutch system, re ducing
b rakin g or clutch performance.
Clean the filler caps before re-
moving . Use only DOT 4 b rake
flui d from a seale d container.
Use only the specified b rake flu-
i d ; otherwise, the ru bber seals
may deteriorate, causin g leak-
a g e.
Refill with the same type of
brake flui d. A ddin g a brake flui d
other than DOT 4 may result in a
harmful chemical reaction.
Be careful that water does not
enter the brake or clutch flui d
reservoir when refillin g. Water will si
gnificantly lower the boil-
in g point of the flui d an d may re-
sult in vapor lock.
NOTICE
ECA17641
Brake fluid may damag e painted
surfaces or plastic parts. Always
clean up spille d flui d imme diately.The brake or clutch fluid reservoir dia-
phragm will lose its shape from the
negative pressure if the fluid level goes
down too far. Be sure to return the dia-
phragm to its original shape before in-
stalling it into the brake or clutch fluid
reservoir.
As the brake pads wear, it is normal for
the brake fluid level to gradually go
down. A low brake fluid level may indi-
cate worn brake pads and/or brake
system leakage; therefore, be sure to
check the brake pads for wear and the
brake system for leakage. A low clutch
fluid level may indicate clutch system
leakage; therefore, be sure to check
the clutch system for leakage. If the
brake or clutch fluid level goes down
suddenly, have a Yamaha dealer check
the cause before further riding.
EAU22754
Chan gin g the brake an d
clutch flui dsHave a Yamaha dealer change the
brake and clutch fluids at the intervals
specified in the periodic maintenance
and lubrication chart. In addition, have
the oil seals of the brake and clutch
master cylinders and calipers as well
as the brake and clutch hoses replaced
at the intervals listed below or whenev-
er they are damaged or leaking.
Oil seals: Replace every two
years.
Brake and clutch hoses: Replace
every four years.
Specifie d b rake an d clutch flui d:
DOT 4 brake fluid
U2PNE1E0.book Page 21 Monday, December 28, 2015 11:03 AM