2016 YAMAHA GRIZZLY 350 parking brake
[x] Cancel search: parking brakePage 8 of 146

EBU17421
TABLE OF CONTENTS
LOCATION OF THE WARNING AND
SPECIFICATION LABELS .............................. 1-1
SAFETY INFORMATION ................................ 2-1
DESCRIPTION................................................ 3-1Left view ...................................................... 3-1
Right view.................................................... 3-1
Controls and instruments............................ 3-2
INSTRUMENT AND CONTROL
FUNCTIONS ................................................... 4-1 Main switch ................................................. 4-1
Indicator lights and warning light ................ 4-2
Speedometer .............................................. 4-3
Handlebar switches .................................... 4-5
Throttle lever ............................................... 4-6
Speed limiter ............................................... 4-7
Front brake lever ......................................... 4-8
Brake pedal and rear brake lever ................ 4-8
Parking brake .............................................. 4-9
Drive select lever ....................................... 4-10
Fuel tank cap............................................. 4-10
Fuel ........................................................... 4-11 Fuel cock .................................................. 4-12
Starter (choke) ......................................... 4-14
Seat .......................................................... 4-14
Storage compartment............................... 4-15
Front carrier .............................................. 4-16
Rear carrier ............................................... 4-16
Adjusting the front shock absorber
assemblies .............................................. 4-17
Adjusting the rear shock absorber assembly ................................................ 4-18
PRE-OPERATION CHECKS .......................... 5-1 Fuel ............................................................. 5-3
Engine oil .................................................... 5-3
Final gear oil ............................................... 5-3
Differential gear oil ...................................... 5-3
Front and rear brakes ................................. 5-3
Throttle lever ............................................... 5-4
Tires ............................................................ 5-4
Chassis fasteners ....................................... 5-6
Instruments, lights and switches ................ 5-6
OPERATION .................................................. 6-1 Starting a cold engine................................. 6-1U1NS64E0.book Page 1 Thursday, June 25, 2015 8:36 AM
Page 9 of 146

Starting a warm engine ............................... 6-3
Operating the drive select lever and driving in reverse ....................................... 6-3
Engine break-in ........................................... 6-4
Parking ........................................................ 6-5
Parking on a slope ...................................... 6-5
Accessories and loading ............................. 6-6
RIDING YOUR ATV ........................................ 7-1 GETTING TO KNOW YOUR ATV ................ 7-2
RIDE WITH CARE AND GOOD JUDGMENT .............................................. 7-2
BE CAREFUL WHERE YOU RIDE ............... 7-9
TURNING YOUR ATV................................ 7-12
CLIMBING UPHILL ................................... 7-13
RIDING DOWNHILL .................................. 7-16
CROSSING A SLOPE................................ 7-17
CROSSING THROUGH SHALLOW WATER .................................................... 7-18
RIDING OVER ROUGH TERRAIN ............. 7-21
SLIDING AND SKIDDING.......................... 7-21
WHAT TO DO IF... ..................................... 7-22
WHAT TO DO... ......................................... 7-22
PERIODIC MAINTENANCE AND
ADJUSTMENT................................................ 8-1 Owner’s manual and tool kit ....................... 8-2 Periodic maintenance chart for the
emission control system ........................... 8-3
General maintenance and lubrication chart.......................................................... 8-5
Checking the spark plug............................. 8-9
Engine oil and oil filter cartridge ............... 8-11
Final gear oil ............................................. 8-15
Changing the differential gear oil .............. 8-18
Cleaning the air filter element ................... 8-19
Cleaning the spark arrester ...................... 8-22
V-belt cooling duct check hose ................ 8-24
V-belt case drain plug............................... 8-24
Adjusting the carburetor ........................... 8-25
Adjusting the engine idling speed ............ 8-25
Adjusting the throttle lever free play ......... 8-26
Valve clearance......................................... 8-27
Adjusting the drive select lever safety system cable .......................................... 8-27
Brakes....................................................... 8-27
Checking the front brake pads and rear brake shoes ............................................ 8-28
Checking the brake fluid level .................. 8-29
Changing the brake fluid .......................... 8-30
Checking the front brake lever free play... 8-30
Adjusting the brake pedal height, and the brake pedal and rear brake lever free
play ......................................................... 8-31
U1NS64E0.book Page 2 Thursday, June 25, 2015 8:36 AM
Page 27 of 146

3-2
3
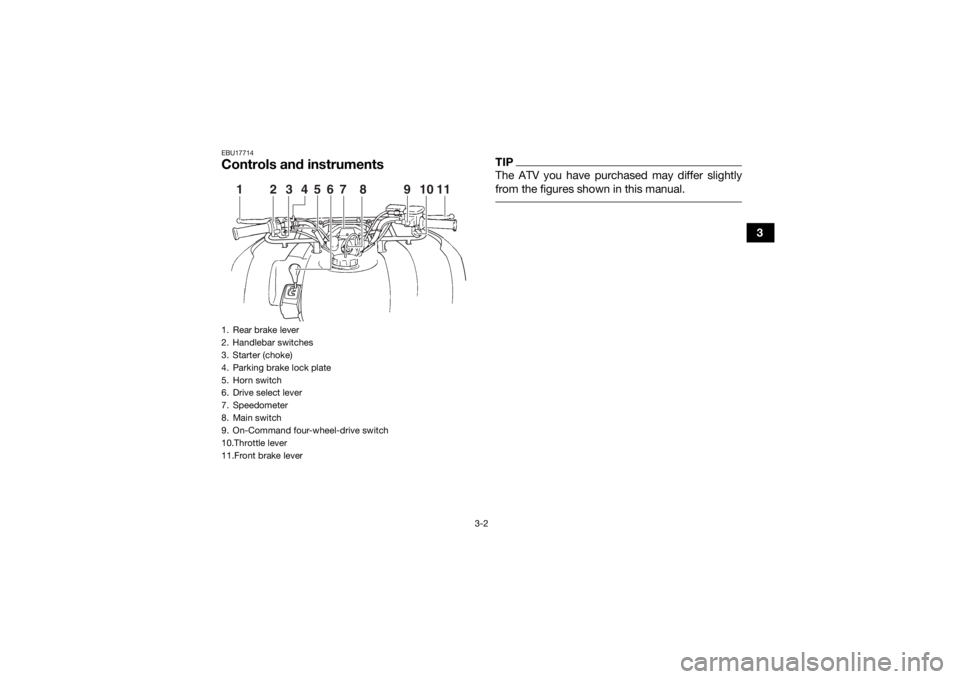
EBU17714Controls and instruments
TIPThe ATV you have purchased may differ slightly
from the figures shown in this manual.
1. Rear brake lever
2. Handlebar switches
3. Starter (choke)
4. Parking brake lock plate
5. Horn switch
6. Drive select lever
7. Speedometer
8. Main switch
9. On-Command four-wheel-drive switch
10.Throttle lever
11.Front brake lever
12349
567 8 1011
U1NS64E0.book Page 2 Thursday, June 25, 2015 8:36 AM
Page 36 of 146

4-9
4
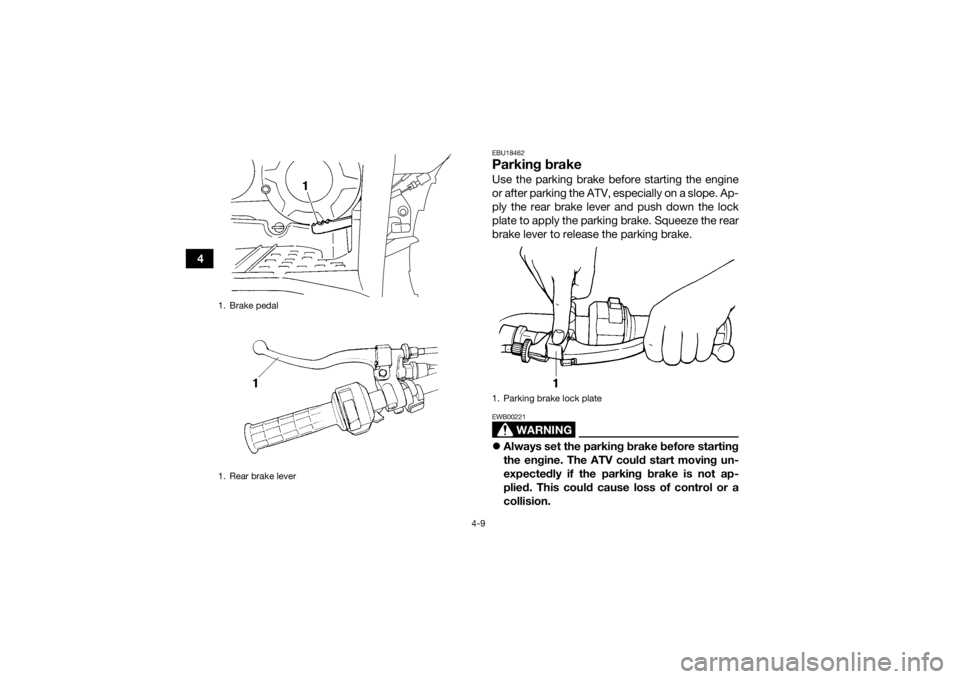
EBU18462Parking brakeUse the parking brake before starting the engine
or after parking the ATV, especially on a slope. Ap-
ply the rear brake lever and push down the lock
plate to apply the parking brake. Squeeze the rear
brake lever to release the parking brake.
WARNING
EWB00221Always set the parking brake before starting
the engine. The ATV could start moving un-
expectedly if the parking brake is not ap-
plied. This could cause loss of control or a
collision.
1. Brake pedal
1. Rear brake lever
1. Parking brake lock plate
U1NS64E0.book Page 9 Thursday, June 25, 2015 8:36 AM
Page 37 of 146

4-10
4
Always be sure you have released the park-
ing brake before you begin to ride. The brake
could overheat if you ride the ATV without re-
leasing the parking brake. You could lose
braking performance which could cause an
accident. You could also wear out the brakes
prematurely.
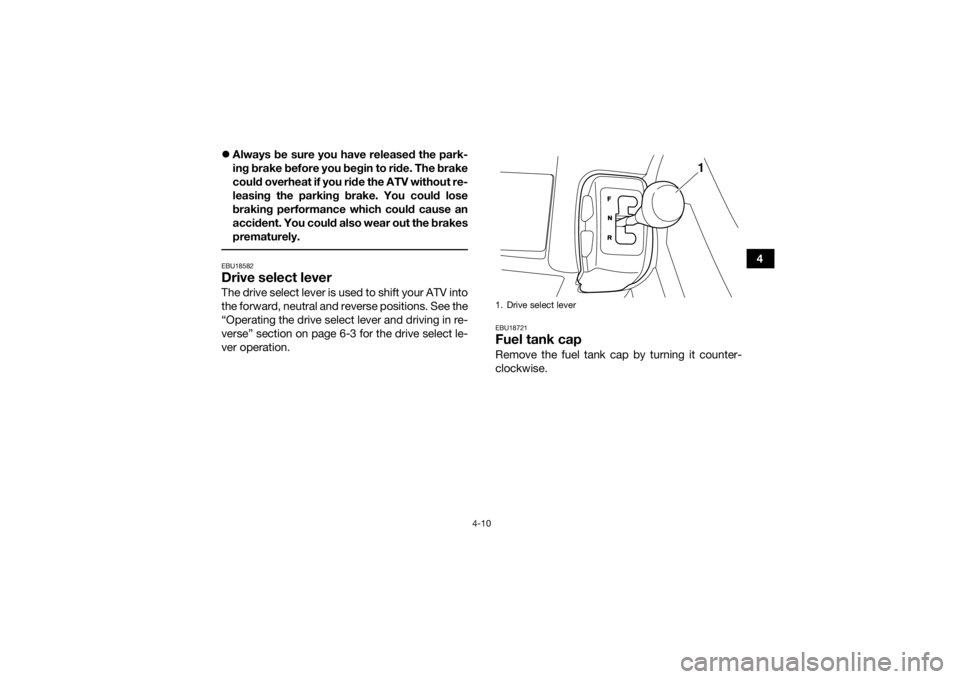
EBU18582Drive select leverThe drive select lever is used to shift your ATV into
the forward, neutral and reverse positions. See the
“Operating the drive select lever and driving in re-
verse” section on page 6-3 for the drive select le-
ver operation.
EBU18721Fuel tank capRemove the fuel tank cap by turning it counter-
clockwise.1. Drive select lever
1
U1NS64E0.book Page 10 Thursday, June 25, 2015 8:36 AM
Page 53 of 146

6-1
6
EBU19882
OPERATION
EBU19902Read the Owner’s Manual carefully before riding
the ATV. If there is a control or function you do not
understand, ask your Yamaha dealer.
WARNING
EWB00632Read the Owner’s Manual carefully to become
familiar with all controls in order to help pre-
vent any loss of control, which could cause an
accident or injury. EBU26954Starting a cold engineNOTICEECB00151See the “Engine break-in” section on page 6-4
prior to operating the engine for the first time. 1. Set the parking brake.
2. Turn the fuel cock to “ON”.
3. Turn the key to “ON” and the engine stopswitch to “ ”. 4. Shift the drive select lever into the neutral po-
sition. The neutral indicator light should come
on. If the indicator light does not come on,
have a Yamaha dealer check the electrical
circuit.
TIPThe engine can be started under the following
conditions:
The drive select lever is in the neutral position.
The rear brake lever is applied with the drive se-
lect lever in any position. However, it is recom-
mended to shift into the neutral position before
starting the engine. 5. Use the starter (choke) in reference to the fi-
gure:
Position (1):
Cold engine start with ambient temperature
below 5 °C (40 °F).
Position (2):
Cold engine start with ambient temperature
between 0 °C (30 °F) and 30 °C (90 °F).
U1NS64E0.book Page 1 Thursday, June 25, 2015 8:36 AM
Page 57 of 146

6-5
6
0–160 km (0–100 mi) or 0–10 hours
Avoid prolonged operation above 1/2 throttle.
Vary the speed of the ATV regularly. Do not oper-
ate it at one set throttle position.
160–320 km (100–200 mi) or 10–20 hours
Avoid prolonged operation above 3/4 throttle. Rev
the engine freely, but do not use full throttle at any
time.
320 km (200 mi) or 20 hours and beyond
The ATV can now be operated normally.
NOTICEECB00221If any engine trouble should occur during the
engine break-in period, immediately have a
Yamaha dealer check the ATV. EBU20703ParkingWhen parking the ATV, apply the brake pedal,
shift the drive select lever into the forward posi-
tion, stop the engine, apply the parking brake, and
then turn the fuel cock to “OFF”.
EBU20765Parking on a slope
WARNING
EWB00832Avoid parking on hills or other inclines. Parking
on a hill or other incline could cause the ATV to
roll out of control, increasing the chance of an
accident. If you must park on an incline, place
the ATV transversely across the incline, shift
the drive select lever to the forward position,
stop the engine, apply the parking brake, and
then block the front and rear wheels with rocks
or other objects.1. Parking brake lock plate
U1NS64E0.book Page 5 Thursday, June 25, 2015 8:36 AM
Page 58 of 146

6-6
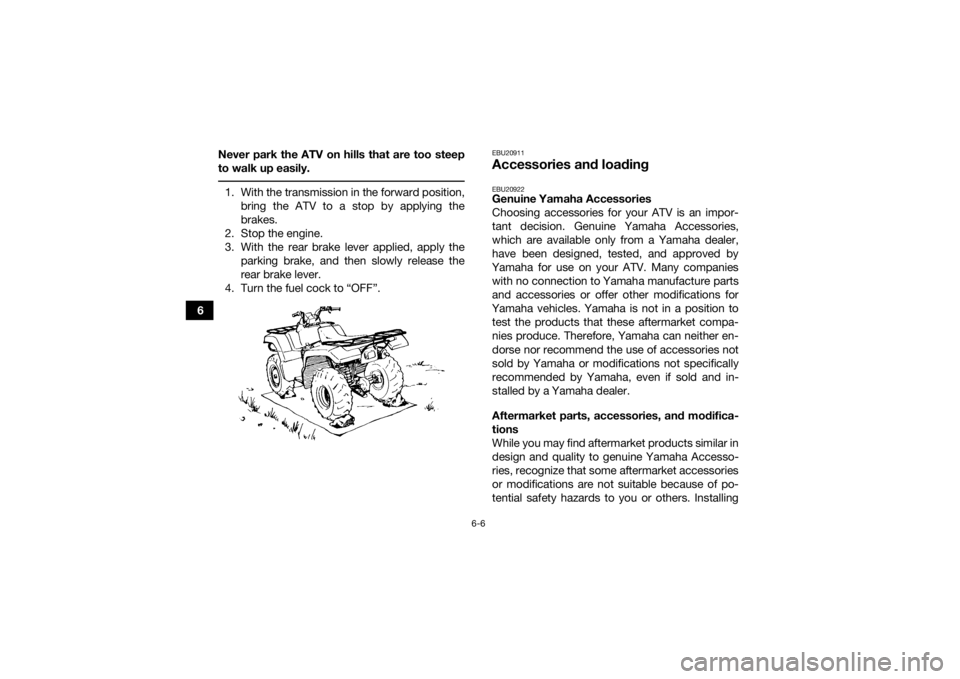
6Never park the ATV on hills that are too steep
to walk up easily.
1. With the transmission in the forward position,
bring the ATV to a stop by applying the
brakes.
2. Stop the engine.
3. With the rear brake lever applied, apply the parking brake, and then slowly release the
rear brake lever.
4. Turn the fuel cock to “OFF”.
EBU20911Accessories and loadingEBU20922Genuine Yamaha Accessories
Choosing accessories for your ATV is an impor-
tant decision. Genuine Yamaha Accessories,
which are available only from a Yamaha dealer,
have been designed, tested, and approved by
Yamaha for use on your ATV. Many companies with no connection to Yamaha manufacture parts
and accessories or offer other modifications for
Yamaha vehicles. Yamaha is not in a position to test the products that these aftermarket compa-
nies produce. Therefore, Yamaha can neither en-
dorse nor recommend the use of accessories not
sold by Yamaha or modifications not specifically
recommended by Yamaha, even if sold and in-
stalled by a Yamaha dealer.
Aftermarket parts, accessories, and modifica-
tions
While you may find aftermarket products similar in
design and quality to genuine Yamaha Accesso-
ries, recognize that some aftermarket accessories
or modifications are not suitable because of po-
tential safety hazards to you or others. Installing
U1NS64E0.book Page 6 Thursday, June 25, 2015 8:36 AM