2016 VAUXHALL MOVANO_B roof
[x] Cancel search: roofPage 21 of 233

Keys, doors and windows19Keys, doors and
windowsKeys, locks ................................... 19
Keys .......................................... 19
Car Pass .................................... 19
Radio remote control .................20
Door locks ................................. 21
Manual door locks .....................21
Central locking system ..............21
Power door locks .......................24
Automatic locking ......................25
Child locks ................................. 25
Doors ........................................... 26
Sliding door ............................... 26
Rear doors ................................. 29
Vehicle security ............................ 30
Anti-theft locking system ...........30
Anti-theft alarm system ..............31
Immobiliser ................................ 32
Exterior mirrors ............................ 33
Convex shape ........................... 33
Manual adjustment ....................33
Electric adjustment ....................33
Folding mirrors .......................... 33
Heated mirrors ........................... 34Interior mirrors............................. 34
Manual anti-dazzle ....................34
Windows ...................................... 35
Windscreen ............................... 35
Manual windows ........................35
Power windows ......................... 35
Rear windows ............................ 36
Heated rear window ..................37
Sun visors .................................. 37
Roof ............................................. 37
Glass panel ............................... 37Keys, locks
Keys Replacement keys
The key number is specified in the
Car Pass or on a detachable tag.
The key number must be quoted
when ordering replacement keys as it
is a component of the immobiliser system.
Locks 3 192.
Lock cylinders
Designed to free-wheel if they are forcefully rotated without the correct
key or if the correct key is not fully
inserted. To reset, turn cylinder with
the correct key until its slot is vertical,
remove key and then re-insert it. If the
cylinder still free-wheels, turn the key through 180° and repeat operation.
Car Pass
The Car Pass contains security
related vehicle data and should
therefore be kept in a safe place.
Page 38 of 233

36Keys, doors and windowsOverload
If the windows are repeatedly
operated within short intervals, the
window operation is disabled for
some time.
Rear windows
Sliding side windows
Press catch and slide window to
open. Ensure catch engages when
closing.
Press catch and slide window to
open. Ensure catch engages when
closing.
Opening side windows
Pull handle to open window. Notice
Depending on vehicle, some
windows may not open fully.
Emergency exit
To provide an emergency exit from
the vehicle, use hammer 1 to strike
glass 2.
Depending on version, emergency
exit may be via the roof glass panel
3 37.
Page 39 of 233

Keys, doors and windows37Heated rear window
Operated by pressing Ü on either
system. LED illuminates in button
during operation.
Heating works with the engine
running and is switched off
automatically after a short time.
Climate control system 3 103.
Electronic climate control system 3 105.
Sun visors
The sun visors can be folded down or swivelled to the side to prevent
dazzling.
If the sun visors have integral mirrors, the mirror covers should be closed
when driving.
Sun visors may also feature a holder for parking tickets etc.
Wide view mirror 3 34.Roof
Glass panel
Emergency exit
In an emergency, the glass can be
broken. Use the hammer to strike the glass panel.
Depending on version, emergency
exit may be via the side windows
3 36.
Page 41 of 233

Seats, restraints39Removal
Press both catches, pull the head
restraint upwards and remove.
Stow head restraints securely in load
compartment. Do not drive with head
restraints removed if the seat is
occupied.
Front seats
Seat position9 Warning
Only drive with the seat correctly
adjusted.
● Sit with buttocks as far back
against the backrest as possible.
Adjust the distance between the
seat and the pedals so that legs
are slightly angled when pressing
the pedals. Slide the front
passenger seat as far back as
possible.
● Sit with shoulders as far back against the backrest as possible.Set the backrest rake so that it is
possible to reach the steering
wheel with arms slightly bent. Maintain contact between
shoulders and the backrest when turning the steering wheel. Do
not angle the backrest too far
back. We recommend a
maximum rake of approx. 25°.
● Adjust the steering wheel 3 73.
● Set seat height high enough to have a clear field of vision on allsides and of all display
instruments. There should be at
least one hand of clearance
between head and the roof
frame. Thighs should rest lightly
on the seat without pressing into
it.
● Adjust the head restraint 3 38.
● Adjust the height of the seat belt 3 47.
● Adjust the lumbar support so that
it supports the natural shape of
the spine 3 40.
Page 49 of 233

Seats, restraints47Seat belts are designed to be used by
only one person at a time. Child
restraint system 3 55.
Periodically check all parts of the belt system for damage and proper
functionality.
Have damaged components
replaced. After an accident, have the
belts and triggered belt pretensioners
replaced by a workshop.
Notice
Make sure that the belts are not damaged by shoes or sharp-edgedobjects or are trapped. Prevent dirt
from getting into the belt retractors.
Seat belt reminder
Front seats are equipped with a seat
belt reminder, indicated by control
indicator X in the roof console or
beside the climate controls in the
instrument panel 3 81, 3 84.
Belt force limiters
On the front seats, stress on the body is reduced by the gradual release of
the belt during a collision.Belt pretensioners
In the event of a head-on or rear-end
collision of a certain severity, the front
seat belts are tightened.9 Warning
Incorrect handling (e.g. removal or
fitting of belts) can trigger the belt
pretensioners.
Deployment of the belt pretensioners
is indicated by continuous illumination
of control indicator v 3 84.
Triggered belt pretensioners must be replaced by a workshop. Belt
pretensioners can only be triggered
once.
Notice
Do not affix or install accessories or
other objects that may interfere with
the operation of the belt
pretensioners. Do not make any
modifications to belt pretensioner components as this will invalidate
the vehicle type approval.
Three-point seat belt
Fastening
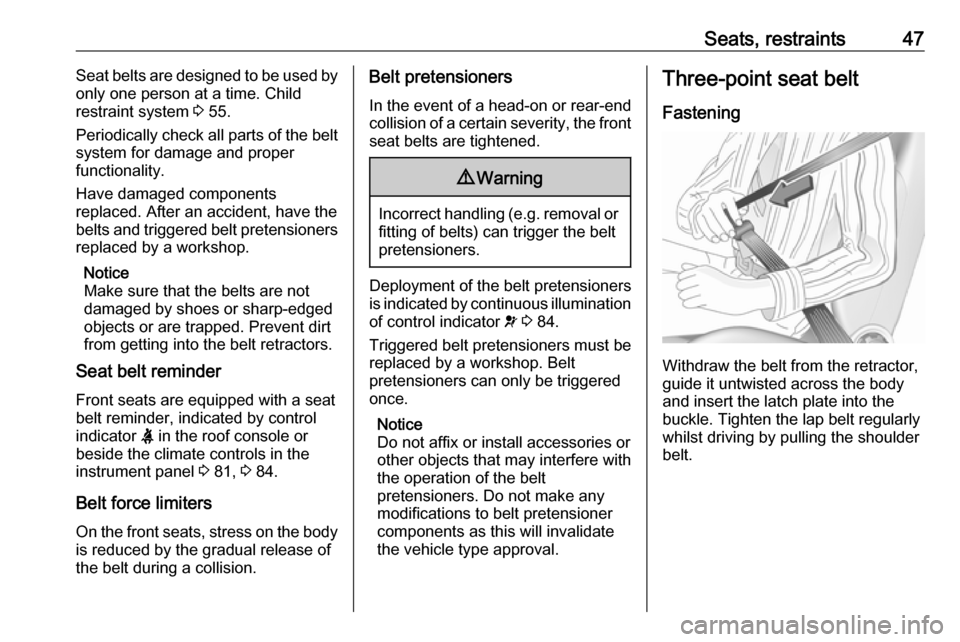
Withdraw the belt from the retractor,
guide it untwisted across the body
and insert the latch plate into the
buckle. Tighten the lap belt regularly
whilst driving by pulling the shoulder
belt.
Page 56 of 233

54Seats, restraints
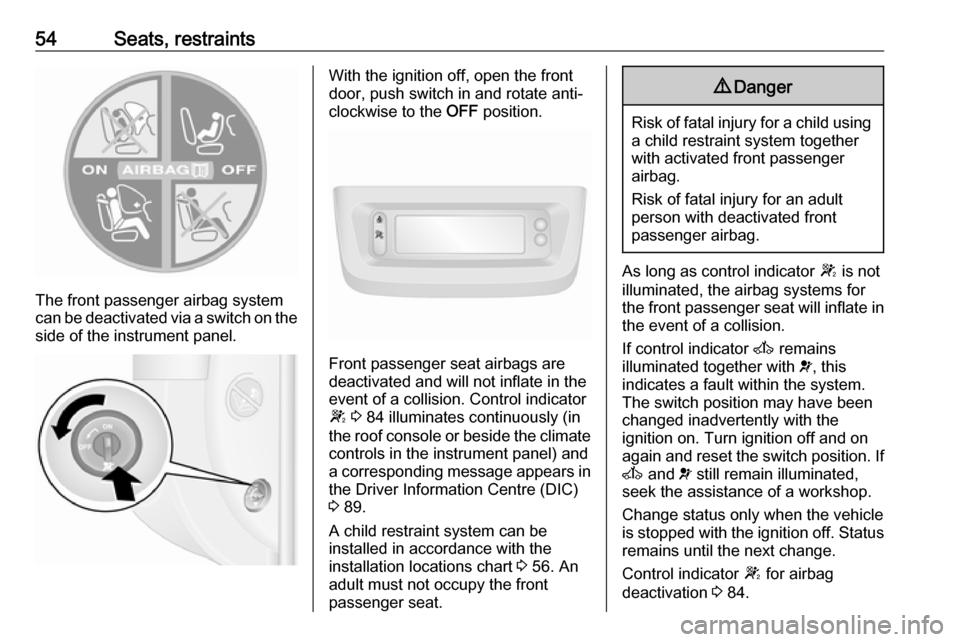
The front passenger airbag system
can be deactivated via a switch on the
side of the instrument panel.
With the ignition off, open the front
door, push switch in and rotate anti-
clockwise to the OFF position.
Front passenger seat airbags are
deactivated and will not inflate in the event of a collision. Control indicator
W 3 84 illuminates continuously (in
the roof console or beside the climate controls in the instrument panel) and
a corresponding message appears in
the Driver Information Centre (DIC)
3 89.
A child restraint system can be
installed in accordance with the
installation locations chart 3 56. An
adult must not occupy the front
passenger seat.
9 Danger
Risk of fatal injury for a child using
a child restraint system together
with activated front passenger
airbag.
Risk of fatal injury for an adult
person with deactivated front
passenger airbag.
As long as control indicator W is not
illuminated, the airbag systems for
the front passenger seat will inflate in the event of a collision.
If control indicator A remains
illuminated together with v, this
indicates a fault within the system.
The switch position may have been
changed inadvertently with the
ignition on. Turn ignition off and on
again and reset the switch position. If
A and v still remain illuminated,
seek the assistance of a workshop.
Change status only when the vehicle
is stopped with the ignition off. Status remains until the next change.
Control indicator W for airbag
deactivation 3 84.
Page 66 of 233

64StorageStorageStorage compartments................64
Instrument panel storage ...........64
Glovebox ................................... 65
Cupholders ................................ 65
Front storage ............................. 65
Sunglasses storage ...................65
Overhead console .....................66
Underseat storage .....................66
Overcab storage ........................67
Load compartment .......................67
Lashing eyes ............................. 67
Cargo management system ......67
Safety net .................................. 69
Warning triangle ........................69
First aid kit ................................. 69
Fire extinguisher ........................70
Roof rack system .........................70
Roof rack ................................... 70
Loading information .....................71Storage compartments9Warning
Do not store heavy or sharp
objects in the storage
compartments. Otherwise vehicle
occupants could be injured by
objects being thrown around in the
event of hard braking, a sudden
change in direction or an accident.
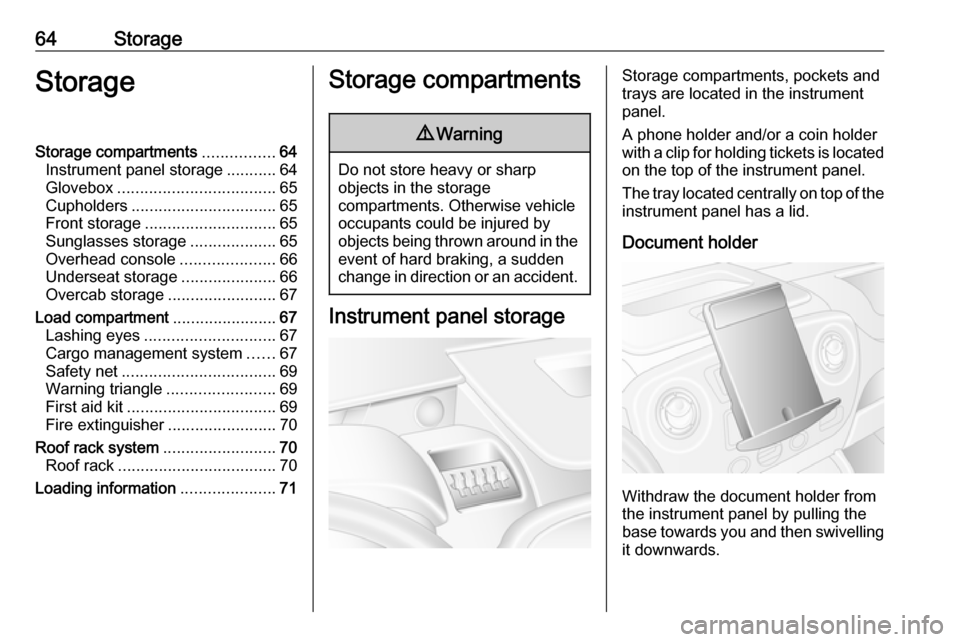
Instrument panel storage
Storage compartments, pockets and
trays are located in the instrument
panel.
A phone holder and/or a coin holder
with a clip for holding tickets is located on the top of the instrument panel.
The tray located centrally on top of the instrument panel has a lid.
Document holder
Withdraw the document holder from
the instrument panel by pulling the
base towards you and then swivelling it downwards.
Page 69 of 233

Storage67Overcab storage
The total weight in this compartment
must not exceed 35 kg.
Rear storage
Combi, Bus
Objects can be stored in the overhead
storage compartments above the rear passenger seats.
The total weight must not exceed
20 kg evenly distributed.
Load compartment
Lashing eyes
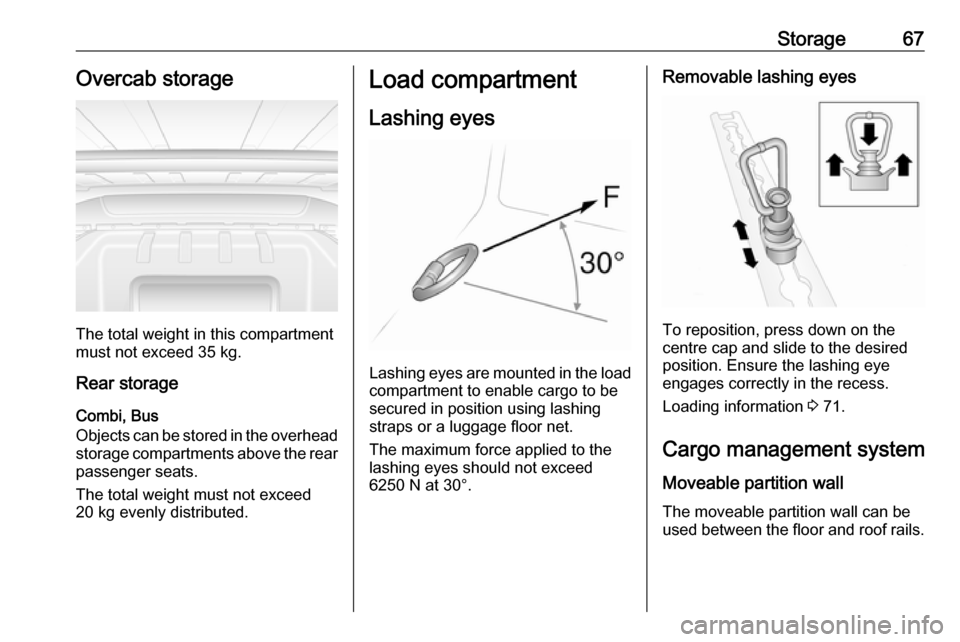
Lashing eyes are mounted in the load
compartment to enable cargo to be
secured in position using lashing
straps or a luggage floor net.
The maximum force applied to the
lashing eyes should not exceed
6250 N at 30°.
Removable lashing eyes
To reposition, press down on the
centre cap and slide to the desired position. Ensure the lashing eye
engages correctly in the recess.
Loading information 3 71.
Cargo management system
Moveable partition wall
The moveable partition wall can be
used between the floor and roof rails.