2016 VAUXHALL MOVANO_B clock
[x] Cancel search: clockPage 56 of 233

54Seats, restraints
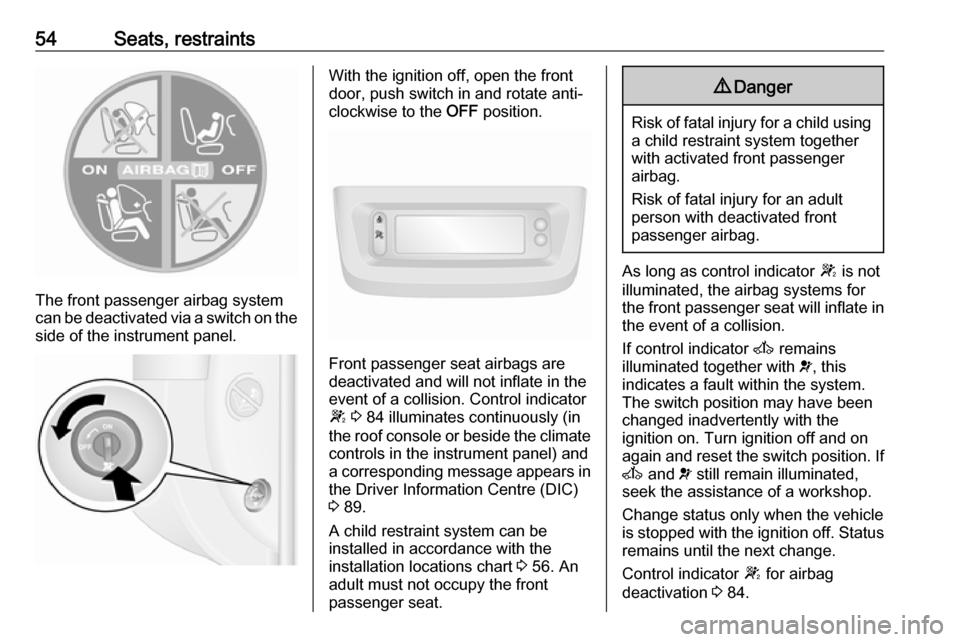
The front passenger airbag system
can be deactivated via a switch on the
side of the instrument panel.
With the ignition off, open the front
door, push switch in and rotate anti-
clockwise to the OFF position.
Front passenger seat airbags are
deactivated and will not inflate in the event of a collision. Control indicator
W 3 84 illuminates continuously (in
the roof console or beside the climate controls in the instrument panel) and
a corresponding message appears in
the Driver Information Centre (DIC)
3 89.
A child restraint system can be
installed in accordance with the
installation locations chart 3 56. An
adult must not occupy the front
passenger seat.
9 Danger
Risk of fatal injury for a child using
a child restraint system together
with activated front passenger
airbag.
Risk of fatal injury for an adult
person with deactivated front
passenger airbag.
As long as control indicator W is not
illuminated, the airbag systems for
the front passenger seat will inflate in the event of a collision.
If control indicator A remains
illuminated together with v, this
indicates a fault within the system.
The switch position may have been
changed inadvertently with the
ignition on. Turn ignition off and on
again and reset the switch position. If
A and v still remain illuminated,
seek the assistance of a workshop.
Change status only when the vehicle
is stopped with the ignition off. Status remains until the next change.
Control indicator W for airbag
deactivation 3 84.
Page 74 of 233

72Instruments and controlsInstruments and
controlsControls ....................................... 73
Steering wheel adjustment ........73
Steering wheel controls .............73
Horn ........................................... 73
Steering column controls ...........73
Windscreen wiper/washer .........74
Outside temperature ..................75
Clock ......................................... 75
Power outlets ............................. 76
Cigarette lighter ......................... 77
Ashtrays .................................... 77
Warning lights, gauges and indi‐ cators ........................................... 77
Instrument cluster ......................77
Speedometer ............................. 77
Odometer .................................. 78
Trip odometer ............................ 78
Tachometer ............................... 78
Fuel gauge ................................ 79
Engine coolant temperature gauge ....................................... 79
Engine oil level monitor .............80
Service display .......................... 80
Transmission display .................81Control indicators ......................81
Turn signal ................................. 83
Seat belt reminder .....................84
Airbag and belt tensioners .........84
Airbag deactivation ....................84
Charging system .......................84
Malfunction indicator light ..........84
Service vehicle soon .................85
Stop engine ............................... 85
Brake system ............................. 85
Antilock brake system (ABS) .....86
Upshift ....................................... 86
Lane departure warning ............86
Electronic Stability Program ......86
Electronic Stability Program off ............................................. 86
Engine coolant temperature ......87
Preheating ................................. 87
AdBlue ....................................... 87
Tyre pressure monitoring system ...................................... 87
Engine oil pressure ....................87
Low fuel ..................................... 88
Stop-start system ......................88
Exterior light .............................. 88
High beam ................................. 88
High beam assist .......................89
Fog light ..................................... 89
Rear fog light ............................. 89
Cruise control ............................ 89Tachograph............................... 89
Door open .................................. 89
Information displays .....................89
Driver Information Centre ..........89
Triple-Info-Display .....................90
Vehicle messages ........................90
Warning chimes .........................91
Trip computer ............................... 92
Tachograph .................................. 94
Page 77 of 233

Instruments and controls75Windscreen washer
Pull lever. Washer fluid is sprayed
onto the windscreen.
short pull:wiper swipes oncelong pull:wiper swipes for a few
strokesOutside temperature
A drop in temperature is indicated
immediately and a rise in temperature
after a time delay.
If outside temperatures drop to 3 °C, the °C flashes in the information
display as a warning for icy road
conditions. This will continue to flash until temperatures rise above 3 °C.
9 Warning
The road surface may already be
icy even though the display
indicates a few degrees above 0
°C.
Clock
Depending on vehicle, the current
time and/or date may appear in the information display 3 90 or the
Driver Information Centre (DIC)
3 89.
Set time and date in information
display
Hours and minutes can be adjusted
by pressing the appropriate buttons
by the display or with the Infotainment
system controls.
Further information is available in the
Infotainment system manual.
Page 78 of 233

76Instruments and controlsSet time in DIC
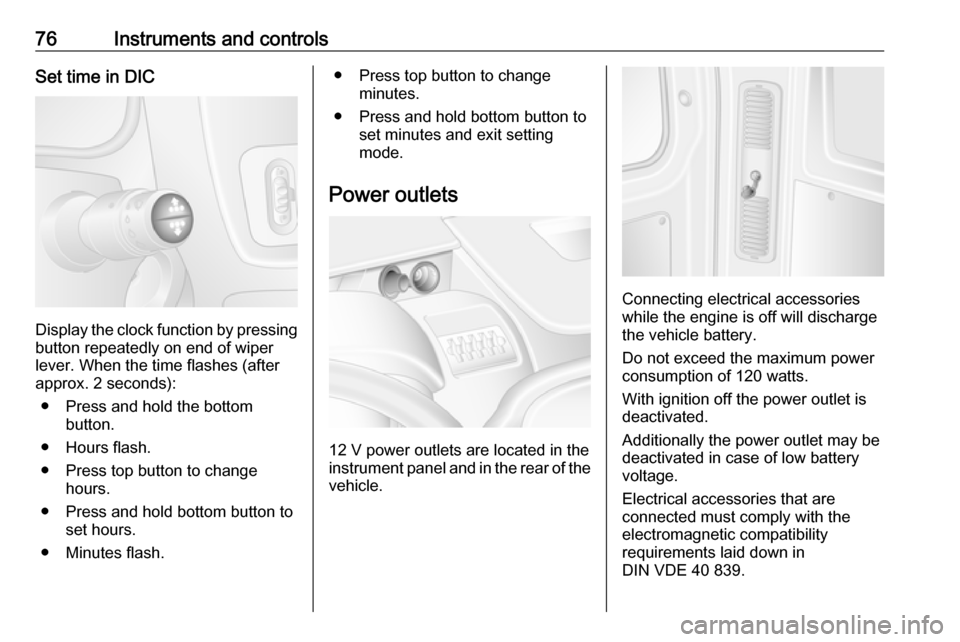
Display the clock function by pressingbutton repeatedly on end of wiper
lever. When the time flashes (after
approx. 2 seconds):
● Press and hold the bottom button.
● Hours flash.
● Press top button to change hours.
● Press and hold bottom button to set hours.
● Minutes flash.
● Press top button to change minutes.
● Press and hold bottom button to set minutes and exit setting
mode.
Power outlets
12 V power outlets are located in the instrument panel and in the rear of the
vehicle.
Connecting electrical accessories
while the engine is off will discharge
the vehicle battery.
Do not exceed the maximum power consumption of 120 watts.
With ignition off the power outlet is deactivated.
Additionally the power outlet may be
deactivated in case of low battery
voltage.
Electrical accessories that are
connected must comply with the
electromagnetic compatibility
requirements laid down in
DIN VDE 40 839.
Page 91 of 233

Instruments and controls89High beam assistí illuminates when the high beam
assist is activated 3 96.
Fog light > illuminates green.
Illuminated when the front fog lights are on 3 98.
Rear fog light r illuminates yellow.
Illuminated when the rear fog light is
on 3 99.
Cruise control m , U illuminates green or yellow.
m illuminates green when a certain
speed is stored.
U illuminates green when the system
is on.
Speed limiter U illuminates yellow.
U illuminates yellow when the
system is on.Cruise control, Speed limiter 3 139.
Tachograph
& illuminates when there is a fault
3 94.
Door open y illuminates yellow.
Illuminates with the ignition switched
on when a door or the load
compartment is open.
Depending on version, control
indicator also illuminates in
transmission display, indicating
relevant open door.Information displays
Driver Information Centre The Driver Information Centre (DIC)
is located in the instrument cluster
below the speedometer.
Depending on vehicle configuration,
the following items appear in the
display:
● outside temperature 3 75
● clock 3 75
● odometer, trip odometer 3 78
● engine oil level monitor 3 80
● service display 3 80
Page 94 of 233

92Instruments and controlsTrip computerThe trip computer provides
information on driving data, which is
continually recorded and evaluated electronically.
Depending on vehicle, the following
functions can be selected by pressing button repeatedly on end of wiper
lever:
● fuel used
● average consumption
● instantaneous consumption
● range
● distance travelled
● average speed
● distance before service 3 80
● clock 3 75
● odometer 3 78, trip odometer
3 78
● cruise control and speed limiter stored speed 3 139
● tyre pressures 3 177
● fault and information messages
Fuel used Displays the amount of fuel
consumed since the last reset.
The measurement can be restarted at any time by pressing and holding the
button on the end of the wiper lever.
Average consumption
The value is displayed after driving a distance of 0.25 miles.
Average consumption is displayed,
taking into consideration the distance
travelled and the fuel used since the
last reset.
The measurement can be restarted at
any time.Instantaneous consumption
The value is displayed after reaching
a speed of 20 mph.
Range
The value is displayed after driving a distance of 0.25 miles.
The range is calculated from the
current contents of the fuel tank and
the average consumption since the
last reset.
The range will not display if control
indicator Y is illuminated in the
instrument cluster 3 88.
The measurement can be restarted at
any time.
Distance travelled
Displays the distance driven since the
last reset.
The measurement can be restarted at
any time.
Average speedThe value is displayed after driving a
distance of 0.25 miles.
Page 110 of 233

108Climate controlThe display will remain illuminated forapprox. 15 seconds after the ignition
is switched off.
Operating the rear compartment
additional heating
Press Y to operate heating. Y will
appear in the display to indicate that
the heating is operating.
Changing the period for which
heating is operating
With the heating switched off ( Y
extinguished in display), press m for
approx. 3 seconds until the time
period for which heating is provided
flashes in the display.
Press m or n to adjust the heating
duration. The duration is set when the
display extinguishes.
Programming the heating mode
It is possible to store up to three
programmes which allow the heating
to be switched on.
Press P the appropriate number of
times to select the desired stored programme.Press m or n briefly; the
programming time flashes in the
display.
Press m or n to adjust to the
desired time, then, as soon as the
time display stops flashing, adjust the day by pressing m or n .
The time and day are set when the
display stops flashing and the clock is displayed.
Recalling a programming mode
To activate a stored programme,
press P the appropriate number of
times until the corresponding number appears on the display.
Neutral position or no stored
programme activated
Press P until there is no stored
programme number visible in the
display.
Adjusting the temperature To adjust the temperature of the
heating, turn the rotary knob located
on the control panel.turn clockwise:increase
temperatureturn anti-clock‐
wise:decrease
temperature
Rear air conditioning
system
The rear air conditioning system is
actuated in conjunction with the front
passenger compartment air
conditioning system.
Bus
Rear air vents
Page 111 of 233

Climate control109Additional air conditioning is supplied
to the rear passenger compartment
via the overhead air vents.
Fan speed
Adjust the air flow to select the
desired speed.
turn clockwise:increase air flowturn anti-clock‐
wise:decrease air flow
Combi
Additional air conditioning is supplied
to the rear passenger compartment
via the air vents located above the
driver and front passenger
compartment.
With the front passenger
compartment air conditioning system
switched on, adjust the air flow to
select the desired speed.
Ensure the air vents are open when in use, to prevent ice forming in the
system due to lack of air movement.
Auxiliary heater
Coolant heater The Eberspächer engine-
independent, fuel-powered coolant
heater provides rapid heating of the
engine coolant to enable heating of
the vehicle interior without the engine
running.9 Warning
Do not operate the system when
refuelling, when dust or
combustible vapours are present
or in enclosed spaces (e.g.
garage).
Before starting or programming the
system to start, turn the vehicle's
climate control system to heat and the
air distribution to V.
Switch off when not required. Heating stops automatically after the
programmed runtime. It will also
cease to operate if the vehicle fuel
level drops too low.
During operation, power from the
vehicle battery is used. The driving
time should therefore be at least as
long as the heating time. For short
journey times, check the vehicle
battery regularly and recharge if
necessary.
To ensure efficient performance,
briefly operate the auxiliary heater
once a month.
Control units The timer or remote control unit turns
the system on and off, and is used to programme specific departure times.