Page 77 of 368
772. Instrument cluster
2
Instrument cluster
The brightness of the instrument panel lights can be adjusted.
Brighter
Darker
■ The meters and display illuminate when
The engine switch is in the “ON” position.
Instrument panel light control
1
2
NOTICE
■To prevent damage to the engine and its components
On vehicles with a tachometer, do not let the indicator needle of the tachom-
eter enter the red zone, which indicates the maximum engine speed.
Page 79 of 368

792. Instrument cluster
2
Instrument cluster
.
Items displayed can be switched
by pressing the display change
button.
■Odometer
Displays the total distance the vehicle has been driven.
■Tr i p m e t e r s
Displays the distance the vehicle has been driven since the meter
was last reset. Trip meters “A” and “B” can be used to record and
display different distances independently.
Pressing and holding the display change button while the trip meter is
displayed will reset the trip meter to “0”.
■
Driving range
Displays the estimated maximum distance that can be driven with
the quantity of fuel remaining.
• This distance is computed based on your average fuel consumption. As a result, the actual distance that can be driven may differ from that dis-
played.
• When only a small amount of fuel is added to the tank, the display may not be updated.
When refueling, turn the engine switch to the “LOCK” position. If th\
e vehi-
cle is refueled without turning the engine switch to the “LOCK” po\
sition, the
display may not be updated.
Changing the display
Drive information
Page 80 of 368

802. Instrument cluster
■Average fuel consumption
Displays the average fuel consumption since the function was
reset.
• The function can be reset by pressing and holding the display change button when the average fuel consumption is displayed.
• Use the displayed average fuel consumption as a reference.
■
Instantaneous fuel consumption
Displays the instantaneous of fuel consumption.
■Average vehicle speed
Displays the average vehicle speed since the engine was last
started.
Eco Driving Indicator Light can be activated or deactivated by press-
ing the display change button when the Eco Driving Indicator Light
customization display is displayed.
To change the Eco Driving Indicator Light customization display, display the
odometer and press and hold the display change button until the display
changes.
After customization, press the display change button for more than 2 sec-
onds to return to the odometer.
The clock can be adjusted by pressing the buttons.
Adjust the hours
Adjust the minutes
Eco Driving Indicator Light custom ization (Vehicles with an auto-
matic transmission)
Clock
1
2
Page 84 of 368
843-1. Key information
Keys
The following keys are provided with the vehicle.
Vehicles without an engine immobilizer system (type A)
Master keys
Key number plate
Vehicles without an engine immobilizer system (type B)
Master key (with a wireless
remote control function)
Operating the wireless remote con-
trol function ( P. 89)
Master keys (without a wireless
remote control function)
Key number plate
Vehicles with an engine immobilizer system (type A)
Master keys
Key number plate
The keys
1
2
1
2
3
1
2
Page 85 of 368
853-1. Key information
3
Operation of each component
Vehicles with an engine immobilizer system (type B)
Master keys
Operating the wireless remote con-
trol function ( P. 89)
Key number plate
Vehicles with an engine immobilizer system (type C)
Master keys
Operating the wireless remote con-
trol function ( P. 89)
Key number plate
Ty p e A
Locks all the doors (
P. 8 9 )
Sounds the alarm
(press and hold)
Unlocks all the doors (
P. 89)
Pressing the button unlocks the
driver’s door. Pressing the button
again within 3 seconds unlocks the
other doors.
1
2
1
2
Wireless remote control (if equipped)
1
2
3
Page 91 of 368
913-2. Opening, closing and locking the doors
3
Operation of each component
◆Door lock switchUnlocks all the doors
Locks all the doors
◆Inside door lock buttonsLocks the doors
Unlocks the doors
The front doors can be opened
by pulling the inside handle
even if the inside door lock but-
ton is in the lock position.
Move the inside door lock button to the lock position.
Close the door.
The door cannot be locked if either of the front doors is open and the
key is in the engine switch.
Unlocking and locking the doors from the inside
1
2
1
2
Locking the front door from the outside without a key
1
2
Page 112 of 368

1123-4. Adjusting the steering wheel and mirrors
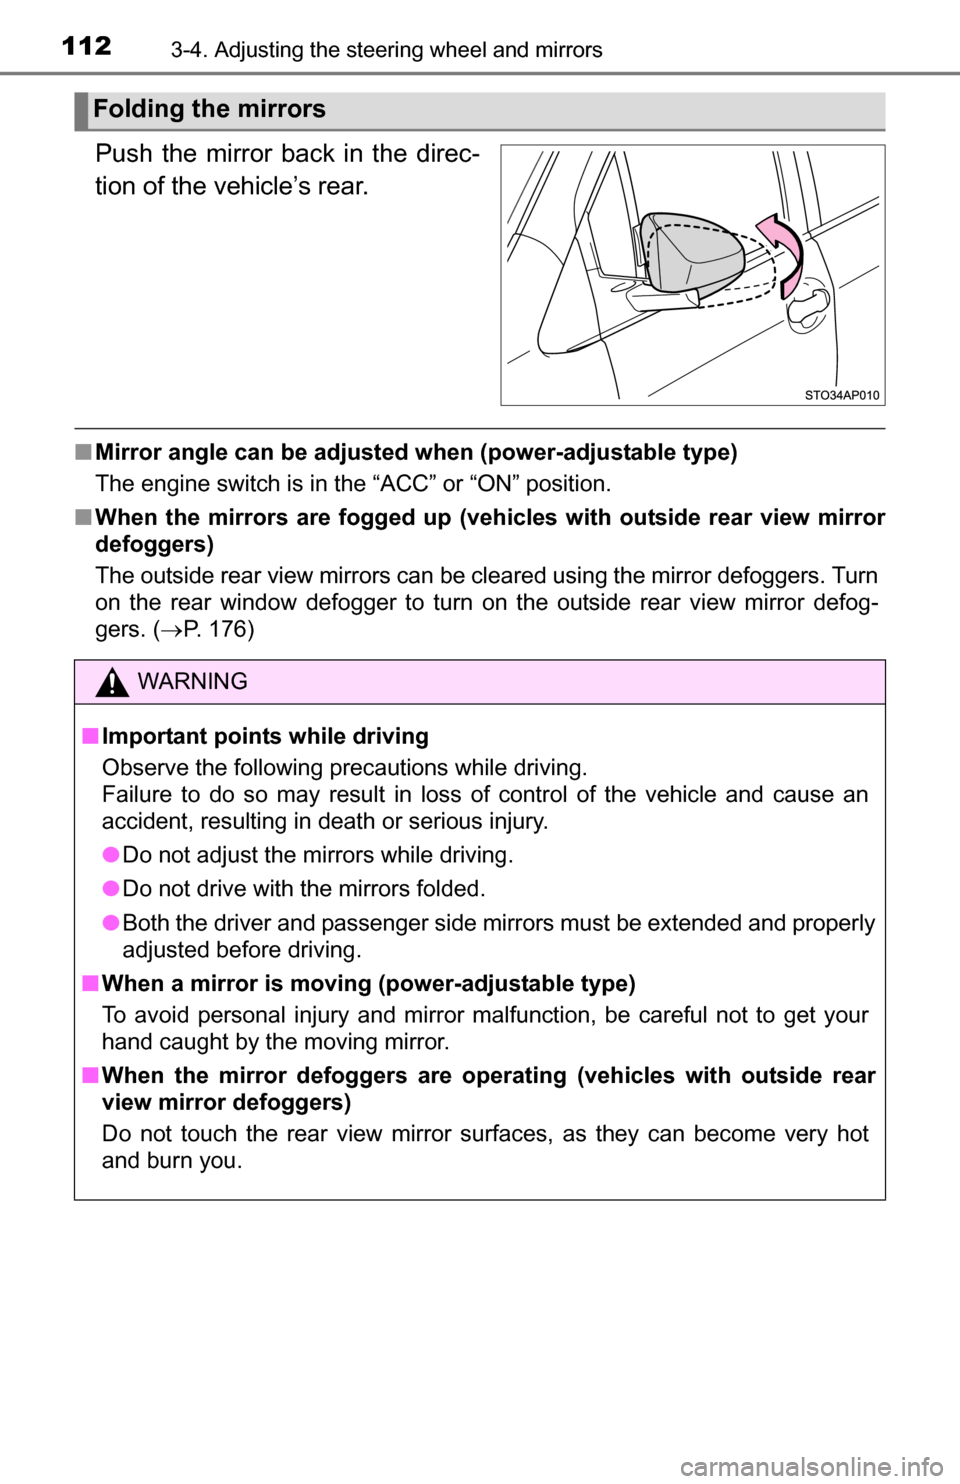
Push the mirror back in the direc-
tion of the vehicle’s rear.
■Mirror angle can be adjusted when (power-adjustable type)
The engine switch is in the “ACC” or “ON” position.
■ When the mirrors are fogg ed up (vehicles with outside rear view mirror
defoggers)
The outside rear view mirrors can be cleared using the mirror defoggers. Turn
on the rear window defogger to turn on the outside rear view mirror defog-
gers. ( P. 176)
Folding the mirrors
WARNING
■Important points while driving
Observe the following precautions while driving.
Failure to do so may result in loss of control of the vehicle and cause an
accident, resulting in death or serious injury.
● Do not adjust the mirrors while driving.
● Do not drive with the mirrors folded.
● Both the driver and passenger side mirrors must be extended and properly
adjusted before driving.
■ When a mirror is moving (power-adjustable type)
To avoid personal injury and mirror malfunction, be careful not to get your
hand caught by the moving mirror.
■ When the mirror defoggers are opera ting (vehicles with outside rear
view mirror defoggers)
Do not touch the rear view mirror surfaces, as they can become very hot
and burn you.
Page 114 of 368

1143-5. Opening and closing the windows
■The power windows can be operated when
The engine switch is in the “ON” position.
■ Operating the power windows after turning the engine
The power windows can be operated for approximately 45 seconds even
after the engine switch is turned to the “ACC” or “LOCK” position. They can-
not, however, be operated once either front door is opened.
WARNING
Observe the following precautions.
Failure to do so may result in death or serious injury.
■Closing the windows
● The driver is responsible for all the power window operations, including the
operation for the passengers. In order to prevent accidental operation,
especially by a child, do not let a child operate the power windows. It is
possible for children and other passengers to have body parts caught in
the power window. Also, when riding with a child, it is recommended to use
the window lock switch. ( P. 113)
● Check to make sure that all passengers do not have any part of their body
in a position where it could be caught when a window is being operated.
● When exiting the vehicle, turn the engine switch off, carry the key and exit
the vehicle along with the child. There may be accidental operation, due to
mischief, etc., that may possibly lead to an accident.