2016 TOYOTA TUNDRA window
[x] Cancel search: windowPage 352 of 588
3526-1. Using the air conditioning system
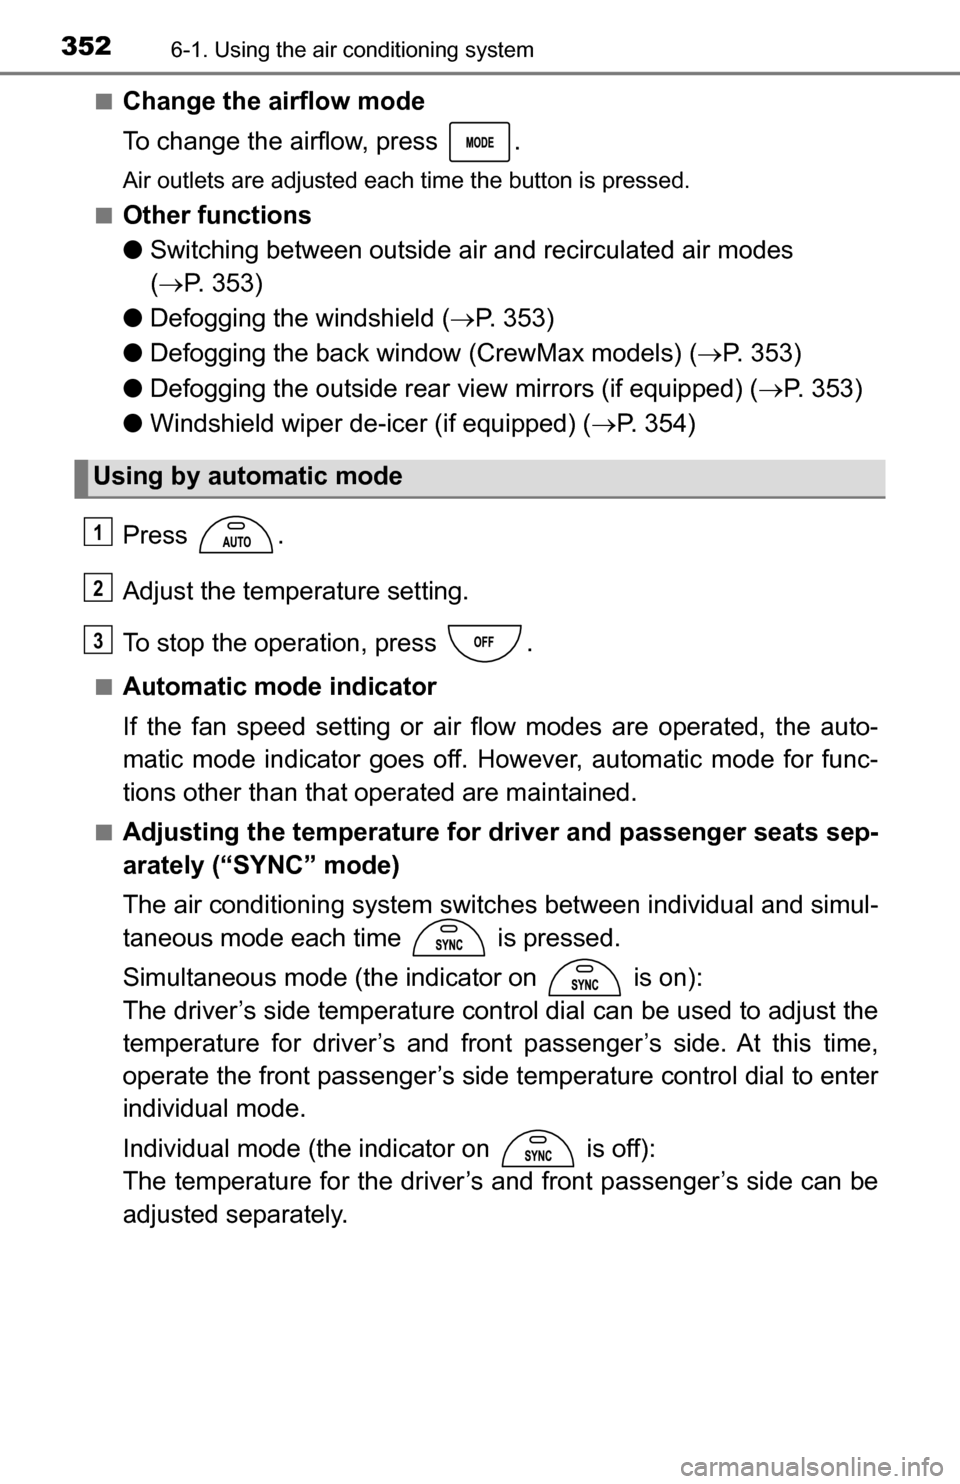
■Change the airflow mode
To change the airflow, press .
Air outlets are adjusted each time the button is pressed.
■
Other functions
● Switching between outside ai r and recirculated air modes
( P. 353)
● Defogging the windshield ( P. 353)
● Defogging the back window (CrewMax models) ( P. 353)
● Defogging the outside rear view mirrors (if equipped) ( P. 353)
● Windshield wiper de-icer (if equipped) ( P. 354)
Press .
Adjust the temperature setting.
To stop the operation, press .
■Automatic mode indicator
If the fan speed setting or air fl ow modes are operated, the auto-
matic mode indicator goes off. However, automatic mode for func-
tions other than that operated are maintained.
■Adjusting the temperature for driver and passenger seats sep-
arately (“SYNC” mode)
The air conditioning system switches between individual and simul-
taneous mode each time is pressed.
Simultaneous mode (the indicator on is on):
The driver’s side temperature control dial can be used to adjust the
temperature for driver’s and front passenger’s side. At this time,
operate the front passenger’s side temperature control dial to enter
individual mode.
Individual mode (the indicator on is off):
The temperature for the driver’s and front passenger’s side can be
adjusted separately.
Using by automatic mode
1
2
3
Page 353 of 588
3536-1. Using the air conditioning system
6
Interior features
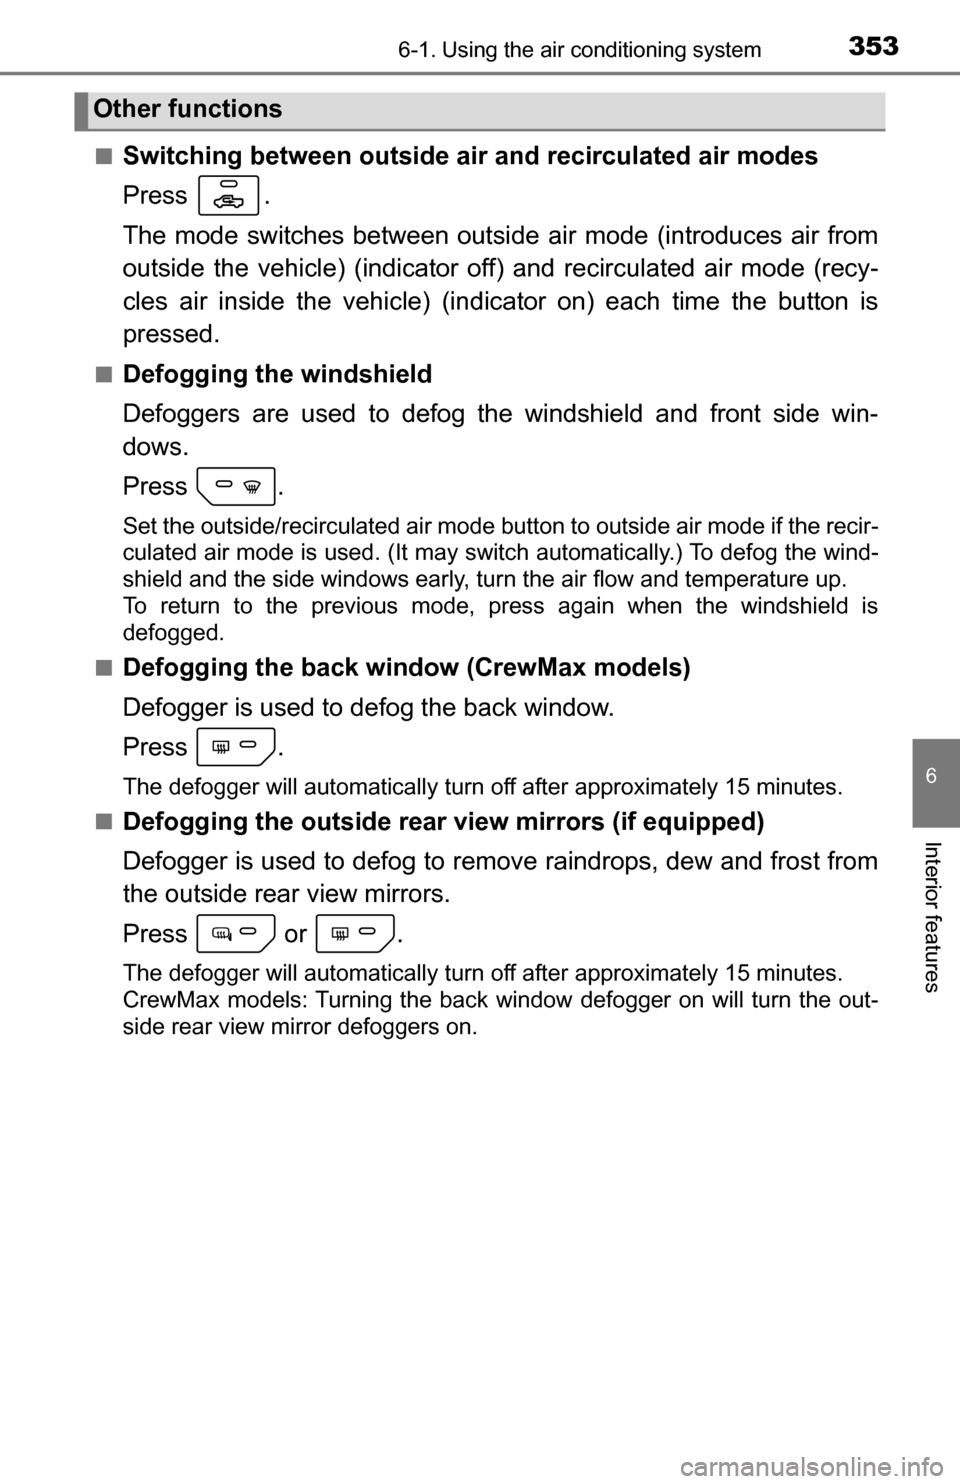
■Switching between outside air and recirculated air modes
Press .
The mode switches between outsi de air mode (introduces air from
outside the vehicle) (indicator of f) and recirculated air mode (recy-
cles air inside the vehicle) (indicator on) each time the button is
pressed.
■Defogging the windshield
Defoggers are used to defog the windshield and front side win-
dows.
Press .
Set the outside/recirculated air mode button to outside air mode if the recir-
culated air mode is used. (It may switch automatically.) To defog the wind-
shield and the side windows early, turn the air flow and temperature up.
To return to the previous mode, press again when the windshield is
defogged.
■
Defogging the back window (CrewMax models)
Defogger is used to defog the back window.
Press .
The defogger will automatically turn off after approximately 15 minutes.
■
Defogging the outside rear view mirrors (if equipped)
Defogger is used to defog to remove raindrops, dew and frost from
the outside rear view mirrors.
Press or .
The defogger will automatically turn off after approximately 15 minutes.
CrewMax models: Turning the back window defogger on will turn the out-
side rear view mirror defoggers on.
Other functions
Page 354 of 588
3546-1. Using the air conditioning system
■Windshield wiper de-icer (if equipped)
This feature is used to prevent ice from building up on the wind-
shield and wiper blades.
Press or .
The defogger will automatically turn off after approximately 15 minutes.
Regular Cab and Double Cab models: Turning the outside rear view mirror
defoggers on will turn the windshield wiper de-icer on.
CrewMax models: Turning the back window defogger on will turn the wind-
shield wiper de-icer on.
[
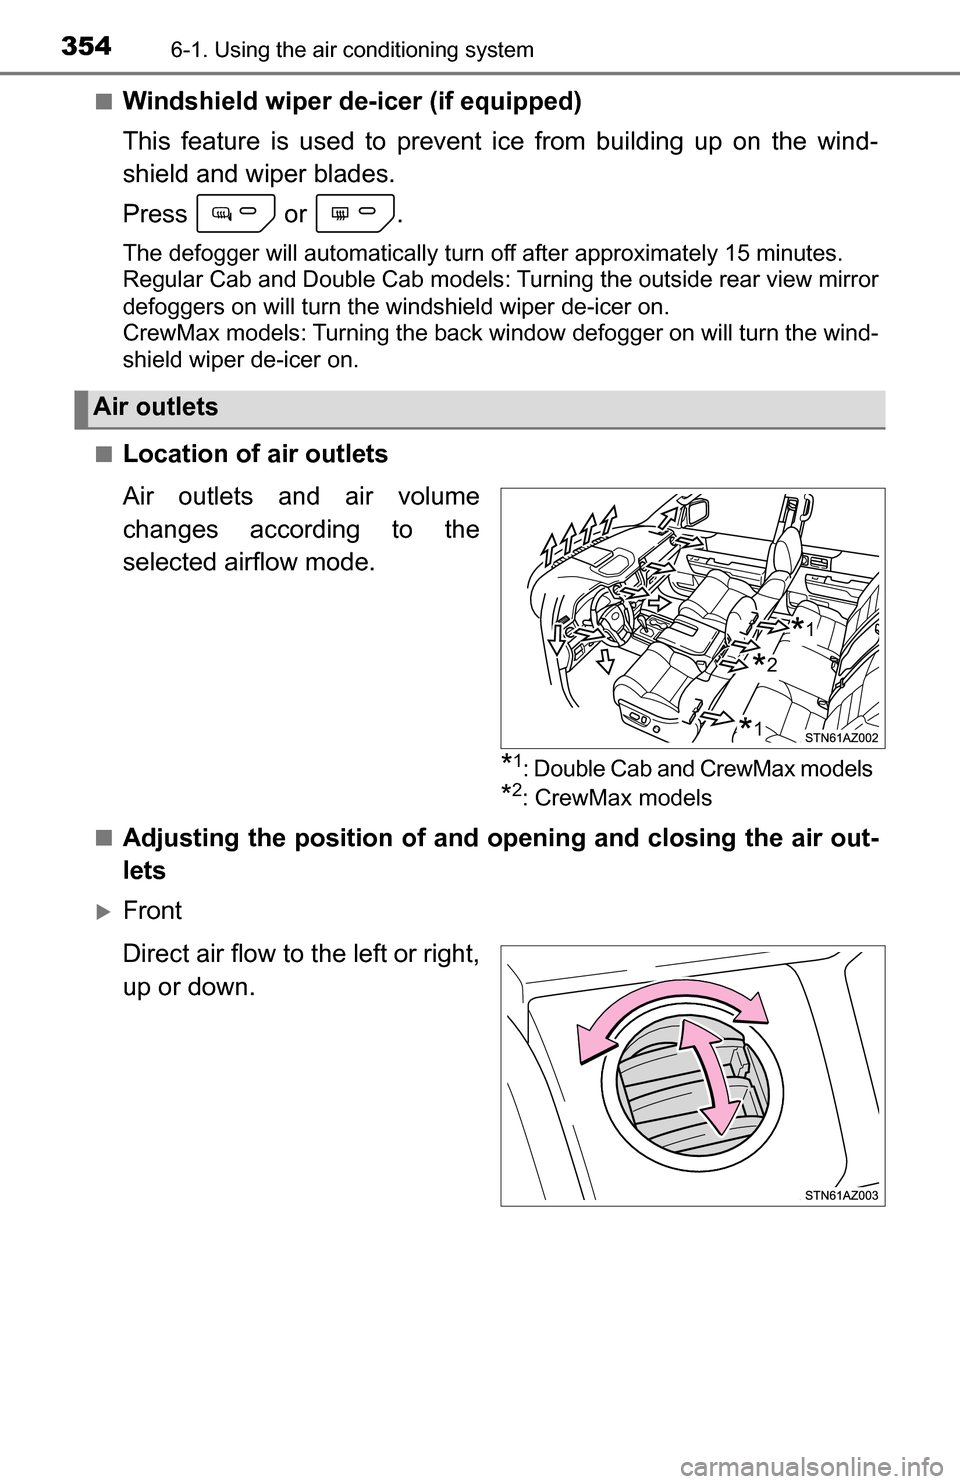
■Location of air outlets
Air outlets and air volume
changes according to the
selected airflow mode.
*1: Double Cab and CrewMax models
*2: CrewMax models
■
Adjusting the position of and opening and closing the air out-
lets
Front
Direct air flow to the left or right,
up or down.
Air outlets
*2
*1
*1
Page 356 of 588
3566-1. Using the air conditioning system
■Using automatic mode
Fan speed is adjusted automatically according to the temperature setting and
the ambient conditions.
Therefore, the fan may stop for a while until warm or cool air is ready to flow
immediately after is pressed.
■ Fogging up of the windows
●The windows will easily fog up when the humidity in the vehicle is high.
Turning on will dehumidify the air from the outlets and defog the
windshield effectively.
● If you turn off, the windows may fog up more easily.
● The windows may fog up if the recirculated air mode is used.
■ Outside/recirculated air mode
●When driving on dusty roads such as tunnels or in heavy traffic, set the out-
side/recirculated air mode button to the recirculated air mode. This is effec-
tive in preventing outside air from entering the vehicle interior. During
cooling operation, setting the recirculated air mode will also cool the vehicle
interior effectively.
● Outside/recirculated air mode may automatically switch depending on the
temperature setting or the inside temperature.
■ When the outside temperature exceeds 75°F (24°C) and the air condition-
ing system is on
● In order to reduce the air conditioning power consumption, the air condition-
ing system may switch to recirculated air mode automatically. This may also
reduce fuel consumption.
● Recirculated air mode is selected as a default mode when the engine switch
is in the “ON” position.
● It is possible to switch to outside air mode at any time by pressing .
■ When the outside temperat ure falls to nearly 32F (0C)
The dehumidification function may not operate even when is selected.
■ Ventilation and air conditioning odors
●To let fresh air in, set the air conditioning system to the outside air m\
ode.
● During use, various odors from inside and outside the vehicle may enter into
and accumulate in the air conditioning system. This may then cause odor to
be emitted from the vents.
● To reduce potential odors from occurring:
• It is recommended that the air conditioning system be set to outside air
mode prior to turning the vehicle off.
• The start timing of the blower may be delayed for a short period of time immediately after the air conditioning system is started in automatic
mode.
Page 400 of 588
4007-1. Maintenance and care
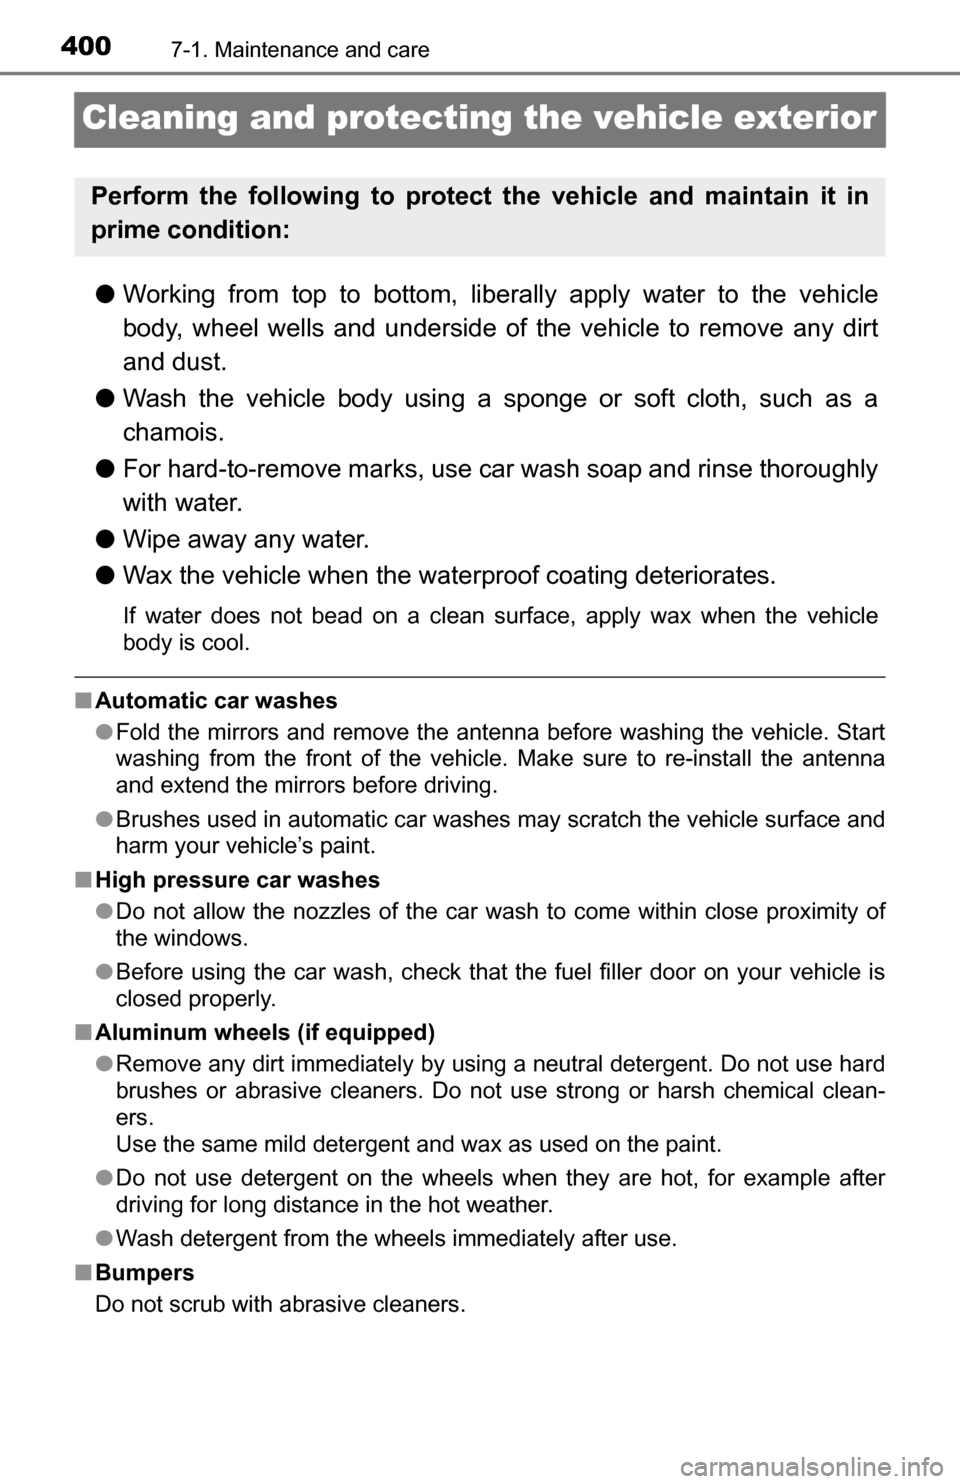
Cleaning and protecting the vehicle exterior
●Working from top to bottom, liber ally apply water to the vehicle
body, wheel wells and underside of the vehicle to remove any dirt
and dust.
● Wash the vehicle body using a sponge or soft cloth, such as a
chamois.
● For hard-to-remove marks, use car wash soap and rinse thoroughly
with water.
● Wipe away any water.
● Wax the vehicle when the wate rproof coating deteriorates.
If water does not bead on a clean surface, apply wax when the vehicle
body is cool.
■Automatic car washes
●Fold the mirrors and remove the antenna before washing the vehicle. Start
washing from the front of the vehicle. Make sure to re-install the antenna
and extend the mirrors before driving.
● Brushes used in automatic car washes may scratch the vehicle surface and
harm your vehicle’s paint.
■ High pressure car washes
●Do not allow the nozzles of the car wash to come within close proximity of
the windows.
● Before using the car wash, check that the fuel filler door on your vehicle is
closed properly.
■ Aluminum wheels (if equipped)
●Remove any dirt immediately by using a neutral detergent. Do not use hard
brushes or abrasive cleaners. Do not use strong or harsh chemical clean-
ers.
Use the same mild detergent and wax as used on the paint.
● Do not use detergent on the wheels when they are hot, for example after
driving for long distance in the hot weather.
● Wash detergent from the wheels immediately after use.
■ Bumpers
Do not scrub with abrasive cleaners.
Perform the following to protect the vehicle and maintain it in
prime condition:
Page 404 of 588
4047-1. Maintenance and care
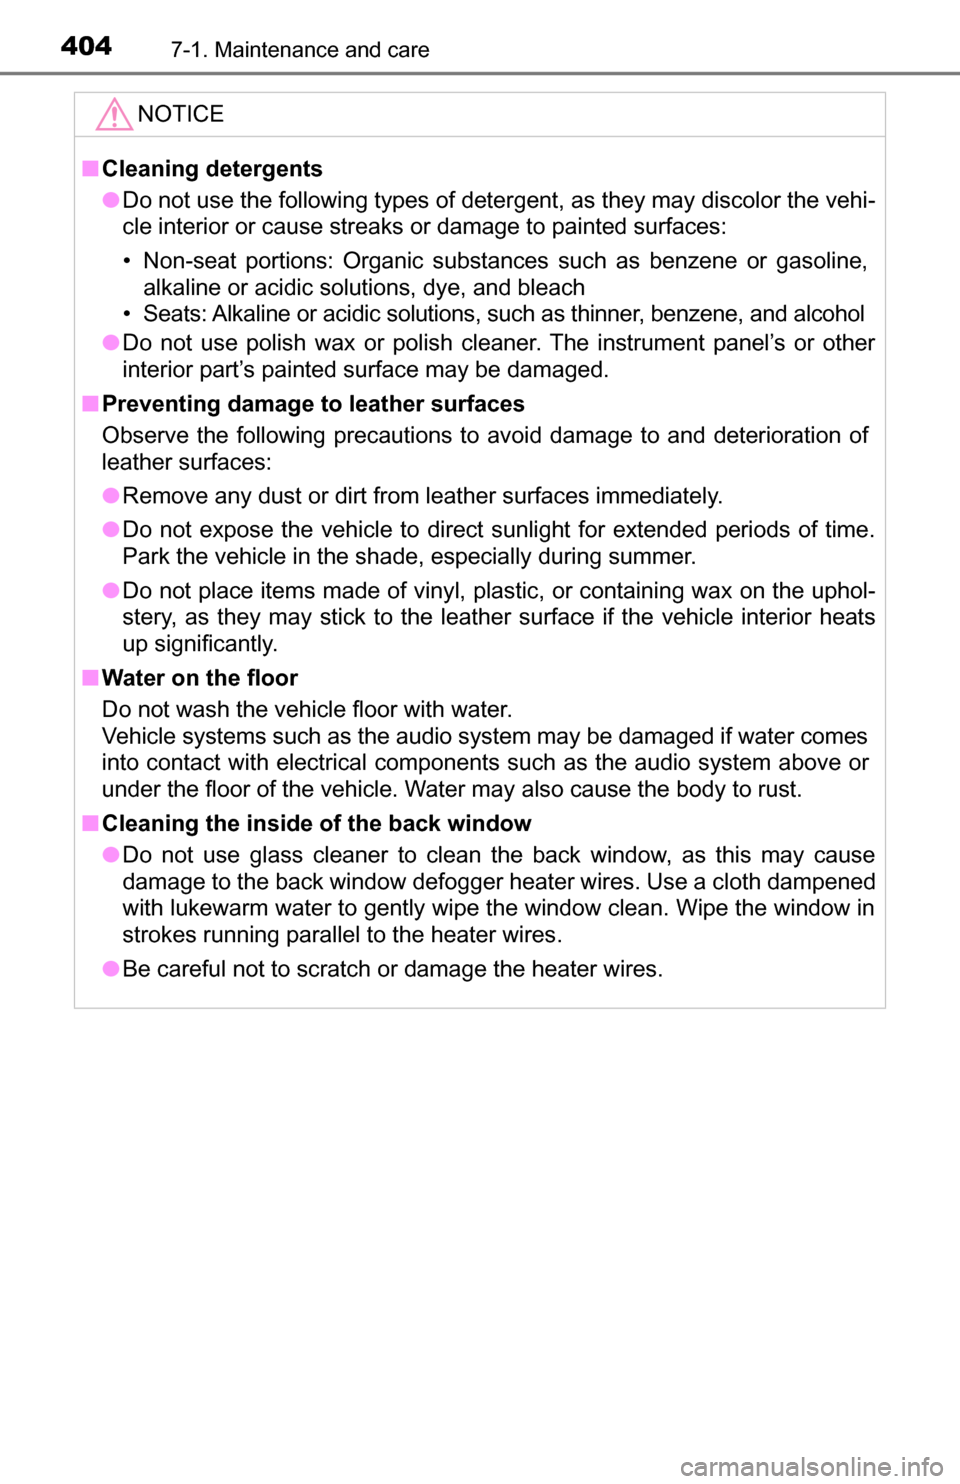
NOTICE
■Cleaning detergents
● Do not use the following types of detergent, as they may discolor the vehi-
cle interior or cause streaks or damage to painted surfaces:
• Non-seat portions: Organic substances such as benzene or gasoline,
alkaline or acidic solutions, dye, and bleach
• Seats: Alkaline or acidic solutions, such as thinner, benzene, and alcohol
● Do not use polish wax or polish cleaner. The instrument panel’s or other
interior part’s painted surface may be damaged.
■ Preventing damage to leather surfaces
Observe the following precautions to avoid damage to and deterioration of
leather surfaces:
● Remove any dust or dirt from leather surfaces immediately.
● Do not expose the vehicle to direct sunlight for extended periods of time.
Park the vehicle in the shade, especially during summer.
● Do not place items made of vinyl, plastic, or containing wax on the uphol-
stery, as they may stick to the leather surface if the vehicle interior heats
up significantly.
■ Water on the floor
Do not wash the vehicle floor with water.
Vehicle systems such as the audio system may be damaged if water comes
into contact with electrical components such as the audio system above or
under the floor of the vehicle. Water may also cause the body to rust.
■ Cleaning the inside of the back window
● Do not use glass cleaner to clean the back window, as this may cause
damage to the back window defogger heater wires. Use a cloth dampened
with lukewarm water to gently wipe the window clean. Wipe the window in
strokes running parallel to the heater wires.
● Be careful not to scratch or damage the heater wires.
Page 428 of 588

4287-3. Do-it-yourself maintenance
■Tire types
●Summer tires
Summer tires are high-speed performance tires best suited to highway
driving under dry conditions. Since summer tires do not have the same
traction performance as snow tires, summer tires are inadequate for
driving on snow-covered or icy ro ads. For driving on snow-covered
roads or icy roads, the use of snow tires is recommended. When install-
ing snow tires, be sure to replace all four tires.
●All season tires
All season tires are designed to provide better traction in snow and to
be adequate for driving in most winter conditions as well as for use
year-round. All season tires, however, do not have adequate traction
performance compared with snow tires in heavy or loose snow. Also, all
season tires fall short in acceleration and handling performance com-
pared with summer tires in highway driving.
●Snow tires
For driving on snow-covered roads or icy roads, we recommend using
snow tires. If you need snow tires, select tires of the same size, con-
struction and load capacity as the or iginally installed tires. Since your
vehicle has radial tires as original equipment, make sure your snow
tires also have radial construction. Do not install studded tires without
first checking local regulations fo r possible restrictions. Snow tires
should be installed on all wheels. ( P. 243)
■If the tread on snow tires wears down below 0.16 in. (4 mm)
The effectiveness of the tire s as snow tires is lost.
■Situations in which the tire pressure warning system may not oper-
ate properly
●In the following cases, the tire pr essure warning system may not operate
properly.
• If non-genuine Toyota wheels are used.
• A tire has been replaced with a tire that is not an OE (Original Equip- ment) tire.
• A tire has been replaced with a tire that is not of the specified size.
• Tire chains, etc., are equipped.
• An auxiliary-supported run- flat tire is equipped.
• If a window tint that affects the radio wave signals is installed.
• If there is a lot of snow or ice on the vehicle, particularly around the wheels or wheel housings.
• If the tire inflation pressure is extremely higher than the specified
level.
Page 538 of 588
5389-1. Specifications
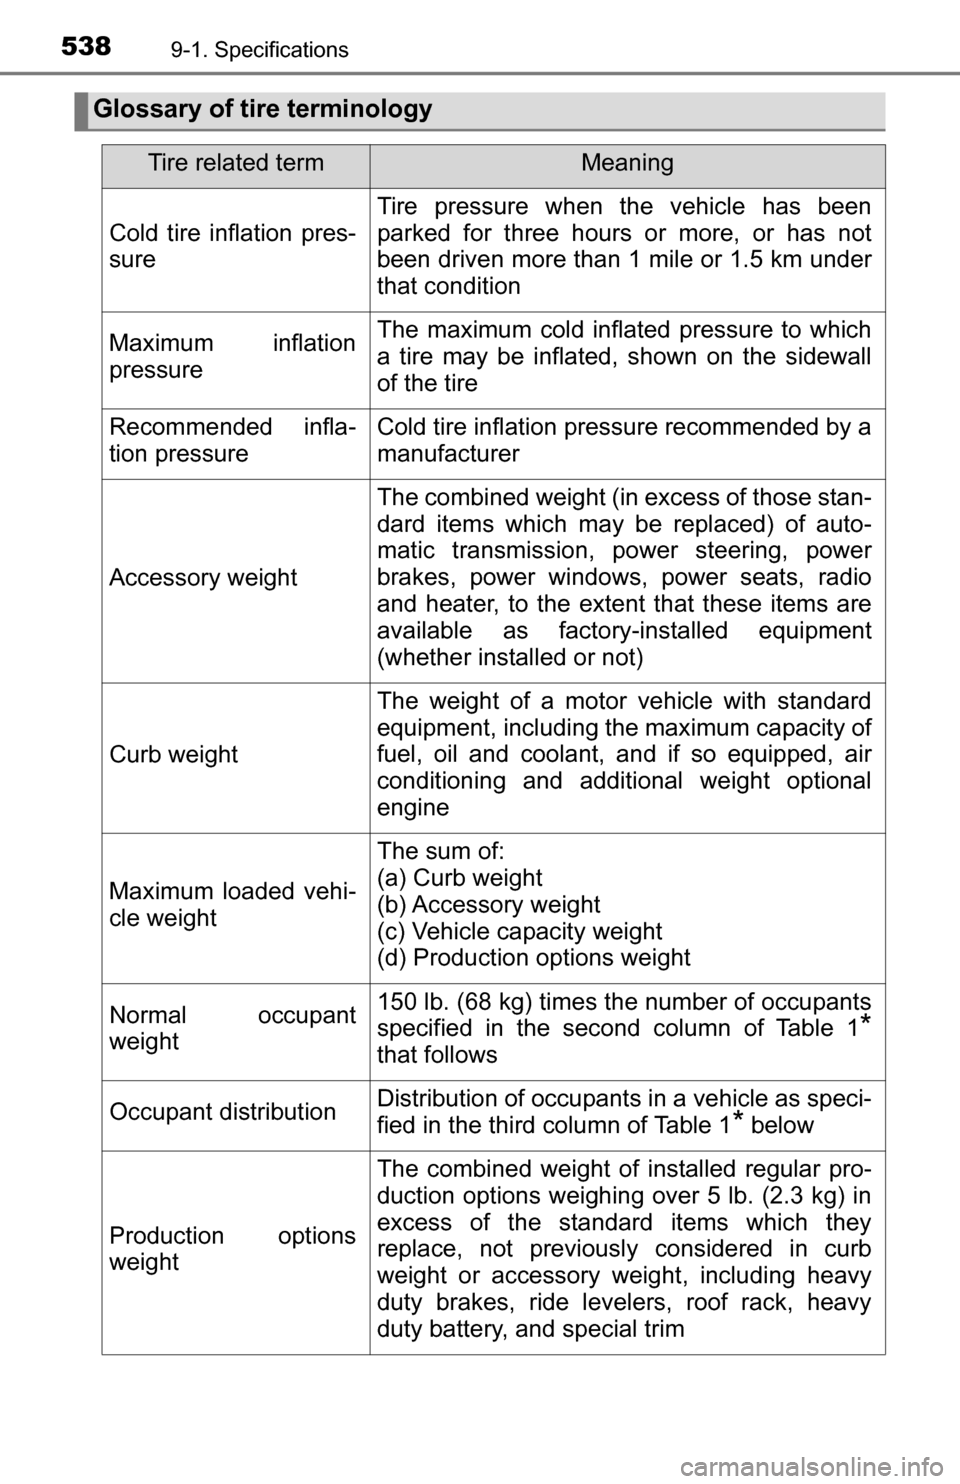
Glossary of tire terminology
Tire related termMeaning
Cold tire inflation pres-
sure
Tire pressure when the vehicle has been
parked for three hours or more, or has not
been driven more than 1 mile or 1.5 km under
that condition
Maximum inflation
pressureThe maximum cold inflated pressure to which
a tire may be inflated, shown on the sidewall
of the tire
Recommended infla-
tion pressureCold tire inflation pressure recommended by a
manufacturer
Accessory weight
The combined weight (in excess of those stan-
dard items which may be replaced) of auto-
matic transmission, power steering, power
brakes, power windows, power seats, radio
and heater, to the extent that these items are
available as factory-installed equipment
(whether installed or not)
Curb weight
The weight of a motor vehicle with standard
equipment, including the maximum capacity of
fuel, oil and coolant, and if so equipped, air
conditioning and additional weight optional
engine
Maximum loaded vehi-
cle weight
The sum of:
(a) Curb weight
(b) Accessory weight
(c) Vehicle capacity weight
(d) Production options weight
Normal occupant
weight150 lb. (68 kg) times the number of occupants
specified in the second column of Table 1
*
that follows
Occupant distributionDistribution of occupants in a vehicle as speci-
fied in the third column of Table 1
* below
Production options
weight
The combined weight of installed regular pro-
duction options weighing over 5 lb. (2.3 kg) in
excess of the standard items which they
replace, not previously considered in curb
weight or accessory weight, including heavy
duty brakes, ride levelers, roof rack, heavy
duty battery, and special trim