Page 7 of 52

OVERVIEW
FEATURES/OPERATIONS
SAFETY AND EMERGENCY FEATURES
5
Indicator symbols
Charging system warning1,2
Brake system warning1
2 If equipped
Anti-lock Brake System warning1
Headlight low/high beam indicator Turn signal indicator
Vehicle Stability Control
OFF indicator1
SNOW mode indicator
Cruise control/Cruise control “SET” indicator2
Tire Pressure Warning1
Open door warning2
Airbag SRS warning1
Master warning1
Driver seat belt reminder
(alarm will sound if speed is over 12 mph)
Low engine oil pressure warning1,2
Malfunction/Check Engine
indicator1
Pre-collison warning
system indicator1
Low fuel level warning
Electric power steering
system warning1
Arrow direction indicates fuel
tank door position Blind Spot Monitor (BSM) outside
rear view indicator
2
Front fog light indicator2
Downhill Assist Control indicator2
Slip indicator1
For details, refer to “Indicators and warning lights,” Section 2, 2016 Owner’s
Manual.
Automatic High Beam (AHB) indicator2
Lane Departure Alert (LDA) indicator2
Intuitive parking assist indicator2
All-wheel drive lock indicator1,2
Security indicator1
Eco driving indicator1
Air Bag ON/OFF indicator1
Page 25 of 52

23
OVERVIEW
FEATURES/OPERATIONS
SAFETY AND EMERGENCY FEATURES
The LDA function or displays when the Multi-Information Display (MID)
is switched to the driving assist system information screen.
The system displays solid white lines on the LDA indicator when visible lane
markers on the road are detected. A side flashes to alert the driver when the
vehicle deviates from its lane.
The system displays outlines on the LDA indicator when lane markers on the road
are not detected or the function is temporarily cancelled.
Note: When operation conditions are no longer met, a function may be temporarily
canceled. However, when the operation conditions are met again, operation of
the function is automatically restored. For example, LDA may not function on the
side(s) where white/yellow lines are not detectable.
MonochromeColor display
Lane marker detected
Lane marker not detected
Garage door opener (HomeLink®)*
(if equipped)
Garage door openers manufactured under license from HomeLink®* can be
programmed to operate garage doors, estate gates, security lighting, etc.
Refer to “Garage door opener,” Section 6-4 in the Owner’s Manual for more
details.
For programming assistance, contact HomeLink
® at 1-800-355-3515, or visit
http://www.homelink.com.
* HomeLink®
is a registered trademark of Gentex Corporation.
HomeLink®
indicator light
Garage door operation
indicator
Page 35 of 52

33
OVERVIEW
FEATURES/OPERATIONS
SAFETY AND EMERGENCY FEATURES
SAFETY AND EMERGENCY FEATURES
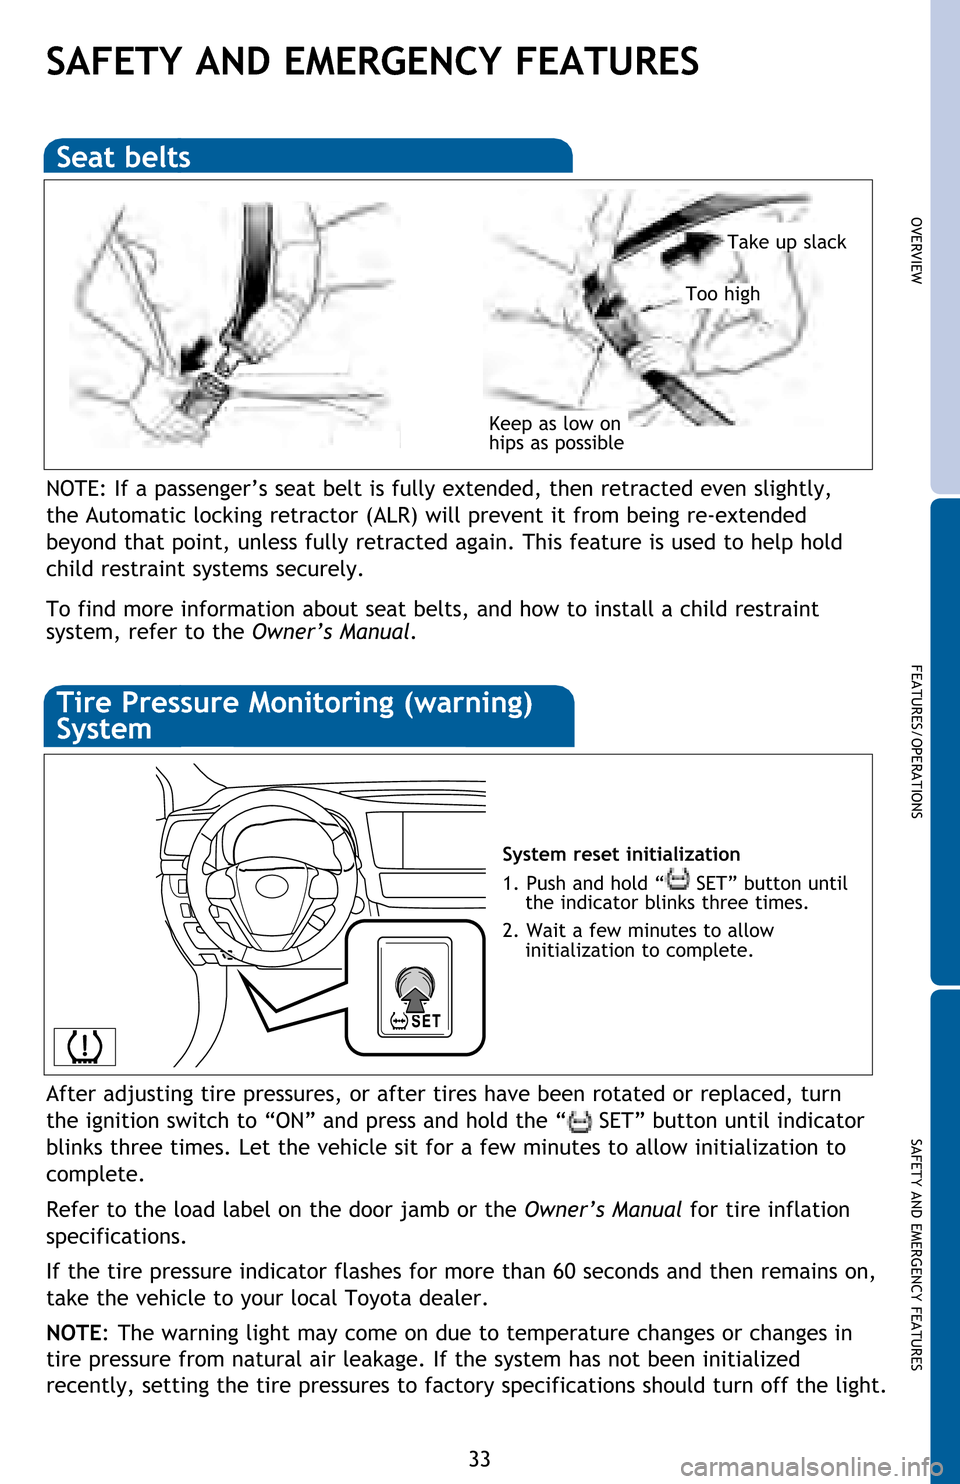
Keep as low on
hips as possible
Take up slack
Too high
Seat belts
System reset initialization
1. Push and hold “
SET” button until
the indicator blinks three times.
2. Wait a few minutes to allow
initialization to complete.
Tire Pressure Monitoring (warning)
System
After adjusting tire pressures, or after tires have been rotated or replaced, turn
the ignition switch to “ON” and press and hold the “
SET” button until indicator
blinks three times. Let the vehicle sit for a few minutes to allow initialization to
complete.
Refer to the load label on the door jamb or the Owner’s Manual for tire inflation
specifications.
If the tire pressure indicator flashes for more than 60 seconds and then remains on,
take the vehicle to your local Toyota dealer.
NOTE: The warning light may come on due to temperature changes or changes in
tire pressure from natural air leakage. If the system has not been initialized
recently, setting the tire pressures to factory specifications should turn off the light.
NOTE: If a passenger’s seat belt is fully extended, then retracted even slightly,
the Automatic locking retractor (ALR) will prevent it from being re-extended
beyond that point, unless fully retracted again. This feature is used to help hold
child restraint systems securely.
To find more information about seat belts, and how to install a child restraint
system, refer to the Owner’s Manual.