Page 4 of 608

TABLE OF CONTENTS4
HIGHLANDER_HV_U (OM48F12U)5-1. Using the air conditioning
system and defogger
Front automatic air conditioning system ........ 328
Rear automatic air conditioning system ........ 335
Heated steering wheel/ seat heaters/
seat ventilators ................ 338
5-2. Using the interior lights Interior lights list ................ 341
• Interior lights ................. 342
• Personal lights .............. 342
5-3. Using the storage features
List of storage features...... 344
• Glove box...................... 345
• Console box .................. 345
• Bottle holders ................ 346
• Cup holders .................. 347
• Auxiliary boxes.............. 349
• Open tray ...................... 350
Luggage compartment features ........................... 351 5-4. Using the other interior
features
Other interior features........ 353
• Sun visors ..................... 353
• Vanity mirrors ................ 353
• Conversation mirror....... 354
• Clock ............................. 355
• Outside temperature display ........................... 355
• Power outlets ................ 356
• Rear sunshades ............ 359
• Armrest.......................... 360
• Coat hooks .................... 361
• Assist grips .................... 361
• Side table ...................... 362
Garage door opener .......... 363
Safety Connect .................. 370
Compass ........................... 376
5Interior features
Page 19 of 608

19Pictorial index
HIGHLANDER_HV_U (OM48F12U)Parking brake . . . . . . . . . . . . . . . . . . . . . . . . . . . . . . . . . . . . . P. 243
Applying/releasing . . . . . . . . . . . . . . . . . . . . . . . . . . . . . . . . . . P. 243
Precautions against winter season . . . . . . . . . . . . . . . . . . . . . P. 320
Warning buzzer/message . . . . . . . . . . . . . . . . . . . . . . . . . . . . P. 470
Turn signal lever . . . . . . . . . . . . . . . . . . . . . . . . . . . . . . . . . . P. 242
Headlight switch . . . . . . . . . . . . . . . . . . . . . . . . . . . . . . . . . . P. 244
Headlights/tail lights/daytime running lights . . . . . . . . . . . . . . . P. 244
Front fog lights . . . . . . . . . . . . . . . . . . . . . . . . . . . . . . . . . . . . . P. 254
Wiper and washer switch . . . . . . . . . . . . . . . . . . . . . . . P. 255, 259
Usage . . . . . . . . . . . . . . . . . . . . . . . . . . . . . . . . . . . . . . . P. 255, 259
Adding washer fluid . . . . . . . . . . . . . . . . . . . . . . . . . . . . . . . . . P. 409
Warning messages . . . . . . . . . . . . . . . . . . . . . . . . . . . . . . . . . P. 480
Emergency flasher switch . . . . . . . . . . . . . . . . . . . . . . . . . . P. 454
Hood lock release lever. . . . . . . . . . . . . . . . . . . . . . . . . . . . . P. 399
Tilt and telescopic steering lock release lever . . . . . . . . . . P. 173
Adjustment . . . . . . . . . . . . . . . . . . . . . . . . . . . . . . . . . . . . . . . . P. 173
Automatic air conditioning system . . . . . . . . . . . . . . . . . . . P. 328
Usage . . . . . . . . . . . . . . . . . . . . . . . . . . . . . . . . . . . . . . . . . . . P. 328
Rear window defogger . . . . . . . . . . . . . . . . . . . . . . . . . . . . . . . P. 330
Audio system
*
Clock . . . . . . . . . . . . . . . . . . . . . . . . . . . . . . . . . . . . . . . . . . . . P. 355
Power back door main switch . . . . . . . . . . . . . . . . . . . . . . . P. 136
Fuel filler door opener switch . . . . . . . . . . . . . . . . . . . . . . . . P. 263
*: Refer to “NAVIGATION AND MULTIMEDIA SYSTEM OWNER’S MANUAL”.
4
5
6
7
8
9
10
11
12
13
14
Page 327 of 608

327
5Interior features
HIGHLANDER_HV_U (OM48F12U)5-1. Using the air conditioning
system and defogger
Front automatic air conditioning system ........ 328
Rear automatic air conditioning system ........ 335
Heated steering wheel/ seat heaters/
seat ventilators ................ 338
5-2. Using the interior lights Interior lights list ................ 341
• Interior lights ................. 342
• Personal lights .............. 342
5-3. Using the storage features
List of storage features ..... 344
• Glove box...................... 345
• Console box .................. 345
• Bottle holders ................ 346
• Cup holders .................. 347
• Auxiliary boxes.............. 349
• Open tray ...................... 350
Luggage compartment features ........................... 351 5-4. Using the other interior
features
Other interior features ....... 353
• Sun visors ..................... 353
• Vanity mirrors................ 353
• Conversation mirror ...... 354
• Clock ............................. 355
• Outside temperature display........................... 355
• Power outlets ................ 356
• Rear sunshades............ 359
• Armrest ......................... 360
• Coat hooks.................... 361
• Assist grips ................... 361
• Side table ...................... 362
Garage door opener.......... 363
Safety Connect ................. 370
Compass ........................... 376
Page 328 of 608
328
HIGHLANDER_HV_U (OM48F12U)
5-1. Using the air conditioning system and defogger
■Adjusting the temperature setting
To adjust the temperature setting, turn clockwise to increase
the temperature and countercloc kwise to decrease the tempera-
ture.
The temperature for the driver, front passenger and rear seats can be
adjusted separately when: • is pressed. (The “SYNC” displays disappear.)
• The front passenger side dial is turned. (The “PASS SYNC”
display changes to “PASS”.)
• The “
” or “” side of is pressed. (The “REAR SYNC” display
changes to “REAR”.)
The air conditioning system switches between individual and synchro-
nized modes each time is pressed.
Front automatic air conditioning system
Air outlets and fan speed are automatically adjusted according
to the temperature setting.
Air conditioning controls
Page 355 of 608
3555-4. Using the other interior features
5
Interior features
HIGHLANDER_HV_U (OM48F12U)
The clock can be adjusted by pressing the buttons.Adjusts the hours
Adjusts the minutes
■The clock is displayed when
The power switch is in ACCESSORY or ON mode.
■ When the 12-volt battery is disconnected
The time display will automatically be set to 1:00.
The temperature display shows temperatures within the range of -40F
(-40
C) to 122F (50C).
Clock
1
2
Outside temperature display
Vehicles with monochrome dis-
playVehicles with color display
Page 404 of 608

4046-3. Do-it-yourself maintenance
HIGHLANDER_HV_U (OM48F12U)■
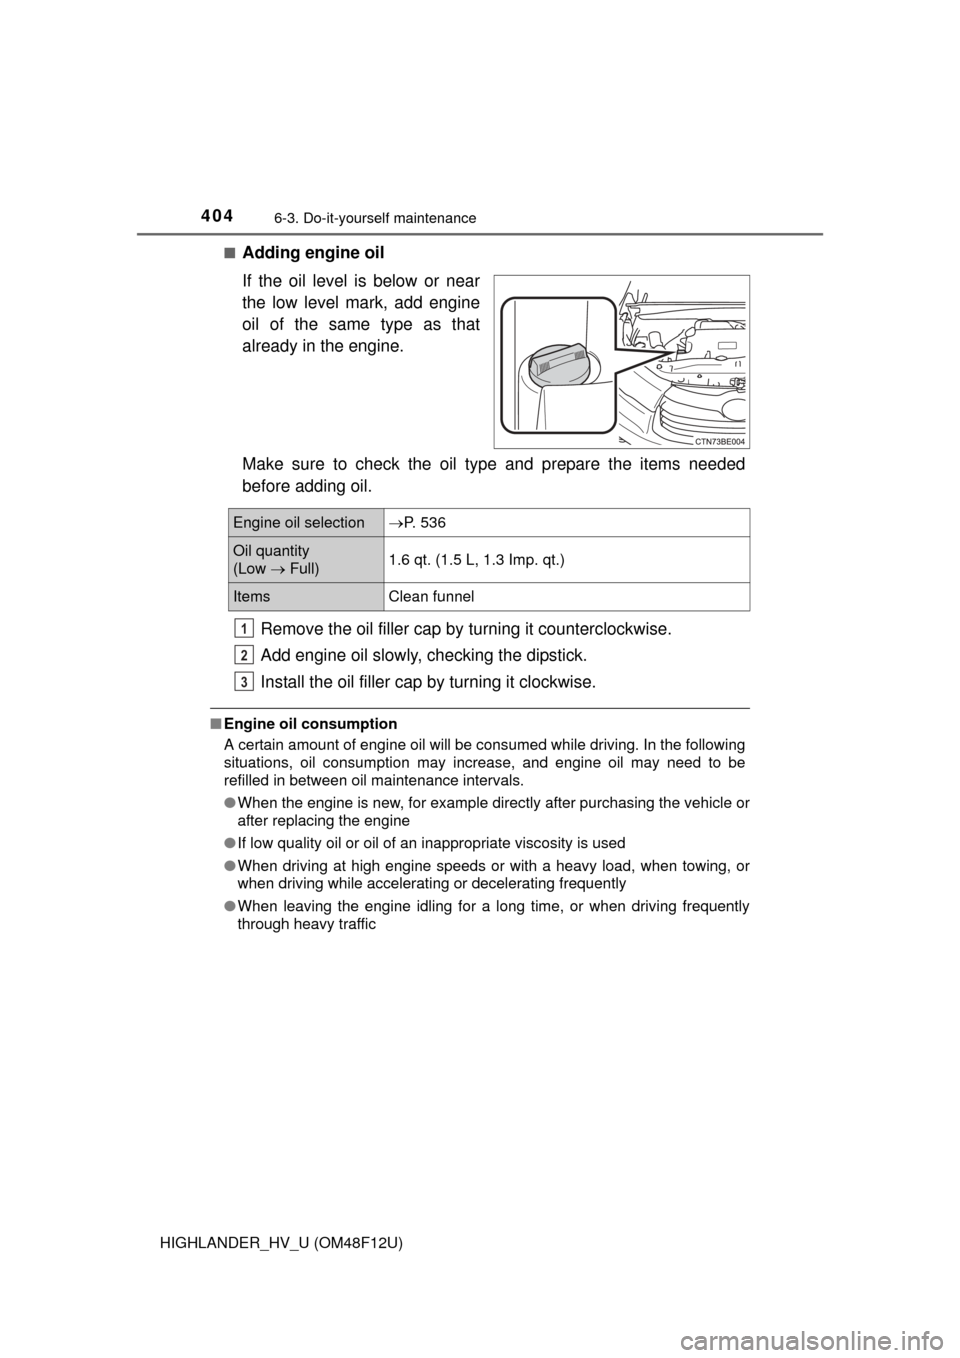
Adding engine oil
If the oil level is below or near
the low level mark, add engine
oil of the same type as that
already in the engine.
Make sure to check the oil type and prepare the items needed
before adding oil.
Remove the oil filler cap by turning it counterclockwise.
Add engine oil slowly, checking the dipstick.
Install the oil filler cap by turning it clockwise.
■ Engine oil consumption
A certain amount of engine oil will be consumed while driving. In the following
situations, oil consumption may increase, and engine oil may need to be
refilled in between oil maintenance intervals.
●When the engine is new, for example directly after purchasing the vehicle or
after replacing the engine
● If low quality oil or oil of an inappropriate viscosity is used
● When driving at high engine speeds or with a heavy load, when towing, or
when driving while accelerating or decelerating frequently
● When leaving the engine idling for a long time, or when driving frequently
through heavy traffic
Engine oil selection P. 536
Oil quantity
(Low Full) 1.6 qt. (1.5 L, 1.3 Imp. qt.)
Items
Clean funnel
1
2
3
Page 440 of 608
4406-3. Do-it-yourself maintenance
HIGHLANDER_HV_U (OM48F12U)■
Headlight low beams
For the right side only:
Remove the washer fluid
tank opening.
For the left side only:
Remove the fuse box.
Turn the bulb base counter-
clockwise.
Unplug the connector while
pressing the lock release.
Replacing light bulbs
1
2
3
Page 442 of 608
4426-3. Do-it-yourself maintenance
HIGHLANDER_HV_U (OM48F12U)■
Headlight high beams/
daytime running lights
Turn the bulb base counter-
clockwise.
Unplug the connector while
pressing the lock release.
Replace the light bulb, and
install the bulb base.
Align the 3 tabs on the light bulb
with the mounting, and insert.
Turn and secure the bulb
base.
Shake the bulb base gently to
check that it is not loose, turn
the headlights on once and visu-
ally confirm that no light is leak-
ing through the mounting.
1
2
3
4