Page 9 of 304

9
AVA L O N _ N a v i _ U
1
2
3
4
5
6
7
9
8
3. MEDIA OPERATION ....................... 96
CD ......................................................... 96
USB MEMORY ...................................... 99
iPod ..................................................... 103
Bluetooth
® AUDIO ............................... 107
AUX ..................................................... 113
4. AUDIO REMOTE CONTROLS ...... 115
STEERING SWITCHES ...................... 115
5. SETUP ........................................... 118
AUDIO SETTINGS .............................. 118
6. TIPS FOR OPERATING THE AUDIO SYSTEM .................. 120
OPERATING INFORMATION ............. 120
1. VOICE COMMAND SYSTEM
OPERATION ................................ 130
VOICE COMMAND SYSTEM.............. 130
CASUAL SPEECH
RECOGNIZATION ............................ 136
COMMAND LIST ................................. 137
2. MOBILE ASSISTANT OPERATION ................................ 139
MOBILE ASSISTANT .......................... 139
1. USEFUL INFORMATION............... 142
RECEIVING WEATHER
INFORMATION ................................. 142
RECEIVING TRAFFIC MAP INFORMATION ................................. 144
DATA SERVICES SETTINGS ............. 145
1. REAR VIEW MONITOR SYSTEM ....... ............................ ... 148
REAR VIEW MONITOR SYSTEM ....... 148
REAR VIEW MONITOR SYSTEM
PRECAUTIONS ................................ 150
THINGS YOU SHOULD KNOW .......... 155
2. TOYOTA PARKING ASSIST MONITOR .................................... 156
TOYOTA PARKING ASSIST
MONITOR ......................................... 156
ESTIMATED COURSE LINE DISPLAY MODE ............................... 161
PARKING ASSIST GUIDE LINE DISPLAY MODE ............................... 163
TOYOTA PARKING ASSIST MONITOR PRECAUTIONS............... 165
THINGS YOU SHOULD KNOW .......... 170
1. PHONE OPERATION (HANDS-FREE SYSTEM FOR
CELLULAR PHONES) ................ 174
QUICK REFERENCE .......................... 174
SOME BASICS .................................... 175
CALLING ON THE Bluetooth
®
PHONE .............................................. 179
RECEIVING ON THE Bluetooth
®
PHONE .............................................. 185
TALKING ON THE Bluetooth
®
PHONE .............................................. 186
Bluetooth
® PHONE MESSAGE
FUNCTION ........................................ 189
2. SETUP ........................................... 194
PHONE/MESSAGE SETTINGS .......... 194
3. WHAT TO DO IF... ....................... 206
TROUBLESHOOTING ......................... 206
4VOICE COMMAND SYSTEM
5INFORMATION
6PERIPHERAL MONITORING
SYSTEM
7PHONE
Page 60 of 304
60
3. OTHER SETTINGS
AVA L O N _ N a v i _ U
■TRANSFERRING IMAGES
1Push the tray forward until it locks.
2Open the cover and connect a USB
memory.
Turn on the power of the USB memory if it
is not turned on.
3Press the “APPS” button.
4Select “Setup”.
5Select “General” .
6Select “Customize Screen Off Im-
age” .
7Select “Transfer” .
8Select “Yes”.
CUSTOMIZING THE SCREEN
OFF IMAGES
An image can be copied from a USB
memory and used as the screen off im-
ages.
When “Screen Off” on the “Setup”
screen is selected, the screen is turned
off and the desired screen off image
that is set is displayed. (To turn the
screen off: P.20)
Page 61 of 304

61
3. OTHER SETTINGS
AVA L O N _ N a v i _ U
BASIC FUNCTION
2
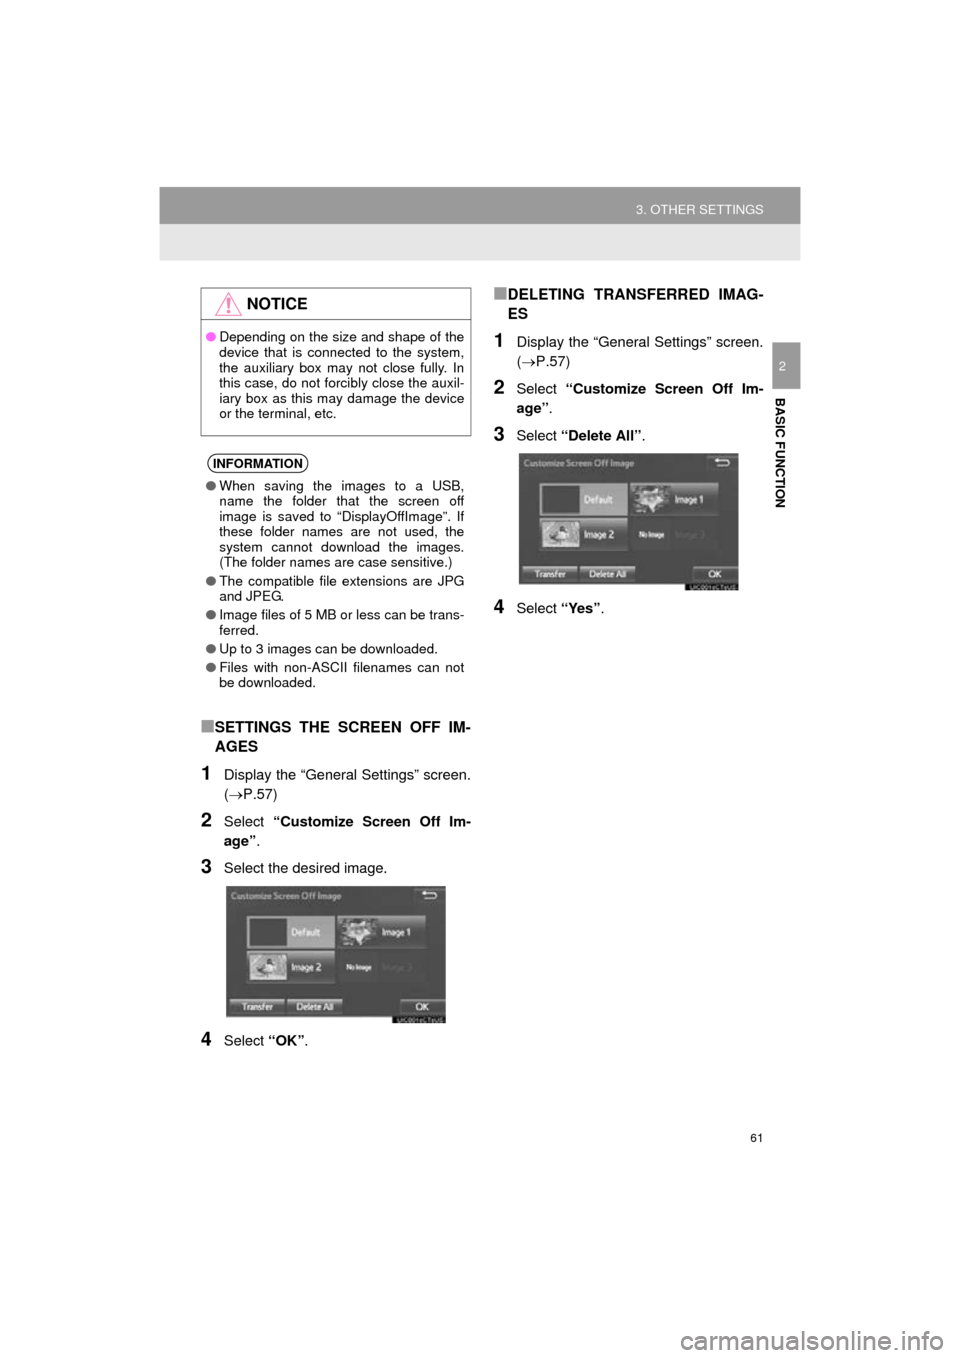
■SETTINGS THE SCREEN OFF IM-
AGES
1Display the “General Settings” screen.
(P.57)
2Select “Customize Screen Off Im-
age” .
3Select the desired image.
4Select “OK”.
■DELETING TRANSFERRED IMAG-
ES
1Display the “General Settings” screen.
(P.57)
2Select “Customize Screen Off Im-
age” .
3Select “Delete All” .
4Select “Yes”.
NOTICE
●Depending on the size and shape of the
device that is connected to the system,
the auxiliary box may not close fully. In
this case, do not forcibly close the auxil-
iary box as this may damage the device
or the terminal, etc.
INFORMATION
●When saving the images to a USB,
name the folder that the screen off
image is saved to “DisplayOffImage”. If
these folder names are not used, the
system cannot download the images.
(The folder names are case sensitive.)
● The compatible file extensions are JPG
and JPEG.
● Image files of 5 MB or less can be trans-
ferred.
● Up to 3 images can be downloaded.
● Files with non-ASCII filenames can not
be downloaded.
Page 70 of 304

70
AVA L O N _ N a v i _ U
1. QUICK REFERENCE ..................... 72
2. SOME BASICS............................... 73
TURNING THE SYSTEM ON AND OFF ...................................... 74
SELECTING AN AUDIO SOURCE ........ 74
DISC SLOT ............................................ 75
USB/AUX PORT .................................... 76
SOUND SETTINGS ............................... 76
VOICE COMMAND SYSTEM ................ 78
1. AM/FM RADIO ............................... 79
OVERVIEW ............................................ 79
PRESETTING A STATION .................... 82
SELECTING A STATION FROM THE LIST ............................................. 82
CACHING A RADIO PROGRAM ........... 83
RADIO BROADCAST DATA SYSTEM .............................................. 84
TRAFFIC ANNOUNCEMENT (FM RADIO) ......................................... 85
USING HD Radio™ TECHNOLOGY...... 85
AVAILABLE HD Radio™ TECHNOLOGY.................................... 86
TROUBLESHOOTING GUIDE ............... 88
2. XM Satellite Radio ........................ 89
OVERVIEW ............................................ 89
HOW TO SUBSCRIBE TO AN XM Satellite Radio ......................... 91
DISPLAYING THE RADIO ID................. 93
PRESETTING A CHANNEL ................... 93
SELECTING A CHANNEL FROM THE LIST ............................................. 93
IF THE SATELLITE RADIO TUNER MALFUNCTIONS ................................ 94
3. INTERNET RADIO......................... 95
LISTENING TO INTERNET RADIO ....... 95
1BASIC OPERATION2RADIO OPERATION
3
AUDIO SYSTEM
Page 71 of 304

3
71
AVA L O N _ N a v i _ U
4
5
6
7
8
9
1
2
3
1. CD .................................................. 96
OVERVIEW ........................................... 96
PLAYING AN AUDIO CD ...................... 98
PLAYING AN MP3/WMA/AAC DISC.................................................... 98
2. USB MEMORY ............................... 99
OVERVIEW ........................................... 99
PLAYING A USB AUDIO ..................... 102
3. iPod .............................................. 103
OVERVIEW ......................................... 103
iPod AUDIO ......................................... 106
4. Bluetooth® AUDIO ...................... 107
OVERVIEW ......................................... 107
CONNECTING A Bluetooth®
DEVICE ............................................. 112
LISTENING TO Bluetooth
® AUDIO ..... 112
5. AUX .............................................. 113
OVERVIEW ......................................... 113
1. STEERING SWITCHES............... 115
1. AUDIO SETTINGS ...................... 118
AUDIO SETTINGS SCREEN............... 118
1. OPERATING INFORMATION ..... 120
RADIO.................................................. 120
CD PLAYER AND DISC ...................... 121
iPod ...................................................... 123
FILE INFORMATION ........................... 124
TERMS ................................................ 127
ERROR MESSAGES ........................... 128
3MEDIA OPERATION4AUDIO REMOTE CONTROLS
5SETUP
6TIPS FOR OPERATING
THE AUDIO SYSTEM
AUDIO SYSTEM
Page 72 of 304
72
AVA L O N _ N a v i _ U
1. BASIC OPERATION
1. QUICK REFERENCE
The audio control screen can be reached by the following methods:
Using the “AUDIO” button
Press the “AUDIO” button to display the audio screen.
Using the “APPS” button
Press the “APPS” button, then select “Audio” to display the audio screen.
FunctionPage
Using the radio79, 89, 95
Playing an audio CD or MP3/WMA/AAC disc96
Playing a USB memory99
Playing an iPod103
Playing a Bluetooth® device107
Using the AUX port11 3
Using the steering wheel audio switches11 5
Audio system settings11 8
INFORMATION
●The display and button positions will differ depending on the type of the system.
Page 76 of 304

76
1. BASIC OPERATION
AVA L O N _ N a v i _ U
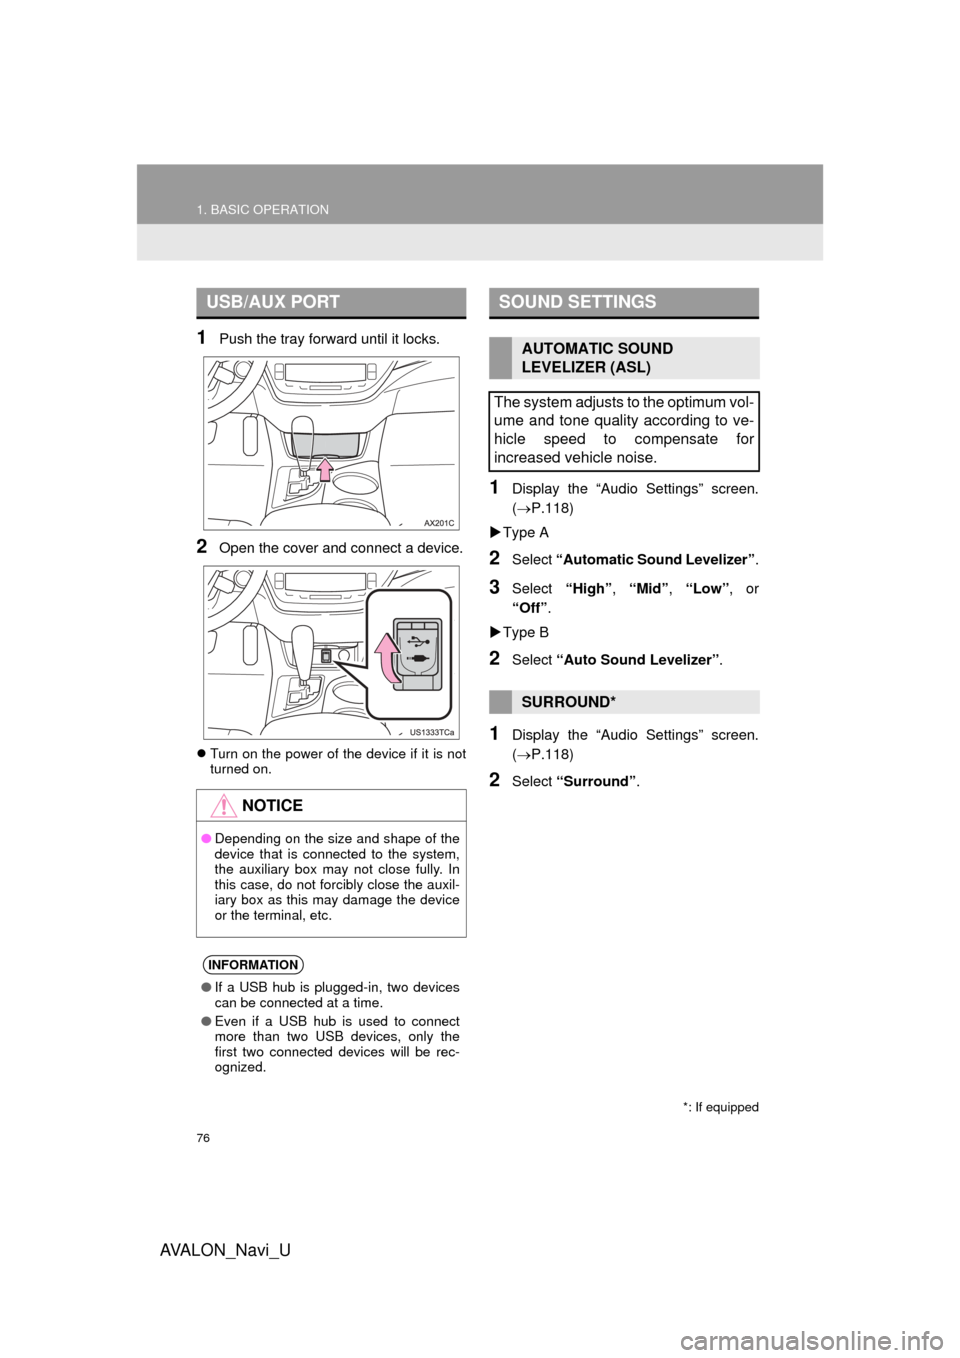
1Push the tray forward until it locks.
2Open the cover and connect a device.
Turn on the power of the device if it is not
turned on.
1Display the “Audio Settings” screen.
(P.118)
Type A
2Select “Automatic Sound Levelizer” .
3Select “High”, “Mid” , “Low” , or
“Off” .
Type B
2Select “Auto Sound Levelizer” .
1Display the “Audio Settings” screen.
(P.118)
2Select “Surround” .
USB/AUX PORT
NOTICE
●Depending on the size and shape of the
device that is connected to the system,
the auxiliary box may not close fully. In
this case, do not forcibly close the auxil-
iary box as this may damage the device
or the terminal, etc.
INFORMATION
●If a USB hub is plugged-in, two devices
can be connected at a time.
● Even if a USB hub is used to connect
more than two USB devices, only the
first two connected devices will be rec-
ognized.
SOUND SETTINGS
AUTOMATIC SOUND
LEVELIZER (ASL)
The system adjusts to the optimum vol-
ume and tone quality according to ve-
hicle speed to compensate for
increased vehicle noise.
SURROUND*
*: If equipped
Page 99 of 304
99
3. MEDIA OPERATION
AVA L O N _ N a v i _ U
AUDIO SYSTEM
3
2. USB MEMORY
■CONTROL SCREEN
■CONTROL PANEL
OVERVIEW
The USB memory operation screen can be reached by the following methods:
Select “USB (DEVICE NAME)” on the “Select Audio Source” screen. ( P.74)
Connect a USB memory. ( P.76)