Page 260 of 304

260
4. MEMORY POINTS
AVA L O N _ N a v i _ U
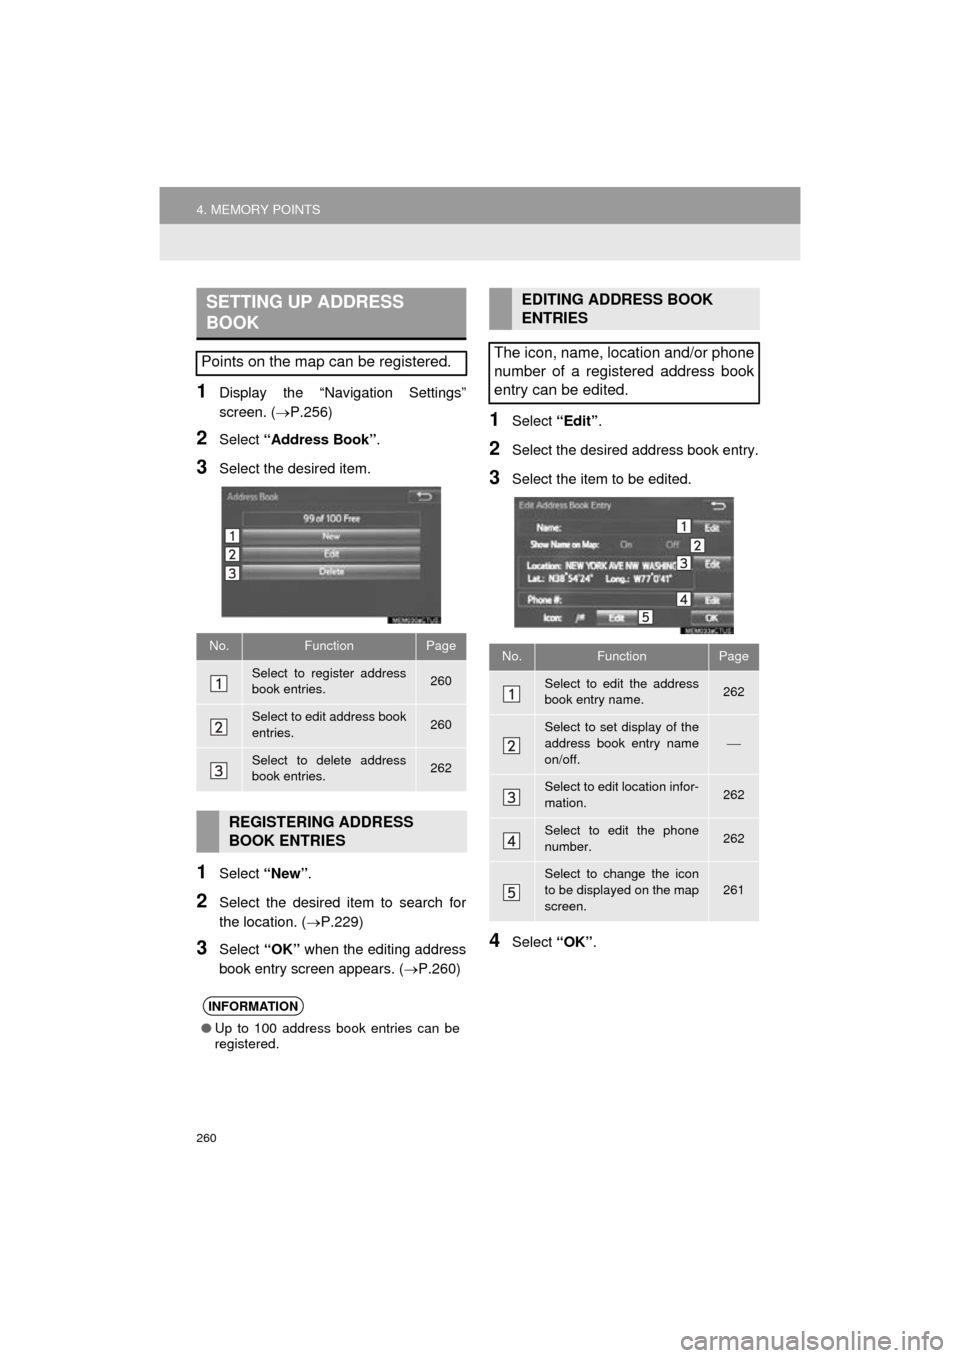
1Display the “Navigation Settings”
screen. (P.256)
2Select “Address Book” .
3Select the desired item.
1Select “New”.
2Select the desired item to search for
the location. ( P.229)
3Select “OK” when the editing address
book entry screen appears. ( P.260)
1Select “Edit”.
2Select the desired address book entry.
3Select the item to be edited.
4Select “OK”.
SETTING UP ADDRESS
BOOK
Points on the map can be registered.
No.FunctionPage
Select to register address
book entries.260
Select to edit address book
entries.260
Select to delete address
book entries.262
REGISTERING ADDRESS
BOOK ENTRIES
INFORMATION
●Up to 100 address book entries can be
registered.
EDITING ADDRESS BOOK
ENTRIES
The icon, name, location and/or phone
number of a registered address book
entry can be edited.
No.FunctionPage
Select to edit the address
book entry name.262
Select to set display of the
address book entry name
on/off.
Select to edit location infor-
mation.262
Select to edit the phone
number.262
Select to change the icon
to be displayed on the map
screen.
261
Page 261 of 304
261
4. MEMORY POINTS
AVA L O N _ N a v i _ U
NAVIGATION SYSTEM
8
■CHANGING THE ICON
1Select “Edit” next to the “Icon”.
2Select the desired icon.
Change pages by selecting the “Page 1”,
“Page 2” or “With Sound” tab.
“With Sound”: Select the memory points
with a sound
When the “With Sound” tab is selected
1Select the “With Sound” tab.
2Select the desired sound icon.
: Select to play the sound.
When “Bell (with Direction)” is selected,
select an arrow to adjust the direction and
select “OK”.
A sound for some address book entries
can be set. When the vehicle ap-
proaches the location of the address
book entry, the selected sound will be
heard.
INFORMATION
●The bell sounds only when the vehicle
approaches this point in the direction
that has been set.
Page 262 of 304
262
4. MEMORY POINTS
AVA L O N _ N a v i _ U
■CHANGING THE NAME
1Select “Edit” next to “Name”.
2Enter a name and select “OK”.
■CHANGING THE LOCATION
1Select “Edit” next to “Location”.
2Scroll the map to the desired point
(P.221) and select “OK”.
■CHANGING PHONE NUMBER
1Select “Edit” next to “Phone #”.
2Enter the phone number and select
“OK”.
1Select “Delete” .
2Select the item to be deleted and select
“Delete”.
3Select “Yes” when the confirmation
screen appears.
1Display the “Navigation Settings”
screen. ( P.256)
2Select “Areas to Avoid” .
3Select the desired item.
DELETING ADDRESS BOOK
ENTRIES
SETTING UP AREAS TO
AVOID
Areas to be avoided because of traffic
jams, construction work or other rea-
sons can be registered as “Areas to
Avoid”.
No.FunctionPage
Select to register areas to
avoid.263
Select to edit areas to
avoid.263
Select to delete areas to
avoid.264
Page 263 of 304

263
4. MEMORY POINTS
AVA L O N _ N a v i _ U
NAVIGATION SYSTEM
8
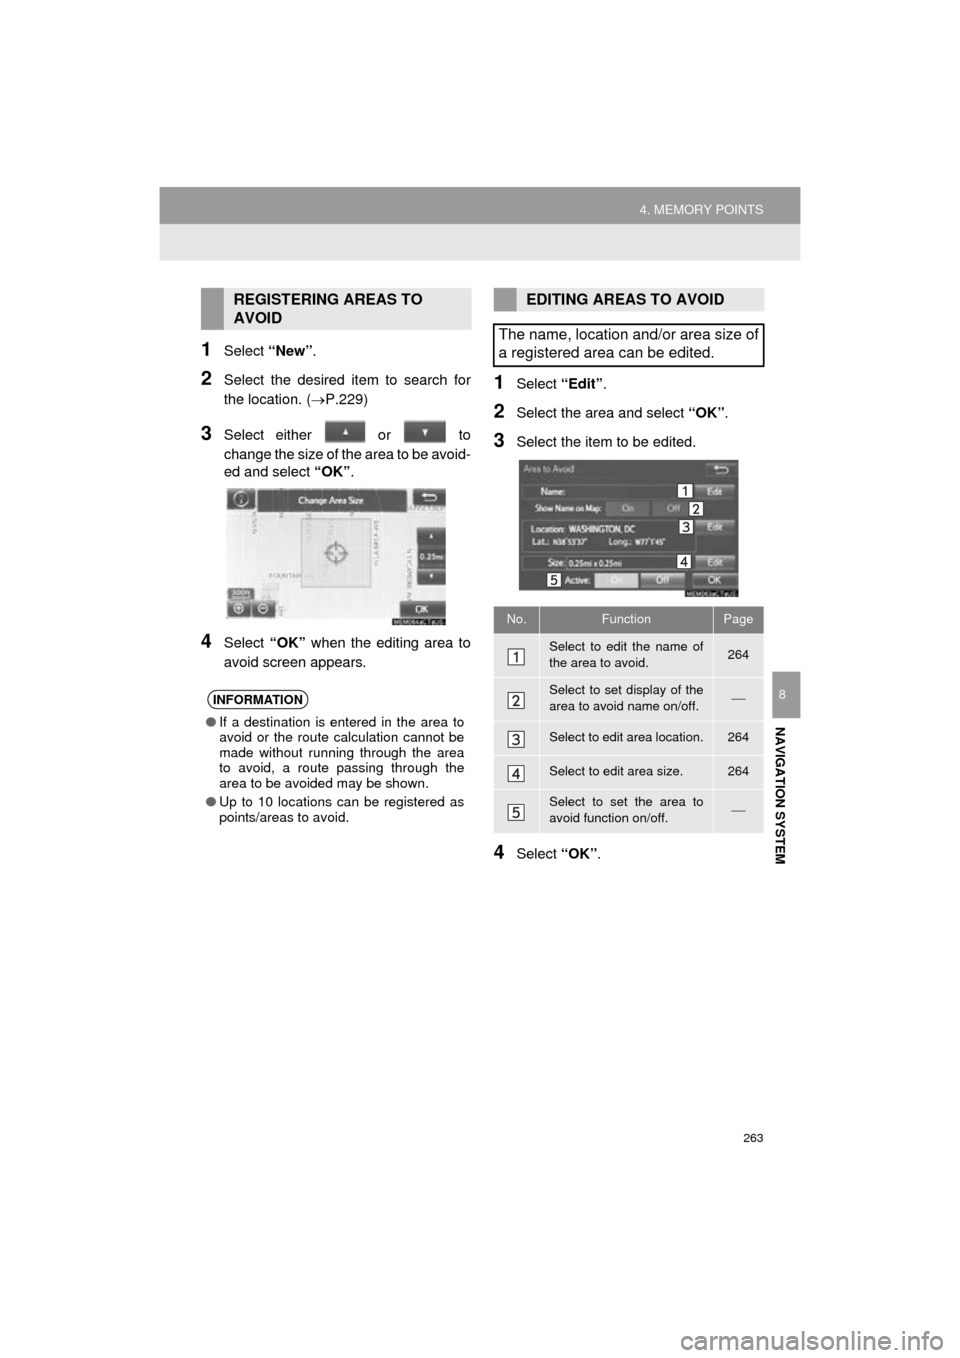
1Select “New”.
2Select the desired item to search for
the location. ( P.229)
3Select either or to
change the size of the area to be avoid-
ed and select “OK”.
4Select “OK” when the editing area to
avoid screen appears.
1Select “Edit”.
2Select the area and select “OK”.
3Select the item to be edited.
4Select “OK”.
REGISTERING AREAS TO
AVOID
INFORMATION
●If a destination is entered in the area to
avoid or the route calculation cannot be
made without running through the area
to avoid, a route passing through the
area to be avoided may be shown.
● Up to 10 locations can be registered as
points/areas to avoid.
EDITING AREAS TO AVOID
The name, location and/or area size of
a registered area can be edited.
No.FunctionPage
Select to edit the name of
the area to avoid.264
Select to set display of the
area to avoid name on/off.
Select to edit area location.264
Select to edit area size.264
Select to set the area to
avoid function on/off.
Page 264 of 304
264
4. MEMORY POINTS
AVA L O N _ N a v i _ U
■CHANGING THE NAME
1Select “Edit” next to “Name”.
2Enter a name and select “OK”.
■CHANGING THE LOCATION
1Select “Edit” next to “Location”.
2Scroll the map to the desired point
(P.221) and select “OK”.
■CHANGING THE AREA SIZE
1Select “Edit” next to “Size”.
2Select either or to
change the size of the area to be avoid-
ed and select “OK”.
1Select “Delete” .
2Select the area to be deleted and se-
lect “Delete” .
3Select “Yes” when the confirmation
screen appears.
1Display the “Navigation Settings”
screen. ( P.256)
2Select “Delete Previous Dest.” .
3Select the previous destination to be
deleted and select “Delete”.
4Select “Yes” when the confirmation
screen appears.
DELETING AREAS TO AVOID
DELETING PREVIOUS
DESTINATIONS
Previous destinations can be deleted.
Page 265 of 304
265
AVA L O N _ N a v i _ U
NAVIGATION SYSTEM
8
5. SETUP
1. DETAILED NAVIGATION SETTINGS
1Press the “APPS” button.
2Select “Setup” .
3Select “Navigation” .
4Select “Detailed Navi. Settings”.
5Select the items to be set.
6Select “OK”.
Settings are available for pop-up infor-
mation, favorite POI categories, low
fuel warning, etc.SCREENS FOR NAVIGATION
SETTINGS
Page 267 of 304

267
5. SETUP
AVA L O N _ N a v i _ U
NAVIGATION SYSTEM
8
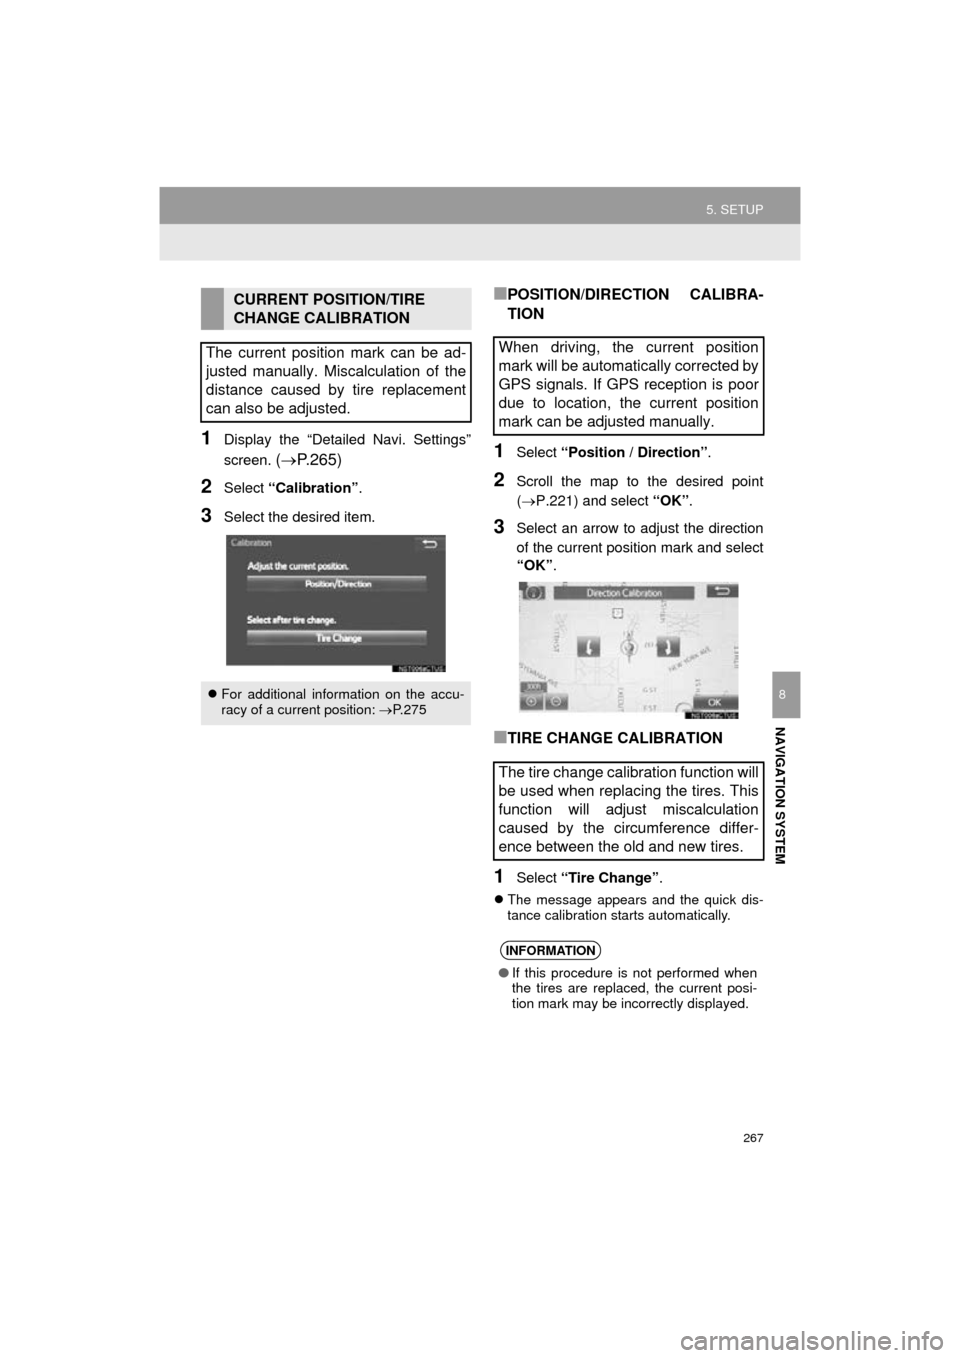
1Display the “Detailed Navi. Settings”
screen.
( P.265)
2Select “Calibration” .
3Select the desired item.
■POSITION/DIRECTION CALIBRA-
TION
1Select “Position / Direction” .
2Scroll the map to the desired point
(P.221) and select “OK”.
3Select an arrow to adjust the direction
of the current position mark and select
“OK” .
■TIRE CHANGE CALIBRATION
1Select “Tire Change” .
The message appears and the quick dis-
tance calibration starts automatically.
CURRENT POSITION/TIRE
CHANGE CALIBRATION
The current position mark can be ad-
justed manually. Miscalculation of the
distance caused by tire replacement
can also be adjusted.
For additional information on the accu-
racy of a current position: P. 2 7 5
When driving, the current position
mark will be automatically corrected by
GPS signals. If GPS reception is poor
due to location, the current position
mark can be adjusted manually.
The tire change calibration function will
be used when replacing the tires. This
function will adjust miscalculation
caused by the circumference differ-
ence between the old and new tires.
INFORMATION
● If this procedure is not performed when
the tires are replaced, the current posi-
tion mark may be incorrectly displayed.
Page 269 of 304
269
5. SETUP
AVA L O N _ N a v i _ U
NAVIGATION SYSTEM
8
2. TRAFFIC SETTINGS
1Press the “APPS” button.
2Select “Setup” .
3Select “Traffic” .
4Select the items to be set.
5Select “OK”.
Traffic information such as traffic con-
gestion or traffic incident warnings can
be made available. SCREEN FOR TRAFFIC
SETTINGS
No.Function
Select to set specific routes (such as
frequently used routes) on which
you wish to receive traffic informa-
tion. ( P.271)
Select to set the avoid traffic func-
tion auto/manual. ( P.270)
Select to set the usage of traffic in-
formation for the estimated arrival
time on/off.
Select to set the display of an arrow
of free flowing traffic on/off.
Select to set to on/off whether to
consider the predictive traffic infor-
mation ( P.227) with estimated ar-
rival time and detoured route
search.
Select to set of traffic incident voice
warning on/off.
Select to reset all setup items.