2016 TOYOTA AVALON CD player
[x] Cancel search: CD playerPage 114 of 304

114
3. MEDIA OPERATION
AVA L O N _ N a v i _ U
No.Function
Select to display the audio source selection screen.
Select to display the sound setting screen.
Press to select an audio mode.
Press to turn mute on/off.
Turn to adjust volume.
Press to turn the audio system on/off.
Press and hold to restart the audio system.
WA R N I N G
● Do not connect portable audio device or operate the controls while driving.
NOTICE
●Depending on the size and shape of the portable audio device that is connected to the
system, the auxiliary box may not close fully. In this case, do not forcibly close the auxil-
iary box as this may damage the portable audio device or the terminal, etc.
● Do not leave portable audio device in the vehicle. The temperature inside the vehicle may
become high, resulting in damage to the player.
● Do not push down on or apply unnecessary pressure to the portable audio device while it
is connected as this may damage the portable audio device or its terminal.
● Do not insert foreign objects into the port as this may damage the portable audio device
or its terminal.
Page 121 of 304

121
6. TIPS FOR OPERATING THE AUDIO SYSTEM
AVA L O N _ N a v i _ U
AUDIO SYSTEM
3
Cargo loaded on the roof luggage carrier,
especially metal objects, may adversely
affect the reception of XM Satellite Radio.
Alternation or modifications carried out
without appropriate authorization may
invalidate the user’s right to operate the
equipment.
This CD player is intended for use with 4.7
in. (12 cm). discs only.
Extremely high temperatures can keep the
CD player from working. On hot days, use
the air conditioning system to cool the
inside of the vehicle before using the
player.
Bumpy roads or other vibrations may
make the CD player skip.
If moisture gets into the CD player, the
discs may not be able to be played.
Remove the discs from the player and
wait until it dries.
Use only discs marked as shown above.
The following products may not be play-
able on your player:
•SACD
•dts CD
• Copy-protected CD
• Video CD
XM
CD PLAYER AND DISC
WA R N I N G
●This CD player use an invisible laser
beam which could cause hazardous
laser radiation exposure if directed out-
side the unit. Be sure to operate the
player correctly.
CD PLAYER
Audio CDs
Page 122 of 304

122
6. TIPS FOR OPERATING THE AUDIO SYSTEM
AVA L O N _ N a v i _ U
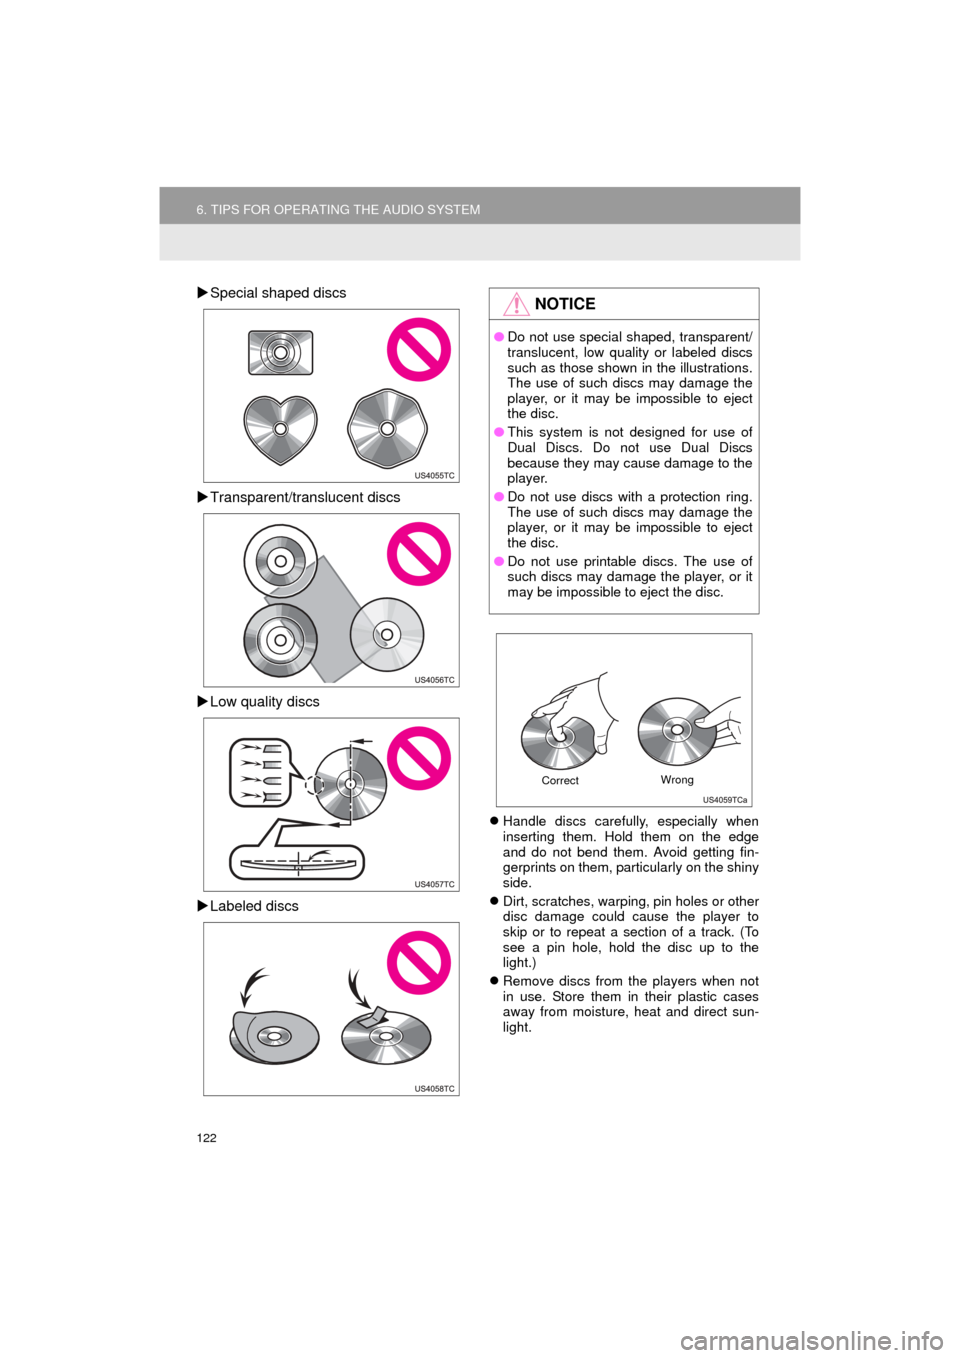
Special shaped discs
Transparent/translucent discs
Low quality discs
Labeled discs
Handle discs carefully, especially when
inserting them. Hold them on the edge
and do not bend them. Avoid getting fin-
gerprints on them, particularly on the shiny
side.
Dirt, scratches, warping, pin holes or other
disc damage could cause the player to
skip or to repeat a section of a track. (To
see a pin hole, hold the disc up to the
light.)
Remove discs from the players when not
in use. Store them in their plastic cases
away from moisture, heat and direct sun-
light.
NOTICE
●Do not use special shaped, transparent/
translucent, low quality or labeled discs
such as those shown in the illustrations.
The use of such discs may damage the
player, or it may be impossible to eject
the disc.
● This system is not designed for use of
Dual Discs. Do not use Dual Discs
because they may cause damage to the
player.
● Do not use discs with a protection ring.
The use of such discs may damage the
player, or it may be impossible to eject
the disc.
● Do not use printable discs. The use of
such discs may damage the player, or it
may be impossible to eject the disc.
Correct Wrong
Page 123 of 304

123
6. TIPS FOR OPERATING THE AUDIO SYSTEM
AVA L O N _ N a v i _ U
AUDIO SYSTEM
3
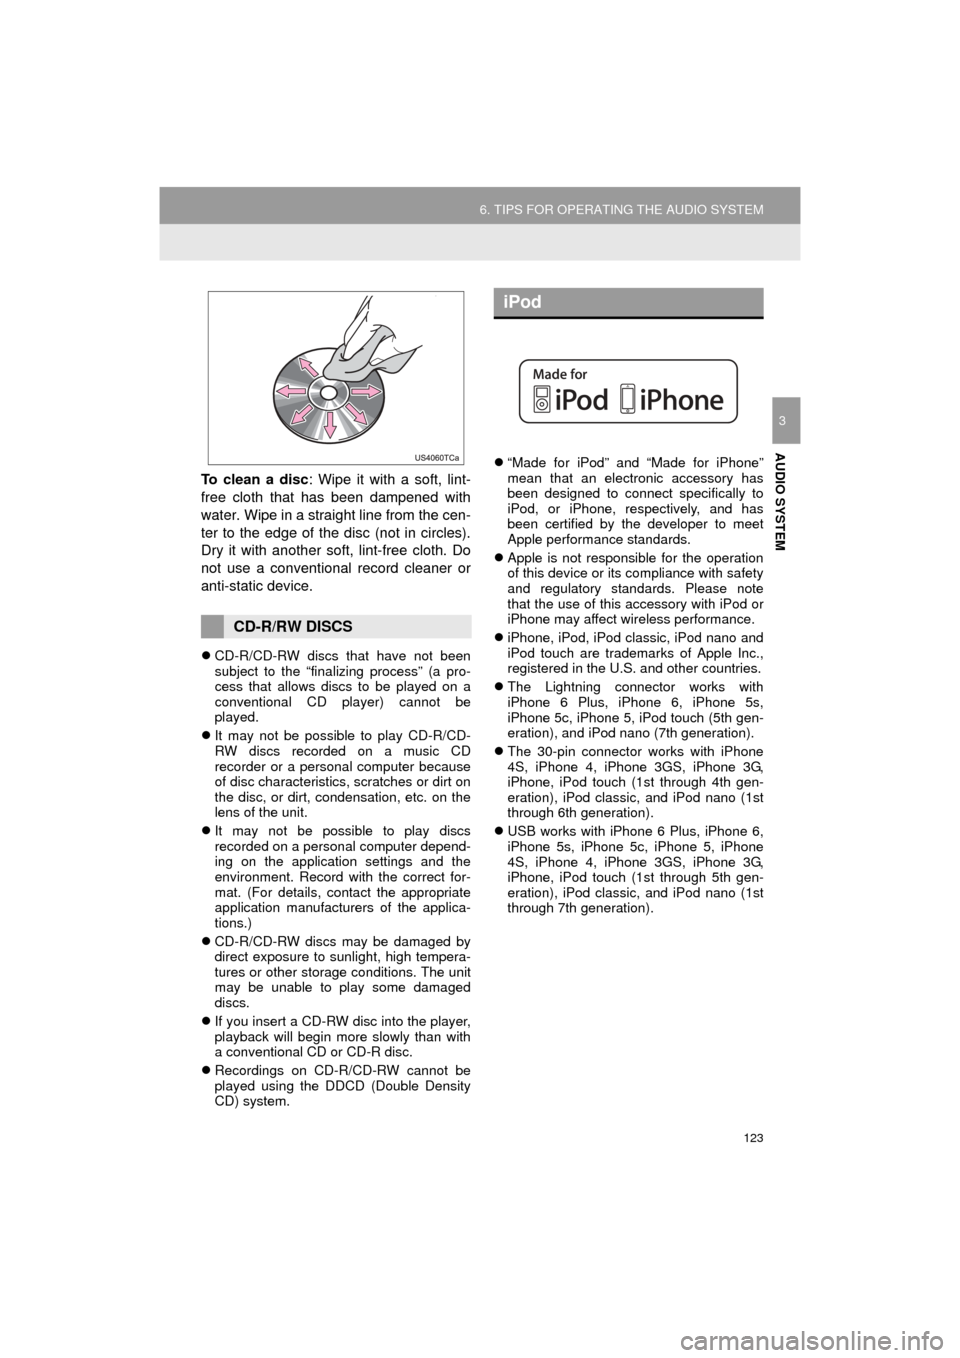
To clean a disc: Wipe it with a soft, lint-
free cloth that has been dampened with
water. Wipe in a straight line from the cen-
ter to the edge of the disc (not in circles).
Dry it with another soft, lint-free cloth. Do
not use a conventional record cleaner or
anti-static device.
CD-R/CD-RW discs that have not been
subject to the “finalizing process” (a pro-
cess that allows discs to be played on a
conventional CD player) cannot be
played.
It may not be possible to play CD-R/CD-
RW discs recorded on a music CD
recorder or a personal computer because
of disc characteristics, scratches or dirt on
the disc, or dirt, condensation, etc. on the
lens of the unit.
It may not be possible to play discs
recorded on a personal computer depend-
ing on the application settings and the
environment. Record with the correct for-
mat. (For details, contact the appropriate
application manufacturers of the applica-
tions.)
CD-R/CD-RW discs may be damaged by
direct exposure to sunlight, high tempera-
tures or other storage conditions. The unit
may be unable to play some damaged
discs.
If you insert a CD-RW disc into the player,
playback will begin more slowly than with
a conventional CD or CD-R disc.
Recordings on CD-R/CD-RW cannot be
played using the DDCD (Double Density
CD) system.
“Made for iPod” and “Made for iPhone”
mean that an electronic accessory has
been designed to connect specifically to
iPod, or iPhone, respectively, and has
been certified by the developer to meet
Apple performance standards.
Apple is not responsible for the operation
of this device or its compliance with safety
and regulatory standards. Please note
that the use of this accessory with iPod or
iPhone may affect wireless performance.
iPhone, iPod, iPod classic, iPod nano and
iPod touch are trademarks of Apple Inc.,
registered in the U.S. and other countries.
The Lightning connector works with
iPhone 6 Plus, iPhone 6, iPhone 5s,
iPhone 5c, iPhone 5, iPod touch (5th gen-
eration), and iPod nano (7th generation).
The 30-pin connector works with iPhone
4S, iPhone 4, iPhone 3GS, iPhone 3G,
iPhone, iPod touch (1st through 4th gen-
eration), iPod classic, and iPod nano (1st
through 6th generation).
USB works with iPhone 6 Plus, iPhone 6,
iPhone 5s, iPhone 5c, iPhone 5, iPhone
4S, iPhone 4, iPhone 3GS, iPhone 3G,
iPhone, iPod touch (1st through 5th gen-
eration), iPod classic, and iPod nano (1st
through 7th generation).
CD-R/RW DISCS
iPod
Page 126 of 304

126
6. TIPS FOR OPERATING THE AUDIO SYSTEM
AVA L O N _ N a v i _ U
The sound quality of MP3/WMA files gen-
erally improves with higher bit rates. In
order to achieve a reasonable level of
sound quality, discs recorded with a bit
rate of at least 128 kbps are recom-
mended.
m3u playlists are not compatible with the
audio player.
MP3i (MP3 interactive) and MP3PRO for-
mats are not compatible with the audio
player.
The player is compatible with VBR (Vari-
able Bit Rate).
When playing back files recorded as VBR
(Variable Bit Rate) files, the play time will
not be correctly displayed if the fast for-
ward or reverse operations are used.
It is not possible to check folders that do
not include MP3/WMA/AAC files.
MP3/WMA/AAC files in folders up to 8 lev-
els deep can be played. However, the
start of playback may be delayed when
using discs containing numerous levels of
folders. For this reason, we recommend
creating discs with no more than 2 levels
of folders.
The play order of the compact disc with
the structure shown above is as follows:
The order changes depending on the per-
sonal computer and MP3/WMA/AAC
encoding software you use.
001.mp3
002.wma
Folder 1
003.mp3Folder 2
004.mp3
005.wma Folder 3
006.m4a
001.mp3 002.wma . . . 006.m4a
Page 288 of 304

288
2. Entune App Suite OPERATION
AVA L O N _ N a v i _ U
IF A MESSAGE APPEARS ON THE SCREEN
When problems occur starting up the application player, a message will appear on
the screen. Referring to the table below to identify the problem, take the suggested
corrective action. The following messages are only a few examples. If a message
other than the following is displayed, follow the instructions displayed on \
the
screen.
MessageDisplay conditionsCorrective action
“The Phone is not connected.
For more information, please
visit toyota.com.”The cellular phone cannot be
connected.
Refer to http://
www.toyota.com/entune/ to
confirm if the phone is com-
patible or not.
“To use the services, an ac-
tive application needs to be
running on your phone. For
more information, please visit
toyota.com.”The Entune App Suite appli-
cation cannot be connected
to Bluetooth
SPP.
Refer to http://www.toyota.com/entune/ to
confirm if the phone is
Bluetooth
SPP compatible
or not, and then activate the
Entune App Suite application.
INFORMATION
● The actual messages displayed on screen may differ from the messages in this manual.
Page 294 of 304

294
ALPHABETICAL INDEX
AVA L O N _ N a v i _ U
A
AAC.......................................................... 96
AM............................................................ 79
APPS button ............................................ 12
“Apps” screen........................................... 14
AUDIO button........................................... 12
Audio settings ........................................ 118
AUX........................................................ 113
B
Bluetooth®................................................ 44
Profiles ................................................. 46
Registering a Bluetooth
® audio
player ................................................ 45
Registering a Bluetooth
® phone ........... 44
Bluetooth® audio .................................... 107
Connecting a Bluetooth® device ........ 112
Listening to Bluetooth® audio ............. 112
Bluetooth® phone................................... 174
Bluetooth® phone message function ..... 189
Buttons overview...................................... 12
C
Calling on the Bluetooth® phone............ 179
Casual speech recognization ................. 136
CD ............................................................ 96
Playing an audio CD............................. 98
Playing an MP3/WMA/AAC disc........... 98
Command list ......................................... 137
D
Data services settings ............................ 145
Setting download methods ................. 145
Destination search screen...................... 229
Driver settings .......................................... 65
E
Editing route ........................................... 251
Adding destinations ............................ 252
Deleting destinations .......................... 252
Detour setting ..................................... 254
Reordering destinations...................... 252
Selecting route type ............................ 253
Setting route preferences ................... 253
Emergency ............................................. 238
Entering letters and numbers/ list screen operation ............................. 38
Entering letters and numbers ............... 38
Entune App Suite ................................... 285
Entering keyword operation ................ 290
Linking Entune App Suite and navigation function .......................... 289
Page 296 of 304

296
ALPHABETICAL INDEX
AVA L O N _ N a v i _ U
N
Navigation .............................................. 213
O
Operating information ............................ 120CD player and disc ............................. 121
Error messages .................................. 128
File information ................................... 124
iPod .................................................... 123
Radio .................................................. 120
Terms ................................................. 127
P
Phonebook ............................................. 181
Phone/message settings........................ 194“Contact/Call History Settings” screen ............................................. 196
“Messaging Settings” screen .............. 204
“Phone Display Settings” screen ........ 205
Phone/message settings screen ........ 194
“Sound Settings” screen ..................... 195
PWR/VOL knob........................................ 12
R
Rear view monitor system ...................... 148
Receiving on the Bluetooth® phone ....... 185
Incoming calls ..................................... 185
Receiving traffic map information ........... 144
Receiving weather information ............... 142
Registering/connecting Bluetooth
®
device ................................................... 44
Certification........................................... 48
Profiles.................................................. 46
Registering a Bluetooth
® audio player
for the first time ................................. 45
Registering a Bluetooth
® phone
for the first time ................................. 44
Registering home ..................................... 22
Registering preset destinations ................ 24
Route guidance screen .......................... 245
During freeway driving ........................ 247
Route overview ................................... 246
Screen for route guidance .................. 245
Turn list screen ................................... 249
Turn-by-turn arrow screen .................. 249
When approaching intersection .......... 248
Route trace............................................. 224