2016 TESLA MODEL X brake
[x] Cancel search: brakePage 2 of 179
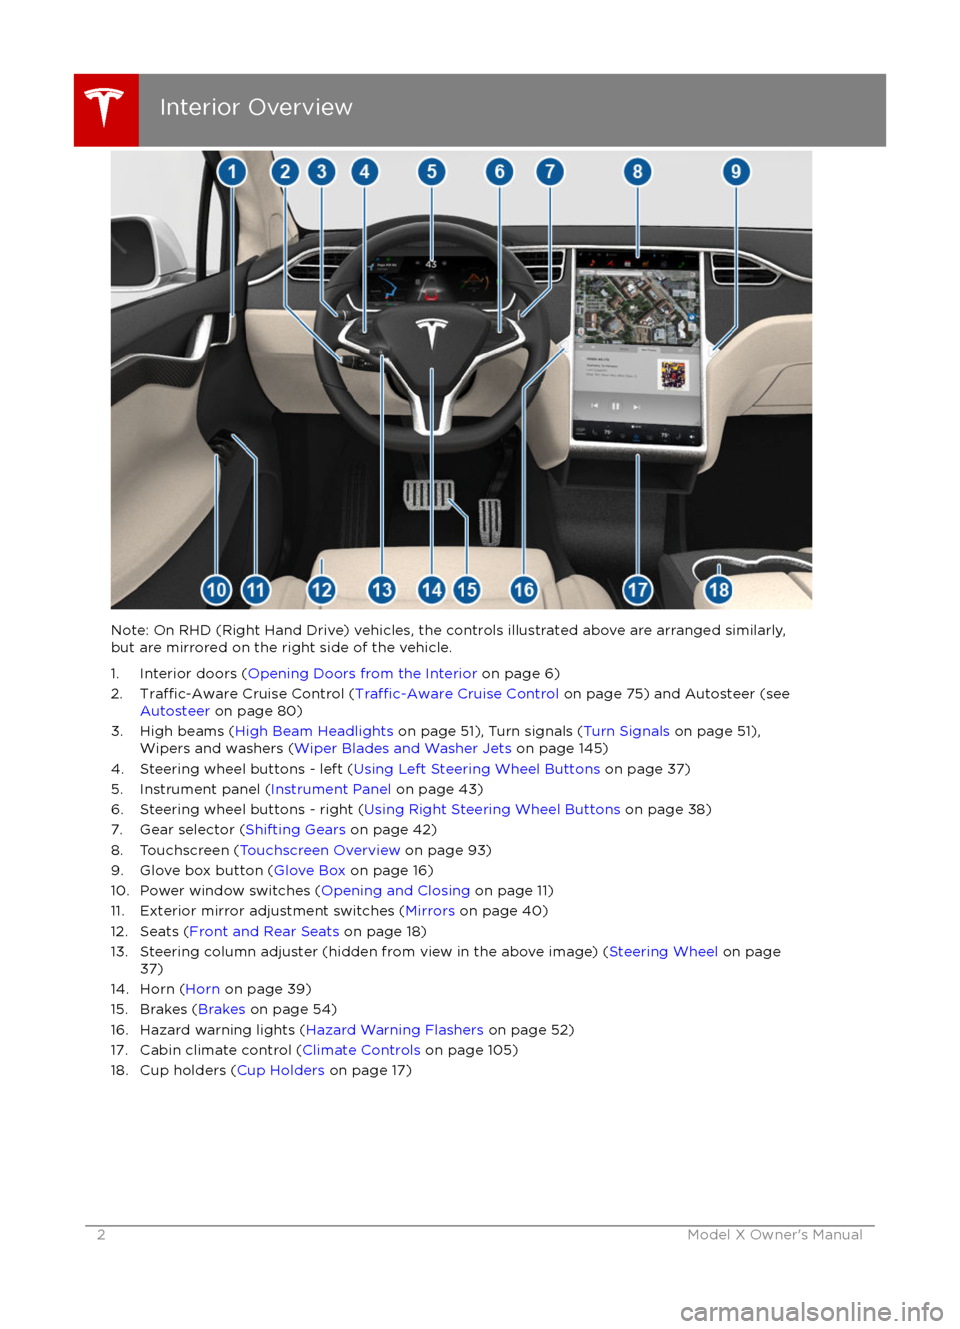
Note: On RHD (Right Hand Drive) vehicles, the controls illustrated above are arranged similarly,but are mirrored on the right side of the vehicle.
1. Interior doors ( Opening Doors from the Interior on page 6)
2.
Traffic-Aware Cruise Control (Traffic-Aware Cruise Control on page 75) and Autosteer (see
Autosteer on page 80)
3. High beams ( High Beam Headlights on page 51), Turn signals ( Turn Signals on page 51),
Wipers and washers ( Wiper Blades and Washer Jets on page 145)
4. Steering wheel buttons - left ( Using Left Steering Wheel Buttons on page 37)
5. Instrument panel ( Instrument Panel on page 43)
6. Steering wheel buttons - right ( Using Right Steering Wheel Buttons on page 38)
7. Gear selector ( Shifting Gears on page 42)
8. Touchscreen ( Touchscreen Overview on page 93)
9. Glove box button ( Glove Box on page 16)
10. Power window switches ( Opening and Closing on page 11)
11. Exterior mirror adjustment switches ( Mirrors on page 40)
12. Seats ( Front and Rear Seats on page 18)
13. Steering column adjuster (hidden from view in the above image) ( Steering Wheel on page
37)
14. Horn ( Horn on page 39)
15. Brakes ( Brakes on page 54)
16. Hazard warning lights ( Hazard Warning Flashers on page 52)
17. Cabin climate control ( Climate Controls on page 105)
18. Cup holders ( Cup Holders on page 17)
Interior Overview
2Model X Owner
Page 42 of 179
Shifting GearsWhen Model X is in Park, you must press the
brake to shift to another gear.
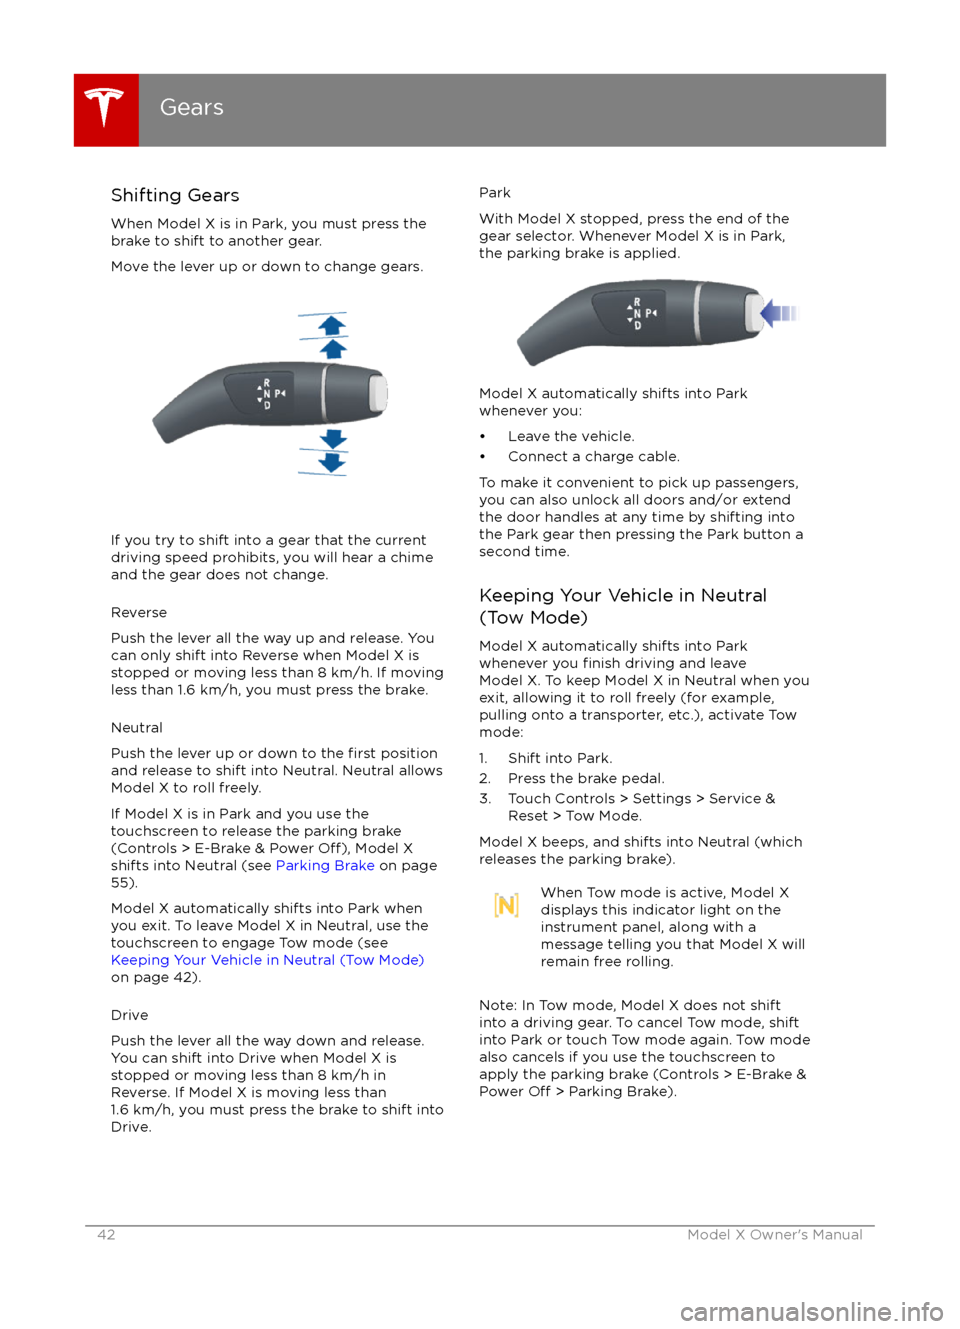
Move the lever up or down to change gears.
If you try to shift into a gear that the current
driving speed prohibits, you will hear a chime
and the gear does not change.
Reverse
Push the lever all the way up and release. You
can only shift into Reverse when Model X is
stopped or moving less than 8 km/h. If moving
less than 1.6 km/h, you must press the brake.
Neutral
Push the lever up or down to the
first position
and release to shift into Neutral. Neutral allows
Model X to roll freely.
If Model X is in Park and you use the
touchscreen to release the parking brake
(Controls > E-Brake & Power
Off), Model X
shifts into Neutral (see Parking Brake on page
55).
Model X automatically shifts into Park when
you exit. To leave Model X in Neutral, use the touchscreen to engage Tow mode (see
Keeping Your Vehicle in Neutral (Tow Mode)
on page 42).
Drive
Push the lever all the way down and release.
You can shift into Drive when Model X is stopped or moving less than 8 km/h inReverse. If Model X is moving less than
1.6 km/h, you must press the brake to shift into Drive.
Park
With Model X stopped, press the end of the
gear selector. Whenever Model X is in Park,
the parking brake is applied.
Model X automatically shifts into Park
whenever you:
Page 44 of 179

IndicatorDescriptionParking lights (side marker lights, tail lights, and license plate lights) are on.
See Lights on page 48.Front fog lights (optional). See Lights on page 48.
Electronic stability control systems are actively minimizing wheel spin by by
controlling brake pressure and motor power (indicator flashes). See Traction
Control on page 56. If this indicator stays illuminated, a fault is detected
(contact Tesla immediately).Smart Air Suspension
Page 54 of 179
Braking Systems
Model X has an anti-lock braking system
(ABS) that prevents the wheels from locking when you apply maximum brake pressure. This
improves steering control during heavy
braking in most road conditions.
During emergency braking conditions, the
ABS constantly monitors the speed of each
wheel and varies the brake pressure according to the grip available.
The alteration of brake pressure can be felt as
a pulsing sensation through the brake pedal.
This demonstrates that the ABS is operating
and is not a cause for concern. Keep
firm and
steady pressure on the brake pedal while
experiencing the pulsing.
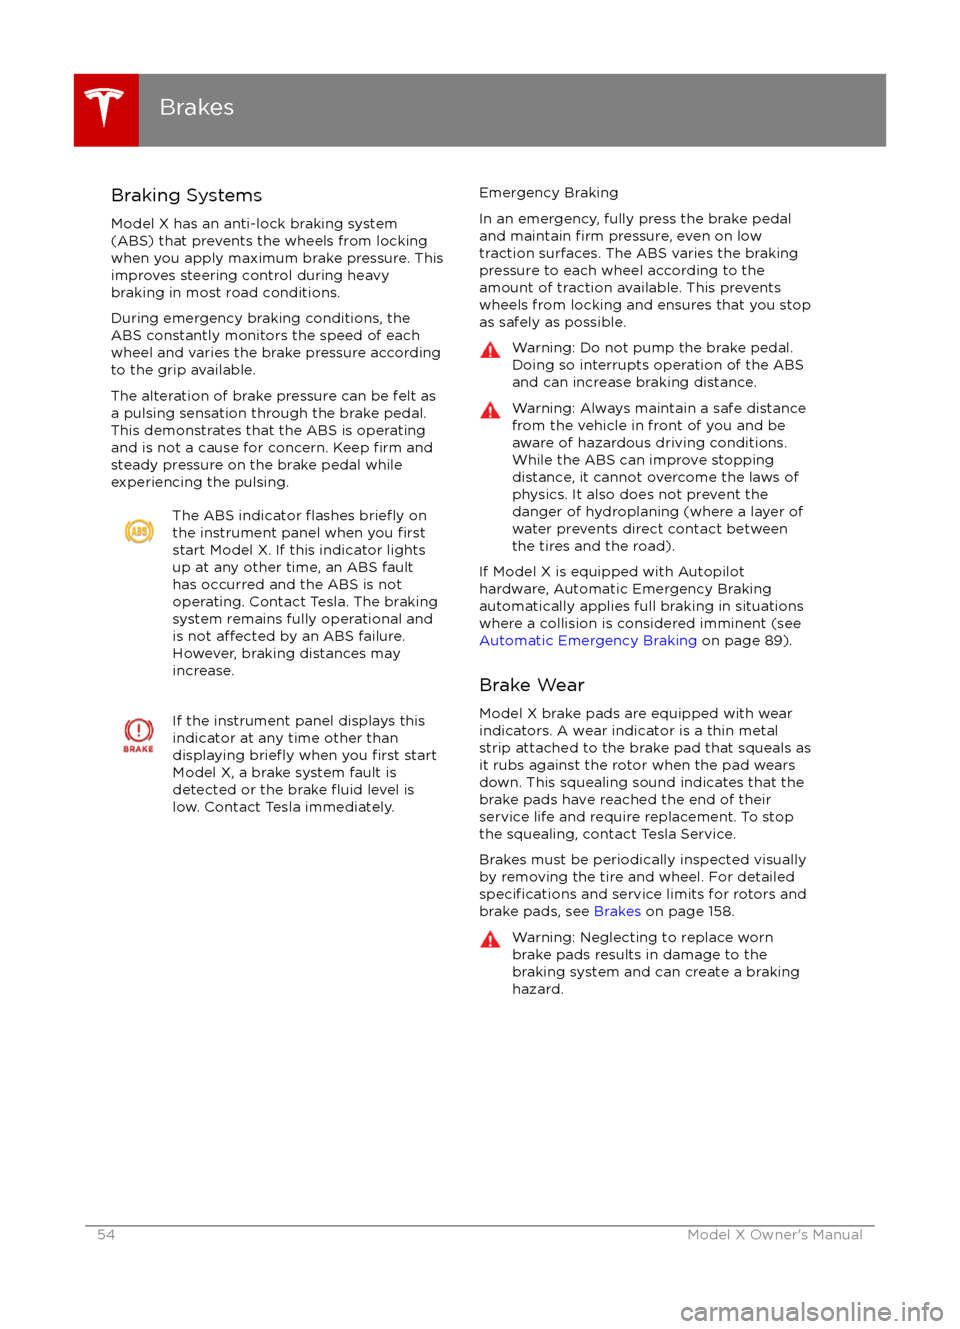
The ABS indicator flashes briefly on
the instrument panel when you firststart Model X. If this indicator lights
up at any other time, an ABS fault
has occurred and the ABS is not
operating. Contact Tesla. The braking system remains fully operational and
is not
affected by an ABS failure.
However, braking distances may increase.
If the instrument panel displays this
indicator at any time other than
displaying
briefly when you first start
Model X, a brake system fault is
detected or the brake
fluid level is
low. Contact Tesla immediately.
Emergency Braking
In an emergency, fully press the brake pedal
and maintain
firm pressure, even on low
traction surfaces. The ABS varies the braking
pressure to each wheel according to the
amount of traction available. This prevents
wheels from locking and ensures that you stop
as safely as possible.
Warning: Do not pump the brake pedal.
Doing so interrupts operation of the ABS
and can increase braking distance.Warning: Always maintain a safe distance
from the vehicle in front of you and be
aware of hazardous driving conditions.
While the ABS can improve stopping
distance, it cannot overcome the laws of physics. It also does not prevent the
danger of hydroplaning (where a layer of
water prevents direct contact between the tires and the road).
If Model X is equipped with Autopilot
hardware, Automatic Emergency Braking
automatically applies full braking in situations
where a collision is considered imminent (see
Automatic Emergency Braking on page 89).
Brake Wear Model X brake pads are equipped with wearindicators. A wear indicator is a thin metal
strip attached to the brake pad that squeals as
it rubs against the rotor when the pad wears
down. This squealing sound indicates that the
brake pads have reached the end of their
service life and require replacement. To stop
the squealing, contact Tesla Service.
Brakes must be periodically inspected visually by removing the tire and wheel. For detailed
specifications and service limits for rotors and
brake pads, see Brakes on page 158.
Warning: Neglecting to replace worn
brake pads results in damage to the
braking system and can create a braking
hazard.
Brakes
54Model X Owner
Page 55 of 179
Regenerative Braking
Whenever Model X is moving and your foot is
off the accelerator, regenerative braking slows
down Model X and feeds any surplus energy
back to the Battery.
By anticipating your stops and simply
removing pressure from the accelerator to slow down, you can take advantage ofregenerative braking to increase driving range.
Of course, this is no substitute for regular braking when needed for safety.
Note: If regenerative braking is aggressively
slowing Model X, such as on a steep descent,
brake lights turn on to alert other road usersthat you are slowing down.
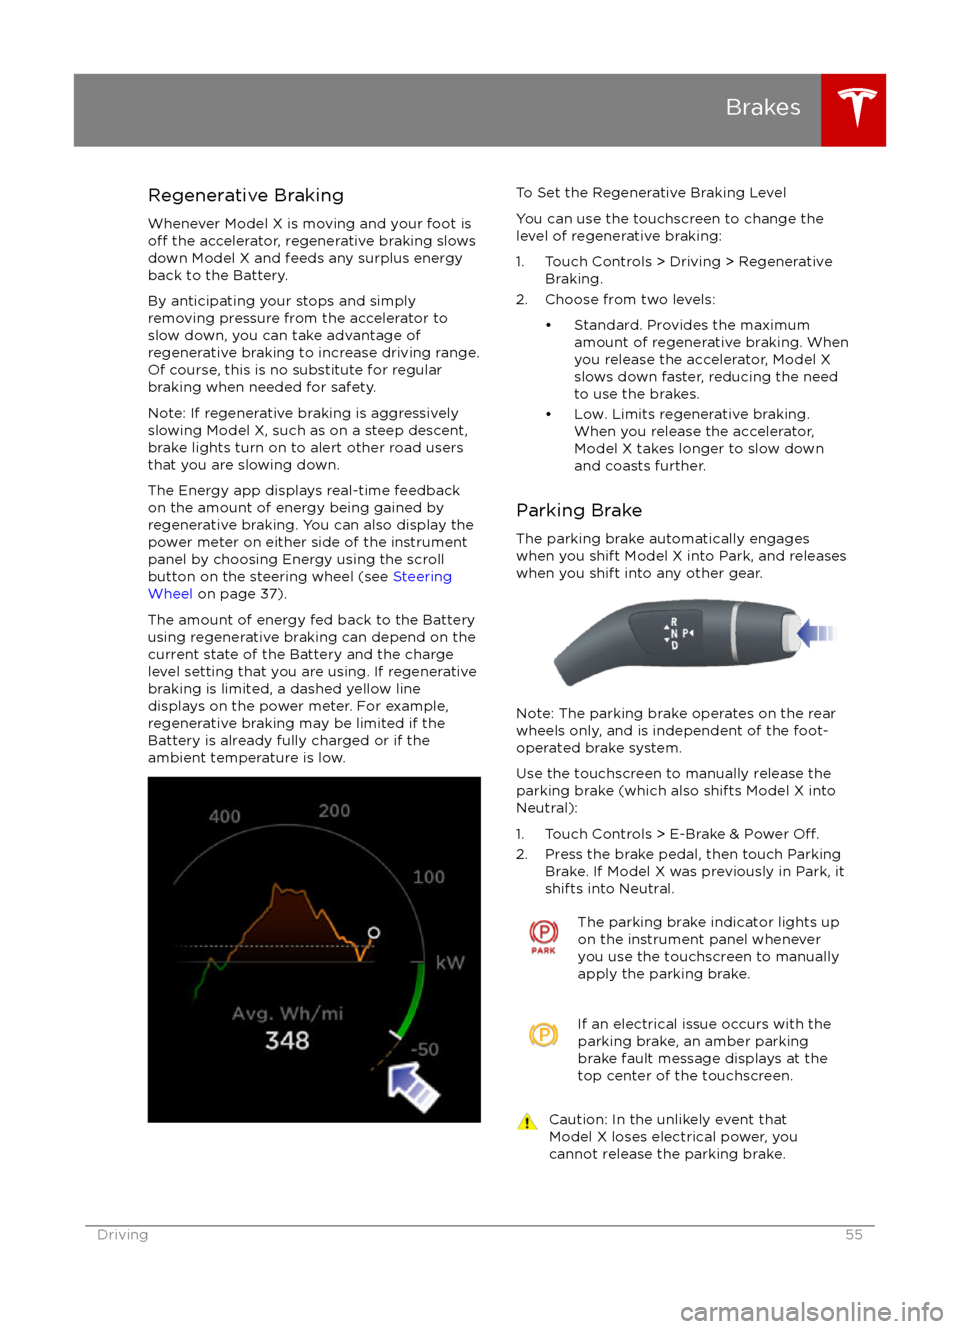
The Energy app displays real-time feedback on the amount of energy being gained by
regenerative braking. You can also display the
power meter on either side of the instrument panel by choosing Energy using the scroll
button on the steering wheel (see Steering
Wheel on page 37).
The amount of energy fed back to the Battery
using regenerative braking can depend on the
current state of the Battery and the charge level setting that you are using. If regenerative
braking is limited, a dashed yellow line
displays on the power meter. For example,
regenerative braking may be limited if the Battery is already fully charged or if the
ambient temperature is low.
To Set the Regenerative Braking Level
You can use the touchscreen to change the
level of regenerative braking:
1. Touch Controls > Driving > Regenerative Braking.
2. Choose from two levels:
Page 56 of 179
How It WorksThe traction control system constantly
monitors the speed of the front and rear
wheels. If Model X experiences a loss of
traction, the system minimizes wheel spin by
controlling brake pressure and motor power.
By default, the traction control system is
always active. Under normal conditions, it should remain active to ensure maximum
safety.
You can enable slip start to allow the wheels
to spin at a limited speed. Slip start can be
enabled only when Model X is moving
32 km/h or slower. Slip start automatically
disables when the speed exceeds 64 km/h.This indicator flashes on the
instrument panel whenever the
traction control system is actively
controlling brake pressure and motor
power to minimize wheel spin. If the
indicator stays on, a fault is detected with the traction control system.
Contact Tesla Service.Warning: Traction control can not prevent
accidents caused by driving dangerously
or turning too sharply at high speeds.Warning: If the above indicator remains
illuminated without turning off traction
control (single motor vehicles) or
enabling slip start (dual motor vehicles), the traction control system may not be
operating correctly. Contact Tesla Service immediately.
Allowing Wheel Slip (dual motor vehicles)
To allow the wheels to slip at a limited speed,
you can enable Slip Start. Slip Start can be
enabled only when Model X is moving
32 km/h or slower. Slip Start automatically
disables when the speed exceeds 64 km/h.
Under normal conditions, Slip Start should not
be enabled. Enable it only in circumstances where you deliberately want the wheels toslip, such as:
Page 59 of 179

When Model X is stopped, Vehicle Holdcontinues to apply the brakes even after you
remove your foot from the brake pedal. When
driving up a hill or on a
flat surface, brake as
you normally would and when Model X is fully
stopped, the brakes remain engaged when
you release the pedal. When driving downhill,
engage Vehicle Hold by applying the brakes
firmly after coming to a complete stop.
Whenever Vehicle Hold is actively applying the brakes, the instrument panel displays the
Vehicle Hold indicator light.
This indicator displays on the
instrument panel whenever Vehicle
Hold is engaged.
To disengage Vehicle Hold, press the
accelerator pedal or press and release the
brake pedal. Shifting into Neutral also releases
Vehicle Hold.
Note: After actively braking Model X for
approximately 10 minutes, Model X shifts into
Park and Vehicle Hold cancels. Model X also shifts into Park if it detects that the driver has
left the vehicle.
Vehicle Hold
Driving59
Page 69 of 179

touchscreen (Controls > Driving > E-Brake &
Power Off > Parking Brake).Warning: Do not rely on Model X to
detect the trailer and automatically
engage Trailer Mode. Always check that
Trailer Mode is engaged before towing a trailer.Warning: Under no circumstances shouldyou exit Trailer Mode when towing a
trailer. Doing so can cause serious injury
and/or death.Warning: Do not use the air suspension setting to appropriately match the height
of the hitch with the height of the trailer.
You must choose a trailer hitch and trailer
that have the appropriate height for suitable axle loading and trailer balance.Warning: Do not use Trailer Mode when
attaching a bicycle carrier to the trailer
hitch (see Using a Bicycle Carrier on page
71).
While Towing a Trailer
Model X is designed primarily as a passenger- carrying vehicle. Towing a trailer putsadditional load on the motor, drive train,brakes, tires and suspension and
significantlydecreases range. If you decide to tow a trailer,
proceed with caution and follow these general
guidelines: