2016 SUBARU OUTBACK License plate
[x] Cancel search: License platePage 124 of 572
Keys and doors/PIN Code Access (models with“keyless access with push–button start system”)
&Registering a PIN code
!Preparation
1. Turn off the ignition switch.
2. Close all doors (including trunk/rear
gate).
3. Press and hold the“
”button on the
access key. Then all doors (including rear
gate) will be locked.
4. Keep the“
”button pressed, and
press the following button within 5 sec-
onds after step 3.
.Legacy: the trunk opener button
.Outback: the rear lock button
5. Press and hold the above button for
more than 5 seconds. Then a chirp will
sound.
6. Press the“
”button on the access key
while the chirp sounds.
Then the chirp will stop and the prepara-
tion is complete.
NOTE
If you do not press the“”button on
the access key, the chirp will sound for
30 seconds. In this case, the prepara-
tion for registering a PIN code does not
complete even if the chirp stops.!Registration
For example, to register“32468”as the
PIN code, perform the following proce-
dure.
Legacy:
1. Press the trunk opener button three
times.
2. After a buzzer (ding) sounds once,
press the trunk opener button twice.
3. After a buzzer (ding) sounds once,
press the trunk opener button four times.
4. After a buzzer (ding) sounds once,
press the trunk opener button six times.
5. After a buzzer (ding) sounds once,
press the trunk opener button eight times.
6. Perform steps 1 to 5 again within
approximately 30 seconds after the buz-
zer starts sounding intermittently.
7. All doors will be unlocked and locked.
Then the PIN code will be registered.
Outback:
1. Press the rear lock button three times.
2. After a buzzer (ding) sounds once,
press the rear lock button twice.
3. After a buzzer (ding) sounds once,
press the rear lock button four times.
4. After a buzzer (ding) sounds once,
press the rear lock button six times.
5. After a buzzer (ding) sounds once,press the rear lock button eight times.
6. Perform steps 1 to 5 again within
approximately 30 seconds after the buz-
zer starts sounding intermittently.
7. All doors (including rear gate) will be
unlocked and locked. Then the PIN code
will be registered.
NOTE
.Press the trunk opener button/rear
lock button ten times to enter“0”.
.Change the PIN code frequently to
protect your vehicle from theft.
.If you have lent your vehicle to
another person, confirm that the PIN
code has not been changed or deleted.
If the PIN code has been changed or
deleted, reregister a new PIN code.
.If you make an error during the
registration procedure, press the“
”
or“”button on the access key.
Then, start over from the procedure
described in“Preparation”.
.To protect your vehicle from theft,
you cannot register“00000”to“99999”
or“12345”as a PIN code.
.Do not register your vehicle license
plate number or simple numbers such
as“11122”or“12121”as a PIN code.
Doing so will increase the risk of
vehicle theft.
.When you try to register“22222”,
2-22
Page 196 of 572
Instruments and controls/Light control switch
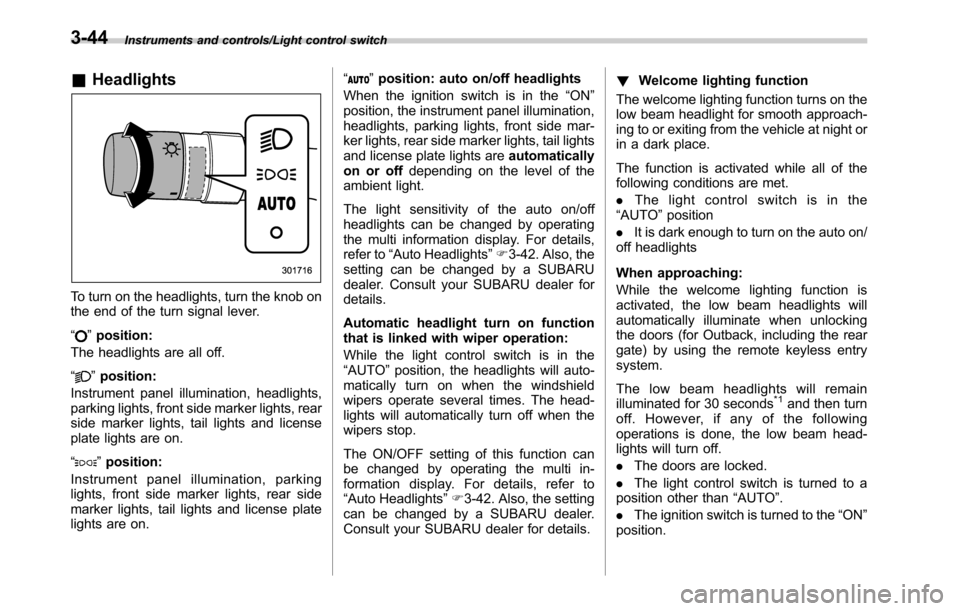
&Headlights
To turn on the headlights, turn the knob on
the end of the turn signal lever.
“
”position:
The headlights are all off.
“
”position:
Instrument panel illumination, headlights,
parking lights, front side marker lights, rear
side marker lights, tail lights and license
plate lights are on.
“
”position:
Instrument panel illumination, parking
lights, front side marker lights, rear side
marker lights, tail lights and license plate
lights are on.“
”position: auto on/off headlights
When the ignition switch is in the“ON”
position, the instrument panel illumination,
headlights, parking lights, front side mar-
ker lights, rear side marker lights, tail lights
and license plate lights areautomatically
on or offdepending on the level of the
ambient light.
The light sensitivity of the auto on/off
headlights can be changed by operating
the multi information display. For details,
refer to“Auto Headlights”F3-42. Also, the
setting can be changed by a SUBARU
dealer. Consult your SUBARU dealer for
details.
Automatic headlight turn on function
that is linked with wiper operation:
While the light control switch is in the
“AUTO”position, the headlights will auto-
matically turn on when the windshield
wipers operate several times. The head-
lights will automatically turn off when the
wipers stop.
The ON/OFF setting of this function can
be changed by operating the multi in-
formation display. For details, refer to
“Auto Headlights”F3-42. Also, the setting
can be changed by a SUBARU dealer.
Consult your SUBARU dealer for details.!Welcome lighting function
The welcome lighting function turns on the
low beam headlight for smooth approach-
ing to or exiting from the vehicle at night or
in a dark place.
The function is activated while all of the
following conditions are met.
.The light control switch is in the
“AUTO”position
.It is dark enough to turn on the auto on/
off headlights
When approaching:
While the welcome lighting function is
activated, the low beam headlights will
automatically illuminate when unlocking
the doors (for Outback, including the rear
gate) by using the remote keyless entry
system.
The low beam headlights will remain
illuminated for 30 seconds
*1and then turn
off. However, if any of the following
operations is done, the low beam head-
lights will turn off.
.The doors are locked.
.The light control switch is turned to a
position other than“AUTO”.
.The ignition switch is turned to the“ON”
position.
3-44
Page 198 of 572
Instruments and controls/Light control switch
&High/low beam change
(dimmer)
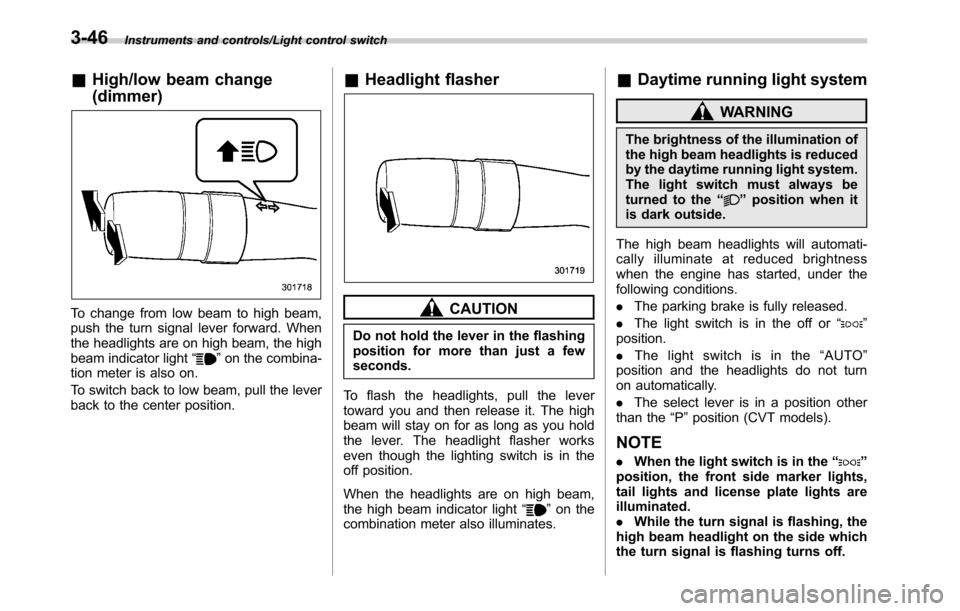
To change from low beam to high beam,
push the turn signal lever forward. When
the headlights are on high beam, the high
beam indicator light“
”on the combina-
tion meter is also on.
To switch back to low beam, pull the lever
back to the center position.
&Headlight flasher
CAUTION
Do not hold the lever in the flashing
position for more than just a few
seconds.
To flash the headlights, pull the lever
toward you and then release it. The high
beam will stay on for as long as you hold
the lever. The headlight flasher works
even though the lighting switch is in the
off position.
When the headlights are on high beam,
the high beam indicator light“
”on the
combination meter also illuminates.
&Daytime running light system
WARNING
The brightness of the illumination of
the high beam headlights is reduced
by the daytime running light system.
The light switch must always be
turned to the“
”position when it
is dark outside.
The high beam headlights will automati-
cally illuminate at reduced brightness
when the engine has started, under the
following conditions.
.The parking brake is fully released.
.The light switch is in the off or“
”
position.
.The light switch is in the“AUTO”
position and the headlights do not turn
on automatically.
.The select lever is in a position other
than the“P”position (CVT models).
NOTE
.When the light switch is in the“”
position, the front side marker lights,
tail lights and license plate lights are
illuminated.
.While the turn signal is flashing, the
high beam headlight on the side which
the turn signal is flashing turns off.
3-46
Page 470 of 572

Maintenance and service
Wheel replacement........................................... 11-31
Aluminum wheels............................................. 11-31
Windshield washer fluid.................................. 11-32
Replacement of wiper blades.......................... 11-33
Windshield wiper blade assembly..................... 11-34
Windshield wiper blade rubber......................... 11-34
Rear window wiper blade assembly
(Outback)....................................................... 11-35
Rear window wiper blade rubber (Outback) ....... 11-36
Battery............................................................... 11-37
Fuses................................................................ 11-38
Installation of accessories............................... 11-40
Replacing bulbs............................................... 11-40
HID headlights (if equipped)............................. 11-40
Halogen headlights.......................................... 11-40Front turn signal light...................................... 11-42
Front side marker light..................................... 11-42
Front fog light (if equipped).............................. 11-42
Rear combination lights................................... 11-43
Backup light.................................................... 11-45
License plate light........................................... 11-47
Dome light....................................................... 11-48
Map light......................................................... 11-48
Door step light................................................. 11-48
Cargo area light (Outback)............................... 11-49
Trunk light (Legacy)......................................... 11-49
Other bulbs..................................................... 11-49
Replacing battery............................................. 11-49Replacing battery of access key....................... 11-50
Replacing battery of transmitter....................... 11-51
Page 515 of 572
5. Install the light cover on the rear gate.
&License plate light
!Legacy
NOTE
It may be difficult to replace the bulbs.
We recommend that you have the bulbs
replaced by your SUBARU dealer if
necessary.
1. Open the trunk.
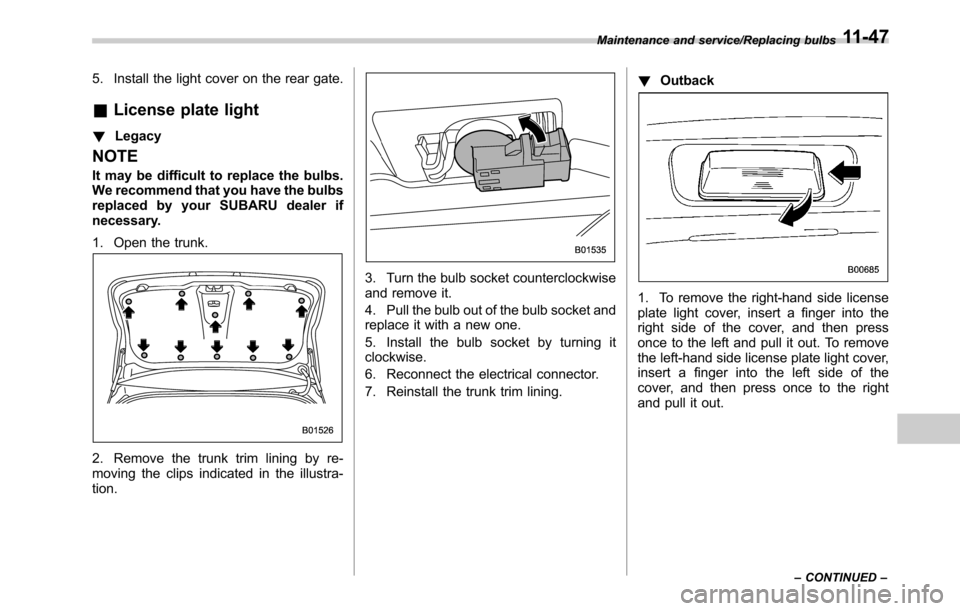
2. Remove the trunk trim lining by re-
moving the clips indicated in the illustra-
tion.
3. Turn the bulb socket counterclockwise
and remove it.
4. Pull the bulb out of the bulb socket and
replace it with a new one.
5. Install the bulb socket by turning it
clockwise.
6. Reconnect the electrical connector.
7. Reinstall the trunk trim lining.!Outback
1. To remove the right-hand side license
plate light cover, insert a finger into the
right side of the cover, and then press
once to the left and pull it out. To remove
the left-hand side license plate light cover,
insert a finger into the left side of the
cover, and then press once to the right
and pull it out.
Maintenance and service/Replacing bulbs
–CONTINUED–11-47
Page 516 of 572
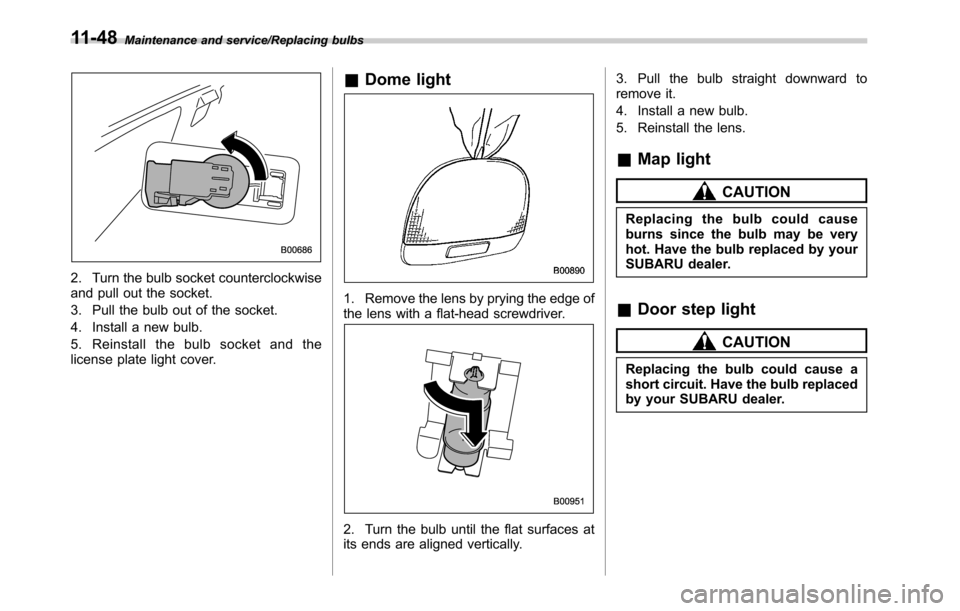
Maintenance and service/Replacing bulbs
2. Turn the bulb socket counterclockwise
and pull out the socket.
3. Pull the bulb out of the socket.
4. Install a new bulb.
5. Reinstall the bulb socket and the
license plate light cover.
&Dome light
1. Remove the lens by prying the edge of
the lens with a flat-head screwdriver.
2. Turn the bulb until the flat surfaces at
its ends are aligned vertically.3. Pull the bulb straight downward to
remove it.
4. Install a new bulb.
5. Reinstall the lens.
&Map light
CAUTION
Replacing the bulb could cause
burns since the bulb may be very
hot. Have the bulb replaced by your
SUBARU dealer.
&Door step light
CAUTION
Replacing the bulb could cause a
short circuit. Have the bulb replaced
by your SUBARU dealer.
11-48
Page 536 of 572

Specifications/Bulb chart
Wattage Bulb No.
1) High beam headlight 12V-60W HB3
2) Low beam headlight
Models with HID headlights 12V-35W D4S
Models without HID headlights 12V-55W H11
3) Front side marker light 12V-5W W5W
4) Map light 12V-8W
5) Dome light 12V-8W
6) Door step light 12V-5W W5W
7) Front turn signal light 12V-21W WY21W
8) Front fog light
Legacy (models without steering responsive fog
lights system)12V-19W H16
Legacy (models with steering responsive fog lights
system)12V-55W H11
Outback 12V-55W H11
9) Vanity mirror light 14V-1.4W HTU
10) Cargo area light 12V-13W SAE #912
11) Licence plate light (Outback)12V-5W W5W
12) Backup light (Outback) 12V-16W W16W
13)
Rear turn signal light (Outback) 12V-21W WY21W
14) Rear side marker light (Outback)
12V-5W W5W
15) Trunk light (Legacy) 12V-3.8W SAE #194
16)
License plate light (Legacy) 12V-5W W5W
17) Backup light (Legacy) 12V-16W W16W12-16
Page 561 of 572

J
Jack-up point............................................................... 9-5
Jump starting............................................................. 9-11
K
Key ............................................................................ 2-3
Number.................................................................. 2-3
Reminder chime....................................................... 3-4
Replacement........................................................... 2-5
Keyless access with push-button start system ............... 2-10
Disabling keyless access functions........................... 2-18
Locking and unlocking doors................................... 2-13
Opening rear gate.................................................. 2-16
Opening trunk........................................................ 2-16
Warning chimes and warning indicator...................... 3-24
When access key does not operate properly............. 9-18
Keyless entry system................................................. 2-23
L
LCA ......................................................................... 7-54
Leather seat materials................................................ 10-5
License plate light..................................................... 11-47
Light
Backup................................................................ 11-45
Cargo area.................................................... 6-3, 11-49
Control switch........................................................ 3-43
Daytime running..................................................... 3-46
Dome........................................................... 6-2, 11-48
Door step............................................................. 11-48
Front fog...................................................... 3-49, 11-42
Front side marker................................................... 3-44Ignition switch......................................................... 3-4
License plate....................................................... 11-47
Map .............................................................. 6-2, 11-48
Rear combination................................................. 11-43
Rear side marker light........................................... 11-43
Rear turn signal.................................................... 11-43
Trunk.................................................................. 11-49
Turn signal........................................ 3-47, 11-42, 11-43
Vanity mirror........................................................... 6-5
Loading your vehicle................................................... 8-12
Low fuel warning light................................................. 3-21
Low tire pressure warning light..................................... 3-16
Lower and tether anchorage........................................ 1-35
M
Maintenance
Precautions........................................................... 11-3
Schedule............................................................... 11-3
Seatbelt................................................................. 1-24
Tips ...................................................................... 11-5
Tools...................................................................... 9-3
Malfunction indicator light (check engine warning light) .... 3-15
Manual
Climate control system............................................. 4-6
Mode (continuously variable transmission)................. 7-29
Seat....................................................................... 1-4
Transmission......................................................... 7-23
Transmission oil........................................... 11-18, 12-7
Map light........................................................... 6-2, 11-48
Maximum load limits
................................................... 8-21
Meters and gauges...................................................... 3-7
Index14-7