2016 SKODA SUPERB Cooling
[x] Cancel search: CoolingPage 273 of 336

Diesel enginesSpecification1.6 ltr. / 88 kW TDI CRVW 507 002.0 l/110, 130, 140 kW TDI CR
Vehicles with fixed service intervals
Petrol enginesSpecification1.4 l/92, 110 kW TSI
VW 502 00
1.8 ltr./132 kW TSI2.0 l/162, 206 kW TSIDiesel enginesSpecification1.6 ltr. / 88 kW TDI CRVW 507 002.0 l/110, 130, 140 kW TDI CR
Engine oil VW 505 01 can optionally be used in diesel engines without a DPF.
CAUTION
■
If no prescribed engine oil is available, then max. 0.5 l oil of the following
specifications can be refilled. ■Petrol engines: ACEA A3/ACEA B4 or API SN, (API SM);
■ Diesel engines: ACEA C3 or API CJ-4.
Check and refill
Fig. 321
Dipstick variants
Read and observe and on page 270 first.
Check the oil under the following conditions and refill.
The vehicle is standing on a horizontal surface.
The engine operating temperature is reached.
The engine is turned off.
Checking the level
›
Wait a few minutes until the engine oil flows back into the oil trough.
›
Remove the dipstick and wipe with a clean cloth.
›
Push the dipstick to the stop and pull out again.
›
Read the oil level and push in the dipstick.
The oil level must be in range
A
» Fig. 321 . If the oil level is below the range
A
, refill the oil.
Refilling
›
Unscrew the cap of the engine oil filler opening
C
» Fig. 319 on page 269 .
›
Add oil of the correct specification in portions of 0.5 litres » page 270.
›
Check the oil level .
›
Screw the lid of the engine oil filler closed carefully.
CAUTION
■
The oil level must never be below the range A » Fig. 321 – risk of damage to
the motor as well as the exhaust system.■
If a top up with oil is not possible or the oil level is above range
A
,
stop
driving! Switch off the engine and seek assistance from a specialist garage.
Note
Too low engine oil level is shown in the instrument cluster by the warning
light illuminating and also indicated by the message » page 40. Nevertheless,
we recommend to check the oil level on a regular basis with the dipstick.
Coolant
Introduction
This chapter contains information on the following subjects:
Checking and refilling
272
The coolant cools the engine and consists of water and coolant additive (with
additives that protect the cooling system against corrosion and prevents fur-
ring).
271Inspecting and replenishing
Page 274 of 336

The coolant additive proportion in the coolant must be between 40 and 60 %.
The correct mixing ratio of water and coolant additive should be checked if
necessary by a specialist garage or corrected if necessary.WARNING■ The following warning instructions must be followed at all times when
working in the engine compartment » page 268.■
Never open the end cover of the coolant expansion reservoir while the
engine is still warm. The cooling system is pressurized - risk of scalding or
injury from being splashed with coolant!
■
To protect against coolant splashes, cover the cap with a cloth when
opening.
■
Coolant and coolant fumes are harmful - avoid contact with the coolant. If
your eyes or skin come into contact with the coolant, immediately wash the
affected area for a few minutes long with a lot of water and seek medical
advice if required.
CAUTION
Do not cover the radiator or fit any parts (e.g. auxiliary lights) in front of the air
intakes - there is a risk of the engine overheating.
Checking and refilling
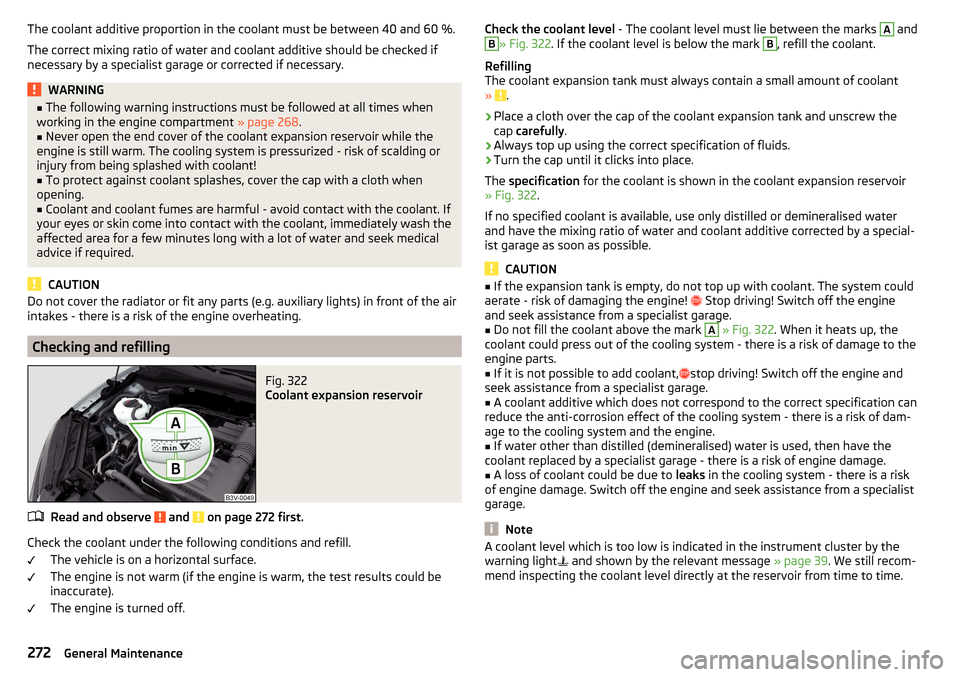
Fig. 322
Coolant expansion reservoir
Read and observe and on page 272 first.
Check the coolant under the following conditions and refill.
The vehicle is on a horizontal surface.
The engine is not warm (if the engine is warm, the test results could be
inaccurate).
The engine is turned off.
Check the coolant level - The coolant level must lie between the marks A andB» Fig. 322. If the coolant level is below the mark B, refill the coolant.
Refilling
The coolant expansion tank must always contain a small amount of coolant
»
.
›
Place a cloth over the cap of the coolant expansion tank and unscrew the
cap carefully .
›
Always top up using the correct specification of fluids.
›
Turn the cap until it clicks into place.
The specification for the coolant is shown in the coolant expansion reservoir
» Fig. 322 .
If no specified coolant is available, use only distilled or demineralised water
and have the mixing ratio of water and coolant additive corrected by a special-
ist garage as soon as possible.
CAUTION
■ If the expansion tank is empty, do not top up with coolant. The system could
aerate - risk of damaging the engine! Stop driving! Switch off the engine
and seek assistance from a specialist garage.■
Do not fill the coolant above the mark
A
» Fig. 322 . When it heats up, the
coolant could press out of the cooling system - there is a risk of damage to the
engine parts.
■
If it is not possible to add coolant,
stop driving! Switch off the engine and
seek assistance from a specialist garage.
■
A coolant additive which does not correspond to the correct specification can
reduce the anti-corrosion effect of the cooling system - there is a risk of dam-
age to the cooling system and the engine.
■
If water other than distilled (demineralised) water is used, then have the
coolant replaced by a specialist garage - there is a risk of engine damage.
■
A loss of coolant could be due to leaks in the cooling system - there is a risk
of engine damage. Switch off the engine and seek assistance from a specialist
garage.
Note
A coolant level which is too low is indicated in the instrument cluster by the
warning light and shown by the relevant message » page 39. We still recom-
mend inspecting the coolant level directly at the reservoir from time to time.272General Maintenance
Page 285 of 336

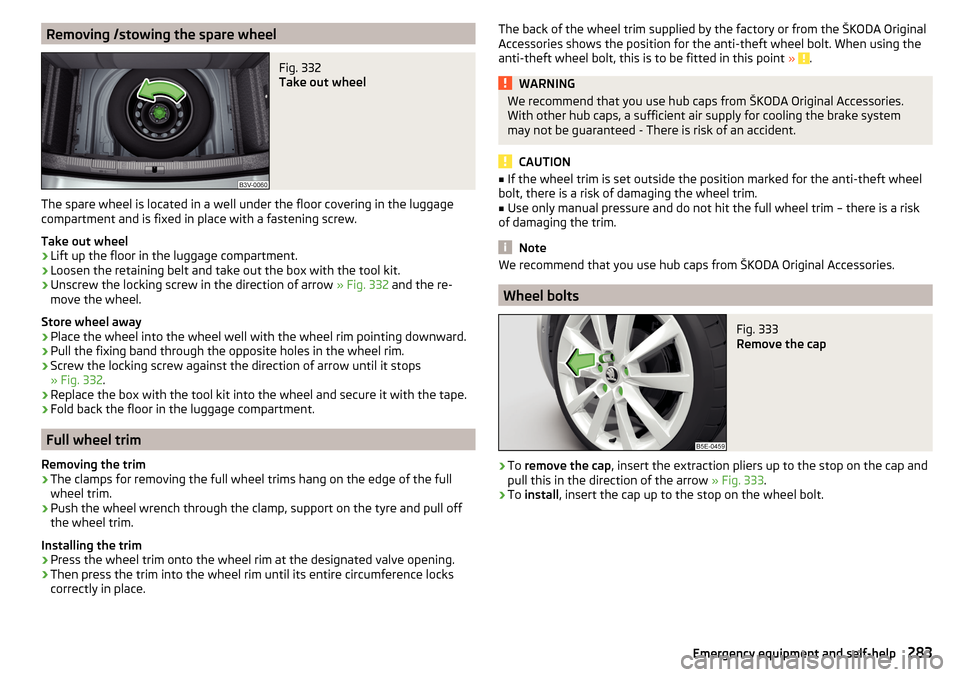
Removing /stowing the spare wheelFig. 332
Take out wheel
The spare wheel is located in a well under the floor covering in the luggage
compartment and is fixed in place with a fastening screw.
Take out wheel
›
Lift up the floor in the luggage compartment.
›
Loosen the retaining belt and take out the box with the tool kit.
›
Unscrew the locking screw in the direction of arrow » Fig. 332 and the re-
move the wheel.
Store wheel away
›
Place the wheel into the wheel well with the wheel rim pointing downward.
›
Pull the fixing band through the opposite holes in the wheel rim.
›
Screw the locking screw against the direction of arrow until it stops
» Fig. 332 .
›
Replace the box with the tool kit into the wheel and secure it with the tape.
›
Fold back the floor in the luggage compartment.
Full wheel trim
Removing the trim
›
The clamps for removing the full wheel trims hang on the edge of the full
wheel trim.
›
Push the wheel wrench through the clamp, support on the tyre and pull off
the wheel trim.
Installing the trim
›
Press the wheel trim onto the wheel rim at the designated valve opening.
›
Then press the trim into the wheel rim until its entire circumference locks
correctly in place.
The back of the wheel trim supplied by the factory or from the ŠKODA Original
Accessories shows the position for the anti-theft wheel bolt. When using the
anti-theft wheel bolt, this is to be fitted in this point »
.
WARNINGWe recommend that you use hub caps from ŠKODA Original Accessories.
With other hub caps, a sufficient air supply for cooling the brake system
may not be guaranteed - There is risk of an accident.
CAUTION
■ If the wheel trim is set outside the position marked for the anti-theft wheel
bolt, there is a risk of damaging the wheel trim.■
Use only manual pressure and do not hit the full wheel trim – there is a risk
of damaging the trim.
Note
We recommend that you use hub caps from ŠKODA Original Accessories.
Wheel bolts
Fig. 333
Remove the cap
›
To remove the cap , insert the extraction pliers up to the stop on the cap and
pull this in the direction of the arrow » Fig. 333.
›
To install , insert the cap up to the stop on the wheel bolt.
283Emergency equipment and self-help