2016 SKODA FABIA display
[x] Cancel search: displayPage 24 of 76

If a DAB station is also not available in the FM band due to poor reception, the
device will be switched to mute.
L-band
For the DAB radio reception in different countries, different broadcasting rang-
es are used. In some countries the DAB radio reception is only possible in the
so called L-band.
If no L-band DAB radio reception is possible in the country then we recom-
mend turning off the L-band. The channel scan is therefore faster.Media
Operation
Main menu
Fig. 19
Media: Main menu
›
To display the main menu, press the button.
Main menu » Fig. 19
Information on playing track
Playback timeline with a slider
Selected audio source or selected album image
Select the audio source
Depending on the audio source type: ▶ Folder / Title list
▶ Multimedia database
Menu settings Media
Note
■
Information concerning the given title appears on the screen, if they are stor-
ed as so-called ID3 Tags on the audio source. If no ID3 tag is available, only the
title name is displayed.■
The remaining playback time indicated does not correspond to the actual re-
maining playback time for titles with variable bit rates (VBR).
ABCD22Media
Page 25 of 76
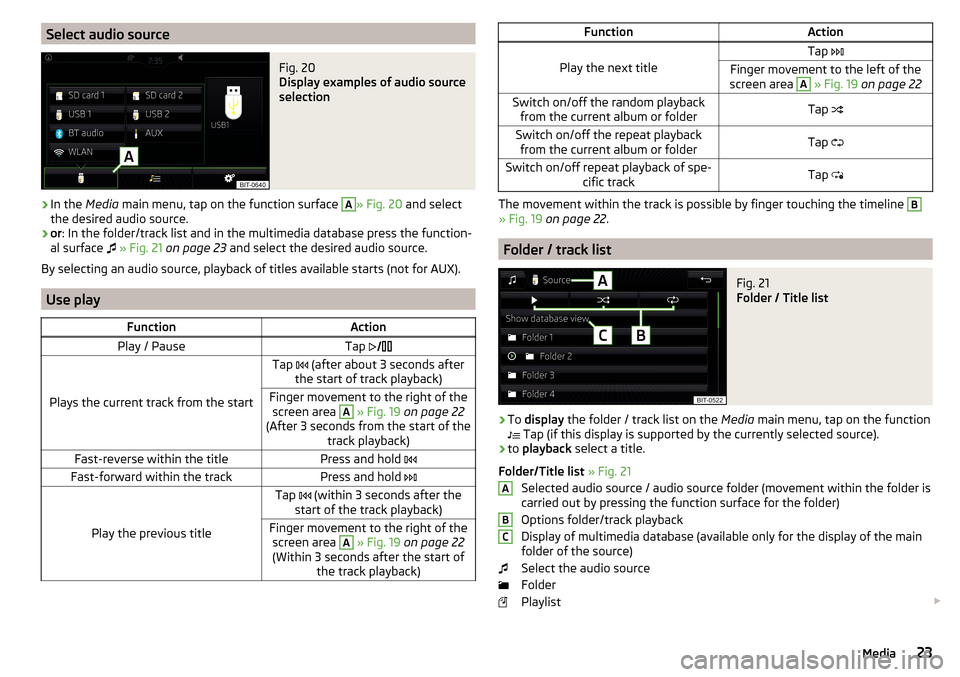
Select audio sourceFig. 20
Display examples of audio source
selection
›
In the Media main menu, tap on the function surface
A
» Fig. 20 and select
the desired audio source.
›
or : In the folder/track list and in the multimedia database press the function-
al surface
» Fig. 21 on page 23 and select the desired audio source.
By selecting an audio source, playback of titles available starts (not for AUX).
Use play
FunctionActionPlay / PauseTap
Plays the current track from the start
Tap (after about 3 seconds after
the start of track playback)Finger movement to the right of the screen area A
» Fig. 19 on page 22
(After 3 seconds from the start of the track playback)Fast-reverse within the titlePress and hold Fast-forward within the trackPress and hold
Play the previous title
Tap (within 3 seconds after the
start of the track playback)Finger movement to the right of the screen area A
» Fig. 19 on page 22
(Within 3 seconds after the start of the track playback)FunctionAction
Play the next title
Tap Finger movement to the left of the
screen area A
» Fig. 19 on page 22Switch on/off the random playback
from the current album or folderTap Switch on/off the repeat playback
from the current album or folderTap Switch on/off repeat playback of spe-
cific trackTap
The movement within the track is possible by finger touching the timeline
B
» Fig. 19 on page 22 .
Folder / track list
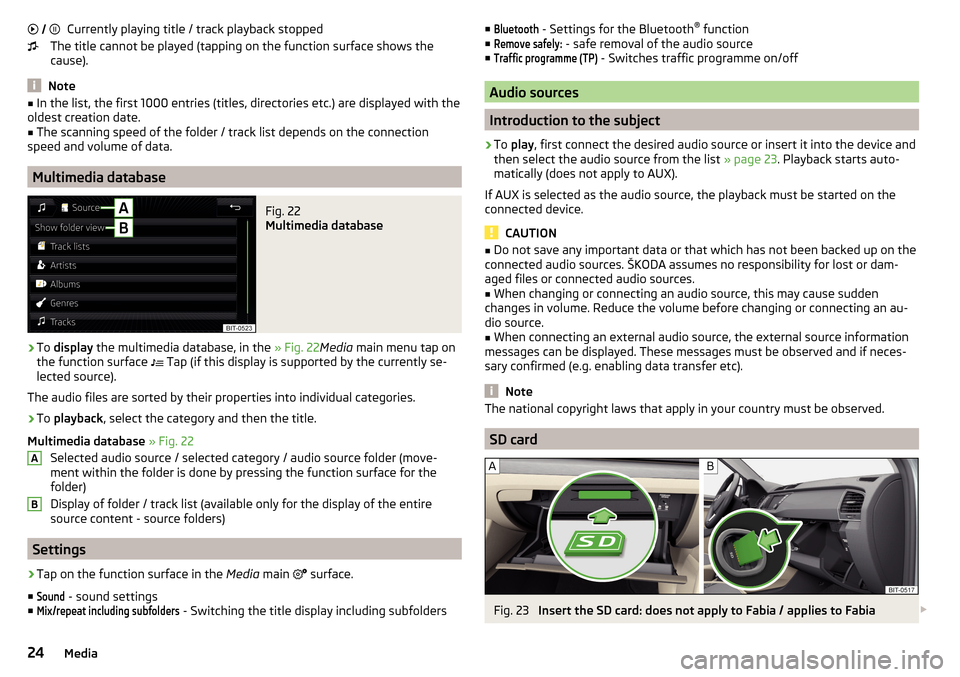
Fig. 21
Folder / Title list
›
To display the folder / track list on the Media main menu, tap on the function
Tap (if this display is supported by the currently selected source).
›
to
playback select a title.
Folder/Title list » Fig. 21
Selected audio source / audio source folder (movement within the folder is
carried out by pressing the function surface for the folder)
Options folder/track playback
Display of multimedia database (available only for the display of the main
folder of the source)
Select the audio source
Folder
Playlist
ABC23Media
Page 26 of 76
Currently playing title / track playback stopped
The title cannot be played (tapping on the function surface shows the
cause).
Note
■ In the list, the first 1000 entries (titles, directories etc.) are displayed with the
oldest creation date.■
The scanning speed of the folder / track list depends on the connection
speed and volume of data.
Multimedia database
Fig. 22
Multimedia database
›
To display the multimedia database, in the » Fig. 22Media main menu tap on
the function surface
Tap (if this display is supported by the currently se-
lected source).
The audio files are sorted by their properties into individual categories.
›
To playback , select the category and then the title.
Multimedia database » Fig. 22
Selected audio source / selected category / audio source folder (move-
ment within the folder is done by pressing the function surface for the
folder)
Display of folder / track list (available only for the display of the entire
source content - source folders)
Settings
›
Tap on the function surface in the Media main
surface.
■
Sound
- sound settings
■
Mix/repeat including subfolders
- Switching the title display including subfolders
AB■Bluetooth - Settings for the Bluetooth ®
function
■Remove safely:
- safe removal of the audio source
■
Traffic programme (TP)
- Switches traffic programme on/off
Audio sources
Introduction to the subject
›
To play , first connect the desired audio source or insert it into the device and
then select the audio source from the list » page 23. Playback starts auto-
matically (does not apply to AUX).
If AUX is selected as the audio source, the playback must be started on the
connected device.
CAUTION
■ Do not save any important data or that which has not been backed up on the
connected audio sources. ŠKODA assumes no responsibility for lost or dam-
aged files or connected audio sources.■
When changing or connecting an audio source, this may cause sudden
changes in volume. Reduce the volume before changing or connecting an au-
dio source.
■
When connecting an external audio source, the external source information
messages can be displayed. These messages must be observed and if neces-
sary confirmed (e.g. enabling data transfer etc).
Note
The national copyright laws that apply in your country must be observed.
SD card
Fig. 23
Insert the SD card: does not apply to Fabia / applies to Fabia
24Media
Page 29 of 76
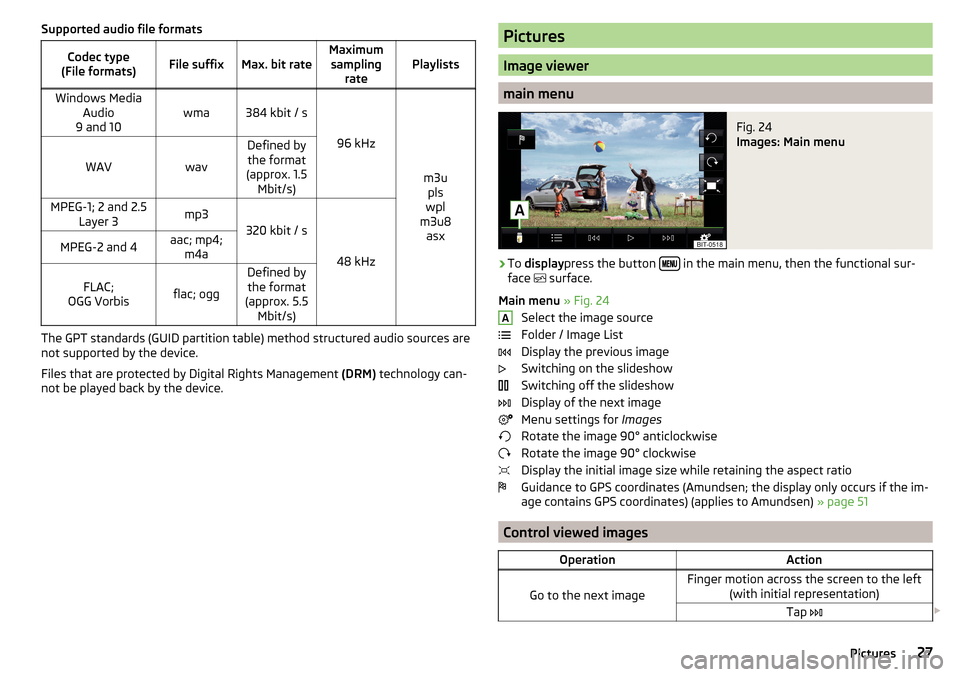
Supported audio file formatsCodec type
(File formats)File suffixMax. bit rateMaximum sampling ratePlaylistsWindows Media Audio
9 and 10wma384 kbit / s
96 kHz
m3u pls
wpl
m3u8 asx
WAVwav
Defined bythe format
(approx. 1.5 Mbit/s)MPEG-1; 2 and 2.5 Layer 3mp3
320 kbit / s
48 kHz
MPEG-2 and 4aac; mp4;m4aFLAC;
OGG Vorbisflac; ogg
Defined by the format
(approx. 5.5 Mbit/s)
The GPT standards (GUID partition table) method structured audio sources are
not supported by the device.
Files that are protected by Digital Rights Management (DRM) technology can-
not be played back by the device.
Pictures
Image viewer
main menu
Fig. 24
Images: Main menu
›
To display press the button in the main menu, then the functional sur-
face surface.
Main menu » Fig. 24
Select the image source
Folder / Image List
Display the previous image
Switching on the slideshow
Switching off the slideshow
Display of the next image
Menu settings for Images
Rotate the image 90° anticlockwise
Rotate the image 90° clockwise
Display the initial image size while retaining the aspect ratio
Guidance to GPS coordinates (Amundsen; the display only occurs if the im-
age contains GPS coordinates) (applies to Amundsen) » page 51
Control viewed images
OperationAction
Go to the next image
Finger motion across the screen to the left
(with initial representation)Tap A27Pictures
Page 30 of 76
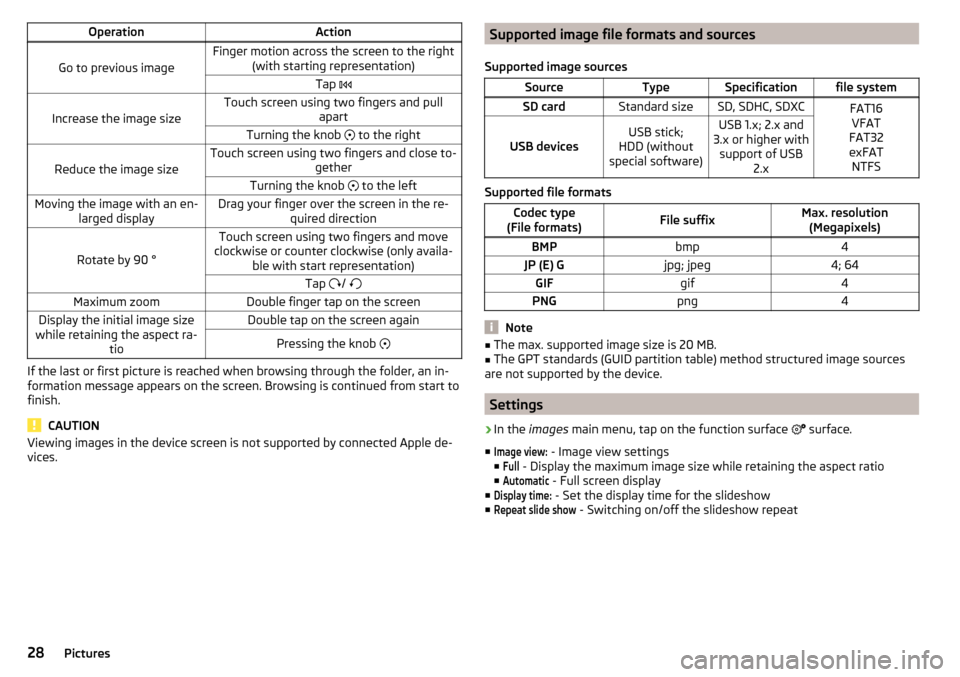
OperationAction
Go to previous image
Finger motion across the screen to the right(with starting representation)Tap
Increase the image size
Touch screen using two fingers and pull
apartTurning the knob to the right
Reduce the image size
Touch screen using two fingers and close to-
getherTurning the knob to the leftMoving the image with an en-
larged displayDrag your finger over the screen in the re- quired direction
Rotate by 90 °
Touch screen using two fingers and move
clockwise or counter clockwise (only availa- ble with start representation)Tap / Maximum zoomDouble finger tap on the screenDisplay the initial image size
while retaining the aspect ra- tioDouble tap on the screen againPressing the knob
If the last or first picture is reached when browsing through the folder, an in-
formation message appears on the screen. Browsing is continued from start to
finish.
CAUTION
Viewing images in the device screen is not supported by connected Apple de-
vices.Supported image file formats and sources
Supported image sourcesSourceTypeSpecificationfile systemSD cardStandard sizeSD, SDHC, SDXCFAT16 VFAT
FAT32
exFAT NTFS
USB devicesUSB stick;
HDD (without
special software)USB 1.x; 2.x and
3.x or higher with support of USB 2.x
Supported file formats
Codec type
(File formats)File suffixMax. resolution (Megapixels)BMPbmp4JP (E) Gjpg; jpeg4; 64GIFgif4PNGpng4
Note
■ The max. supported image size is 20 MB.■The GPT standards (GUID partition table) method structured image sources
are not supported by the device.
Settings
›
In the images main menu, tap on the function surface
surface.
■
Image view:
- Image view settings
■
Full
- Display the maximum image size while retaining the aspect ratio
■
Automatic
- Full screen display
■
Display time:
- Set the display time for the slideshow
■
Repeat slide show
- Switching on/off the slideshow repeat
28Pictures
Page 31 of 76
Media Command
Using the system
Introduction to the subject
Applies to Amundsen (Does not apply to Yeti).
The Media Commandfunction allows playback of audio files or videos in up to
two Tablets That are connected to the device via WLAN, to control the device.
The Media Command function enables operation of tablets with the operating
system Android or iOS and with the running application ŠKODA Media
Command.
Connect tablet with device
›
Turn on the device hotspot (WLAN) (press the button then the functional
surface Tap on
→
WLAN
→
Mobile hotspot
→
Mobile hotspot
).
›
Turn on WiFi in tablet.
›
The hotspot of the device (if necessary, enter the password for the connec-
tion setup according to the setting of the device hotspots » page 39).
›
In the tablet, start the application ŠKODA Media Command.
CAUTION
If several devices are connected to the device via WLAN, there is a risk that the
quality of the WLAN connection, and thus the function of Media Command may
be affected.
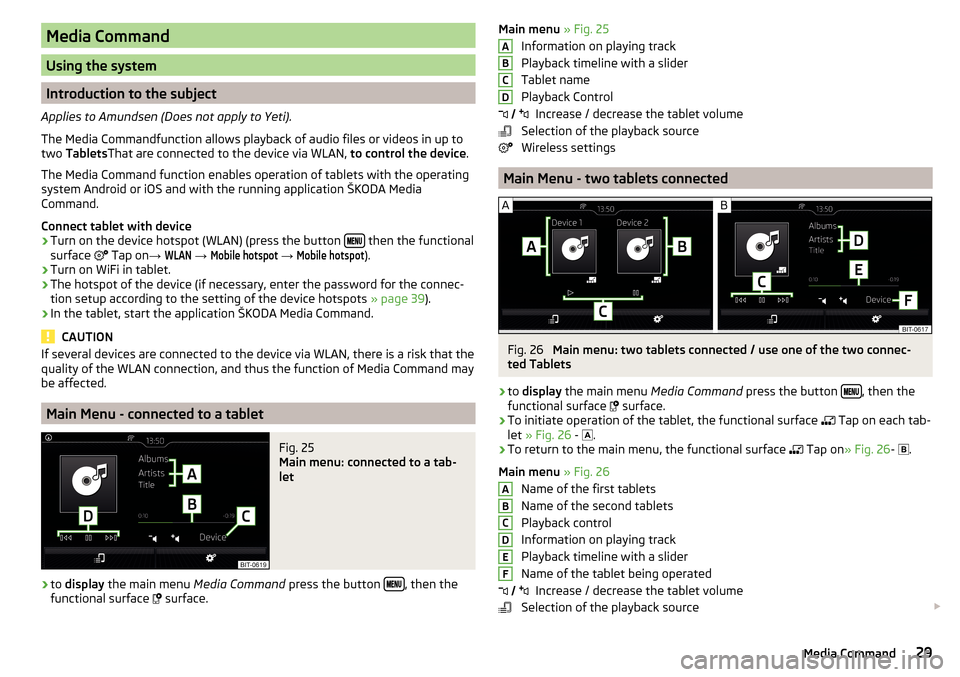
Main Menu - connected to a tablet
Fig. 25
Main menu: connected to a tab-
let
›
to display the main menu Media Command press the button , then the
functional surface
surface.
Main menu » Fig. 25
Information on playing track
Playback timeline with a slider
Tablet name
Playback Control Increase / decrease the tablet volume
Selection of the playback source
Wireless settings
Main Menu - two tablets connected
Fig. 26
Main menu: two tablets connected / use one of the two connec-
ted Tablets
›
to display the main menu Media Command press the button , then the
functional surface surface.
›
To initiate operation of the tablet, the functional surface
Tap on each tab-
let » Fig. 26 -
.
›
To return to the main menu, the functional surface
Tap on
» Fig. 26 -
.
Main menu » Fig. 26
Name of the first tablets
Name of the second tablets
Playback control
Information on playing track
Playback timeline with a slider
Name of the tablet being operated Increase / decrease the tablet volume
Selection of the playback source
ABCD
ABCDEF 29Media Command
Page 33 of 76

Telephone
Introductory information
Introduction to the subject
This chapter covers the operation of a Bluetooth ®
device connected to the tel-
ephone.
Depending on the Bluetooth ®
-profile used it is possible to connect to a tele-
phone or two phones simultaneously to the device.
If telephones are connected to the device with multiple SIM cards, then calls
can be accepted by all SIM cards of the connected telephones.
For outgoing calls, it depends on the type of connected telephone, either only
the primary SIM card or one of the other SIM cards can be selected.
The device allows you to work with text messages from the main telephone, (if
supported by the telephone).
If the device to is connected to an external device via Apple CarPlay ™
, then the
use of the Bluetooth ®
Connection is not possible and the phone menu is not
available.
If the device is connected to an external device via Android Auto ™
then the
connected phones and the Bluetooth ®
player are automatically disconnected
by connecting to external device and it connects to the device via Bluetooth ®
.
Connecting an extension phone while the timer using Android car ™
is not pos-
sible. If the Bluetooth ®
Feature was not turned on in external device to be con-
nected, it will be automatically switched on usingAndroid Auto ™
switched
when setting up the connection.WARNINGThe general binding country-specific regulations for operating mobile
phones in the vehicle must be observed.
Possible connection typesDepending on the number of connected Bluetooth ®
Devices and the connection type, the following functions are available.The first device (main phone)The second device (additional phone)HFP (Incoming / outgoing calls), SMS,
Phone contacts,
Bluetooth ®
player a)HFP
(incoming calls),
Bluetooth ®
player a)a)
Only an external device can be connected to the device as a Bluetooth
®
player.
Telephone
Fig. 28
Telephone: Main menu
The Telephone main menu appears when a telephone is connected to the de-
vice.›
To display , press the button.
If another, menu id displayed which was open last, to display the phone main
menu, press the button again
.
Home page - information and function surfaces » Fig. 28
Name of the telephone service provider (with active roaming, the symbol
appears before the name
)
Function surfaces of preferred contacts
Emergency number dialling or function surface of the preferred contact
» page 35 , Management of preferred contacts (favourites)
Choice of storage group for the preferred contact
Display the list of paired telephones (the name of the main telephone appears in the button)
Change the main telephone with the auxiliary telephone (the name of
the auxiliary telephone appears in the function surface)
ABC31Telephone
Page 34 of 76

Enter the telephone number
Display the phone contact list, depending on the connection type
» page 31 , Possible connection types
Display a collection of text messages (SMS) (with new messages the
number of messages appears next to the functional surface)
Display the call list (missed calls, in addition to the function surface, the
number of calls when absent is displayed)
Menu settings for Telephone
Symbols in the status bar Signal strength of the telephone service network
Charge status of the telephone battery
Missed call
Current call
Incoming SMS
Ongoing data transfer
Settings
›
In the Telephone main menu, tap on the function surface,
surface.
■
Hands-free
- Switching a call to the telephone / back to the device (the menu
item is displayed during a call)
■
Select telephone
- Search for available telephones/list of paired telephones/se-
lect telephone
■
Bluetooth
- Bluetooth ®
settings » page 17
■
User profile
- user profile settings
■
Manage favourites
- set the function surfaces for your favourite contacts
■
Mailbox number:
- Enter the voice mail phone number
■
Sort by:
- Arrangement of telephone contact list
■
Surname
- Sort by contact name
■
Forename
- Sort by contact's first name
■
Import contacts:
- Import telephone contacts
■
Select ring tone
- Selecting the ring tone
■
Reminder: Remember your mobile
- Turn on/off the warning mode before forget-
ting the phone in the vehicle (if the phone was connected to the device)
■
Show pictures for contacts
- Switch on/off the display of the image assigned to
the contact
■
Conference
- Activates/deactivates conference calls
Pair and connect
Introduction to the subject
The range of the connection to the hands-free system is limited to the passen-
ger compartment.
To connect a telephone with the device, the two devices must be paired via
Bluetooth ®
.
The coupling procedure depends on the number of telephones that are already
connected » page 31, Possible connection types .
Up to 20 external devices can be paired with the device. After reaching the
maximum number, the pairing of the next external device will replace that of
the device that has not been used for the longest period of time.
A connection with a telephone that is already paired does not require coupling.
It is enough to find the telephone that has been coupled in the list of coupled
phones and make the connection.
WARNINGPair and connect a telephone to the device only when the vehicle is at a
standstill - there is risk of accident!
conditions for coupling
Fig. 29
Compatibility of the phones on
the ŠKODA websites
The telephone can be coupled with the device under the following conditions.
The ignition is switched on.
The Bluetooth ®
function of the device and the telephone is switched on.
The visibility of the device and the telephone is switched on.
The telephone is within range of the Bluetooth ®
signal of the device.
32Telephone