Page 113 of 232

Lights and visibility
Mirror Int erior r
e
ar vision mirrorFig. 116
Manual anti-dazzle function for rear
v i
s
ion mirror The driver should always adjust the rear vi-
s
ion mirr
or t
o permit adequate visibility
through the rear window.
Manual anti-dazzle function for interior rear
vision mirror
● Basic position: point the lever at the bot-
tom of the mirr
or forwards.
● Pull the lever to the back to select the anti-
dazzl
e function ››› Fig. 116. Exterior mirrors
Fig. 117
In the front doors: button to adjust
the mec h
anic
al exterior rear vision mirror Fig. 118
In the driver door: rotary control for
the e xt
erior el
ectric mirrors Read the additional information carefully
› ›
›
page 13
Adjust the exterior mirrors by pressing the
adjust button ››› Fig. 117 or the rotary con-
trol* ››› Fig. 118. Folding in the exterior mirrors and returning
them to their original
position is possible
through a mechanical system. Carefully fold
the exterior rear vision mirror casing towards
the side window or pull it away from the win-
dow until it clicks into place. WARNING
Fold and unfold the exterior mirror, taking
car e t
o avoid injuries.
● Only fold or unfold the exterior mirror when
there is
no-one in the way of the mirror.
● When moving the mirror, take care not to
trap fing
ers between the mirror and the mir-
ror bracket. WARNING
Failure to correctly estimate the distance of
the v ehic
le behind could lead to serious acci-
dent.
● Rear-view convex or aspheric mirrors in-
cre
ase the field of vision, however objects ap-
pear smaller and further away in the mirrors.
● The use of these mirrors to estimate the
dist
ance to the next vehicle when changing
lane is imprecise and could result in serious
accident.
● If possible, use the rear vision mirror to es-
timate di
stances to vehicles behind you or in
other circumstances.
● Make sure that the rear visibility is ade-
quate. » 111
Technical data
Advice
Operation
Emergencies
Safety
Page 114 of 232

Operation
For the sake of the environment
The exterior mirror heating should be switch-
ed off when it i
s no longer needed. Other-
wise, it is an unnecessary fuel waste. Note
In the event of a fault, the electric exterior
mirror s
can be adjusted manually by pressing
the edge of the mirror surface. Seats and head restraints
Adju
s
tin
g the seat and head re-
straints
Manual front seat adjustment Read the additional information carefully
›› ›
page 12 WARNING
The safe driving chapter contains important
inform ation, tip
s, suggestions and warnings
that you should read and observe for your
own safety and the safety of your passengers
››› page 48. WARNING
● Adjus t
the front seats only when the vehi-
cle is stationary. Failure to follow this instruc-
tion could result in an accident.
● Be careful when adjusting the seat height.
Carel
ess or uncontrolled adjustment can
cause injuries.
● The front seat backrests must not be re-
clined for driv
ing. Otherwise, seat belts and
the airbag system might not protect as they
should in case of an accident, increasing risk
of injury. Removing and fitting the rear head re-
s
tr
aint
s Fig. 119
Removing the rear head restraint The rear seats are equipped with a head re-
s
tr
aint
.
Removing the rear head restraint.
● Unlock the seat backrest and fold it forward
›››
page 123.
● Push the head restraint up as far as it will
go ››
› .
● Pull the head restraint out of the fitting
w ithout
r
eleasing the button ››› Fig. 119 1 .
● Fold the backrest of the rear seat backward
ag ain u
nti
l it is engaged.
● Safely store the removed head restraints.
Fitting the re
ar head restraint
● Unlock the seat backrest and fold it forward
›››
page 123.
112
Page 115 of 232

Seats and head restraints
● Inser
t
the head restraint into the guides on
the seat backrest.
● Push the head restraint down as far as it
wil
l go while pressing button 1 .
● Fold the backrest of the rear seat backward
ag ain u
nti
l it is engaged.
● Adjust the head restraint to the correct po-
sition ››
› page 51. WARNING
Travelling with the head restraints removed
or improperly a
djusted increases the risk of
severe or fatal injuries in the event of acci-
dents and sudden braking or manoeuvres.
● Always fit and adjust the head restraint
properly whenev
er a person is occupying a
seat.
● Refit any removed head restraints immedi-
ately so th
at passengers are properly protec-
ted. CAUTION
When removing and fitting the head restraint,
mak e s
ure it does not hit the headliner of the
vehicle or the front seat backrest. Otherwise,
the interior roof and other parts of the vehicle
could be damaged. Seat functions
Se at
he
ating* Fig. 120
In the centre console: Front seats
he atin
g sw
itch With the engine connected, the seat cushion
and the b
ac
k
rests can be heated electrically.
● Switching on: Pres
s the button or
the
t op p
ar
t of the centre console. Seat heating
functions at maximum output. All of the con-
trol lamps are turned on.
● Adjust: Press the button repeatedly or
even setting the desired level.
●
Switching off: Pr e
s
s the button or
as
m an
y
times as need be until no control lamp
is lit on the button.
When the seat heating is at maximum level,
after approx. 15 minutes have lapsed, the
first level is automatically set. Cases in which the seat heating should not
be connected
If
any of the following conditions are encoun-
tered, do not connect the seat heating:
● The seat is not occupied.
● The seat is covered with a covering.
● A child seat is installed on the seat.
● The seat cushion is damp or wet.
● The outdoor or passenger compartment
temperat
ure is greater than +25 °C (77 °F). WARNING
Those persons whose tolerance to pain or
temper at
ure is affected by taking medication
or by any type of paralysis or chronic illness
(i.e. diabetes) may sustain burns on the
shoulder, backside or legs. These burns take
considerable time to heal up or do not man-
age to heal up completely. If you have any
questions concerning your health status, con-
sult a doctor.
● Those persons who may have a limited tol-
erance t
o pain or temperature must never use
the seat heating. WARNING
If the upholstery were to get soaked, the seat
heatin g c
ould stop running correctly and
might also increase the risk for burns to be
caused. » 113
Technical data
Advice
Operation
Emergencies
Safety
Page 116 of 232

Operation
●
Prior to u s
ing the seat heating, be certain
that the seat cushion is dry.
● Avoid sitting down with damp or wet cloth-
ing.
● Do not p
lace damp or wet objects or gar-
ments on t
op of the seat.
● Do not spill liquids on the seat. CAUTION
● To av oid d
amaging the heating compo-
nents, please refrain from kneeling on the
seats or applying excessive pressure to a sin-
gle point of the seat cushion and backrest.
● If liquids are spilled, sharps objects are left
or insu
lating materials are placed (such as a
covering or child seat), this can manage to
damage the seat heating.
● In any odour were noted, disconnect the
seat he
ating immediately and have the unit
inspected by a specialised workshop. For the sake of the environment
The seat heating must only remain connected
when it i s
necessary. Otherwise, it incurs an
unnecessary waste of fuel. Transport and practical
equipment
T r
an
sporting objects
Introduction Always transport heavy loads in the luggage
comp
ar
tment and place the seat backs in a
vertical position. Never overload the vehicle.
Both the carrying capacity as well as the dis-
tribution of the load in the vehicle affect driv-
ing behaviour and braking ability ››› .
WARNING
Unsecured or incorrectly secured objects can
cau se seriou
s injury in case of a sudden ma-
noeuvring or breaking or in case of an acci-
dent. This is especially true when objects are
struck by a detonating airbag and fired
through the vehicle interior. To reduce the
risks, please note the following:
● Secure all objects in the vehicle. Always
keep equipment and he
avy objects in the lug-
gage compartment.
● Always secure objects with suitable rope or
sling
s so that they cannot enter the deploy-
ment areas around the frontal or side airbags
in case of sudden braking or an accident.
● Always ensure that objects inside the vehi-
cle c
annot move into the deployment area of
the bags while driving. ●
Whil e driv
ing, always keep object compart-
ments closed.
● Remove all objects from the front passen-
ger seat
when it is folded down. When the
seat backrest is folded down, it presses on
small and light objects and these are detec-
ted by the weight sensor on the seat; this
sends false information to the airbag control
unit.
● While the backrest of the front passenger
seat i
s folded, the frontal airbag must remain
disconnected and the PASSENGER AIRBAG
OFF light on.
● Objects secured in the vehicle should never
be plac
ed in such a way as to make passen-
gers sit in an incorrect position.
● If secured objects occupy a seat, this seat
should not
be occupied or used by anyone. WARNING
The driving behaviour and braking ability
ch an
ge when transporting heavy and large
objects.
● Adjust your speed and driving style to visi-
bility
, road, traffic and weather conditions.
● Accelerate gently and carefully.
● Avoid sudden braking and manoeuvres.
● Brake early. 114
Page 117 of 232

Transport and practical equipment
Transporting the load Secure all objects in the vehicle
● Distribute the load throughout the vehicle
and on the roof a
s uniformly as possible.
● Transport heavy objects as far forward as
poss
ible in the luggage compartment and
lock the seat backs in the vertical position.
● Check the headlight adjustment
›››
page 103.
● Use the suitable tyre pressure according to
the load bein
g transported. Read the tyre in-
flation information label ›››
page 199. CAUTION
Objects on the shelf could chafe against the
wir e
s of the heating element in the heated
rear window and cause damage. Note
Please refer to the notes on loading the roof
carrier ››
› page 127. Driving with the rear lid open
Driving with the rear lid open creates an addi-
tion
al
ri
sk. Secure all objects and secure the
rear lid correctly and take all measures possi-
ble to reduce toxic gases from entering the
vehicle. WARNING
Driving with the rear lid unlocked or open
cou l
d cause serious injuries.
● Always drive with the rear lid closed.
● Secure all objects in the vehicle. Loose
items c
ould fall out of the vehicle and injure
other road users or damage other vehicles.
● Drive particularly carefully and think
ahead.
● A
void sudden manoeuvres and braking giv-
en that thi
s could cause an uncontrolled
movement of the open rear lid.
● When transporting objects that protrude
out of the lug
gage compartment, indicate
them suitably. Observe legal requirements.
● If objects must project out of the luggage
compar
tment, the rear lid must never be used
to “secure” or “attach” objects.
● If a baggage rack is fitted on the rear lid, it
should be r
emoved before travelling with the
rear lid open. WARNING
Toxic gases may enter the vehicle interior
when the re ar lid i
s open. This could cause
loss of consciousness, carbon monoxide poi-
soning, serious injury and accidents.
● To avoid toxic gases entering the vehicle al-
way
s drive with the rear lid closed.
● In exceptional circumstances, if you must
drive with the r
ear lid open, observe the fol- lowing to reduce the entry of toxic gases in-
side the
v
ehicle:
– Close all windows.
– Disable air recirculation mode.
– Open all of the air outlets on the instru-
ment panel.
– Switch on the blower to maximum. CAUTION
An open boot hatch changes the length and
height of the
vehicle. Driving a loaded vehicle
For the best handling when driving a loaded
v
ehic
l
e, note the following:
● Secure all objects ›››
page 115.
● Accelerate gently and carefully.
● Avoid sudden braking and manoeuvres.
● Brake early.
● If necessary, read the instructions for driv-
ing with a r
oof carrier system ››› page 127. WARNING
A sliding load could considerably affect the
st ab
ility and safety of the vehicle resulting in
an accident with serious consequences.
● Secure loads correctly so they do not move. » 115
Technical data
Advice
Operation
Emergencies
Safety
Page 118 of 232

Operation
●
When tran s
porting heavy objects, use suit-
able ropes or straps.
● Lock the seat backs in vertical position. Practical equipment
Introduction Storage compartments must only be used to
st
or
e light or small objects. WARNING
In the event of sudden braking movements or
turn s, loo
se objects may be thrown around
the vehicle interior. This could cause serious
injuries to passengers and cause the driver to
lose control of the vehicle.
● Do not transport animals or place hard,
heavy or sh
arp objects inside the vehicle in:
open storage compartments, dash panel, rear
shelf, items of clothing or bags.
● While driving, always keep object compart-
ments c
losed. WARNING
Objects falling into the driver's footwell could
prev ent
use of the pedals. This could lead the
driver to lose control of the vehicle, increas-
ing the risk of a serious accident. ●
Mak e s
ure the pedals can be used at all
times, with no objects rolling underneath
them.
● The floor mat should always be secured to
the floor.
● Never p
lace other mats or rugs on top of
the original
mat supplied by the factory.
● Make sure that no objects can fall into the
driver's f
ootwell while the vehicle is in mo-
tion. CAUTION
● Obj
ects on the shelf could chafe against
the wires of the heating element in the heat-
ed rear window and cause damage.
● Do not keep temperature-sensitive objects,
food or medicine
s inside the vehicle. Heat
and cold could damage them or render them
useless.
● Light-transparent objects placed inside the
vehicl
e, such as lenses, magnifying glasses
or transparent suction caps on the windows,
may concentrate the sun's rays and cause
damage to the vehicle. Note
The ventilating slits between the heated rear
windo w and the r
ear shelf must not be cov-
ered so that used air can escape from the ve-
hicle. Storage compartment on the driver
s
ide Fig. 121
On the driver side: storage compart-
ment There may be a storage compartment on the
driv
er s
ide.
116
Page 119 of 232

Transport and practical equipment
Compartment on the centre console Fig. 122
In the front part of the centre con-
so l
e: s
torage compartment The storage compartment
››
›
Fig. 122 may be
used as a drink holder ››› page 120 or as an
ashtray* ››› page 120 or to store small ob-
jects. Note
A 12 volt electrical socket ›››
page 121 can be
found in the storage compartment. Storage compartment with cover on
the p
a
s
senger side* Fig. 123
Storage compartment with cover on
the p a
s
senger side There may be a storage compartment with
c
o v
er on the passenger side. Opening and closing the storage compart-
ment co
ver
Pull the lever to open ››› Fig. 123 1 .
T o
clo
se, press the cover upwards until it
clicks into place.
Sunglasses storage compartment.
Sunglasses can be stored in the passenger
side storage compartment.
The sunglasses storage compartment is in
the upper area of the storage compartment 2 .
S up
por
ts
Next to the eyeglass storage compartment is
a notebook holder 3 and in the interior of
the s t
or
age compartment there is a pen hold-
er 4 , a map storage area and a coin tray
5 .
CAUTION
For structural reasons, some model versions
wi l
l have gaps behind the glove compartment
into which small objects may fall. This could
lead to strange noises and damage to the ve-
hicle. Therefore, do not store small objects in
the glove compartment, apart from those
stored in the spaces provided. 117
Technical data
Advice
Operation
Emergencies
Safety
Page 120 of 232
Operation
Bag support* Fig. 124
Storage on front passenger side:
f o
l
ding hook. On the opening lever of the glove compart-
ment
on the p
a
ssenger side there is a folding
hook ››› Fig. 124 for hanging small items of
luggage, e.g. bags, etc. CAUTION
● The max imum w
eight for the hook is 1.5
kg.
● With the hook folded forward, it automati-
cal
ly draws up when the compartment is
opened.
● We recommend removing hanging bags
from the hook bef
ore opening the glove com-
partment. Open storage compartment on the
p
a
s
senger side* Fig. 125
Open storage compartment on the
p a
s
senger side There may be an open storage compartment
on the p
a
s
senger side.
Support
In the open glove compartment there is a
hook for bags ››› Fig. 125 1 .Storage compartment in the back of
the c
entr
e c
onsole Fig. 126
In the back part of the centre con-
so l
e: s
torage compartment The drink holder at the back of the centre
c
on
so
le can be used as a storage compart-
ment.
118
 1
1 2
2 3
3 4
4 5
5 6
6 7
7 8
8 9
9 10
10 11
11 12
12 13
13 14
14 15
15 16
16 17
17 18
18 19
19 20
20 21
21 22
22 23
23 24
24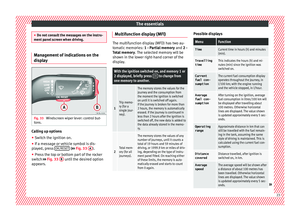 25
25 26
26 27
27 28
28 29
29 30
30 31
31 32
32 33
33 34
34 35
35 36
36 37
37 38
38 39
39 40
40 41
41 42
42 43
43 44
44 45
45 46
46 47
47 48
48 49
49 50
50 51
51 52
52 53
53 54
54 55
55 56
56 57
57 58
58 59
59 60
60 61
61 62
62 63
63 64
64 65
65 66
66 67
67 68
68 69
69 70
70 71
71 72
72 73
73 74
74 75
75 76
76 77
77 78
78 79
79 80
80 81
81 82
82 83
83 84
84 85
85 86
86 87
87 88
88 89
89 90
90 91
91 92
92 93
93 94
94 95
95 96
96 97
97 98
98 99
99 100
100 101
101 102
102 103
103 104
104 105
105 106
106 107
107 108
108 109
109 110
110 111
111 112
112 113
113 114
114 115
115 116
116 117
117 118
118 119
119 120
120 121
121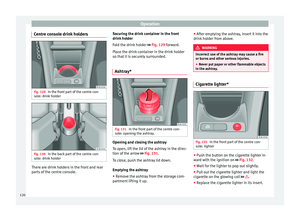 122
122 123
123 124
124 125
125 126
126 127
127 128
128 129
129 130
130 131
131 132
132 133
133 134
134 135
135 136
136 137
137 138
138 139
139 140
140 141
141 142
142 143
143 144
144 145
145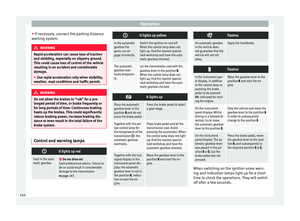 146
146 147
147 148
148 149
149 150
150 151
151 152
152 153
153 154
154 155
155 156
156 157
157 158
158 159
159 160
160 161
161 162
162 163
163 164
164 165
165 166
166 167
167 168
168 169
169 170
170 171
171 172
172 173
173 174
174 175
175 176
176 177
177 178
178 179
179 180
180 181
181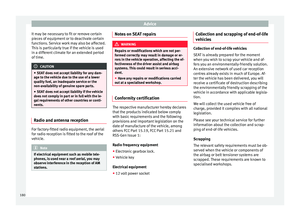 182
182 183
183 184
184 185
185 186
186 187
187 188
188 189
189 190
190 191
191 192
192 193
193 194
194 195
195 196
196 197
197 198
198 199
199 200
200 201
201 202
202 203
203 204
204 205
205 206
206 207
207 208
208 209
209 210
210 211
211 212
212 213
213 214
214 215
215 216
216 217
217 218
218 219
219 220
220 221
221 222
222 223
223 224
224 225
225 226
226 227
227 228
228 229
229 230
230 231
231