2016 Seat Leon 5D buttons
[x] Cancel search: buttonsPage 52 of 96

NavigationFunction button: function
Demo mode start (only when demo mode is active)
Map display
Fig. 34
Messages and function buttons on
the m ap di
s
play. Function buttons and messages on the map
di
s
p
lay.
To activate function buttons
and , press
function button .
Function button: function
To select automatic scaling. If the function
is active, the symbol is displayed in blue.
Current altitude indicator.
View map scale. Move your fingers togeth-
er/apart on the touchscreen to change the
scale.
Function button: function
To change the orientation of the map (north-
facing or direction of travel). This function is
only available in 2D mode.
To centre the vehicle position on the map.
To centre the destination on the map. This
function button is only displayed if either
Display destination on map
or Display route
on the map is selected ››› page 48.
Briefly zooms in on the map. After a few
seconds, it automatically returns to the last
selected scale.
Road signs
: Depending on the vehicle's equipment,
the road signs stored in the navigation data are dis-
played ››› page 52. Traffic reports and dynamic route
guid
anc
e (TRAFFIC) The Infotainment system constantly receives
tr
affic
r
eports (TMC/TMCpro) in the back-
ground, provided a TMC traffic news station
can be received at the current location. The
station being listened to does not have to be
the traffic news station.
TMC traffic reports are displayed on the map
with symbols ›››
page 51, Traffic reports on
map (selection) and are required for dynamic
route guidance ››› page 50, Dynamic route
guidance. List of available traffic reports
● Press the MENU infotainment button
› ›
›
Fig. 1 1 and then select
Tr
affic .
Dynamic route guidance
In order for dynamic route guidance to func-
tion, Dynamic route must be activated in
the route options ››› page 53.
If during route guidance a traffic report is re-
ceived that affects the route being travelled,
an alternative route will be searched for if the
Infotainment system calculates that time can
be saved.
If it calculates that time will not be saved us-
ing the alternative route, it will continue on
the route with the traffic congestion. An an-
nouncement will be made in each case.
Shortly before arriving at the announced con-
gested traffic, it will be announced once
again.
Avoiding congestion by following the instruc-
tions of a traffic report does not always save
time as the alternate roads may be at a
standstill. The quality of the dynamic route
guidance depends on the information con-
tained in the traffic reports.
The remainder of the route to be travelled
may be manually excluded to cause a new
route calculation ››› page 46.
50
Page 57 of 96
Navigation
streets or terrain. It does not detect streets,
b ui
l
dings or natural limits such as mountains
or rivers, although they may be shown on the
map.
Offroad* navigation is not suitable for driving
on conventional roads as it does not detect
one-way streets, motorway entries or similar.
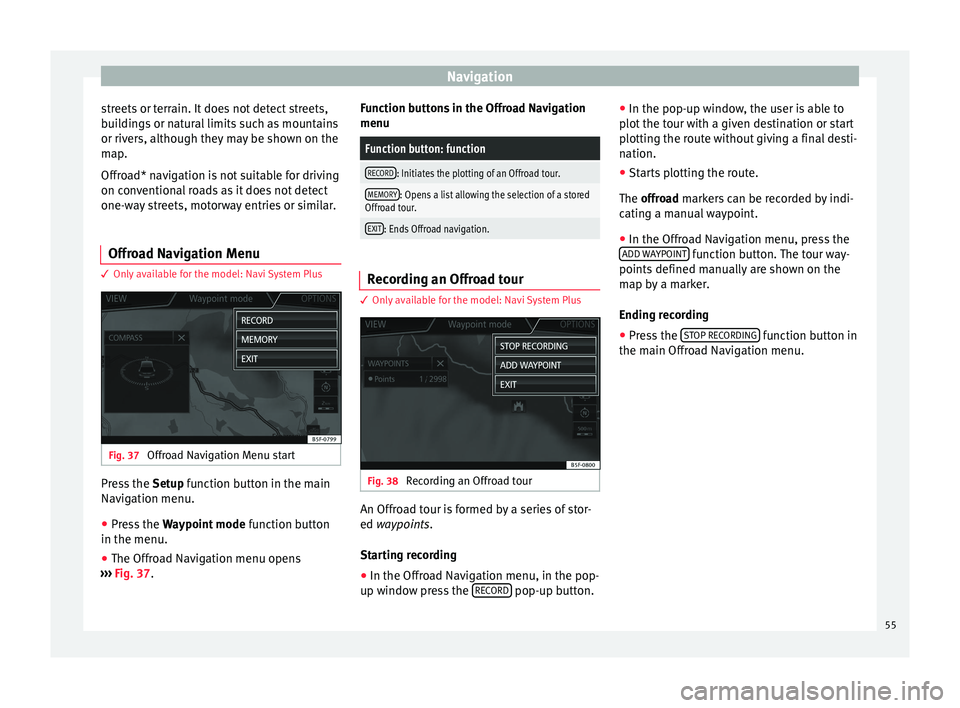
Offroad Navigation Menu 3 Only available for the model: Navi System Plus
Fig. 37
Offroad Navigation Menu start Press the
Setup
f
unction button in the main
Navigation menu.
● Press the Waypoint mode fu
nction button
in the menu.
● The Offroad Navigation menu opens
›››
Fig. 37. Function buttons in the Offroad Navigation
menu
Function button: function
RECORD: Initiates the plotting of an Offroad tour.
MEMORY: Opens a list allowing the selection of a stored
Offroad tour.
EXIT: Ends Offroad navigation. Recording an Offroad tour
3 Only
available for the model: Navi System Plus Fig. 38
Recording an Offroad tour An Offroad tour is formed by a series of stor-
ed wa
ypoin
t
s.
Starting recording
● In the Offroad Navigation menu, in the pop-
up windo w pr
ess the RECORD pop-up button.●
In the pop-up w indo
w
, the user is able to
plot the tour with a given destination or start
plotting the route without giving a final desti-
nation.
● Starts plotting the route.
The offroa
d markers can be recorded by indi-
cating a manual waypoint.
● In the Offroad Navigation menu, press the
ADD WA
YPOINT function button. The tour way-
points defined m
anual
ly are shown on the
map by a marker.
Ending recording
● Press the STOP RE
CORDING function button in
the m ain O
ffr
oad Navigation menu.
55
Page 62 of 96

CAR menu
Evaluation of efficient driving style
The effic iency
of
the driving style is reflected
by different elements on the display.
Display ››› Fig. 46: Meaning
1Different symbols are shown on the left of the col-
umns that report on the current driving style ››› ta-
ble on page 60 .
2
The white column is an indication of where the ef-
ficiency graph begins (from left to right).
It shows the position of the evaluation that is cur-
rently being performed.
3
Bars to represent acceleration.
The position of the car represents the acceleration.
If speed is constant, the car remains in the central
area. When accelerating or braking, the car moves
forward or backward respectively.
4
Columns to show driving style efficiency.
On the horizon, the columns represent the effi-
ciency of the driving style in a retrospective man-
ner and move from left to right every five seconds
or so. The higher the height of the columns, the
more efficient the driving style.
The colour of the sky represents the average of the
last three minutes. The colour changes from grey
(less efficient) to blue (more efficient).
Symbols ››› Fig. 47: Meaning
AForesight when driving. If sudden changes of ac-
celeration occur, driving style efficiency is re-
duced.
BGear-change indicator.
Symbols ››› Fig. 47: Meaning
CThe current vehicle speed is having a negative im-
pact on fuel consumption.
DEcological driving style. Vehicle status
Fig. 48
Standard representation: vehicle sta-
t u
s. Fig. 49
Standard representation: vehicle sta-
tu s. Press the
V
ehic
l
e status button to access infor-
m ation on the Vehicle status
me
s
sages
and Start-Stop System . The Vehicle sta-
tus messages are displayed ››› Fig. 48, in ad-
dition to being specified on the correspond-
ing button.
Depending on the parts affected by these
messages, they will be indicated in different
colours (depending on their significance) in
the vehicle display.
To access the Tyre Pressure Monitor-
ing System you must press the Previous or
Ne xt buttons.
Fr om thi
s
same menu, using the button
SET , the tyre pressures are stored.
Note
The values that appear in the figures
›› ›
Fig. 44, ››› Fig. 45, ››› Fig. 48 and ››› Fig. 4960
Page 67 of 96
Telephone management system (PHONE)
been accepted in the mobile phone. The du-
r ation of
the lo
ading process depends on the
amount of data stored on the mobile tele-
phone. After loading, the data will be availa-
ble on the Infotainment system.
Pairing and connection of mobile telephones
You can pair up to 20 mobile telephones to
the Infotainment system, but there can only
be two mobile phones simultaneously con-
nected as hands-free, and a third device as
BT audio at any time.
When the Infotainment system is switched
on, it automatically connects to the last con-
nected mobile telephone. If it is not possible
to connect to this mobile telephone, the tele-
phone management system will try to auto-
matically connect to the next mobile tele-
phone on the list of paired devices.
The maximum range of the Bluetooth ®
is ap-
proximate. 10 metres. The active Bluetooth ®
connection disconnects if this distance is ex-
ceeded. The connection is automatically re-
established as soon as the device is once
again within Bluetooth ®
range.
If the maximum number of paired devices is
reached and you wish to pair another one to
the system, it will automatically replace the
one least used recently. If you wish to replace
it with another one, the user must erase it be-
forehand. To do so: ●
Pres s the Setup button on the device while
in telephone mode.
● Press the function button Bluetooth setup .
● Activate the P
air
ed dev
ices function button.
● In the list of paired devices, press the function button next to the mobile telephone
t
o be del
et
ed and then press Delete to con-
firm the process. Note
● It m a
y be necessary to confirm the phone-
book data transfer request on the mobile tel-
ephone.
● Check that there are no requests pending
accept
ance in your mobile phone. If there are,
this could block some of the functions in the
PHONE menu. Description of the telephone
m
an
ag
ement system
Introduction Some functions and setup can only be per-
f
ormed when the
v
ehicle is stopped and are
not available on all mobile telephones.
With the help of the telephone manager, up
to 3 mobile telephones can be connected to
the Infotainment system via the Bluetooth
profiles (for example, one used as a Blue- tooth-audio player and/or another two as
hands-fr
ee telephones). Note
● Us in
g a mobile telephone inside the vehicle
may provoke noise in the speakers.
● Some networks may not recognise all lan-
guage ch
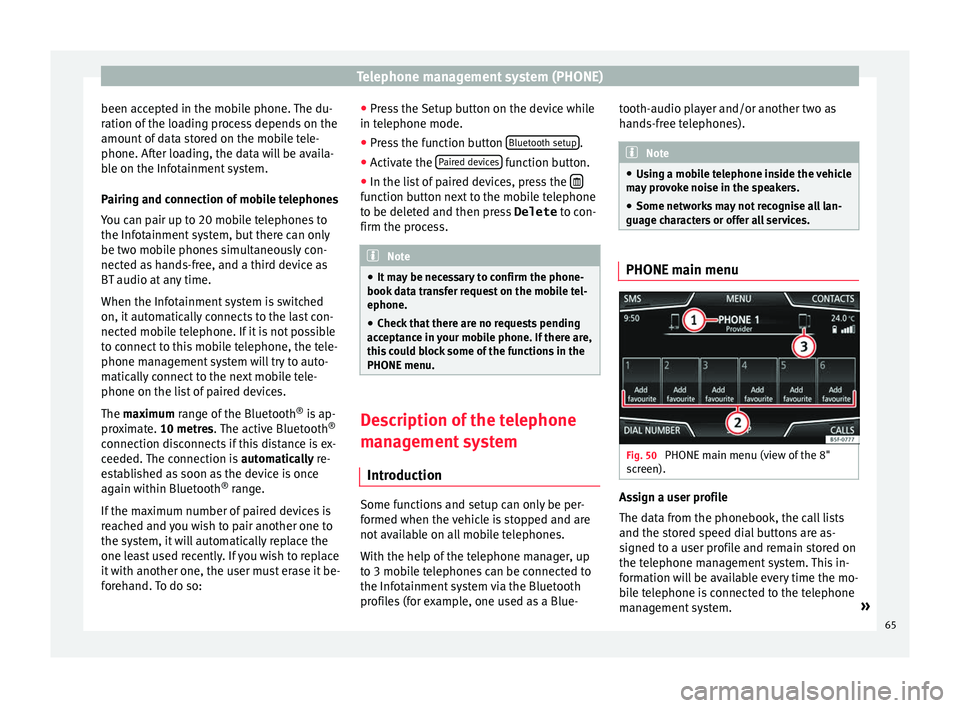
aracters or offer all services. PHONE main menu
Fig. 50
PHONE main menu (view of the 8"
s c
r
een). Assign a user profile
The d
at
a fr
om the phonebook, the call lists
and the stored speed dial buttons are as-
signed to a user profile and remain stored on
the telephone management system. This in-
formation will be available every time the mo-
bile telephone is connected to the telephone
management system. »
65
Page 68 of 96
Telephone management system (PHONE)
After the first connection, it will take a few
minut e
s
for the data from the phonebook of
the linked mobile phone to be available in
the Infotainment system. The next time that
the mobile telephone is connected (e.g. on
the next journey) the phonebook is updated
automatically.
If any entries in the mobile phonebook have
been modified while connected, a manual
update of the phonebook data can be initi-
ated from the User profile settings
menu ››› page 72.
Telephone management can store a maxi-
mum of 4 user profiles for mobile tele-
phones. If you wish to link/connect another
mobile phone, the oldest user profile will au-
tomatically be replaced.
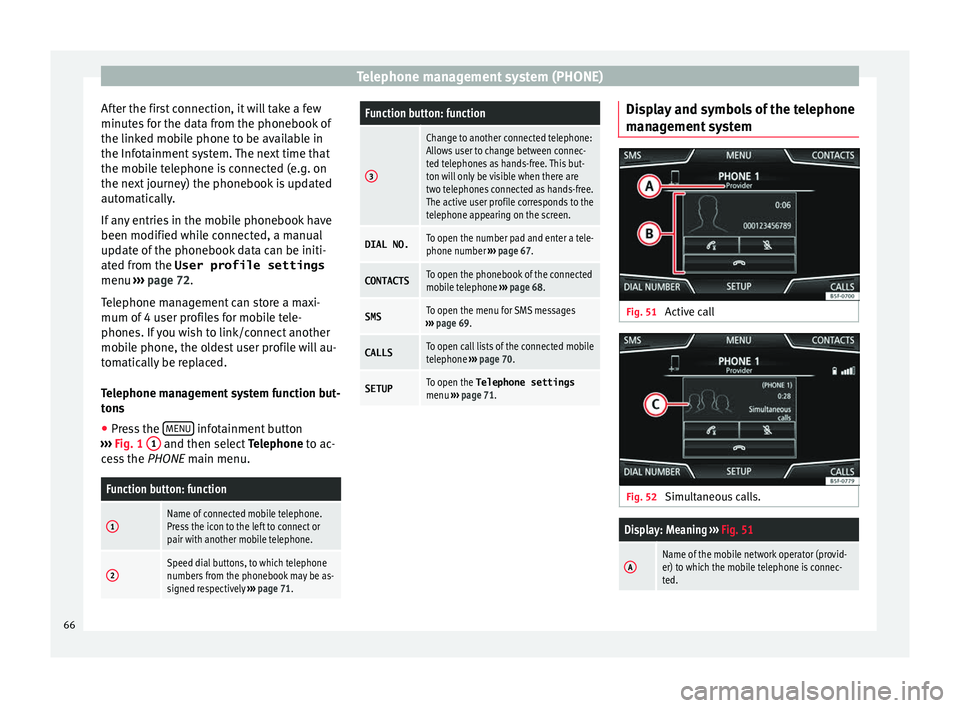
Telephone management system function but-
tons ● Press the MENU infotainment button
› ›
›
Fig. 1 1 and then select
Tel
ephone to ac-
cess the PHONE main menu.
Function button: function
1Name of connected mobile telephone.
Press the icon to the left to connect or
pair with another mobile telephone.
2Speed dial buttons, to which telephone
numbers from the phonebook may be as-
signed respectively ››› page 71.
Function button: function
3
Change to another connected telephone:
Allows user to change between connec-
ted telephones as hands-free. This but-
ton will only be visible when there are
two telephones connected as hands-free.
The active user profile corresponds to the
telephone appearing on the screen.
DIAL NO.To open the number pad and enter a tele-
phone number ››› page 67.
CONTACTSTo open the phonebook of the connected
mobile telephone ››› page 68.
SMSTo open the menu for SMS messages
››› page 69.
CALLSTo open call lists of the connected mobile
telephone ››› page 70.
SETUPTo open the Telephone settings
menu ››› page 71. Display and symbols of the telephone
m
an
ag
ement system Fig. 51
Active call Fig. 52
Simultaneous calls.
Display: Meaning ››› Fig. 51
AName of the mobile network operator (provid-
er) to which the mobile telephone is connec-
ted.66
Page 72 of 96
Telephone management system (PHONE)
allow SMS messages to be received, viewed
and sent b
y
the Infotainment system.
The proper operation of the functions men-
tioned above will depend on the compatibili-
ty of the connected mobile telephone.
Buttons on the Short messages (SMS) menu
● From the PHONE main menu, pre
ss the
SMS function button.
Function button: function
New text mes-
sageTo write and send a text message (in-
cludes the possibility of accessing
templates with predefined messag-
es).
InboxTo open the received text messages
folder.
OutboxTo open the outbox folder. This is
where any unsent text messages are
stored.
SentTo open the sent text messages fold-
er.
DraftsTo select a stored unsent message.
Send contact
detailsTo send the details of a contact from
the phonebook. Possible function buttons for the submenus
Function button: function
ReadIn order for the speech control
system to play the text message.
OptionsOpen the Options
menu.
Reply with tem-
plateTo select a text template from a
list.
Delete current
text messageDeletes the text message from
the Inbox.
Display tele-
phone numberDisplays the sender's telephone
number.
ForwardTo forward a text message.
ReplyTo reply to an incoming text mes-
sage.
Enter number
To enter a telephone number or to
select a recipient from the phone-
book.
Press the Recipients function but-
ton to select multiple recipients.
RecipientsTo select multiple recipients from
the phonebook.
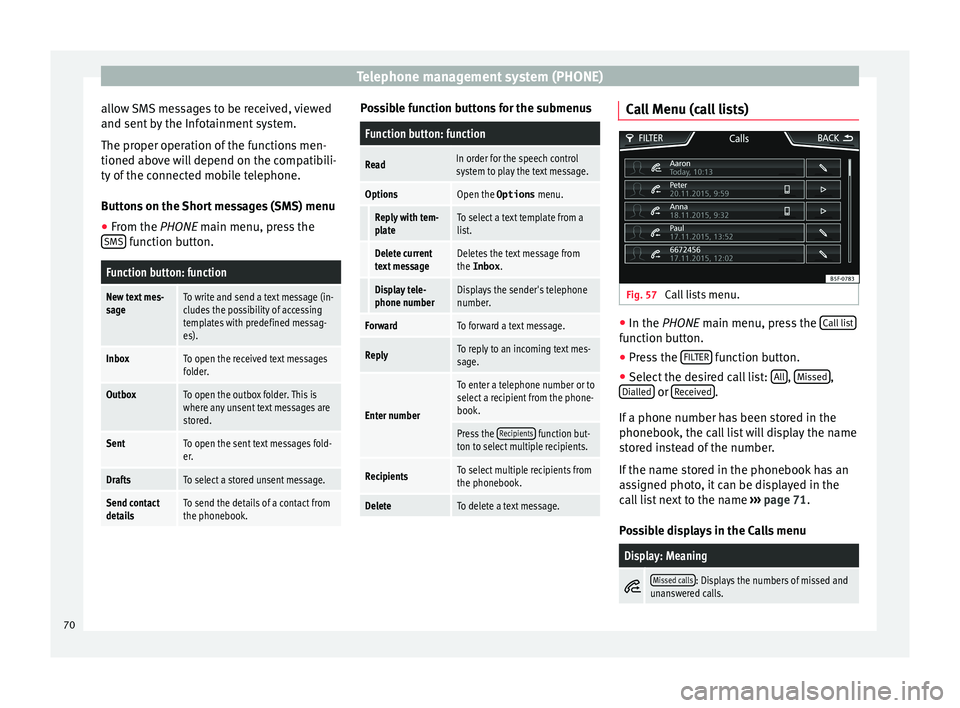
DeleteTo delete a text message. Call Menu (call lists)
Fig. 57
Call lists menu. ●
In the PHONE m ain menu, pr
e
ss the Call list function button.
● Press the FIL
TER function button.
● Select the desired call list: A
l
l ,
Mi
s
sed ,
Di al
l
ed or
R
ec
eiv ed .
If a phone number h
a
s been stored in the
phonebook, the call list will display the name
stored instead of the number.
If the name stored in the phonebook has an
assigned photo, it can be displayed in the
call list next to the name ››› page 71.
Possible displays in the Calls menu
Display: Meaning
Missed calls: Displays the numbers of missed and
unanswered calls. 70
Page 73 of 96
Telephone management system (PHONE)Display: Meaning
Dialled numbers: Indicates the numbers dialled on
the mobile telephone and on the Infotainment
system telephone management system.
Received calls: Indicates the numbers of the calls
received on the mobile telephone and on the Info-
tainment system telephone management system. Note
The availability of the call lists will depend on
the mob i
le phone used. Speed dial buttons
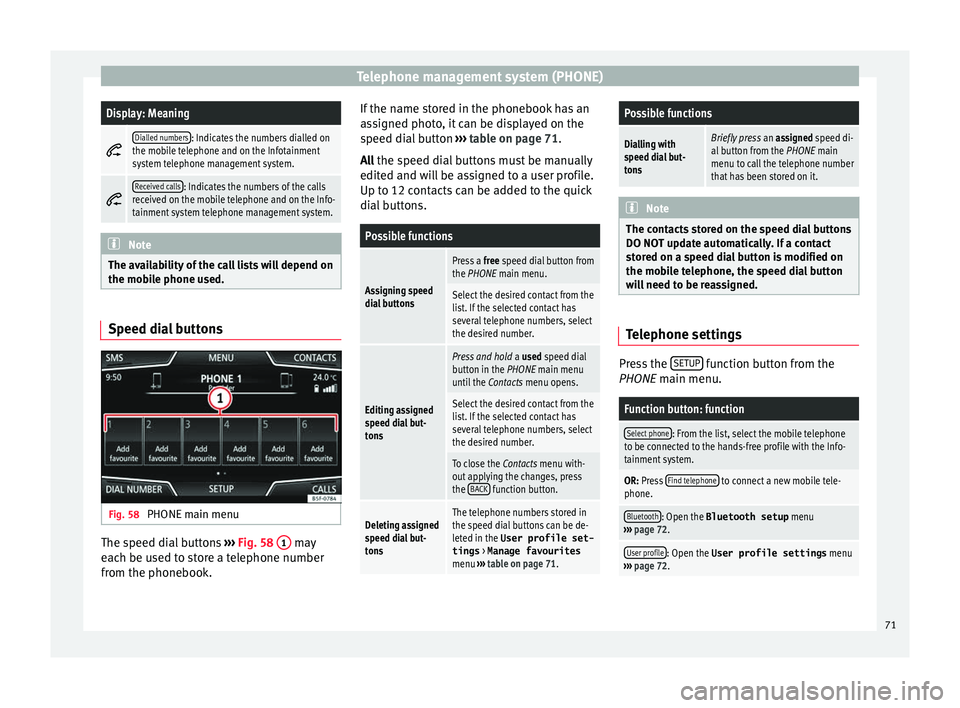
Fig. 58
PHONE main menu The speed dial buttons
››
›
Fig. 58 1 may
e ac
h be u
sed to store a telephone number
from the phonebook. If the name stored in the phonebook has an
ass
igned photo, it can be displayed on the
speed dial button ››› table on page 71.
All the speed dial buttons must be manually
edited and will be assigned to a user profile.
Up to 12 contacts can be added to the quick
dial buttons.
Possible functions
Assigning speed
dial buttons
Press a free speed dial button from
the PHONE main menu.
Select the desired contact from the
list. If the selected contact has
several telephone numbers, select
the desired number.
Editing assigned
speed dial but-
tons
Press and hold a used speed dial
button in the PHONE main menu
until the Contacts menu opens.
Select the desired contact from the
list. If the selected contact has
several telephone numbers, select
the desired number.
To close the Contacts menu with-
out applying the changes, press
the BACK
function button.
Deleting assigned
speed dial but-
tonsThe telephone numbers stored in
the speed dial buttons can be de-
leted in the User profile set-
tings
> Manage favourites
menu ››› table on page 71.
Possible functions
Dialling with
speed dial but-
tonsBriefly press an assigned speed di-
al button from the PHONE main
menu to call the telephone number
that has been stored on it. Note
The contacts stored on the speed dial buttons
DO NOT upd at
e automatically. If a contact
stored on a speed dial button is modified on
the mobile telephone, the speed dial button
will need to be reassigned. Telephone settings
Press the
S
ETUP function button from the
PHONE m ain menu.
Function button: function
Select phone: From the list, select the mobile telephone
to be connected to the hands-free profile with the Info-
tainment system.
OR: Press Find telephone to connect a new mobile tele-
phone.
Bluetooth: Open the Bluetooth setup menu
››› page 72.
User profile: Open the User profile settings menu
››› page 72. 71
Page 74 of 96
Telephone management system (PHONE)
Bluetooth ®
settin g
s In the PHONE main menu, pr
e ss the SETUP function button and then the
Bluetooth func-
tion butt on.
Function button: function
Bluetooth: Press to deactivate Bluetooth
®
. Disconnects
all active connections.
Visibility: Activation and deactivation of Bluetooth ®
visi-
bility.
Visible: Bluetooth ®
visibility is active.
Hidden: Bluetooth ®
visibility is deactivated. Blue-
tooth ®
visibility must be active for the external
pairing of a Bluetooth ®
device with the Infotain-
ment system. If you have a Bluetooth audio device
active and playing, the visibility is automatically
set to Hidden .
Name: Viewing and changing the name the Bluetooth ®
of the Infotainment system. This will be the name dis-
played to other Bluetooth ®
devices.
Paired devices: Displays paired devices. To disconnect
and connect Bluetooth ®
devices and Bluetooth ®
pro-
files.
Find devices: Search for visible Bluetooth ®
devices within
the range of the Infotainment system. The maximum
range is approx. 10 metres.
Bluetooth audio (A2DP/AVRCP): This function must be ac-
tive if it is necessary to connect an external audio source
via Bluetooth ®
to the Infotainment system. ››› page 34. User profile settings
In the PHONE main menu, pr
e
ss the SETUP function button and then the
User pr
ofi le func-
tion butt on.
Function button: function
Manage favourites: Editing speed dial buttons.
Speed dial button in use : Press to delete the stored
number.
Speed dial button free : Press to assign a number
from the phonebook to the speed dial button in
question.
Mailbox number: To enter or edit the voicemail number.
Sort by: To set the order of appearance of the entries in
the phonebook ( Forename and surname or vice-versa).
Import contacts: Press to import the phonebook of the
connected telephone, or to update the imported phone-
book.
Reminder: remember your mobile phone: If there is already
an active Bluetooth ®
connection with another mobile
telephone when turning off the ignition, the following
message appears: “Remember your mobile
phone ”.
Show pictures for contactsa)
: If phonebook contacts have
been stored with a photograph, it can be displayed on
the speed dial buttons, on the call lists and in the pho-
nebook.
a) Depending on the mobile phone. Note
Some telephones need to be restarted to re-
down lo
ad the most recent contacts added. Connectivity Box*
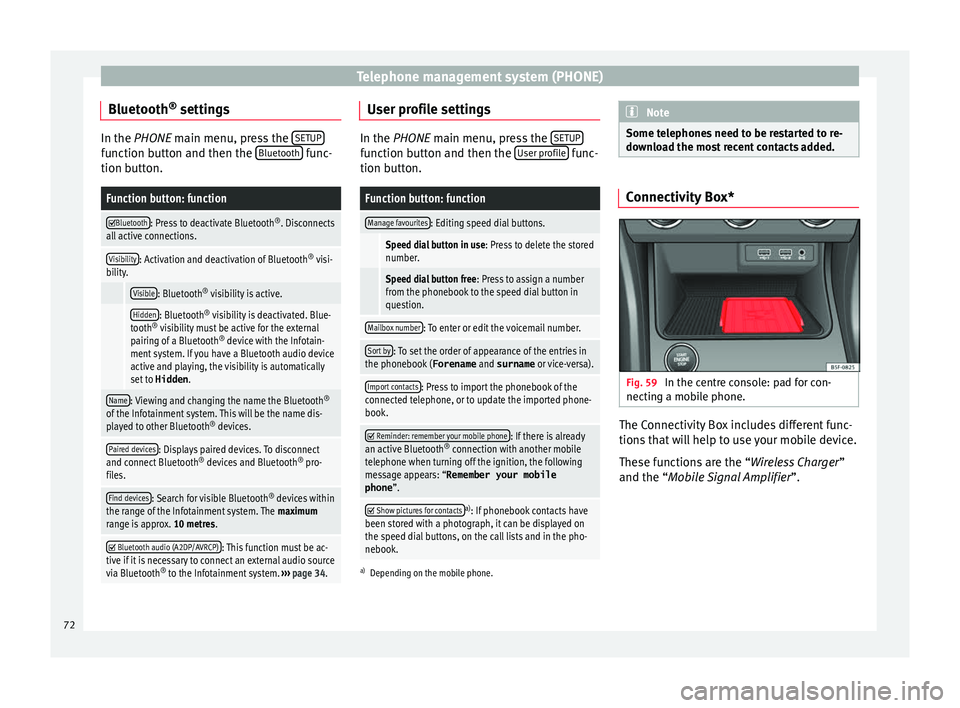
Fig. 59
In the centre console: pad for con-
nectin g a mo
b
ile phone. The Connectivity Box includes different func-
tion
s
th
at will help to use your mobile device.
These functions are the “Wireless Charger ”
and the “Mobile Signal Amplifier”.
72