Page 98 of 216

2.6
Parking the vehicle
When the vehicle is at a standstill,
place the lever in position P: the drive
wheels are mechanically locked by the
transmission.
Apply the handbrake.
GEAR CONTROL (2/2)/HANDBRAKE
Operating fault
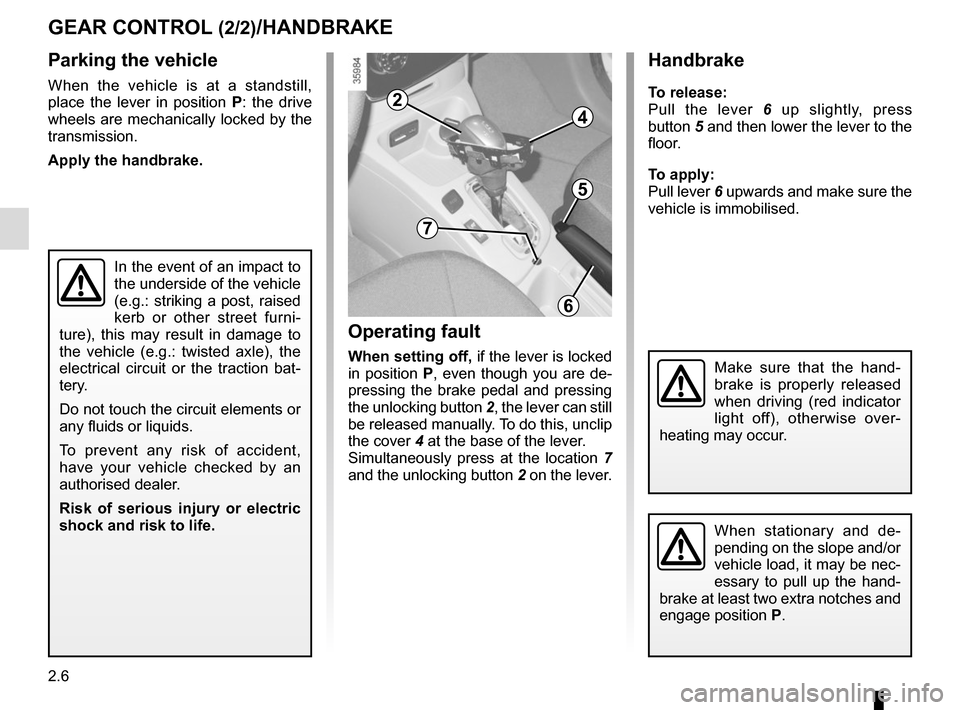
When setting off, if the lever is locked
in position P, even though you are de-
pressing the brake pedal and pressing
the unlocking button 2, the lever can still
be released manually. To do this, unclip
the cover 4 at the base of the lever.
Simultaneously press at the location 7
and the unlocking button 2 on the lever.
In the event of an impact to
the underside of the vehicle
(e.g.: striking a post, raised
kerb or other street furni-
ture), this may result in damage to
the vehicle (e.g.: twisted axle), the
electrical circuit or the traction bat-
tery.
Do not touch the circuit elements or
any fluids or liquids.
To prevent any risk of accident,
have your vehicle checked by an
authorised dealer.
Risk of serious injury or electric
shock and risk to life.
Handbrake
To release:
Pull the lever 6 up slightly, press
button 5 and then lower the lever to the
floor.
To apply:
Pull lever 6 upwards and make sure the
vehicle is immobilised.
When stationary and de-
pending on the slope and/or
vehicle load, it may be nec-
essary to pull up the hand-
brake at least two extra notches and
engage position P.
Make sure that the hand-
brake is properly released
when driving (red indicator
light off), otherwise over-
heating may occur.
6
7
5
4
2
Page 101 of 216

2.9
ECO mode
ECO mode is a function which opti-
mises vehicle range. It acts on all ele-
ments which consume energy (engine
power, heating and/or air conditioning,
etc).
Activating the function
Press switch 3.
The warning light 5
is displayed
on the instrument panel and the lower
part of the instrument panel 4 goes
green. Disabling the function
Press switch 3.
The warning light
5
goes off on
the instrument panel and the lower part
of the instrument panel 4 goes blue.
The cruise control switches to
standby each time the ECO mode
is activated or deactivated. Please
refer to the information on “Cruise
control/speed limiter: cruise control
function” in Section 2.
DRIVING ADVICE, ECO-DRIVING (3/3)
3
54
While driving, it is possible to leave the
ECO mode temporarily in order to im-
prove engine performance.
To do this, press the accelerator pedal
firmly and fully.
ECO mode is reactivated when you
take pressure off the accelerator pedal.
With ECO mode activated, the vehi-
cle speed is limited to approximately
56 mph (90 km/h).
Page 102 of 216

2.10
VEHICLE RANGE: recommendations (1/2)
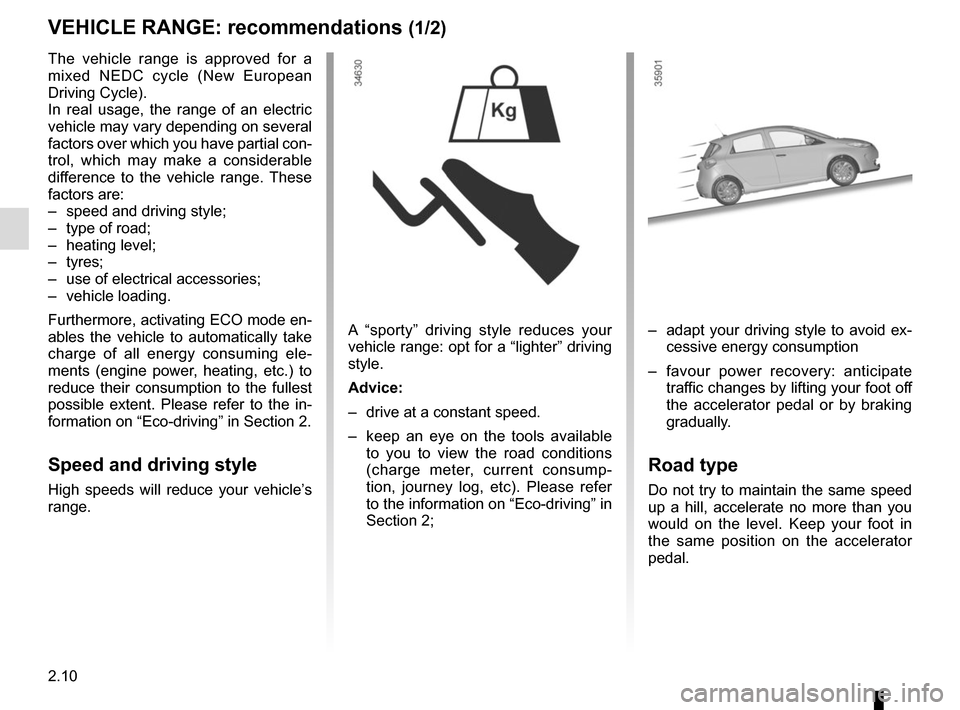
A “sporty” driving style reduces your
vehicle range: opt for a “lighter” driving
style.
Advice:
– drive at a constant speed.
– keep an eye on the tools available to you to view the road conditions
(charge meter, current consump-
tion, journey log, etc). Please refer
to the information on “Eco-driving” in
Section 2;– adapt your driving style to avoid ex- cessive energy consumption
– favour power recovery: anticipate traffic changes by lifting your foot off
the accelerator pedal or by braking
gradually.
Road type
Do not try to maintain the same speed
up a hill, accelerate no more than you
would on the level. Keep your foot in
the same position on the accelerator
pedal.
The vehicle range is approved for a
mixed NEDC cycle (New European
Driving Cycle).
In real usage, the range of an electric
vehicle may vary depending on several
factors over which you have partial con-
trol, which may make a considerable
difference to the vehicle range. These
factors are:
– speed and driving style;
– type of road;
– heating level;
– tyres;
– use of electrical accessories;
– vehicle loading.
Furthermore, activating ECO mode en-
ables the vehicle to automatically take
charge of all energy consuming ele-
ments (engine power, heating, etc.) to
reduce their consumption to the fullest
possible extent. Please refer to the in-
formation on “Eco-driving” in Section 2.
Speed and driving style
High speeds will reduce your vehicle’s
range.
Page 103 of 216
2.11
VEHICLE RANGE: recommendations (2/2)
Heating levels
The use of heating or air-conditioning
reduces vehicle range.
To maintain your vehicle range, you are
recommended to favour:
– before using the vehicle, the “pro-gramming” mode (please refer to the
information in “Air-conditioning: pro-
gramming” in Section 3).
– while driving, the ECO mode (please see information about “ECO driving”
in Section 2).
Tyres
An under-inflated tyre increases energy
consumption. Comply with the speci-
fied tyre pressures for your vehicle.
When driving, use tyres made by the
same manufacturer, with the same di-
mensions, type and structure as the
original tyres. The use of non-regula-
tion tyres significantly reduces vehicle
range.
Please see the information on “Tyre
pressure” in Section 4.
Vehicle loading
Avoid pointlessly overloading your ve-
hicle.
Page 124 of 216
3.2
AIR VENTS: air outlets (1/2)
1 side air vent.
2 side window demister outlet.
3 centre air vents.
4 windscreen demisting vents.5 passenger footwell heater outlets.
6 control panel.
123421
565
Page 126 of 216

3.4
AUTOMATIC AIR-CONDITIONING (1/4)
The system controls the fan speed, air
distribution, air recirculation,starting
and stopping the air conditioning, the
heating and air temperature.
AUTO: allows the selected comfort
level to be best attained, depending on
the exterior conditions. Press button 1.
Adjusting the air temperatureTurn control 2 to obtain the desired
temperature. The further the pointer is
away from the heating stop position,
the higher the temperature will be.
If the outdoor temperature is too high,
the heating decreases automatically.
This limits energy consumption and
maintains the range of the vehicle.
Special note: the highest and lowest
settings allow the system to produce
maximum hot or cold temperature
levels (“ LOW” and “HIGH" indicated on
the multimedia display).
8 Air recirculation.
9
De-icing/demisting of the rear screen
and, depending on the vehicle, the
door mirrors.
Heating or air-conditioning can only be
used while the engine is running.
Automatic mode
The automatic climate control system
guarantees comfort in the passen-
ger compartment and good visibility
(except in the event of extreme condi-
tions), while optimising consumption.
The controls
1 Automatic mode.
2 Air temperature adjuster.
3 “Clear View” function.
4 Passenger compartment air distribu- tion adjustment.
5 Air-conditioning deactivation control.
6 Adjusting the fan speed until the
system switches off.
7 Depending on the vehicle, quick access control to the “Air condition-
ing programming” menu or activa-
tion control for air conditioning pro-
gramming.
3456
897
12
Some buttons have an operating
tell-tale which indicates the operat-
ing status.
Page 127 of 216

3.5
3
Deactivating the air-
conditioning
The button 5 stops (warning light on)
the operation of the air-conditioning.
To activate the air-conditioning, press
the button 1 . The integrated warning
light in the button 5 will go out.
The air conditioning system is used
for:
– lowering the temperature inside the passenger compartment;
– eliminating condensation more quickly.
The air conditioning does not operate
when the exterior temperature is low.
5
AUTOMATIC AIR-CONDITIONING (2/4)
The displayed temperature values
show a comfort level.
When starting the engine, increas-
ing or decreasing the value dis-
played will not allow the com-
fort level to be reached any more
quickly. The system will always op-
timise the temperature increase or
decrease (the ventilation system
does not start instantly at maximum
speed: it gradually increases). This
may take several minutes.
Generally speaking, unless there is
a particular reason not to, the dash-
board air vents should remain open.
Preferably, use automatic mode.
In automatic mode (the button’s
warning light 1 is lit), all heating and
air-conditioning functions are con-
trolled by the system.
You can always modify the choice
of system; in this case, the warning
light in the button 1 goes out.
Advice: to optimize vehicle range, de-
activate the air conditioning when the
outside temperature is comfortable.
Clear View function
Press button 3 – the integrated indica-
tor light comes on.
This system quickly demists and de-
ices the windscreen and the front side
windows. It requires the automatic
usage of the air-conditioning or the
heating.
To exit this function, press the button
marked 3.
61
Page 177 of 216
5.13
Fuse box
If any electrical component does not
work, check the condition of the fuses.
Unclip the access flap A.
Tweezers 1
Remove the fuse using tweezers 1, lo-
cated at the back of flap A.
To remove the fuse from the tweezers,
slide the fuse to the side.
It is not advisable to use the free fuse
locations.
Check the fuse in question
and replace it, if neces-
sary, by a fuse of the same
rating.
If a fuse is fitted where the rating is
too high, it may cause the electrical
circuit to overheat (risk of fire) in the
event of an item of equipment using
an excessive amount of current.
FUSES (1/2)
1
A
In accordance with local legislation
or as a precautionary measure:
Obtain an emergency kit containing
a set of spare bulbs and fuses from
an approved Dealer.