2016 RENAULT TALISMAN change
[x] Cancel search: changePage 171 of 328
2.63
ADAPTIVE CRUISE CONTROL (5/7)
Putting the cruise control
on standby or switching it
off does not cause a rapid
reduction in speed: you
must brake by depressing the brake
pedal.
Please note that you are
strongly advised to keep
your feet close to the pedals
in order to react in an emer-
gency.
Note: if the speed previously stored is
much higher than the current speed,
the vehicle will accelerate to reach this
threshold.
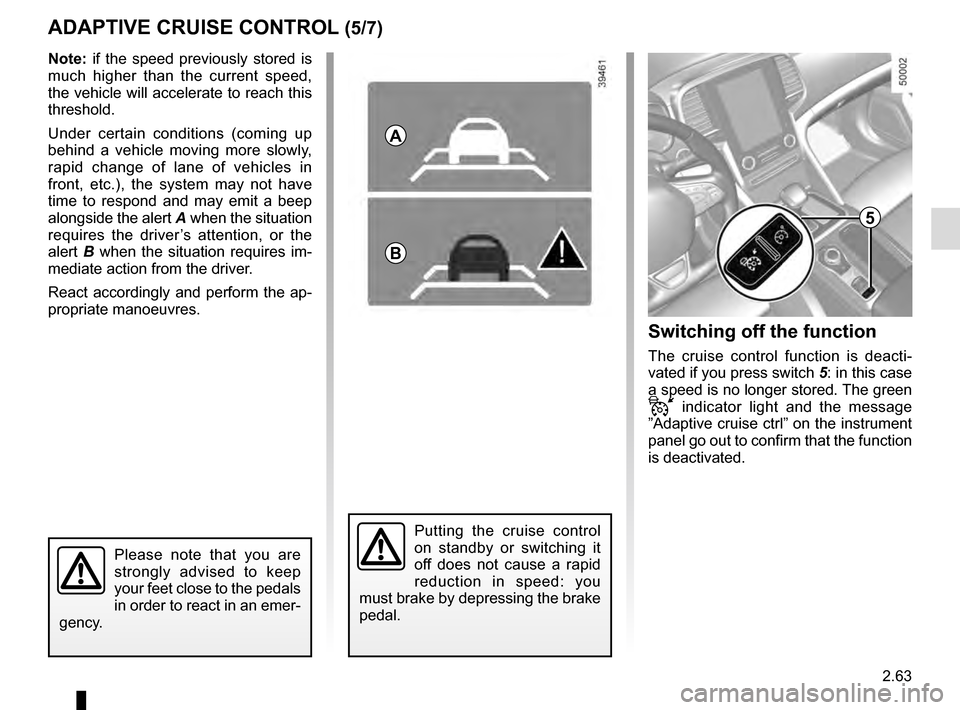
Under certain conditions (coming up
behind a vehicle moving more slowly,
rapid change of lane of vehicles in
front, etc.), the system may not have
time to respond and may emit a beep
alongside the alert A when the situation
requires the driver’s attention, or the
alert B when the situation requires im-
mediate action from the driver.
React accordingly and perform the ap-
propriate manoeuvres.
A
B
5
Switching off the function
The cruise control function is deacti-
vated if you press switch 5: in this case
a speed is no longer stored. The green
indicator light and the message
”Adaptive cruise ctrl” on the instrument
panel go out to confirm that the function
is deactivated.
Page 172 of 328
2.64
ADAPTIVE CRUISE CONTROL (6/7)
This function is an additional driving aid. However, this function is not under any circumstances intended to replace the
due care and attention of the driver, who should at all times be in control of the vehicle.
The driver should always adapt their speed to the traffic conditions, regardless of the system indications.
The system should under no circumstances be taken to be an obstacle dete\
ctor or an anti-collision system.
System servicing/repairs
– In the event of an impact, the sensor alignment may become changed, and \
its operation will consequently be affected. Deactivate the function, then consult an authorised dealer.
– Any work in the area where the radar is located (repairs, replacements,\
touching up of paintwork) must be carried out by a qualified professional.
System disturbance
In a complex environment (metal bridge, etc.), the system may be affected.
Risk of inadvertent braking.
Page 173 of 328
2.65
ADAPTIVE CRUISE CONTROL (7/7)
Limitation of the system operation
– A vehicle travelling in the opposite direction will not trigger any alert\
or any action on the system operation.
– The sensor area should be kept clean and free of any modifications in or\
der to ensure the proper operation of the
system.
– Fixed obstacles (vehicles at a standstill, traffic jams, toll booths, etc.) or objects travelling at low speed or of a\
small size
(motorbikes, bicycles, pedestrians, etc.) may not be detected by the s\
ystem.
– A vehicle entering the same lane will only be detected once it has entere\
d the detection zone. Sudden or late braking may then take place.
– When entering a bend or curve, the sensor may temporarily no longer dete\
ct the vehicle in front, and this may lead to ac- celeration.
– When exiting a curve, the detection of the vehicle in front may be affected or delayed. Sudden or late braking may then take place.
– A slower vehicle travelling in an adjacent lane may be detected and cause\
a slowing down if one of the two vehicles is trav- elling too close to the lane of the other.
– The system is deactivated below around 20 mph (40 km/h). Drivers must \
react accordingly.
– Sudden changes in situation are not instantly taken into account by the \
system. Drivers must remain vigilant at all times and
under all circumstances.
Deactivating the function
The function should be deactivated if:
– the brake lights are not functioning;
– the front of the vehicle has undergone an impact or been damaged;
– the vehicle is being towed (breakdowns);
– traffic is heavy;
– the vehicle is travelling in a tunnel;
– the vehicle is travelling on a windy road;
– the vehicle is travelling on a slippery road or in poor weather conditio\
ns (fog, snow, rain, side winds etc.).
If the driver notices abnormal system behaviour, please consult an authorised dealer.
Page 176 of 328

2.68
An impact to the under-
side of the vehicle while
manoeuvring (e.g.: strik-
ing a post, raised kerb or
other street furniture) may result in
damage to the vehicle (e.g.: defor-
mation of an axle).
To avoid any risk of accident, have
your vehicle checked by an ap-
proved Dealer.
Detection of obstacles to the side
Depending on the direction of the
wheels, the system determines the tra-
jectory of the vehicle and notifies the
driver of any risk or otherwise of a col-
lision with an obstacle 3 to the side of
the vehicle.
PARKING DISTANCE CONTROL (3/5)
If a side obstacle is detected:
– the beeps become faster and then sound continuously as the obstacle
gets nearer. Green, orange and red
zones will be displayed on the dis-
play D;
– if there is no risk of collision, no beep will sound when approaching the ob-
stacle. Green, orange and red zones
will be displayed interspersed on the
display D.
Note: in the event of a change in tra-
jectory during a manoeuvre, the risk of
collision with an obstacles may be sig-
nalled late.
3
D
Page 177 of 328

2.69
– press the switch 5 OK;
– using the control 6, select the set-
tings to be changed;
– press the switch 5 OK.
PARKING DISTANCE CONTROL (4/5)
When the vehicle is being driven
at a speed below approximately
6.2 mph (10 km/h), certain noises
(motorcycle, lorry, pneumatic drill
etc.) may trigger the beeping sound
of the parking distance control.
4
System sound
Enables the system sound to be se-
lected from a choice of 3.
Deactivating the system sound
Activate or deactivate the parking dis-
tance control sound.
Note: If you deactivate the sound, you
will no longer be notified with beeps
when approaching an obstacle.
Deactivating the system
Activate or deactivate parking distance
control.
Vehicles not fitted with a navigation
system
Vehicle stationary:
– press and hold the switch 5 OK to
access the settings menu;
– repeatedly press the control 6 up or
down until you reach the “Driving as-
sistance” menu;
– press the switch 5 OK;
– repeatedly press the control 6 up or
down until you reach the “Parking
distance control settings” menu;
Adjustment
You can adjust certain settings from the
multifunction screen 4. Please see the
equipment instructions for further infor-
mation.
Vehicles fitted with a navigation
system
Select “Vehicle”, “PARKING ASSIST”,
“Obstacle detection”.
Parking distance control audio
volume
Adjust the volume of the parking dis-
tance control by pressing + or -.
5
6
Page 187 of 328
2.79
AUTOMATIC GEARBOX (1/3)
2
Operation
With the selection lever 1 in position P,
switch on the ignition.
To move out of position P, you must de-
press the brake pedal before pressing
the unlocking button 2.
With your foot on the brake pedal
(warning light
c on the display goes
out), move the lever out of position P.
Only engage D or R when the vehi-
cle is stopped, with your foot on the
brake and the accelerator pedal re-
leased.
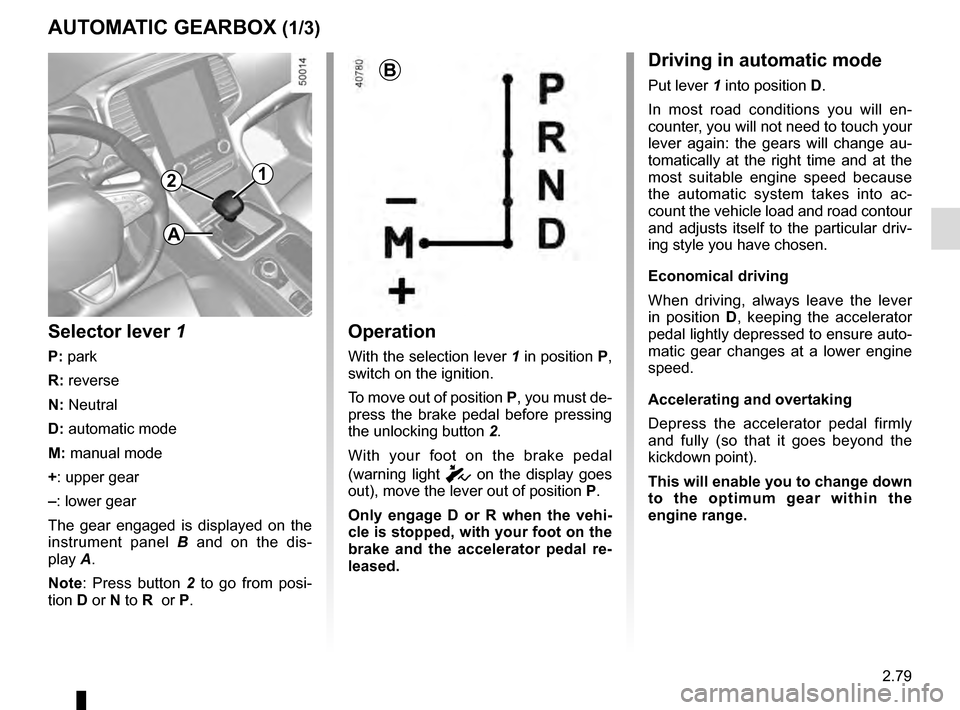
1
B
Selector lever 1
P: park
R: reverse
N: Neutral
D: automatic mode
M: manual mode
+: upper gear
–: lower gear
The gear engaged is displayed on the
instrument panel B and on the dis-
play A.
Note: Press button 2 to go from posi-
tion D or N to R or P.
Driving in automatic mode
Put lever 1 into position D.
In most road conditions you will en-
counter, you will not need to touch your
lever again: the gears will change au-
tomatically at the right time and at the
most suitable engine speed because
the automatic system takes into ac-
count the vehicle load and road contour
and adjusts itself to the particular driv-
ing style you have chosen.
Economical driving
When driving, always leave the lever
in position D, keeping the accelerator
pedal lightly depressed to ensure auto-
matic gear changes at a lower engine
speed.
Accelerating and overtaking
Depress the accelerator pedal firmly
and fully (so that it goes beyond the
kickdown point).
This will enable you to change down
to the optimum gear within the
engine range.
A
Page 188 of 328

2.80
The gear selected is displayed on the
instrument panel.
Special casesIn certain driving conditions (result-
ing in, for example, engine protection,
operation of the Electronic Stability
Control programme: ESC, etc.) the au-
tomated system may change the gear
automatically.
Likewise, to prevent incorrect manoeu-
vres, a gear change may be refused by
the automatic system: in this case the
gear display flashes for a few seconds
as a warning.
AUTOMATIC GEARBOX (2/3)
Driving in manual mode
Move the selector lever 1 to position D,
then move the lever to the left into po-
sition M.
Shifting the lever repeatedly allows you
to change gears manually:
– to move down through the gears, push the lever forwards;
– to move up through the gears, push the lever backwards.
1
When facing uphill, to remain
stopped, do not keep your foot on
the accelerator.
Risk of overheating the automatic
gearbox.
Check that warning light P
on the instrument panel and
the warning light integrated
on the button 2 are acti-
vated before leaving the vehicle.
Risk of loss of immobilisation of the
vehicle
2
Special circumstances
– If the bends and road surface do
not allow you to stay in automatic
mode (e.g. in the mountains), we
recommend that you change to
manual mode. This will prevent the
automatic gearbox from changing
gear repeatedly when climbing, and
permit engine braking on long de-
scents.
– In cold weather , start the engine
and wait a few seconds before
moving the selector lever from posi-
tion P or N and engaging it in D or R
to prevent the engine stalling.
Page 192 of 328
3.2
MULTI-SENSE (1/2)
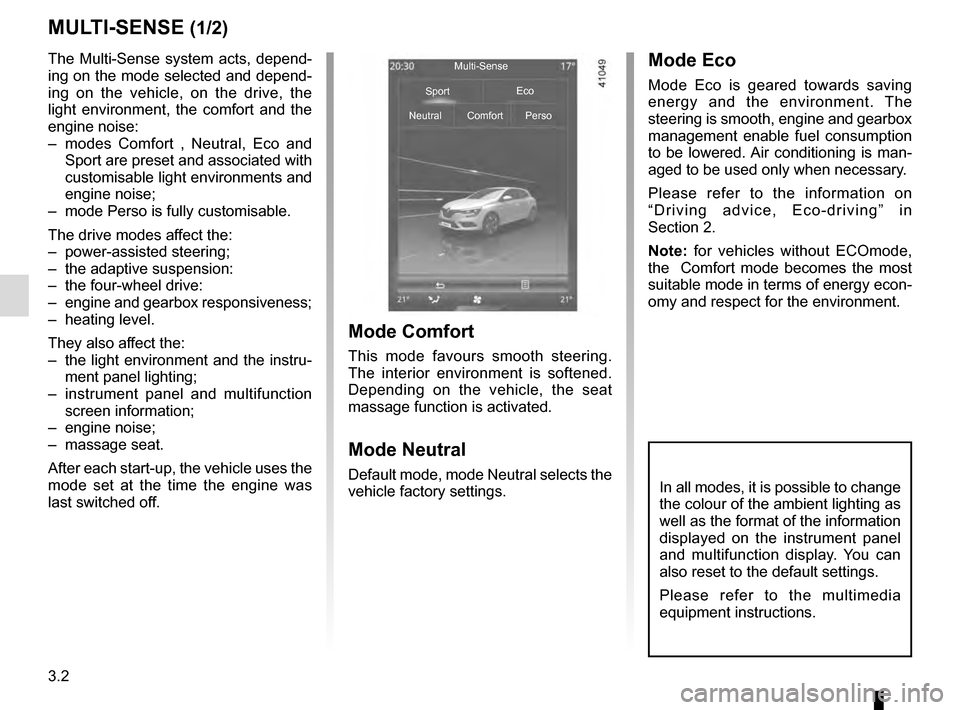
The Multi-Sense system acts, depend-
ing on the mode selected and depend-
ing on the vehicle, on the drive, the
light environment, the comfort and the
engine noise:
– modes Comfort , Neutral, Eco and Sport are preset and associated with
customisable light environments and
engine noise;
– mode Perso is fully customisable.
The drive modes affect the:
– power-assisted steering;
– the adaptive suspension:
– the four-wheel drive:
– engine and gearbox responsiveness;
– heating level.
They also affect the:
– the light environment and the instru- ment panel lighting;
– instrument panel and multifunction screen information;
– engine noise;
– massage seat.
After each start-up, the vehicle uses the
mode set at the time the engine was
last switched off.
Mode Comfort
This mode favours smooth steering.
The interior environment is softened.
Depending on the vehicle, the seat
massage function is activated.
Mode Neutral
Default mode, mode Neutral selects the
vehicle factory settings.
Mode Eco
Mode Eco is geared towards saving
energy and the environment. The
steering is smooth, engine and gearbox
management enable fuel consumption
to be lowered. Air conditioning is man-
aged to be used only when necessary.
Please refer to the information on
“Driving advice, Eco-driving” in
Section 2.
Note: for vehicles without ECOmode,
the Comfort mode becomes the most
suitable mode in terms of energy econ-
omy and respect for the environment.
Multi-Sense
Sport Eco
Neutral Comfort Perso
In all modes, it is possible to change
the colour of the ambient lighting as
well as the format of the information
displayed on the instrument panel
and multifunction display. You can
also reset to the default settings.
Please refer to the multimedia
equipment instructions.