Page 54 of 270

1.48
CHILD SAFETY: deactivating/activating the front passenger airbag (3/3)
1
Operating faults
It is not permitted to fit a rear-facing
child seat to the front passenger seat
if the air bag activation/deactivation
system is faulty.
It is not recommended to allow any
other passenger to sit in that seat if the
two warning lights
› and ¹
are lit at the same time.
Contact your approved dealer as soon
as possible.
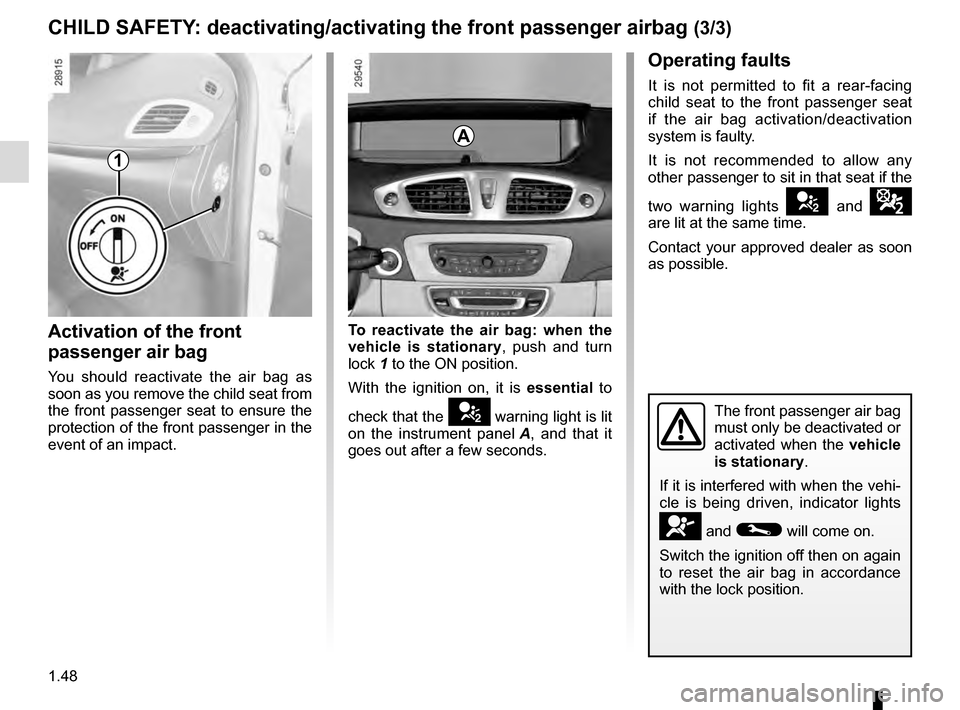
Activation of the front
passenger air bag
You should reactivate the air bag as
soon as you remove the child seat from
the front passenger seat to ensure the
protection of the front passenger in the
event of an impact. To reactivate the air bag: when the
vehicle is stationary, push and turn
lock 1 to the ON position.
With the ignition on, it is
essential to
check that the
› warning light is lit
on the instrument panel A, and that it
goes out after a few seconds.The front passenger air bag
must only be deactivated or
activated when the vehicle
is stationary.
If it is interfered with when the vehi-
cle is being driven, indicator lights
å and © will come on.
Switch the ignition off then on again
to reset the air bag in accordance
with the lock position.
A
Page 57 of 270

1.51
DRIVING POSITION: LEFT-HAND DRIVE (2/2)
1 Side air vent.
2 Side window demister outlet.
3 Stalk for:
– direction indicator lights;
– exterior lights;
– front fog lights;
– rear fog light.
4 Location for driver’s air bag and horn.
5 – Steering column stalk for wind-
screen and rear screen wash/
wiper.
– On-board computer information
read-out control and vehicle set-
tings customisation menu.
6 Instrument panel.
7 Centre air vents.
8 Hazard warning lights switch.
9 Instrument panel customisation menu control.
The equipment fitted, described below, DEPENDS ON THE VERSION AND COUNTRY.
21 Cruise control/speed limiter control.
22 Heating and ventilation controls.
23 Engine start/stop button.
24 Control for adjusting steering wheel height and reach.
25 Cruise control/speed limiter controls.
26 Bonnet release.
27 Controls for: – headlight beam height remote ad-
justment;
– lighting dimmer for control instru-
ments;
– activation/deactivation of the trac-
tion control;
– activation/deactivation of the
function Stop and Start.
28 Traction control.
29 Control for some multimedia equip- ment.
10 Door central locking/unlocking
switch.
11 Location for radio, navigation
system, etc.
12 – Display (depending on the vehi-
cle) of time, temperature, radio
information, navigation system in-
formation, etc.
– Driver and front passenger seat
belt unfastened and passenger
airbag deactivated warning lights.
13 Location for passenger air bag.
14 Side window demister outlet.
15 Side air vent.
16 Glove box.
17 Electronic parking brake or manual parking brake control.
18 Storage compartment, accessories socket or cigarette lighter/multime-
dia socket.
19 Gear lever.
20 RENAULT card reader.
Page 59 of 270

1.53
DRIVING POSITION: RIGHT-HAND DRIVE (2/2)
The equipment fitted, described below, DEPENDS ON THE VERSION AND COUNTRY.
1 Side air vent.
2 Side window demister outlet.
3 Location for passenger air bag.
4 Centre air vents.
5 – Display (depending on the vehi-
cle) of time, temperature, radio
information, navigation system in-
formation, etc.
– Driver and front passenger seat
belt unfastened and passenger
airbag deactivated warning lights.
6 Location for radio, navigation system, etc.
7 Central door locking/unlocking con- trols.
8 Hazard warning lights switch.
9 Instrument panel customisation menu control.
10 Instrument panel.
17 Cruise control/speed limiter controls.
18 Control for adjusting steering wheel height and reach.
19 Engine Start/Stop button.
20 Heating and ventilation controls.
21 Electronic parking brake or manual parking brake control.
22 RENAULT card reader.
23 Gear lever.
24 Storage compartment, accessories socket or cigarette lighter/multime-
dia socket.
25 Cruise control/speed limiter control.
26 Glove box.
27 Bonnet release.
28 Traction control.
29 Control for some multimedia equip- ment.
11
Stalk for:
– direction indicator lights;
– exterior lights;
– front fog lights;
– rear fog light.
12 Location for driver’s air bag and horn.
13 – Steering column stalk for wind-
screen and rear screen wash/
wiper.
– On-board computer information
read-out control and vehicle set-
tings customisation menu.
14 Side window demister outlet.
15 Side air vent.
16 Controls for: – headlight beam height remote ad-
justment;
– lighting dimmer for control instru-
ments;
– activation/deactivation of the trac-
tion control;
– activation/deactivation of the
function Stop and Start.
Page 60 of 270

1.54
WARNING LIGHTS (1/5)
If no lights or sounds are ap-
parent, this indicates a fault
in the instrument panel. This
indicates that it is essential
to stop immediately (as soon as traf-
fic conditions allow). Ensure that the
vehicle is correctly immobilised and
contact an approved Dealer.
Warning light © means you
should drive very carefully to an
authorised dealer as soon as
possible. If you fail to follow this
recommendation, you risk damag-
ing your vehicle.
The ® warning light
requires you to stop imme-
diately, for your own safety,
as soon as traffic conditions allow.
Switch off the engine and do not re-
start it. Contact an approved Dealer.
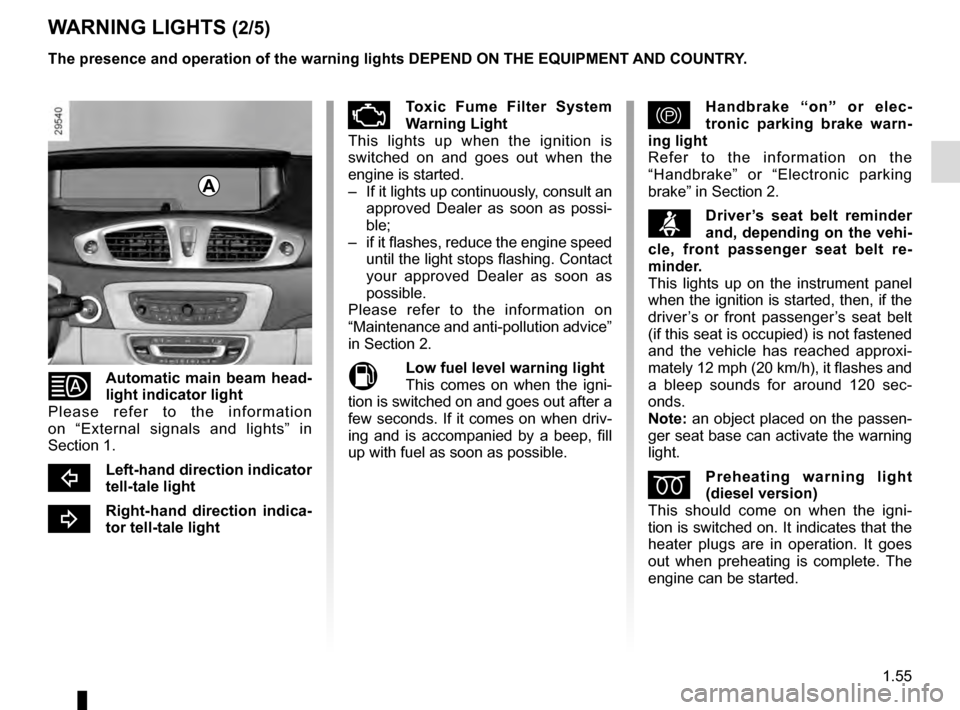
Instrument panelA: lights up when the
ignition is switched on.
In some cases, the appearance of a
warning light is accompanied by a mes-
sage.
ÐÏSpeed limiter and cruise
control indicator lights
See the information on the “Speed lim-
iter” and “Cruise control” in Section 2.
uSide light tell-tale light
kDipped beam headlight tell-
tale light
áMain beam headlight tell-tale
light
gFront fog light tell-tale light
You have an instrument panel
A with a
customisable display.
The customisable instrument panel
can be identified by the presence of
switch 1 or 2 on the dashboard.
To customise your instrument panel,
please refer to the information on
“Displays and indicators” in Section 1.
fRear fog light tell-tale light
The presence and operation of the warning lights DEPEND ON THE EQUIPMENT\
AND COUNTRY.
A
2
1
Page 61 of 270

1.55
WARNING LIGHTS (2/5)
�Automatic main beam head-
light indicator light
Please refer to the information
on “External signals and lights” in
Section 1.
cLeft-hand direction indicator
tell-tale light
bRight-hand direction indica-
tor tell-tale light
ÄToxic Fume Filter System
Warning Light
This lights up when the ignition is
switched on and goes out when the
engine is started.
– If it lights up continuously, consult an approved Dealer as soon as possi-
ble;
– if it flashes, reduce the engine speed until the light stops flashing. Contact
your approved Dealer as soon as
possible.
Please refer to the information on
“Maintenance and anti-pollution advice”
in Section 2.
MLow fuel level warning light
This comes on when the igni-
tion is switched on and goes out after a
few seconds. If it comes on when driv-
ing and is accompanied by a beep, fill
up with fuel as soon as possible.
The presence and operation of the warning lights DEPEND ON THE EQUIPMENT\
AND COUNTRY.
}Handbrake “on” or elec-
tronic parking brake warn-
ing light
Refer to the information on the
“Handbrake” or “Electronic parking
brake” in Section 2.
ßDriver’s seat belt reminder
and, depending on the vehi-
cle, front passenger seat belt re-
minder.
This lights up on the instrument panel
when the ignition is started, then, if the
driver’s or front passenger’s seat belt
(if this seat is occupied) is not fastened
and the vehicle has reached approxi-
mately 12 mph (20 km/h), it flashes and
a bleep sounds for around 120 sec-
onds.
Note: an object placed on the passen-
ger seat base can activate the warning
light.
ÉPreheating warning light
(diesel version)
This should come on when the igni-
tion is switched on. It indicates that the
heater plugs are in operation. It goes
out when preheating is complete. The
engine can be started.
A
Page 65 of 270
1.59
DISPLAYS AND INDICATORS (1/2)
You may customise your instrument
panel A with content and colours of
your choice.
Press switch 1 or 2 as many times as
necessary to obtain the desired display.
Rev counter (rpm × 1,000)
This is displayed according to how the
instrument panel is customised.
Speedometer (km/h or mph)
Fuel gauge
If the level is at the minimum, the M
warning light integrated in the indicator
comes on, accompanied by a beep. Fill
up as soon as possible.
Engine oil level low warning
When the engine is started, the instru-
ment panel display alerts you when the
minimum oil level is reached. Refer to
Section 4: “Engine oil level”.
The first time the warning appears, it
can be cleared by pressing button 4
or 5 on the end of stalk 3.
Subsequent warnings will disappear
automatically after 30 seconds.
4
5
3
A
3
1
2
Page 66 of 270
1.60
DISPLAYS AND INDICATORS (2/2)
Instrument panel in miles
(option to switch to km/h)
– With the ignition off, press button 4 or 5 and the start button 6;
– the speedometer unit indicator flashes for approximately ten sec-
onds, then the new unit is displayed:
release button 4 or 5 when the unit
stops flashing.
To return to the previous mode, repeat
the same operation.
Note: once the battery is switched off,
the trip computer and warning system
automatically returns to the original unit
of measurement.Overspeed buzzer
Depending on the vehicle and country,
a buzzer sounds for approximately
10 seconds every 40 seconds, as long
as the vehicle is travelling in excess of
72 mph (120 km/h).
Trip computer and warning system
Refer to the information on the “Trip
computer and warning system” in
Section 1.
4
56
Page 76 of 270

1.70
TRIP COMPUTER AND WARNING SYSTEM: warning message
These appear with the ® warning light and require you to stop immediately, for your own safety, as soon as traf-
fic conditions allow. Stop your engine and do not restart it. Contact an approved Dealer.
Examples of warning messages are given in the following pages. Note: the messages appear on the display either individually
or alternately (when there are several messages to be displayed), and \
may be accompanied by a warning light and/or a beep.
Examples of messages Interpreting the display selected
“Engine failure hazard” Indicates an injection fault, the vehicle’s engine has overheated or there is a
serious engine fault.
“Braking system fault” Indicates a fault in the braking system.
“Power steering fault” or “Risk of steer-
ing locking ” Indicates a fault in the steering.
“Parking brake fault” or “Stop vehicle” Indicates an electronic parking brake fault. Apply the electronic parking brake
manually and ensure that the vehicle is immobilised using a chock.
“Battery charging fault” Indicates a fault in the vehicle battery charging circuit (alternator e\
tc.).
“Puncture” Indicates a puncture on the tyre displayed on the instrument panel.