Page 238 of 300

5.4
TYRE PRESSURE KIT (1/3)
The kit is only approved for
inflating the tyres of the ve-
hicle originally equipped
with the kit.
It must never be used to inflate
the tyres of another vehicle, or any
other inflatable object (rubber ring,
rubber boat, etc.).
Avoid spillage on skin when hand-
ling the repair liquid bottle. If drop-
lets do leak out, rinse them off with
plenty of water.
Keep the repair kit away from chil-
dren.
Do not dispose of the empty bottle
in the countryside. Return it to your
approved dealer or to a recycling or-
ganisation.
The bottle has a limited service
life which is indicated on its label.
Check the expiry date.
Contact an approved dealer to re-
place the inflation tube and repair
product bottle.
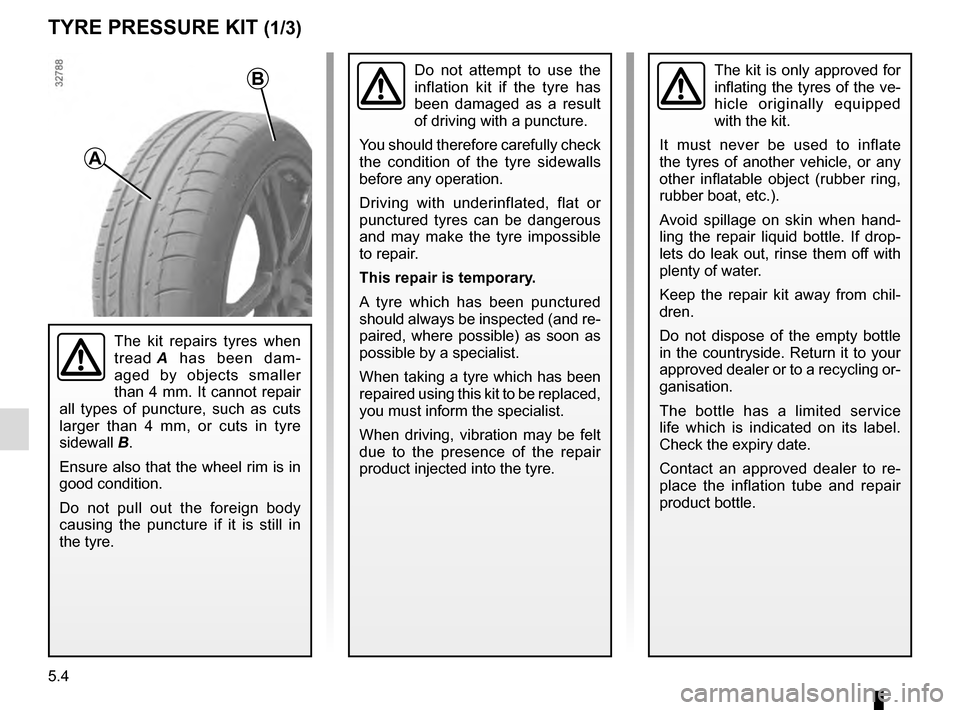
A
B
The kit repairs tyres when
tread A has been dam-
aged by objects smaller
than 4 mm. It cannot repair
all types of puncture, such as cuts
larger than 4 mm, or cuts in tyre
sidewall B.
Ensure also that the wheel rim is in
good condition.
Do not pull out the foreign body
causing the puncture if it is still in
the tyre.
Do not attempt to use the
inflation kit if the tyre has
been damaged as a result
of driving with a puncture.
You should therefore carefully check
the condition of the tyre sidewalls
before any operation.
Driving with underinflated, flat or
punctured tyres can be dangerous
and may make the tyre impossible
to repair.
This repair is temporary.
A tyre which has been punctured
should always be inspected (and re-
paired, where possible) as soon as
possible by a specialist.
When taking a tyre which has been
repaired using this kit to be replaced,
you must inform the specialist.
When driving, vibration may be felt
due to the presence of the repair
product injected into the tyre.
Page 245 of 300

5.11
TYRES (1/3)
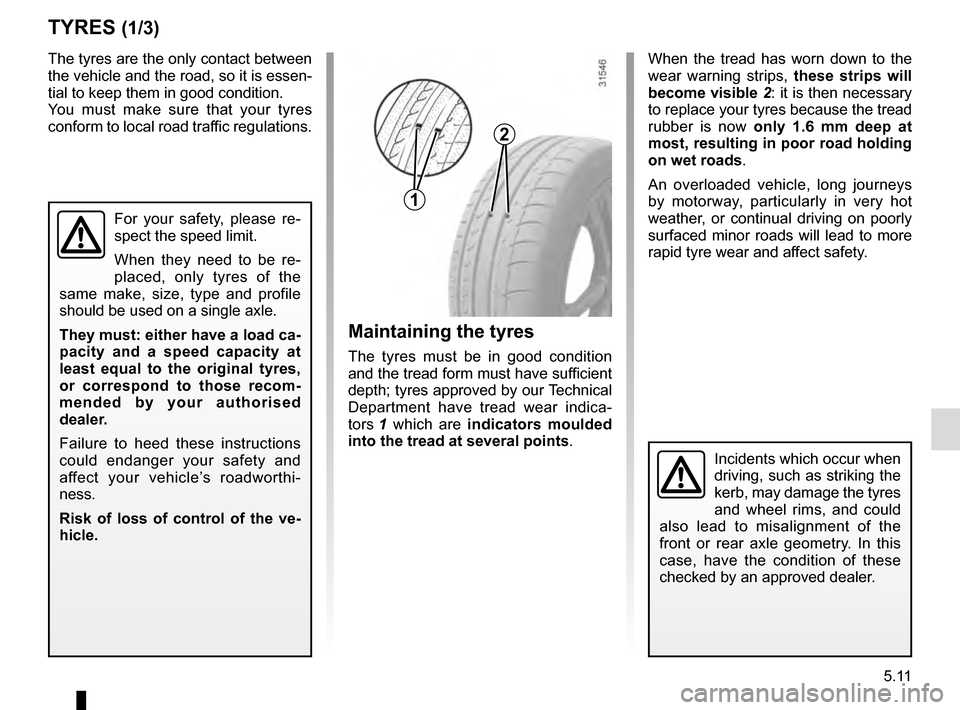
Maintaining the tyres
The tyres must be in good condition
and the tread form must have sufficient
depth; tyres approved by our Technical
Department have tread wear indica-
tors 1 which are indicators moulded
into the tread at several points .
The tyres are the only contact between
the vehicle and the road, so it is essen-
tial to keep them in good condition.
You must make sure that your tyres
conform to local road traffic regulations.
When the tread has worn down to the
wear warning strips,
these strips will
become visible 2: it is then necessary
to replace your tyres because the tread
rubber is now only 1.6 mm deep at
most, resulting in poor road holding
on wet roads.
An overloaded vehicle, long journeys
by motorway, particularly in very hot
weather, or continual driving on poorly
surfaced minor roads will lead to more
rapid tyre wear and affect safety.
Incidents which occur when
driving, such as striking the
kerb, may damage the tyres
and wheel rims, and could
also lead to misalignment of the
front or rear axle geometry. In this
case, have the condition of these
checked by an approved dealer.
2
1
For your safety, please re-
spect the speed limit.
When they need to be re-
placed, only tyres of the
same make, size, type and profile
should be used on a single axle.
They must: either have a load ca-
pacity and a speed capacity at
least equal to the original tyres,
or correspond to those recom-
mended by your authorised
dealer.
Failure to heed these instructions
could endanger your safety and
affect your vehicle’s roadworthi-
ness.
Risk of loss of control of the ve-
hicle.
Page 257 of 300
5.23
FUSES (1/3)
A
B
In accordance with local legislation
or as a precautionary measure:
obtain an emergency kit containing
a set of spare bulbs and fuses from
an approved Dealer.
C
Fuses in passenger compartment C
on the right-hand side of the vehicle
Unclip the cover C using a screwdriver
or similar.
If any electrical component does not
work, check the condition of the fuses.
Fuses in passenger compartment
A or B on the left-hand side of the
vehicle
Unclip the cover
A using a screwdriver
or similar.
Open the glovebox and unclip the
flap B.
Page 259 of 300
5.25
FUSES (3/3)
Allocation of fuses
(the presence of certain fuses depends on the vehicle equipment level)\
Symbol Allocation SymbolAllocation
DIndicatorsSteering column controls
ßBrake lightñHeated seats
Audio amplifierCHeated rear screen
NDoor locking/unlockingElectric door mirror
fWipersëAccessories sockets
Z
Interior lighting, courtesy mirror, rain and
light sensor, electric rear view mirrors, air
conditioning, ECO mode
Passenger compartment central unit, speed
limiter/cruise control, diagnostics socket, electric
windows, 4-wheel drive transmission (4WD)
îRadio, multifunction screen, multimedia sockets
Page 261 of 300

5.27
Starting the vehicle using the
battery from another vehicle
If you have to use the battery from an-
other vehicle to start, obtain suitable
jump leads (with a large cross section)
from an approved dealer or, if you al-
ready have jump leads, ensure that
they are in perfect condition.
The two batteries must have an iden-
tical nominal voltage of 12 volts. The
battery supplying the current should
have a capacity (amp-hours, Ah) which
is at least the same as that of the dis-
charged battery.
Ensure that there is no risk of contact
between the two vehicles (risk of short
circuiting when the positive terminals
are connected) and that the discharged
battery is properly connected. Switch
off your vehicle ignition.
Start the engine of the vehicle supply-
ing the current and run it at a moderate
speed.
BATTERY: troubleshooting (2/2)
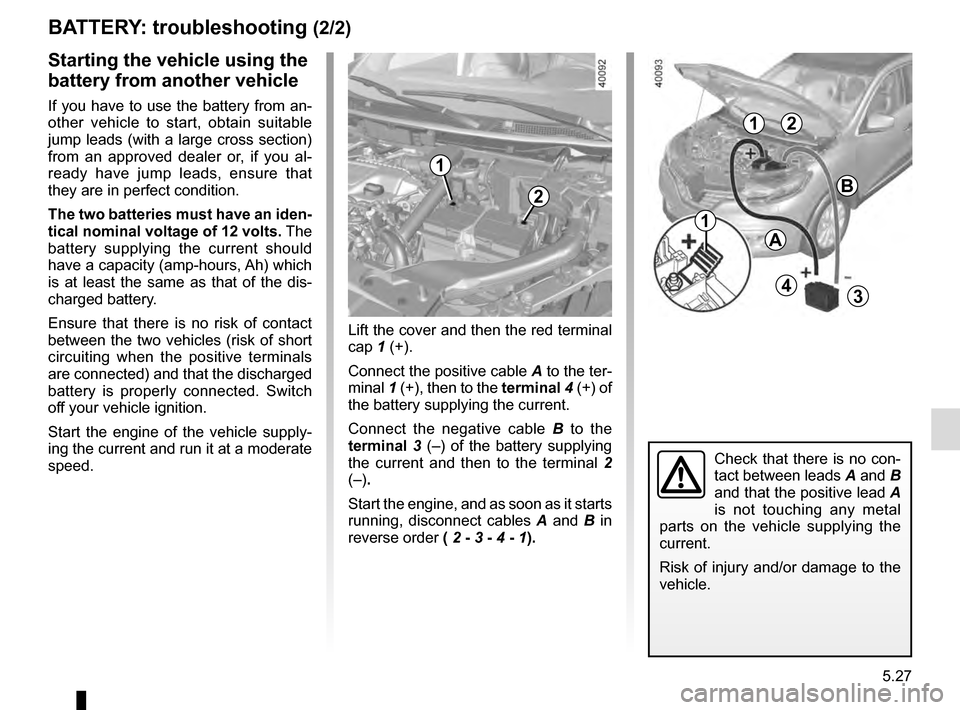
1
B
A
Lift the cover and then the red terminal
cap 1 (+).
Connect the positive cable A to the ter-
minal 1 (+), then to the terminal 4 (+) of
the battery supplying the current.
Connect the negative cable B to the
terminal 3 (–) of the battery supplying
the current and then to the terminal 2
(–).
Start the engine, and as soon as it starts
running, disconnect cables A and B in
reverse order ( 2 - 3 - 4 - 1).
2
43
2
Check that there is no con-
tact between leads A and B
and that the positive lead A
is not touching any metal
parts on the vehicle supplying the
current.
Risk of injury and/or damage to the
vehicle.
1
1
Page 263 of 300

5.29
WINDSCREEN WIPER BLADES: replacement (1/2)
Windscreen wiper blades 1
With the ignition on and the engine
switched off, lower the windscreen
wiper stalk fully: the blades stop slightly
away from the bonnet.
Lift wiper arm 3 , press button 2 to re-
lease the blade.
1
23
Refitting
Slide the blade along the arm until
it clips on. Check that it is correctly
locked in place. Lower the windscreen
wiper arm carefully.
With the ignition on, return the wind-
screen wiper stalk to the stop position.
The blade on the driver’s side must
always be above the passenger blade.
If this is not the case, a quick sweep of
the windscreen wipers should be per-
formed once the vehicle is travelling at
over 4 mph (7 km/h).
NB: Before restarting your vehicle,
lower the windscreen wiper blades
onto the windscreen to avoid any risk
of damaging the bonnet or the wipers.
– In frosty weather, make
sure that the wiper blades
are not stuck by ice (to
avoid the risk of the motor
overheating or damaging the
blades).
– Check the condition of the wiper
blades.
Replace the wiper blades as soon
as they begin to lose efficiency
(approximately once a year).
Whilst changing the blade, take care
not to drop the arm onto the window
after it has been removed as this
may break the window.
Do not activate the wipers on a dry
screen. This will lead to premature
wear or damage to the blades.
Page 264 of 300
5.30
WINDSCREEN WIPER BLADES: replacement (2/2)
Keep monitoring the condition of the
wiper blades. How long they last de-
pends on you:
– clean the blades, windscreen and rear screen regularly with soapy
water;
– do not use them when the wind- screen or rear screen are dry;
– free them from the windscreen or rear screen when they have not
been used for a long time.
4
5
A
B
6
To refit
To refit the wiper blade, proceed in re-
verse order to removal. Make sure that
the blade is correctly locked in position.
Rear screen wiper blade 4
Stalk in stop position (deactivated):
– Lift the wiper arm 6;
– pivot wiper blade 4 until some resist-
ance is met (movement B);
– depending on the vehicle, press tab 5, then remove the wiper blade
by pulling it (movement A).
Before changing the rear
wiper blade, make sure the
stalk is in the stop position
(deactivated).
Risk of injury.
Page 269 of 300

5.35
OPERATING FAULTS (3/7)
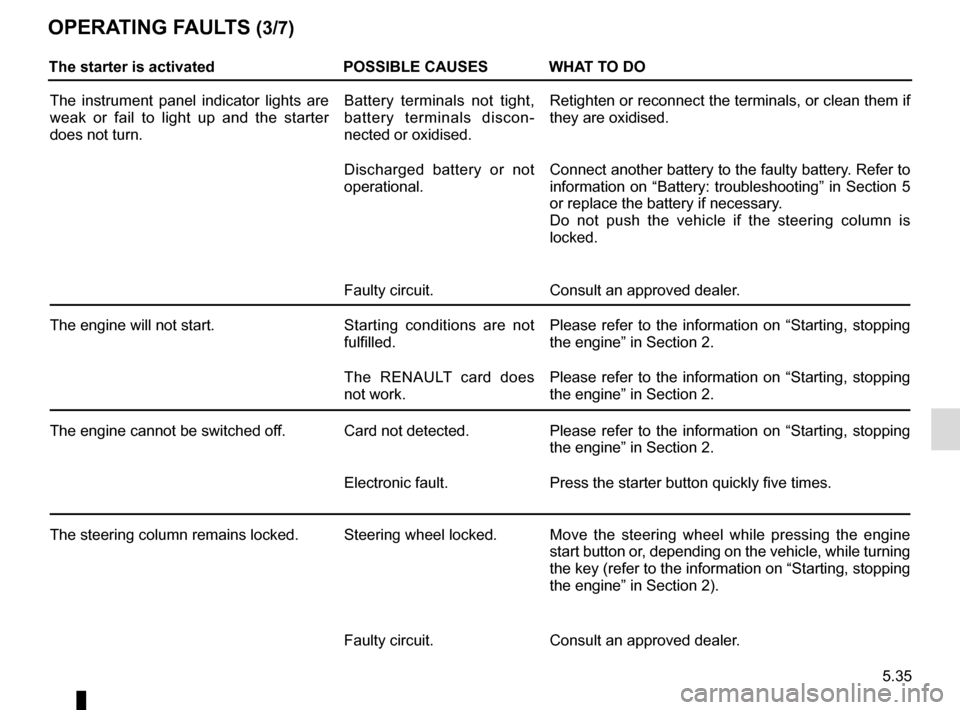
The starter is activatedPOSSIBLE CAUSES WHAT TO DO
The instrument panel indicator lights are
weak or fail to light up and the starter
does not turn. Battery terminals not tight,
battery terminals discon-
nected or oxidised.Retighten or reconnect the terminals, or clean them if
they are oxidised.
Discharged battery or not
operational. Connect another battery to the faulty battery. Refer to
information on “Battery: troubleshooting” in Section 5
or replace the battery if necessary.
Do not push the vehicle if the steering column is
locked.
Faulty circuit. Consult an approved dealer.
The engine will not start. Starting conditions are not
fulfilled.Please refer to the information on “Starting, stopping
the engine” in Section 2.
The RENAULT card does
not work. Please refer to the information on “Starting, stopping
the engine” in Section 2.
The engine cannot be switched off. Card not detected. Please refer to the information on “Starting, stopping
the engine” in Section 2.
Electronic fault. Press the starter button quickly five times.
The steering column remains locked. Steering wheel locked. Move the steering wheel while pressing the engine
start button or, depending on the vehicle, while turning
the key (refer to the information on “Starting, stopping
the engine” in Section 2).
Faulty circuit. Consult an approved dealer.