Page 172 of 300

2.68
Choice of manoeuvre
The system can perform four types of
manoeuvres:
– parallel parking;
– perpendicular parking;
– angle parking;
– moving out of a parallel parking space.
From the multifunction screen, select
the manoeuvre to be performed.
Note: When starting the vehicle, or
after successfully completed parallel
parking using the system, the default
manoeuvre proposed by the system is
assistance in exiting a parallel parking
space. In other cases, the default ma-
noeuvre can be set from the multifunc-
tion screen.
ASSISTED PARKING (2/4)
Operation
Parking
As long as the vehicle speed is less
than 20 mph (30 km/h), the system
looks for available parking spaces on
both sides of the vehicle.
Once a space has been found, it is dis-
played on the multifunction screen, indi-
cated by a small letter “P”. Drive slowly,
with the indicators activated on the side
of the space, until the message “Stop”
is displayed, alongside a beep.
The space is then indicated on the mul-
tifunction screen by a capital “P”.
– Stop the vehicle;
– select reverse gear.
Warning light
lights up on the in-
strument panel, along with a beep.
– release the steering wheel;
– follow the system instructions pro- vided on the multifunction screen. Your speed should not exceed around 4
mph (7 km/h).
Once the warning light
on the
instrument panel goes off and a beep
sounds, the manoeuvre has been com-
pleted.
Page 173 of 300

2.69
ASSISTED PARKING (3/4)
Your speed should not exceed around
4 mph (7 km/h).
Once in position to exit the space, the
system will notify you of the end of the
manoeuvre.
Once the warning light
on the
instrument panel goes off and a beep
sounds, the manoeuvre has been com-
pleted.
Suspending the manoeuvreThe manoeuvre is suspended in the fol-
lowing circumstances:
– you take control of the wheel;
– a door or the boot is opened;
– the vehicle is at a standstill for too long;
– an obstacle in the direction of move- ment prevents the manoeuvre from
being completed;
– the engine will stop.
Once the warning light
on the
instrument panel goes off and a beep
sounds, the manoeuvre has been sus-
pended. Then to resume the manoeu-
vre, press and hold the system activa-
tion switch. In this case, the reason for suspending
the manoeuvre will be displayed on the
multifunction screen.
Make sure:
– you have released the steering wheel
and;
– that all doors and the boot are closed, and;
– that no obstacles are in the way of the direction of movement, and;
– that the engine is started.
Cancelling the manoeuvre
The manoeuvre can be stopped in the
following cases:
– by pressing the system activation switch;
– the vehicle speed has exceeded 4 mph (7 km/h);
– You have performed more than ten forwards/backwards movements in
one manoeuvre;
– the parking distance control sensors are dirty or blocked;
– the vehicle wheels have skidded.
Once the warning light
on the
instrument panel goes off and a beep
sounds, the manoeuvre has been
ended.
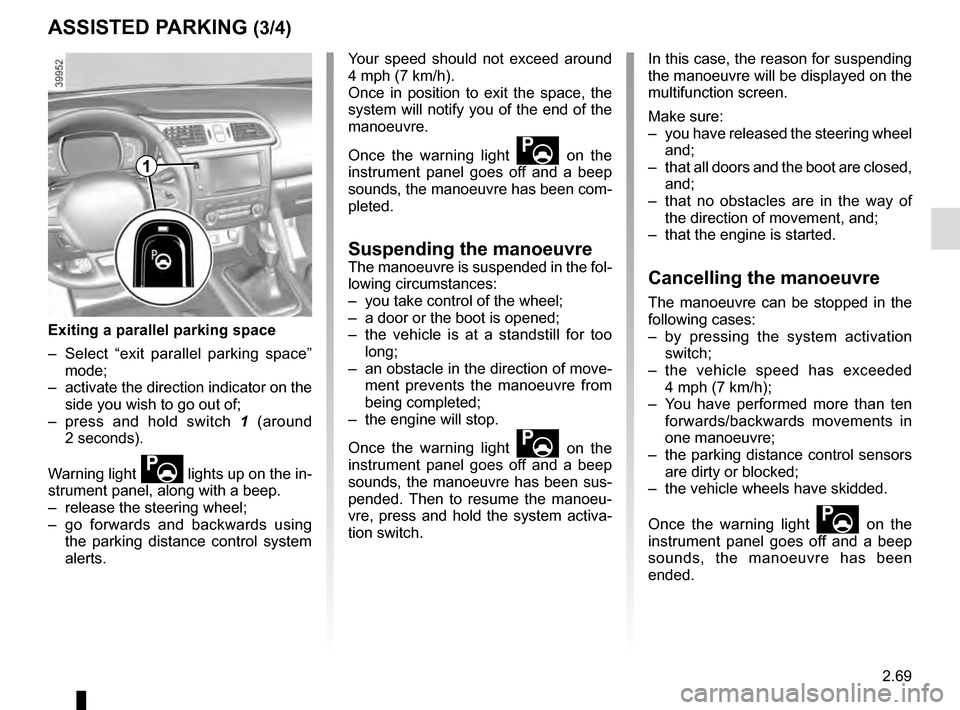
Exiting a parallel parking space
– Select “exit parallel parking space” mode;
– activate the direction indicator on the side you wish to go out of;
– press and hold switch 1 (around
2 seconds).
Warning light
lights up on the in-
strument panel, along with a beep.
– release the steering wheel;
– go forwards and backwards using the parking distance control system
alerts.
1
Page 174 of 300
2.70
ASSISTED PARKING (4/4)
This function is an additional driving aid. However, this function is not under any circumstances intended to replace the
due care and attention of the driver, who should at all times be in control of the vehicle.
Make sure that the manoeuvre complies with the applicable traffic regulations at your location.
– The driver should always look out for sudden hazards during driving: alw\
ays ensure that there are no moving obstacles (such as a child, animal, pram, bicycle, etc.) or small, narrow object\
s such as stones or posts in your path when manoeu-
vring.
– The system cannot detect objects located in the sensor blind spots.
– When manoeuvring, the steering wheel may turn quickly: do not put your h\
ands inside, and make sure that nothing is caught inside.
– Always visually check that the parking space proposed by the system is s\
till available and contains no obstacles.
– The system should be deactivated when towing a trailer.
Page 177 of 300

2.73
AUTOMATIC TRANSMISSION (3/3)
Parking the vehicle
When the vehicle is stopped, move the
lever to position P while keeping your
foot on the brake pedal: the gearbox is
in neutral and the drive wheels are me-
chanically locked by the driveshaft.
Apply the handbrake or, depending
on the vehicle, ensure that the elec-
tronic parking brake is applied.
When setting off, if the lever is locked
in position P even though you are
pressing the brake pedal, the lever can
be released manually. To do this, insert
a tool (with a hard rod) into the slot 4 to
unlock the lever.
Contact an authorised dealer as soon
as possible.
Operating faults
– when driving, if the ‘check gearbox’
message appears on the instrument
panel, it indicates a fault.
Contact your approved Dealer as
soon as possible;
– when driving, if the message
“Gearbox overheating” appears on
the instrument panel, stop as soon
as possible to let the gearbox cool
down and wait for the message to
disappear;
– If a vehicle with an automatic
gearbox breaks down, refer to the
information on “Towing” in Section 5.
4
For safety reasons, do not
switch off the ignition before
the vehicle has come to a
complete standstill.
An impact to the under-
side of the vehicle while
manoeuvring (e.g.: strik-
ing a post, raised kerb or
other street furniture) may result in
damage to the vehicle (e.g.: defor-
mation of an axle).
To avoid any risk of accident, have
your vehicle checked by an appro-
ved Dealer.
Page 206 of 300
3.28
Refitting the luggage
compartment cover
Position the side 3 of the luggage com-
partment cover in its housing, press the
side 3 and position the opposite side
into its housing.
Luggage compartment cover
storage
Version without emergency spare
wheel
Lift the false floor 4, then position the
luggage cover roller 2. Attach it using
the elastic cords 5 on each side of the
boot.
To remove the flexible
section of the luggage cover
Pull then lift the handle 1 gently.
Guide the luggage cover onto the
roller 2.
Removing the luggage cover
Press the side 3 of the luggage cover 2
(movement A), release the opposite
side from its housing then lift, remove
the whole cover.
LUGGAGE COMPARTMENT COVER
3
4
5
2
Do not place any heavy or
solid objects on the luggage
cover. These may pose a
risk to the vehicle occu-
pants if the driver has to brake sud-
denly or if the vehicle is involved in
an accident.
1
2
5
4
A
Page 215 of 300
3.37
MULTIMEDIA EQUIPMENT
Using the telephone
We remind you of the need
to conform to the legislation
in force concerning the use
of such equipment.
Hands-free telephone
integrated control
For equipped vehicles, use the steering
wheel controls 4.
Multimedia systems
1 Multimedia touchscreen;
2 Multimedia sockets;
3 Steering column controls;
4 Steering wheel controls;
5 Microphone.
1
2
4
3
Refer to the equipment instructions
for information on how to operate
this equipment.
5
Page 226 of 300
4.10
TYRE PRESSURE (1/2)
B: dimension of the tyres fitted to the
vehicle.
C: intended driving speed.
D: recommended pressure for optimis- ing fuel consumption.
NB: driving comfort may be altered.
A
C
D
FE
G
B
C
E
E
F
F
E: front tyre pressure.
F: rear tyre pressure.
G : tyre pressure for the emergency
spare wheel.
Vehicle fitted with a tyre pressure
monitoring system
In cases of under-inflation (puncture,
low pressure, etc.), warning light
lights up on the instrument panel.
Please refer to the information on the
“Tyre pressure monitoring system” in
Section 2.
Label A
Open the driver’s door to read it.
Tyre pressures should be checked
when the tyres are cold.
If the tyre pressures cannot be checked
when the tyres are cold, increase the
pressures from 0.2 to 0.3 bar (or 3 PSI).
Never deflate a hot tyre.
A
Page 230 of 300

4.14
BODYWORK MAINTENANCE (1/2)
You should
Wash your car frequently, with the
engine off, with cleaning products rec-
ommended by the manufacturer (never
use abrasive products). Rinse thor-
oughly beforehand with a jet:
– spots of tree resin and industrial
grime;
– mud in the wheel arches and under-
neath the body which forms damp
patches;
– bird droppings , which cause a
chemical reaction with the paint that
rapidly discolours paintwork and
may even cause the paint to peel
off;
wash the vehicle immediately to
remove these marks since it is im-
possible to remove them by polish-
ing;
– salt, particularly in the wheel arches
and underneath the body after driv-
ing in areas where the roads have
been gritted.
Remove any plant matter (resin, leaves,
etc.) from the vehicle regularly.
What you should not doDo not degrease or clean mechani-
cal components (e.g. the engine com-
partment), underneath the body, parts
with hinges (e.g. inside the doors) and
painted plastic external fittings (e.g.
bumpers) using high-pressure clean-
ing equipment or by spraying on prod-
ucts not approved by our Technical
Department. Doing this could give rise
to corrosion or operational faults.
Wash the vehicle in bright sunlight or
freezing temperatures.
Do not scrape off mud or dirt without
pre-wetting.
Allow dirt to accumulate on the exterior.
Allow rust to form following minor im-
pacts.
Do not use solvents not approved by
our Technical Department to remove
stains as this could damage the paint-
work.
Do not drive in snow or muddy condi-
tions without washing the vehicle, par-
ticularly under the wheel arches and
body.
A well-maintained vehicle will last
longer. It is therefore recommended to
maintain the exterior of the vehicle reg-
ularly.
Your vehicle has been treated with very
effective anti-corrosion products. It is
nevertheless subject to various outside
influences.
Corrosive agents in the atmosphere
–
atmospheric pollution (built-up and
industrial areas),
– saline atmospheres (near the sea,
particularly in hot weather),
– seasonal and damp weather condi-
tions (e.g. road salt in winter, water
from road cleaners, etc.).
Minor impacts
Abrasive action
Dust and sand in the air, mud, road grit
thrown up by other vehicles, etc.
You should take a number of minor pre-
cautions in order to safeguard your ve-
hicle against such risks.