Page 157 of 919

have reached the desired position. Then, using body
pressure, move forward and rearward on the seat to be
sure that the seat adjusters have latched.
WARNING!
•Adjusting a seat while driving may be dangerous.
Moving a seat while driving could result in loss of
control which could cause a collision and serious
injury or death.
• Seats should be adjusted before fastening the seat
belts and while the vehicle is parked. Serious
injury or death could result from a poorly adjusted
seat belt.
Dump Feature (Manual Recline Seat Only) —
Standard Cab
Actuating the recliner handle will allow the seatback to
swing (dump) forward on manual recliner seats. This “dump” feature allows access to the storage bin behind
the seat.
WARNING!
•
Do not stand or lean in front of the seat while
actuating the handle. The seatback may swing
forward and hit you causing injury.
• To avoid injury, place your hand on the seatback
and actuate the handle, then position the seatback
in the desired position.
40-20-40 Front Bench Seat — If Equipped
The seat is divided into three segments. The outboard
seat portions are each 40% of the total width of the seat.
On some models the back of the center portion (20%)
easily folds down to provide an armrest/center storage
compartment.
3
UNDERSTANDING THE FEATURES OF YOUR VEHICLE 155
Page 215 of 919

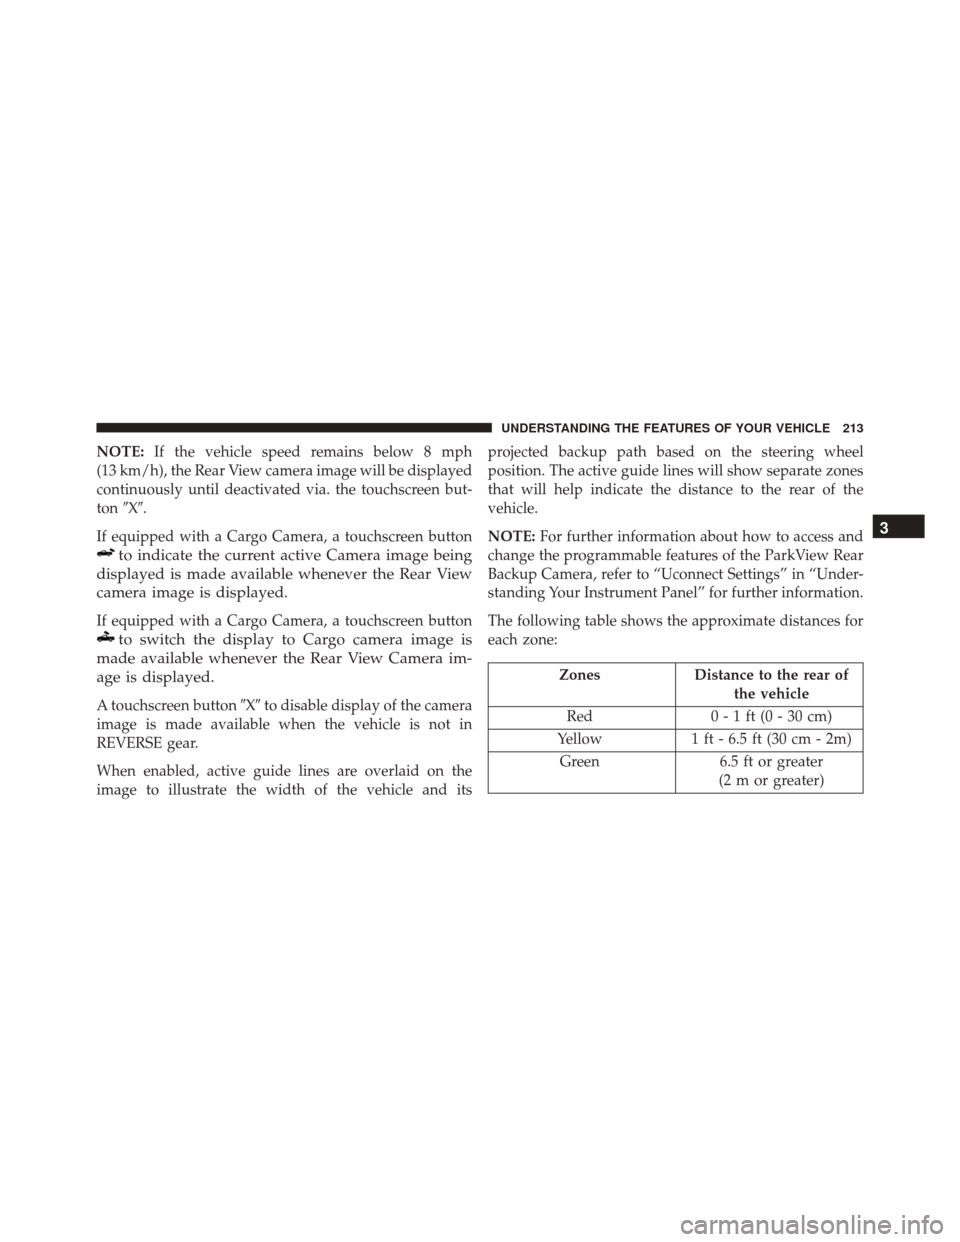
NOTE:If the vehicle speed remains below 8 mph
(13 km/h), the Rear View camera image will be displayed
continuously until deactivated via. the touchscreen but-
ton �X�.
If equipped with a Cargo Camera, a touchscreen button
to indicate the current active Camera image being
displayed is made available whenever the Rear View
camera image is displayed.
If equipped with a Cargo Camera, a touchscreen button
to switch the display to Cargo camera image is
made available whenever the Rear View Camera im-
age is displayed.
A touchscreen button �X�to disable display of the camera
image is made available when the vehicle is not in
REVERSE gear.
When enabled, active guide lines are overlaid on the
image to illustrate the width of the vehicle and its projected backup path based on the steering wheel
position. The active guide lines will show separate zones
that will help indicate the distance to the rear of the
vehicle.
NOTE:
For further information about how to access and
change the programmable features of the ParkView Rear
Backup Camera, refer to “Uconnect Settings” in “Under-
standing Your Instrument Panel” for further information.
The following table shows the approximate distances for
each zone:
Zones Distance to the rear of
the vehicle
Red 0 - 1 ft (0 - 30 cm)
Yellow 1 ft - 6.5 ft (30 cm - 2m)
Green 6.5 ft or greater
(2 m or greater)
3
UNDERSTANDING THE FEATURES OF YOUR VEHICLE 213
Page 639 of 919

NOTE:
•P (Passenger) — Metric tire sizing is based on U.S.
design standards. P-Metric tires have the letter “P”
molded into the sidewall preceding the size designa-
tion. Example: P215/65R15 95H.
• European — Metric tire sizing is based on European
design standards. Tires designed to this standard have
the tire size molded into the sidewall beginning with
the section width. The letter �P�is absent from this tire
size designation. Example: 215/65R15 96H.
• LT (Light Truck) — Metric tire sizing is based on U.S.
design standards. The size designation for LT-Metric
tires is the same as for P-Metric tires except for the
letters “LT” that are molded into the sidewall preced-
ing the size designation. Example: LT235/85R16. •
Temporary spare tires are designed for temporary
emergency use only. Temporary high pressure com-
pact spare tires have the letter “T” or “S” molded into
the sidewall preceding the size designation. Example:
T145/80D18 103M.
• High flotation tire sizing is based on U.S. design
standards and it begins with the tire diameter molded
into the sidewall. Example: 31x10.5 R15 LT.
5
STARTING AND OPERATING 637
Page 640 of 919
Tire Sizing Chart
EXAMPLE:
Example Size Designation: P215/65R15XL 95H, 215/65R15 96H, LT235/85R16C, T145/80D18 103M, 31x10.5 R15
LT P= Passenger car tire size based on U.S. design standards, or
�....blank....� = Passenger car tire based on European design standards, or
LT = Light truck tire based on U.S. design standards, or
TorS= Temporary spare tire or
31 = Overall diameter in inches (in)
215, 235, 145 = Section width in millimeters (mm)
65, 85, 80 = Aspect ratio in percent (%)
– Ratio of section height to section width of tire, or
10.5 = Section width in inches (in)
638 STARTING AND OPERATING
Page 693 of 919

WARNING!
It is important that you do not exceed the maximum
front or rear GAWR. A dangerous driving condition
can result if either rating is exceeded.
Tongue Weight (TW)
The tongue weight is the downward force exerted on the
hitch ball by the trailer. You must consider this as part of
the load on your vehicle.
Frontal Area
The frontal area is the maximum height multiplied by the
maximum width of the front of a trailer.
Trailer Sway Control
The trailer sway control can be a mechanical telescoping
link that can be installed between the hitch receiver andthe trailer tongue that typically provides adjustable fric-
tion associated with the telescoping motion to dampen
any unwanted trailer swaying motions while traveling.
If equipped, the electronic Trailer Sway Control (TSC)
recognizes a swaying trailer and automatically applies
individual wheel brakes and/or reduces engine power to
attempt to eliminate the trailer sway.
Weight-Carrying Hitch
A weight-carrying hitch supports the trailer tongue
weight, just as if it were luggage located at a hitch ball or
some other connecting point of the vehicle. These kinds
of hitches are the most popular on the market today and
they are commonly used to tow small and medium sized
trailers.
Weight-Distributing Hitch
A weight-distributing system works by applying lever-
age through spring (load) bars. They are typically used
5
STARTING AND OPERATING 691