Page 282 of 669
Setting NamesSetting Names
Abbreviated (Left Submenu Layer) Sub-Menus (Right Submenu Layer)
1 Language Select LanguageEnglish, Spanish, French, Italian, German, Dutch
2 Units Units U.S.; Metric
3 ParkSense ParkSense
•Notification — Sound Only; Sound & Display
• Front Volume — Low; Medium; High
• Rear Volume — Low; Medium; High
4 Tilt Mirror in Re-
verse Tilt Mirror in R
On; Off
5 Rain Sensing Wipers Auto Wipers On; Off
6 Hill Start Assist Hill Start Assist On; Off
7 Headlights Off Delay Lights Off Delay 0 seconds; 30 seconds; 60 seconds; 90 seconds
8 Illuminated Ap- proach Lights w/ Unlock 0 seconds; 30 seconds; 60 seconds; 90 seconds
9 Headlights On with Wipers Lights w/ Wipers
On; Off
280 UNDERSTANDING YOUR INSTRUMENT PANEL
Page 304 of 669
Vehicles Settings (Customer-Programmable
Features)
NOTE:This feature is only available on 5.0 and
8.4 Uconnect Radios
Personal Settings allows the driver to set and
recall features when the transmission is in PARK. Push and release the
UPand DOWN button until Per-
sonal Settings displays in the DID.
Follow the prompts to display and set any of the follow-
ing Personal Settings.
NOTE: Your vehicle may or may not be equipped with
all the following settings.
Setting Names Setting Names Abbrevi-
ated (Left Submenu Layer) Sub-Menus (Right Submenu Layer)
1 Language Select Language English, Spanish, French, Italian, German, Dutch
2 Units Units U.S.; Metric
3 ParkSense ParkSense
•Notification — Sound Only; Sound &
Display
• Front Volume — Low; Medium; High
• Rear Volume — Low; Medium; High
4 Tilt Mirror in Reverse Tilt Mirror in ROn; Off
302 UNDERSTANDING YOUR INSTRUMENT PANEL
Page 312 of 669

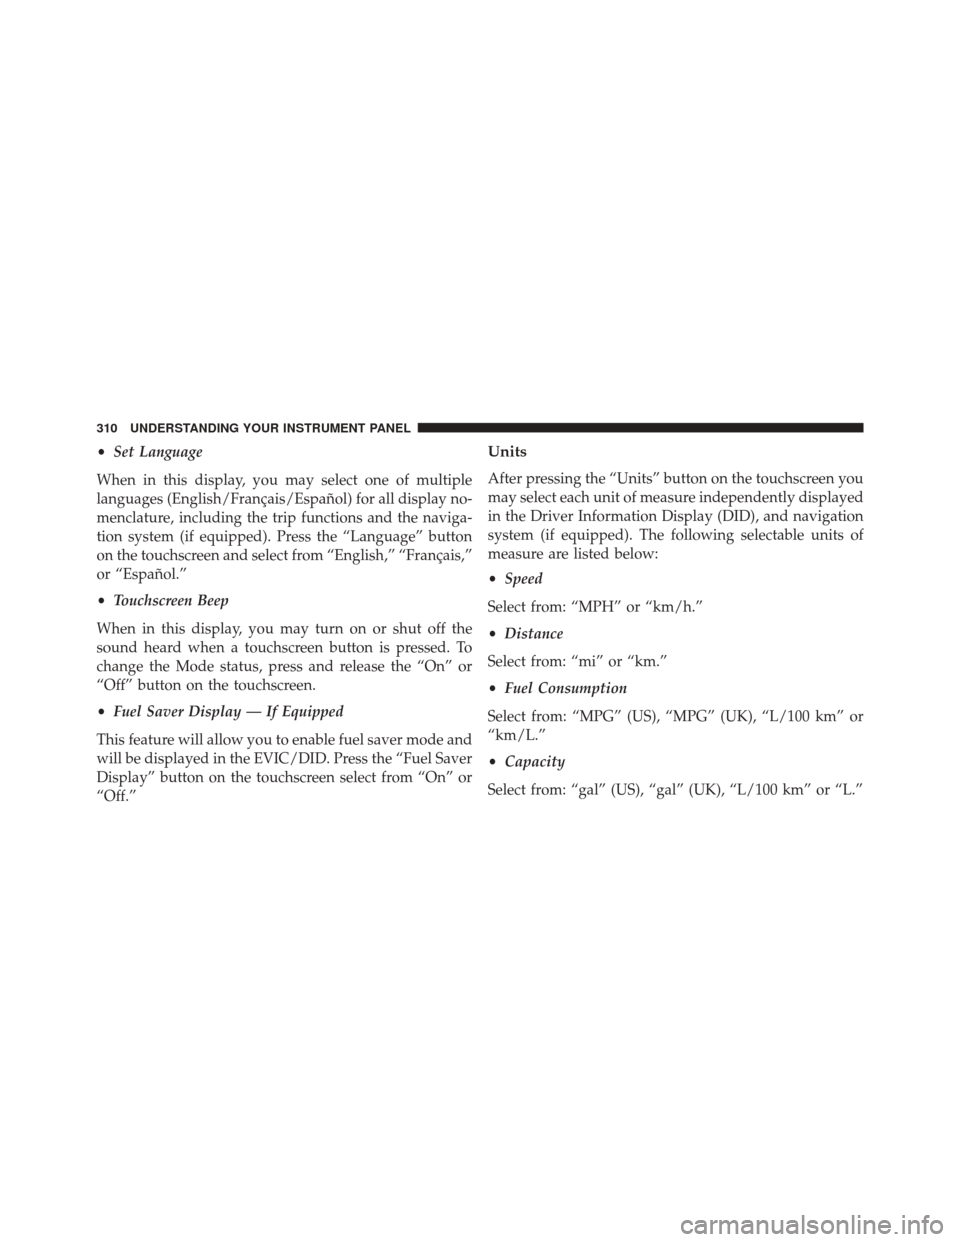
•Set Language
When in this display, you may select one of multiple
languages (English/Français/Español) for all display no-
menclature, including the trip functions and the naviga-
tion system (if equipped). Press the “Language” button
on the touchscreen and select from “English,” “Français,”
or “Español.”
• Touchscreen Beep
When in this display, you may turn on or shut off the
sound heard when a touchscreen button is pressed. To
change the Mode status, press and release the “On” or
“Off” button on the touchscreen.
• Fuel Saver Display — If Equipped
This feature will allow you to enable fuel saver mode and
will be displayed in the EVIC/DID. Press the “Fuel Saver
Display” button on the touchscreen select from “On” or
“Off.”Units
After pressing the “Units” button on the touchscreen you
may select each unit of measure independently displayed
in the Driver Information Display (DID), and navigation
system (if equipped). The following selectable units of
measure are listed below:
• Speed
Select from: “MPH” or “km/h.”
• Distance
Select from: “mi” or “km.”
• Fuel Consumption
Select from: “MPG” (US), “MPG” (UK), “L/100 km” or
“km/L.”
• Capacity
Select from: “gal” (US), “gal” (UK), “L/100 km” or “L.”
310 UNDERSTANDING YOUR INSTRUMENT PANEL
Page 327 of 669

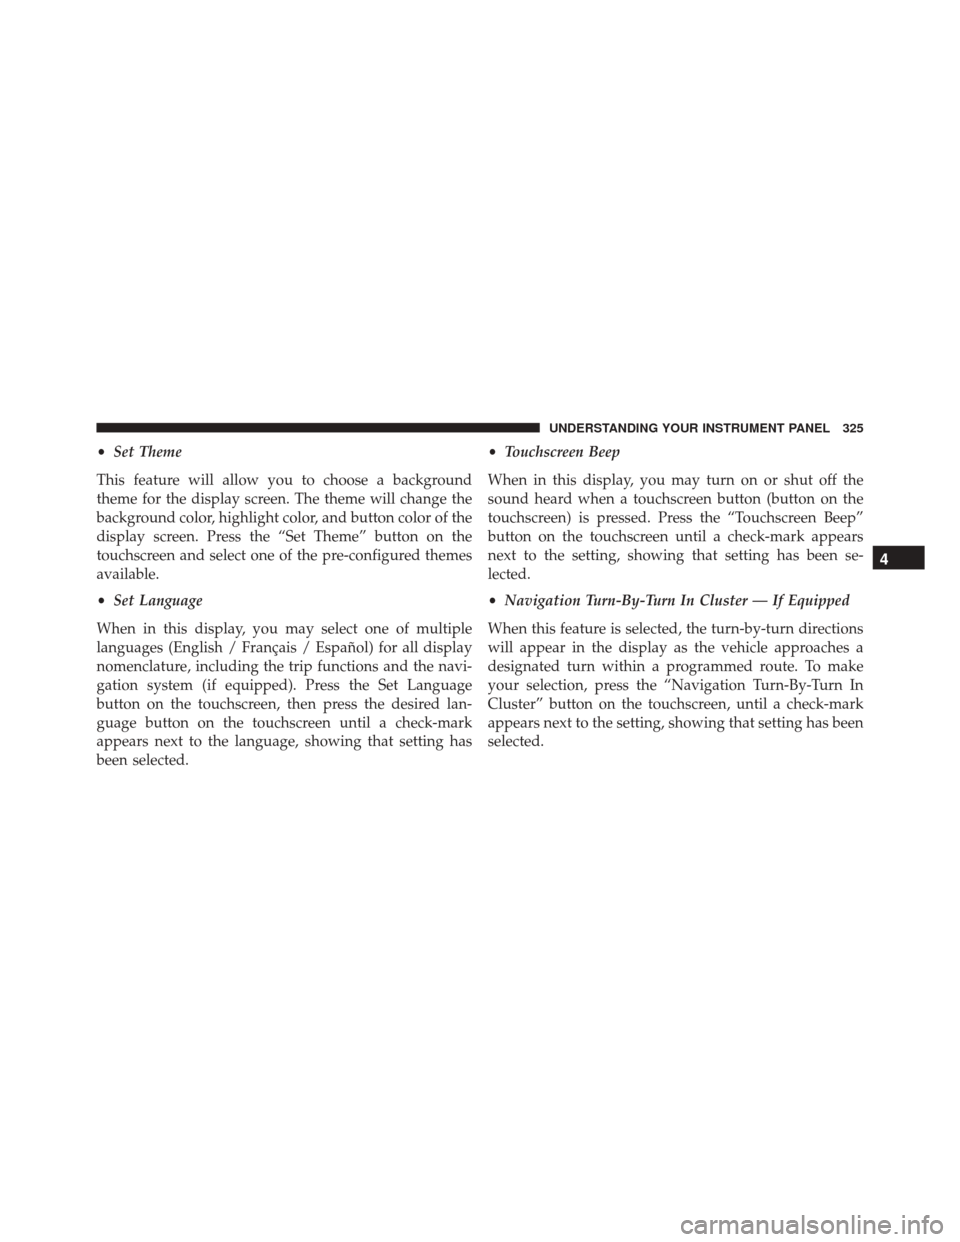
•Set Theme
This feature will allow you to choose a background
theme for the display screen. The theme will change the
background color, highlight color, and button color of the
display screen. Press the “Set Theme” button on the
touchscreen and select one of the pre-configured themes
available.
• Set Language
When in this display, you may select one of multiple
languages (English / Français / Español) for all display
nomenclature, including the trip functions and the navi-
gation system (if equipped). Press the Set Language
button on the touchscreen, then press the desired lan-
guage button on the touchscreen until a check-mark
appears next to the language, showing that setting has
been selected. •
Touchscreen Beep
When in this display, you may turn on or shut off the
sound heard when a touchscreen button (button on the
touchscreen) is pressed. Press the “Touchscreen Beep”
button on the touchscreen until a check-mark appears
next to the setting, showing that setting has been se-
lected.
• Navigation Turn-By-Turn In Cluster — If Equipped
When this feature is selected, the turn-by-turn directions
will appear in the display as the vehicle approaches a
designated turn within a programmed route. To make
your selection, press the “Navigation Turn-By-Turn In
Cluster” button on the touchscreen, until a check-mark
appears next to the setting, showing that setting has been
selected.
4
UNDERSTANDING YOUR INSTRUMENT PANEL 325