Page 100 of 406

CAUTION!
•The engine is allowed to crank as long as 30
seconds. If the engine fails to start during this
period, please wait at least two minutes for the
starter to cool before repeating start procedure.
• If the “Water in Fuel Indicator Light” remains on,
DO NOT START engine before you drain the water
from the fuel filters to avoid engine damage. Refer
to “Maintenance Procedures/Draining Fuel/Water
Separator Filter” in “Maintaining Your Vehicle” for
further information.
Normal Starting
Normal starting of either a warm or cold engine is
obtained without pumping or pressing the accelerator
pedal. Turn the key fob to the START position and release when the engine starts. If the engine fails to start, turn the
key fob to the OFF position, wait five seconds, then
repeat the “Normal Starting” procedure.
Automatic Transmission
Start the engine with the transmission gear selector in the
PARK position. Apply the brake before shifting to any
driving range.
Tip Start Feature
Do not
press the accelerator. Cycle the ignition switch
briefly to the START position and release it. The starter
motor will continue to run but will automatically disen-
gage when the engine is running.
98 STARTING AND OPERATING
Page 101 of 406

Keyless Enter-N-Go
This feature allows the driver to oper-
ate the ignition switch with the push
of a button, as long as the Remote
Start/Keyless Enter-N-Go Key Fob is
in the passenger compartment.
Normal Starting Procedure — Keyless Enter-N-Go
Observe the instrument panel cluster lights when starting
the engine.
NOTE:Normal starting of either a cold or a warm
engine is obtained without pumping or pressing the
accelerator pedal
1. Always apply the parking brake. 2. Press and hold the brake pedal while pushing the
ENGINE START/STOP button once.
NOTE: A delay of the start of up to five seconds is
possible under very cold conditions. The �Wait to Start�
telltale will be illuminated during the pre-heat process,
When the engine Wait To Start light goes off the engine
will automatically crank.
CAUTION!
If the “Water in Fuel Indicator Light” remains on, DO
NOT START the engine before you drain the water
from the fuel filters to avoid engine damage. Refer to
“Maintenance Procedures/Draining Fuel/Water Sepa-
rator Filter” in “Maintaining Your Vehicle” for fur-
ther information.
4
STARTING AND OPERATING 99
Page 102 of 406

3. The system will automatically engage the starter tocrank the engine. If the vehicle fails to start, the starter
will disengage automatically after 25 seconds.
4. If you wish to stop the cranking of the engine prior to the engine starting, push the button again.
5. Check that the oil pressure warning light has turned off.
6. Release the parking brake.
Extreme Cold Weather
The engine block heater is a resistance heater installed in
the water jacket of the engine. It requires a 110–115 Volt
AC electrical outlet with a grounded, three-wire exten-
sion cord. Its use is recommended for environments that
routinely fall below -10°F (-23°C). It should be used when
the vehicle has not been running overnight or longer periods and should be plugged in two hours prior to
start. Its use is required for cold starts with temperatures
under -20°F (-28°C).
NOTE: The engine block heater cord is a factory in-
stalled option. If your vehicle is not equipped, heater
cords are available from your authorized MOPAR
dealer.
•
A 12 Volt heater built into the fuel filter housing aids in
preventing fuel gelling. It is controlled by a built-in
thermostat.
• A Diesel Pre-Heat system both improves engine start-
ing and reduces the amount of white smoke generated
by a warming engine.
Starting Fluids
The engine is equipped with a glow plug preheating
system. If the instructions in this manual are followed,
100 STARTING AND OPERATING
Page 146 of 406

•Do not change the thermostat for Summer or Winter
operation. If replacement is ever necessary, install
ONLY the correct type thermostat. Other designs may
result in unsatisfactory engine coolant (antifreeze)
performance, poor gas mileage, and increased emis-
sions.
Charge Air Cooler — Inter-Cooler
The charge air cooler is positioned in front of the radiator
and the air conditioner condenser. Air enters the engine
through the air cleaner and passes through the turbo-
charger, where it is pressurized. This pressurized air
rapidly reaches high temperature. The air is then directed
through a hose to the charge air cooler and through
another hose to the intake manifold of the engine. This
cooling process enables more efficient burning of fuel
resulting in fewer emissions. To guarantee optimum performance of the system, keep
the surfaces of the charge air cooler, condenser and
radiator clean and free of debris. Periodically check the
hoses leading to and from the charge air cooler for cracks
or loose clamps resulting in loss of pressure and reduced
engine performance.
Brake System
Brake Master Cylinder — Brake Fluid Level Check
The fluid level of the master cylinder should be checked
when performing under the hood service, or immedi-
ately if the “Brake System Warning Light” indicates
system failure.
The brake master cylinder has a translucent plastic
reservoir. On the outboard side of the reservoir, there is a
“MAX” mark and a “MIN” mark. The fluid level must be
kept within these two marks. Do not add fluid above the
full mark because leakage may occur at the cap.
144 MAINTAINING YOUR VEHICLE
Page 154 of 406

MAINTENANCE SCHEDULE
Your vehicle is equipped with an automatic oil change
indicator system. The oil change indicator system will
remind you that it is time to take your vehicle in for
scheduled maintenance.
Based on engine operation conditions, the oil change
indicator message will illuminate. This means that ser-
vice is required for your vehicle. Operating conditions
such as frequent short-trips, trailer tow, extremely hot or
cold ambient temperatures will influence when the “Oil
Change Required” message is displayed. Severe Operat-
ing Conditions can cause the change oil message to
illuminate as early as 3,500 miles (5,600 km) since last
reset. Have your vehicle serviced as soon as possible,
within the next 500 miles (805 km).
Your authorized dealer will reset the oil change indicator
message after completing the scheduled oil change. If a
scheduled oil change is performed by someone otherthan your authorized dealer, the message can be reset by
referring to the steps described under “Electronic Vehicle
Information Center (EVIC)” or “Driver Information Dis-
play (DID)” in “Understanding Your Instrument Panel”
for further information.
NOTE:
Under no circumstances should oil change inter-
vals exceed 10,000 miles (16,000 km) or twelve months,
whichever comes first.
Once A Month Or Before A Long Trip:
• Check engine oil level
• Check windshield washer fluid level
• Check the tire inflation pressures and look for unusual
wear or damage
• Check the fluid levels of the coolant reservoir, brake
master cylinder and power steering, and fill as needed
• Check function of all interior and exterior lights
152 MAINTENANCE SCHEDULE
Page 194 of 406

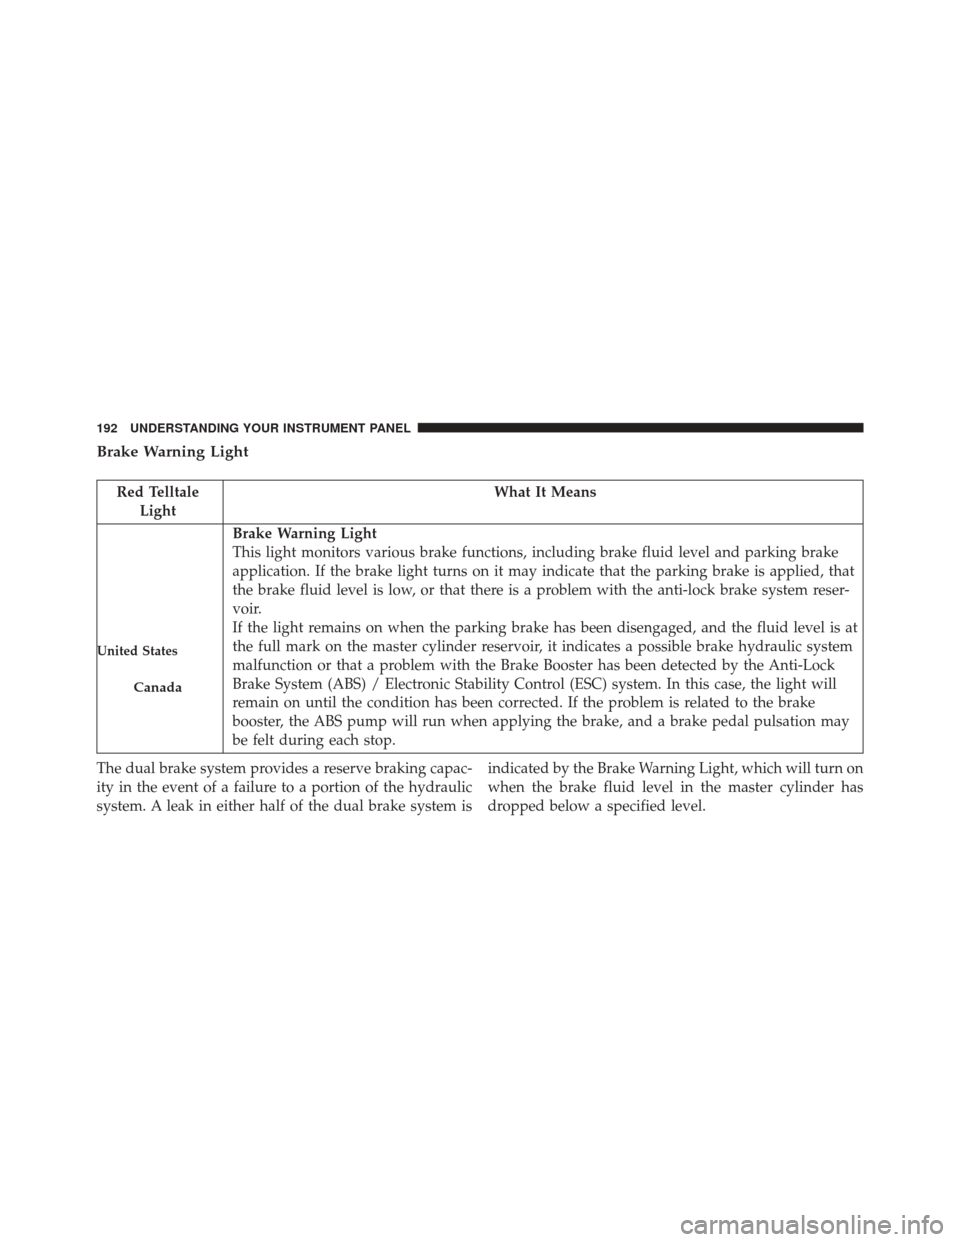
Brake Warning Light
Red TelltaleLight What It Means
United States
Canada
Brake Warning Light
This light monitors various brake functions, including brake fluid level and parking brake
application. If the brake light turns on it may indicate that the parking brake is applied, that
the brake fluid level is low, or that there is a problem with the anti-lock brake system reser-
voir.
If the light remains on when the parking brake has been disengaged, and the fluid level is at
the full mark on the master cylinder reservoir, it indicates a possible brake hydraulic system
malfunction or that a problem with the Brake Booster has been detected by the Anti-Lock
Brake System (ABS) / Electronic Stability Control (ESC) system. In this case, the light will
remain on until the condition has been corrected. If the problem is related to the brake
booster, the ABS pump will run when applying the brake, and a brake pedal pulsation may
be felt during each stop.
The dual brake system provides a reserve braking capac-
ity in the event of a failure to a portion of the hydraulic
system. A leak in either half of the dual brake system is indicated by the Brake Warning Light, which will turn on
when the brake fluid level in the master cylinder has
dropped below a specified level.
192 UNDERSTANDING YOUR INSTRUMENT PANEL
Page 195 of 406

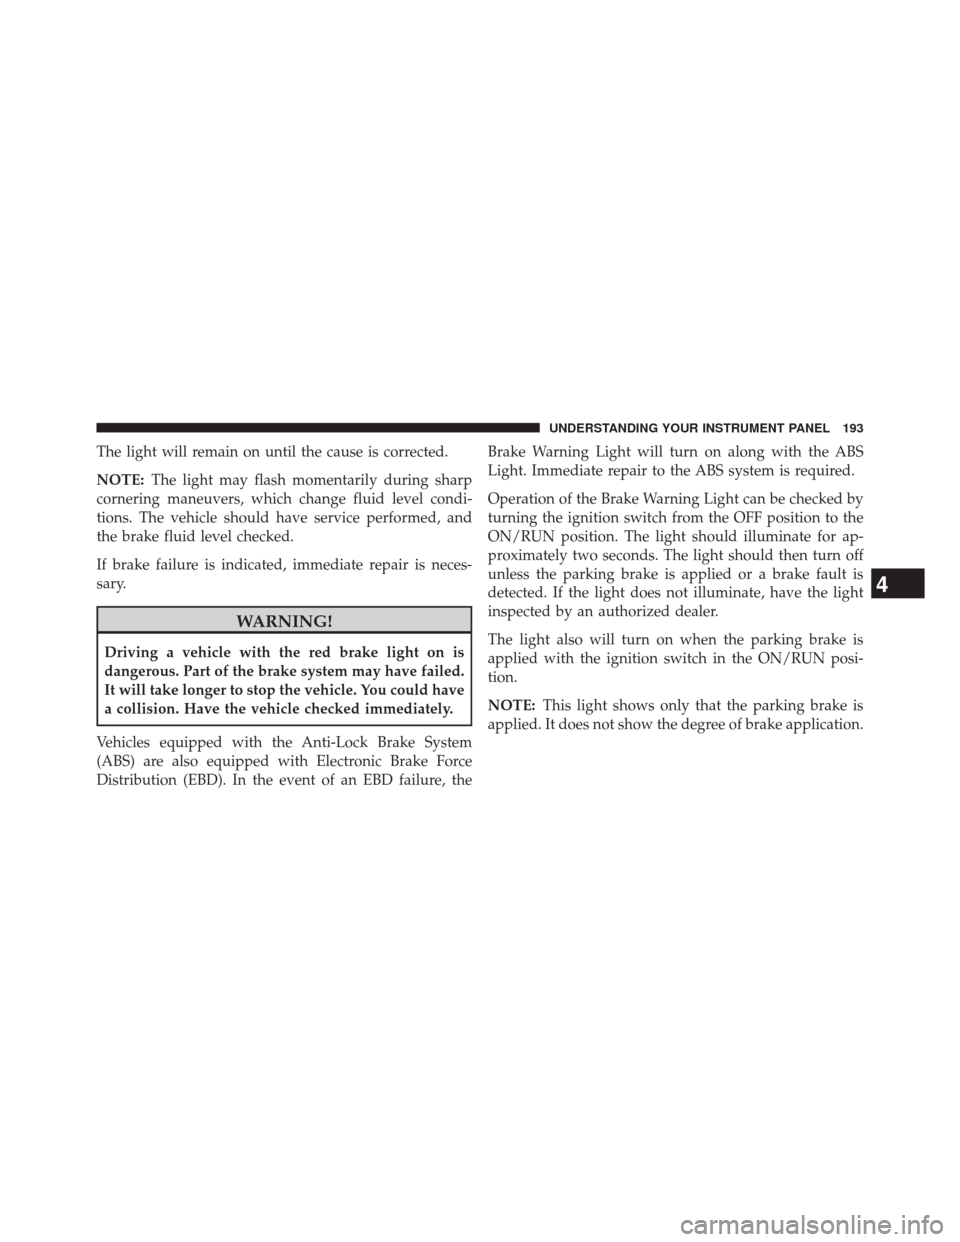
The light will remain on until the cause is corrected.
NOTE:The light may flash momentarily during sharp
cornering maneuvers, which change fluid level condi-
tions. The vehicle should have service performed, and
the brake fluid level checked.
If brake failure is indicated, immediate repair is neces-
sary.
WARNING!
Driving a vehicle with the red brake light on is
dangerous. Part of the brake system may have failed.
It will take longer to stop the vehicle. You could have
a collision. Have the vehicle checked immediately.
Vehicles equipped with the Anti-Lock Brake System
(ABS) are also equipped with Electronic Brake Force
Distribution (EBD). In the event of an EBD failure, the Brake Warning Light will turn on along with the ABS
Light. Immediate repair to the ABS system is required.
Operation of the Brake Warning Light can be checked by
turning the ignition switch from the OFF position to the
ON/RUN position. The light should illuminate for ap-
proximately two seconds. The light should then turn off
unless the parking brake is applied or a brake fault is
detected. If the light does not illuminate, have the light
inspected by an authorized dealer.
The light also will turn on when the parking brake is
applied with the ignition switch in the ON/RUN posi-
tion.
NOTE:
This light shows only that the parking brake is
applied. It does not show the degree of brake application.
4
UNDERSTANDING YOUR INSTRUMENT PANEL 193
Page 201 of 406
Electric Power Steering Fail Warning — If Equipped
Red TelltaleLight What It Means
Electric Power Steering Fail Warning
This light is used to manage the electrical warning of the EPS (Power Steering System). Re-
fer to “Power Steering” in “Starting and Operating” for further information.
Trailer Brake Disconnected Warning Light
Red Warning
Light What It Means
Trailer Brake Disconnected Warning Light
This telltale is on when the Trailer Brake has been disconnected.
4
UNDERSTANDING YOUR INSTRUMENT PANEL 199