2016 PEUGEOT 3008 display
[x] Cancel search: displayPage 45 of 344
43
3008_en_Chap01_controle-marche_ed01-2015
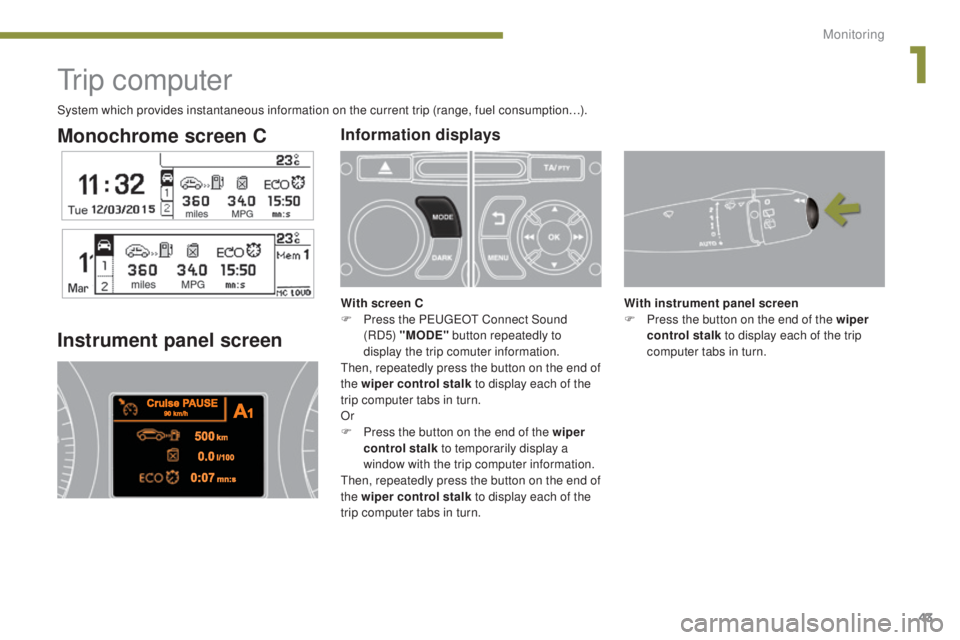
Monochrome screen C
Tr i p c o m p u t e r
Instrument panel screen
With instrument panel screen
F P ress the button on the end of the wiper
control stalk to display each of the trip
computer tabs in turn.
Information displays
With screen C
F P ress the PEUGEOT Connect Sound
(RD5) "MODE" button repeatedly to
display the trip comuter information.
Then, repeatedly press the button on the end of
the wiper control stalk to display each of the
trip computer tabs in turn.
Or
F
P
ress the button on the end of the wiper
control stalk to temporarily display a
window with the trip computer information.
Then, repeatedly press the button on the end of
the wiper control stalk to display each of the
trip computer tabs in turn.
System which provides instantaneous information on the current trip (range, fuel consumption…).
1
Monitoring
Page 46 of 344
44
3008_en_Chap01_controle-marche_ed01-2015
Depending on your vehicle's equipment, the
trip computer information appears in the
monochrome C screen or in the instrument
panel screen.
-
T
he current information with:
●
t
he range,
●
t
he current fuel consumption,
●
t
he distance remaining to be travelled or
the Stop & Start time counter.
-
T
he trip "1" tab with:
●
t
he average speed,
f
or the first trip,
●
t
he average fuel consumption,
-
T
he trip "2" tab with:
●
t
he average speed,
f
or the second trip,
●
t
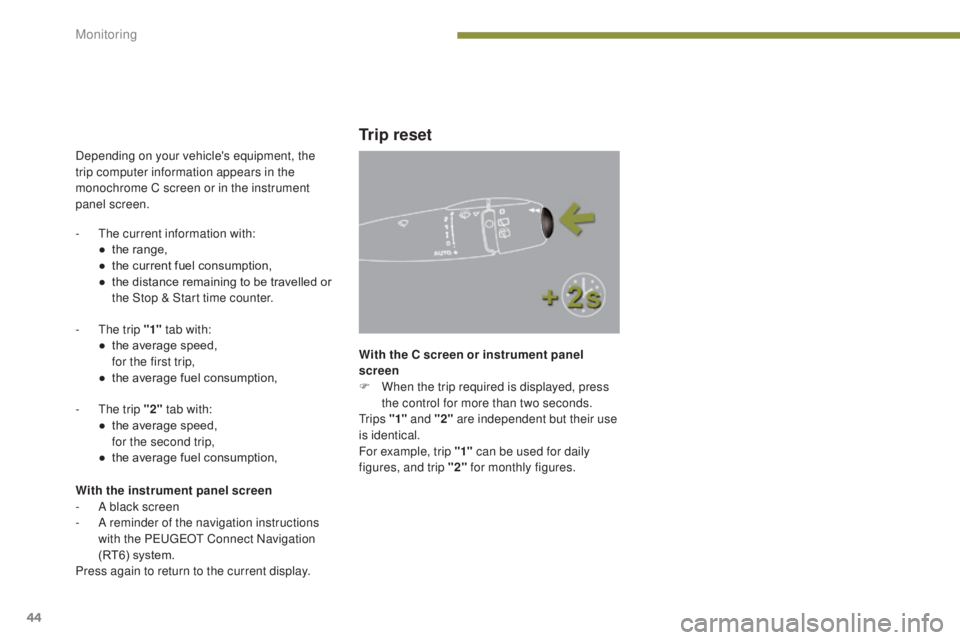
he average fuel consumption, With the C screen or instrument panel
screen
F
W
hen the trip required is displayed, press
the control for more than two seconds.
Tr i p s "1" and "2" are independent but their use
is identical.
For example, trip "1" can be used for daily
figures, and trip "2" for monthly figures.
Trip reset
With the instrument panel screen
-
A b lack screen
-
A r
eminder of the navigation instructions
with the PEUGEOT Connect Navigation
(RT6) system.
Press again to return to the current display.
Monitoring
Page 57 of 344
55
3008_en_Chap02_ouvertures_ed01-2015
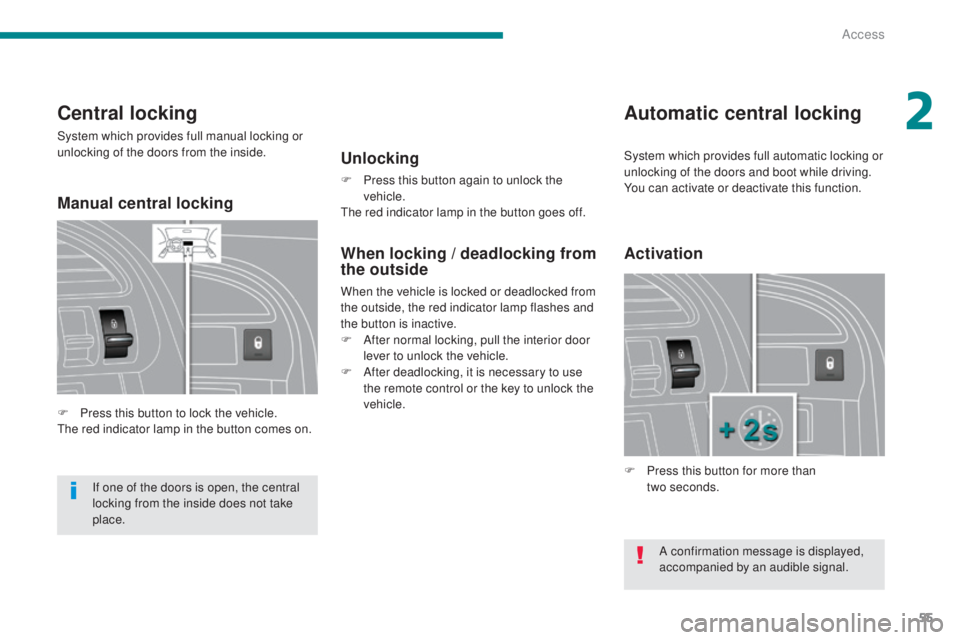
Central locking
System which provides full manual locking or
unlocking of the doors from the inside.
F
P
ress this button to lock the vehicle.
The red indicator lamp in the button comes on.
Automatic central locking
Unlocking
F Press this button again to unlock the vehicle.
The red indicator lamp in the button goes off.
Activation
F Press this button for more than two seconds.
If one of the doors is open, the central
locking from the inside does not take
place.
When locking / deadlocking from
the outside
When the vehicle is locked or deadlocked from
the outside, the red indicator lamp flashes and
the button is inactive.
F
A
fter normal locking, pull the interior door
lever to unlock the vehicle.
F
A
fter deadlocking, it is necessary to use
the remote control or the key to unlock the
vehicle.
A confirmation message is displayed,
accompanied by an audible signal.
System which provides full automatic locking or
unlocking of the doors and boot while driving.
You can activate or deactivate this function.
Manual central locking
2
Access
Page 58 of 344
56
3008_en_Chap02_ouvertures_ed01-2015
Automatic locking
Above 6 mph (10 km/h), the doors and boot
lock automatically.
If one of the doors is open, the automatic
central locking does not take place.
If the boot is open, the automatic central
locking of the doors is active.
Deactivation
F Press this button again for more than two seconds.
Unlocking
F Above 6 mph (10 km/h), press this button to unlock the doors and boot temporarily.
In the event of an impact, the doors
unlock automatically.
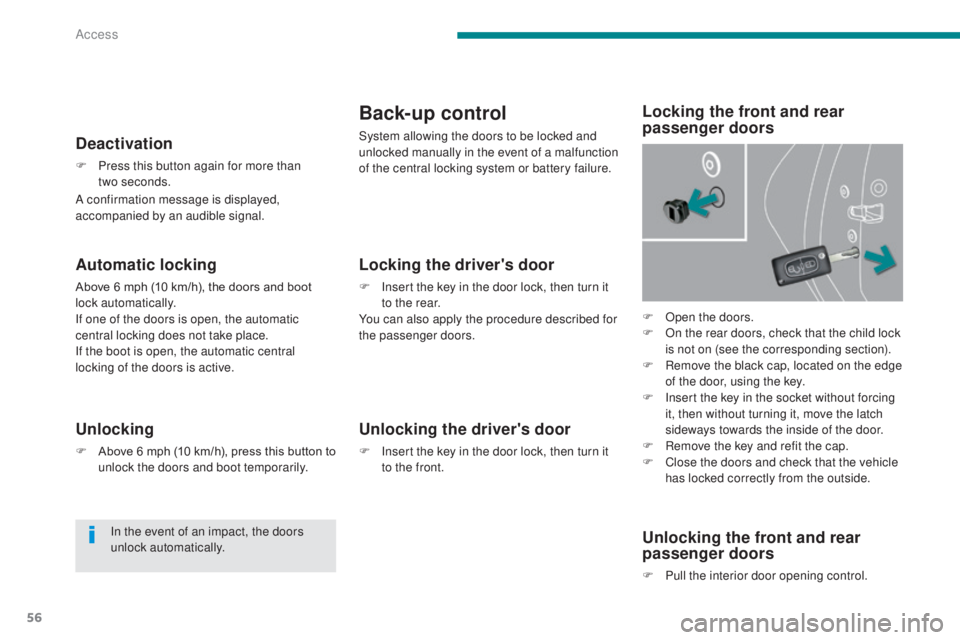
Back-up control
System allowing the doors to be locked and
unlocked manually in the event of a malfunction
of the central locking system or battery failure.
F
O
pen the doors.
F
O
n the rear doors, check that the child lock
is not on (see the corresponding section).
F
R
emove the black cap, located on the edge
of the door, using the key.
F
I
nsert the key in the socket without forcing
it, then without turning it, move the latch
sideways towards the inside of the door.
F
R
emove the key and refit the cap.
F
C
lose the doors and check that the vehicle
has locked correctly from the outside.
Locking the driver's door
F Insert the key in the door lock, then turn it to the rear.
You can also apply the procedure described for
the passenger doors.
Unlocking the driver's door
F Insert the key in the door lock, then turn it to the front.
Locking the front and rear
passenger doors
Unlocking the front and rear
passenger doors
F Pull the interior door opening control.
A confirmation message is displayed,
accompanied by an audible signal.
Access
Page 66 of 344
64
3008_en_Chap03_confort_ed01-2015
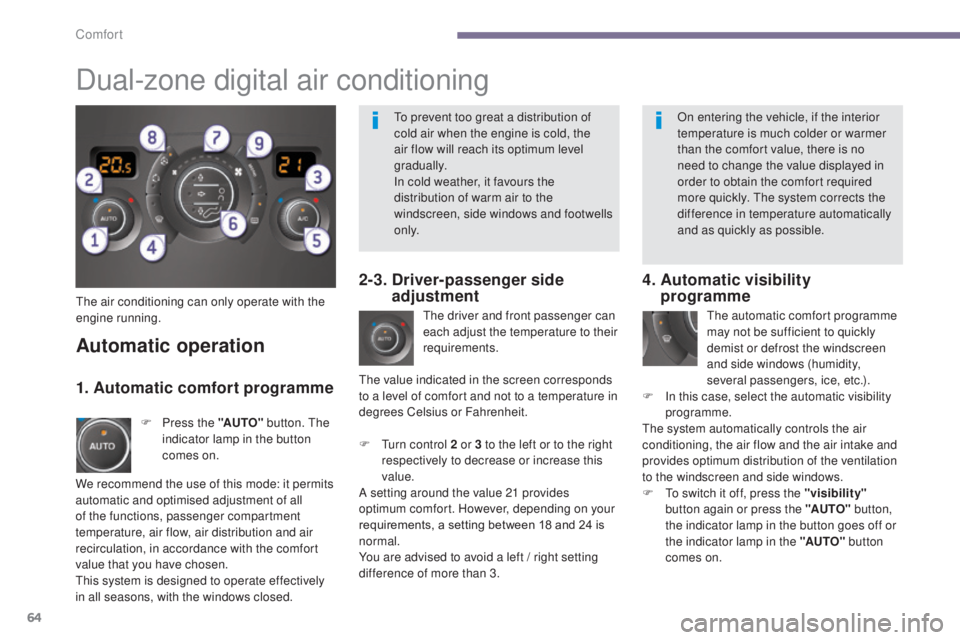
The air conditioning can only operate with the
engine running.The driver and front passenger can
each adjust the temperature to their
requirements.
F
T
urn control 2 or 3 to the left or to the right
respectively to decrease or increase this
value.
A setting around the value 21 provides
optimum comfort. However, depending on your
requirements, a setting between 18 and 24 is
normal.
You are advised to avoid a left
/ right setting
difference of more than 3.
4. Automatic visibility programme
The automatic comfort programme
may not be sufficient to quickly
demist or defrost the windscreen
and side windows (humidity,
several passengers, ice, etc.).
F
I
n this case, select the automatic visibility
programme.
The system automatically controls the air
conditioning, the air flow and the air intake and
provides optimum distribution of the ventilation
to the windscreen and side windows.
F
T
o switch it off, press the "visibility"
button again or press the "AUTO" button,
the indicator lamp in the button goes off or
the indicator lamp in the "AUTO" button
comes on.
Automatic operation
F Press the "AUTO" button. The
indicator lamp in the button
comes on.
2-3. Driver-passenger side adjustment
Dual-zone digital air conditioning
We recommend the use of this mode: it permits
automatic and optimised adjustment of all
of the functions, passenger compartment
temperature, air flow, air distribution and air
recirculation, in accordance with the comfort
value that you have chosen.
This system is designed to operate effectively
in all seasons, with the windows closed. The value indicated in the screen corresponds
to a level of comfort and not to a temperature in
degrees Celsius or Fahrenheit.
1. Automatic comfort programme
To prevent too great a distribution of
cold air when the engine is cold, the
air flow will reach its optimum level
gradually.
In cold weather, it favours the
distribution of warm air to the
windscreen, side windows and footwells
o n l y.
On entering the vehicle, if the interior
temperature is much colder or warmer
than the comfort value, there is no
need to change the value displayed in
order to obtain the comfort required
more quickly. The system corrects the
difference in temperature automatically
and as quickly as possible.
Comfort
Page 67 of 344

65
3008_en_Chap03_confort_ed01-2015
Manual operation
F Press this button to switch off the air conditioning.
6. Air distribution adjustment
F Press one or more buttons to direct the air flow towards:
7. Air flow adjustment
F Turn this control to the left to decrease the air flow or to the
right to increase the air flow.
5. Air conditioning On / Off
- the windscreen and side windows (demisting or defrosting),
-
t
he windscreen, the side
windows and the vents,
-
t
he windscreen, the side windows,
the vents and the footwells,
-
t
he vents and the footwells,
-
t
he vents,
-
t
he footwells,
-
t
he windscreen, the side
windows and the footwells.
The air flow indicator lamps, between the
two
fans, come on progressively in relation to
the value requested.
Switching the system off could result in some
discomfort (humidity, condensation).
F
P
ress this button again to return to
automatic operation of the air conditioning.
The indicator lamp in the "A /C " button
comes on.
If you wish, you can make a different choice
from that offered by the system by changing
a setting. The other functions will still be
controlled automatically.
F
P
ressing the "AUTO"
button returns the
system to completely automatic operation.
To obtain cool air more quickly, you can use
interior air recirculation for a few moments. The
return to the intake of exterior air.
In winter, we recommend keeping the rear air
vents closed.
For maximum cooling or heating of the
passenger compartment, it is possible
to exceed the minimum value 14 or the
maximum value 28.
F
T
urn control 2 or 3 to the left
until
"LO" (low) is displayed or
to the right until "HI" (high) is
displayed.
With Stop & Start, when demisting has
been activated, the STOP mode is not
available.
3
Comfort
Page 80 of 344
78
3008_en_Chap04_visibilite_ed01-2015
Model without AUTO lighting
Model with AUTO lighting
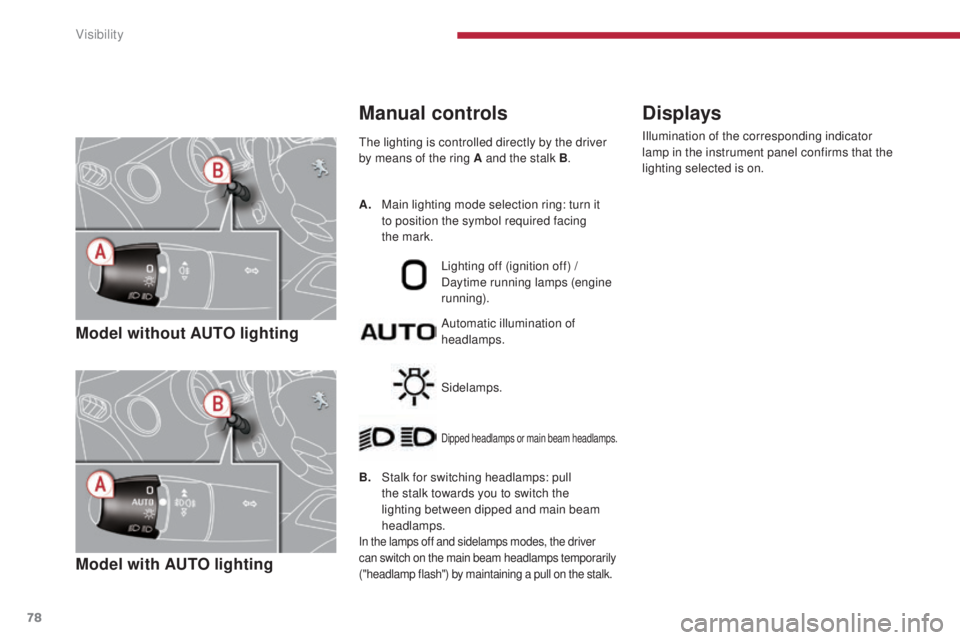
The lighting is controlled directly by the driver
by means of the ring A and the stalk B.
B.
S
talk for switching headlamps: pull
the stalk towards you to switch the
lighting between dipped and main beam
headlamps.
In the lamps off and sidelamps modes, the driver
can switch on the main beam headlamps temporarily
("headlamp flash") by maintaining a pull on the stalk.
Automatic illumination of
headlamps. Lighting off (ignition off) /
Daytime running lamps (engine
running).
Sidelamps.
Dipped headlamps or main beam headlamps.
Displays
Illumination of the corresponding indicator
lamp in the instrument panel confirms that the
lighting selected is on.
Manual controls
A. Main lighting mode selection ring: turn it
to position the symbol required facing
the
mark.
Visibility
Page 84 of 344
82
3008_en_Chap04_visibilite_ed01-2015
Automatic guide-me-home
lighting
Automatic illumination of headlamps
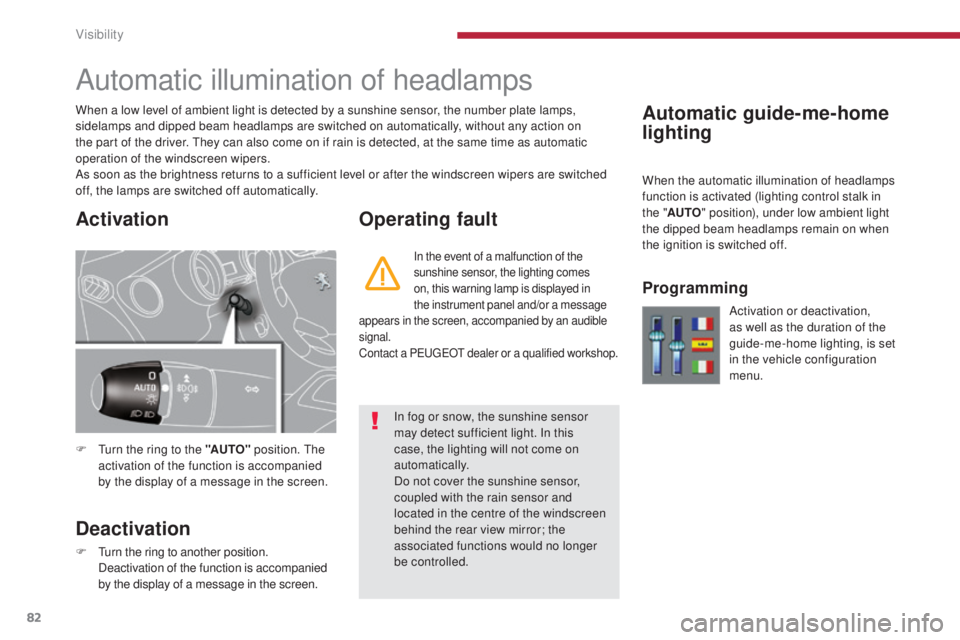
F Turn the ring to the "AUTO" position. The
activation of the function is accompanied
by the display of a message in the screen.
Deactivation
F Turn the ring to another position. Deactivation of the function is accompanied
by the display of a message in the screen.
Operating fault
In the event of a malfunction of the
sunshine sensor, the lighting comes
on, this warning lamp is displayed in
the instrument panel and/or a message
appears in the screen, accompanied by an audible
signal.
Contact a PEUGEOT dealer or a qualified workshop.
When the automatic illumination of headlamps
function is activated (lighting control stalk in
the
"AUTO " position), under low ambient light
the dipped beam headlamps remain on when
the ignition is switched off.
Programming
In fog or snow, the sunshine sensor
may detect sufficient light. In this
case, the lighting will not come on
automatically.
Do not cover the sunshine sensor,
coupled with the rain sensor and
located in the centre of the windscreen
behind the rear view mirror; the
associated functions would no longer
be controlled.
When a low level of ambient light is detected by a sunshine sensor, the number plate lamps,
sidelamps and dipped beam headlamps are switched on automatically, without any action on
the part of the driver. They can also come on if rain is detected, at the same time as automatic
operation of the windscreen wipers.
As soon as the brightness returns to a sufficient level or after the windscreen wipers are switched
off, the lamps are switched off automatically.
Activation or deactivation,
as well as the duration of the
guide-me-home lighting, is set
in the vehicle configuration
menu.
Activation
Visibility