2016 NISSAN TITAN climate settings
[x] Cancel search: climate settingsPage 7 of 40
5
When the vehicle’s outside mirrors are extended for towing, you may see the mirrors in the bird’s-eye view or the front-side view.
For information regarding how to access additional viewing cycles, please\
see your Owner’s Manual.
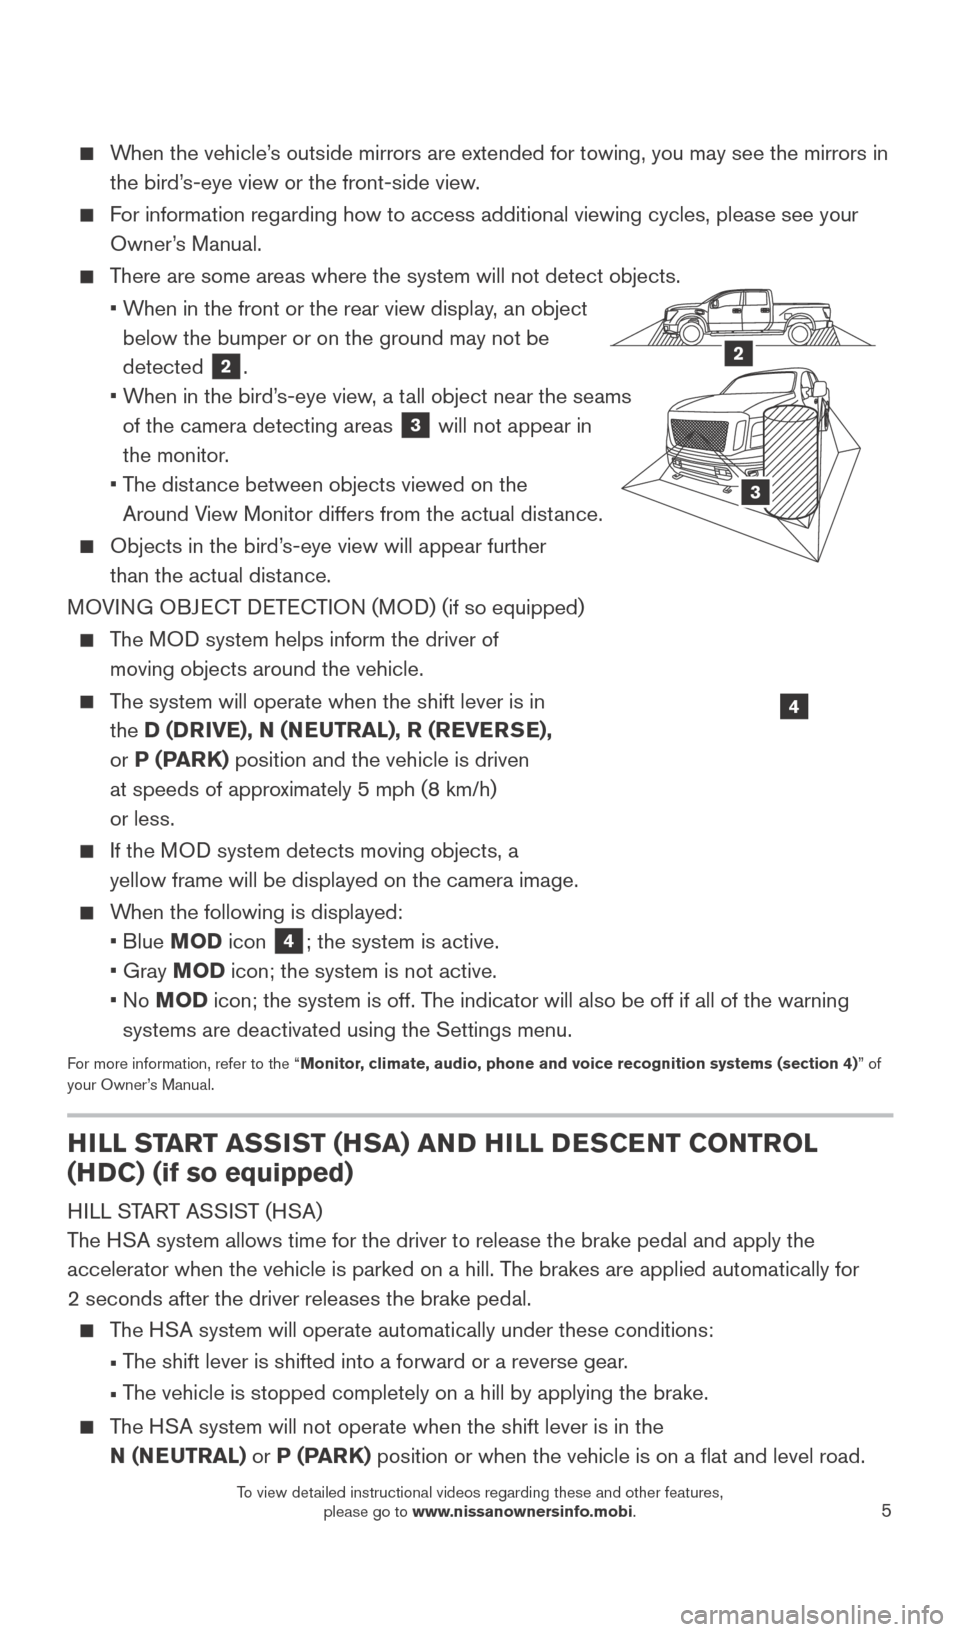
There are some areas where the system will not detect objects.
•
W
hen in the front or the rear view display, an object
below the bumper or on the ground may not be
detected
2.
•
W
hen in the bird’s-eye view, a tall object near the seams
of the camera detecting areas
3 will not appear in
the monitor.
•
T
he distance between objects viewed on the
Around View Monitor differs from the actual distance.
Objects in the bird’ s-eye view will appear further
than the actual distance.
MOVING OBJECT DETECTION (MOD) (if so equipped)
The MOD system helps inform the driver of moving objects around the vehicle.
The system will operate when the shift lever is in the D (DRIVE), N (NEUTRAL), R (REVERSE),
or P (PARK) position and the vehicle is driven
at speeds of approximately 5 mph (8 km/h)
or less.
If the MOD system detects moving objects, a yellow frame will be displayed on the camera image.
When the following is displayed:
• Blue
MOD icon
4; the system is active.
• Gray
MOD icon; the system is not active.
•
No MOD icon; the system is off. The indicator will also be off if all of the warning
systems are deactivated using the Settings menu.
For more information, refer to the “Monitor, climate, audio, phone and voice recognition systems (section 4) ” of
your Owner’s Manual.
4
LHA380 7
2A
3
2
HILL START ASSIST (HSA) AND HILL DESCENT CONTROL
(HDC) (if so equipped)
HILL START ASSIST (HSA)
The HSA system allows time for the driver to release the brake pedal and appl\
y the
accelerator when the vehicle is parked on a hill. The brakes are applied automatically for
2 seconds after the driver releases the brake pedal.
The HSA system will operate automatically under these conditions:
•
T
he shift lever is shifted into a forward or a reverse gear.
•
T
he vehicle is stopped completely on a hill by applying the brake.
The HSA system will not operate when the shift lever is in the N (NEUTRAL) or P (PARK) position or when the vehicle is on a flat and level road.
2027886_16b_Titan_US_pQRG_010716.indd 51/7/16 2:02 PM
To view detailed instructional videos regarding these and other features, please go to www.nissanownersinfo.mobi.
Page 14 of 40
12
CLOCK SET/ADJUSTMENT
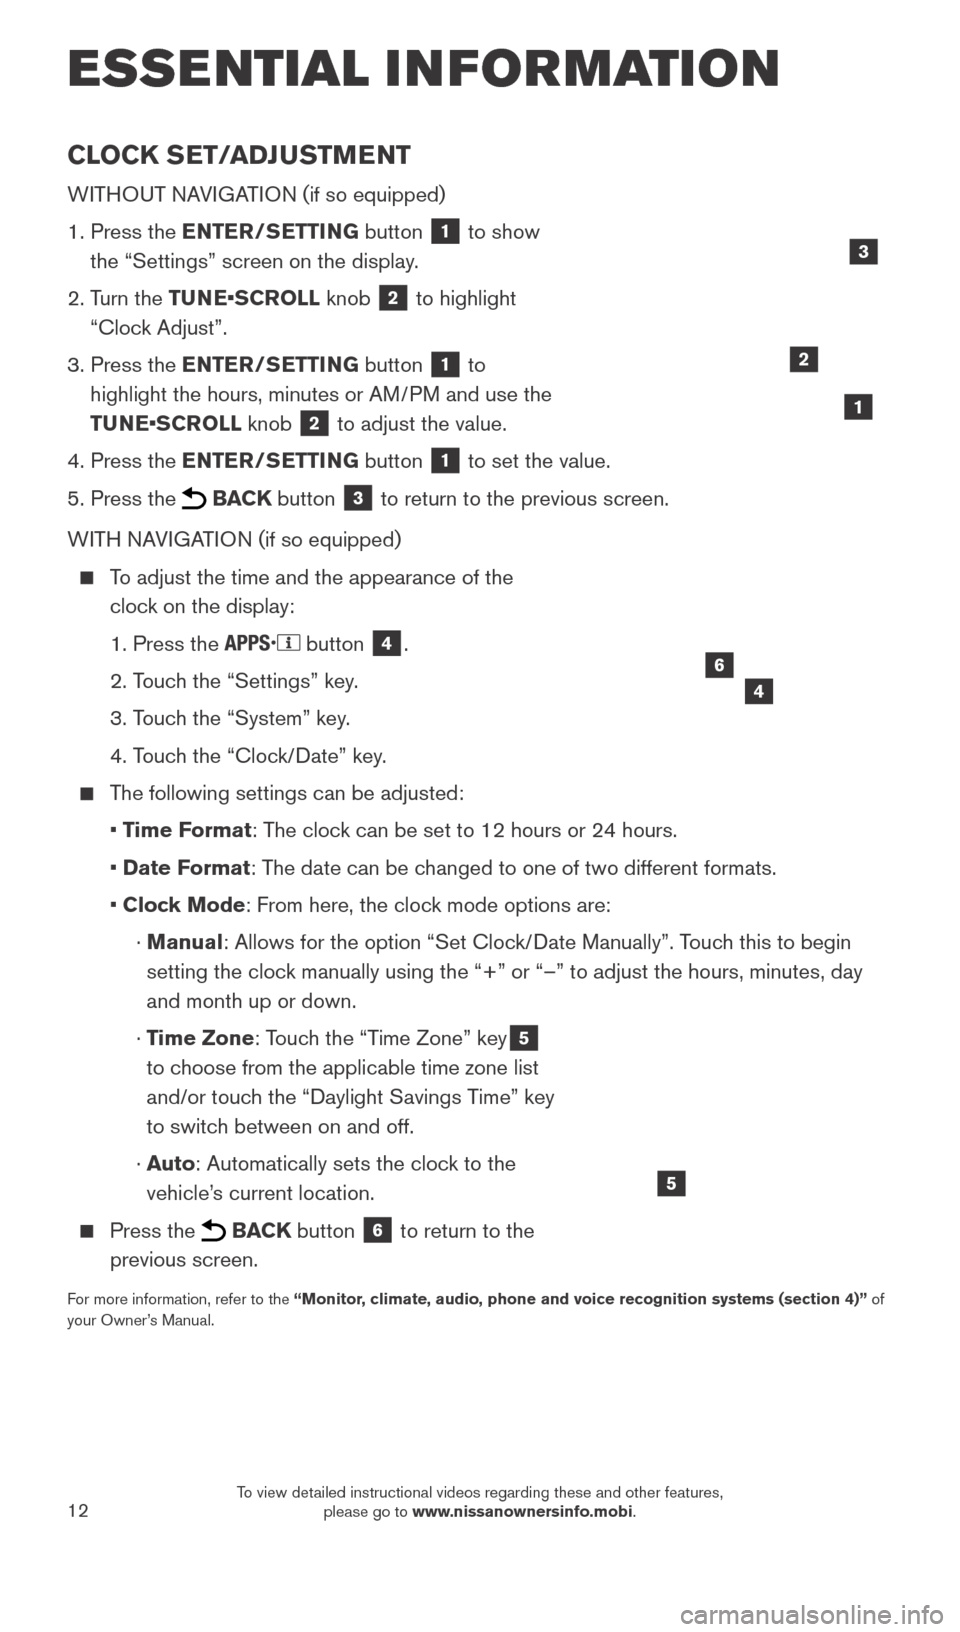
WITHOUT NAVIGATION (if so equipped)
1.
Press the
ENTER/SETTING button
1 to show
the “Settings” screen on the display.
2.
T
urn the TUNE•SCROLL knob
2 to highlight
“Clock Adjust”.
3.
Press the
ENTER/SETTING button
1 to
highlight the hours, minutes or AM/PM and use the
TUNE•SCROLL knob
2 to adjust the value.
4.
Press the
ENTER/SETTING button
1 to set the value.
5.
Press the BACK button 3 to return to the previous screen.
WITH NAVIGATION (if so equipped)
To adjust the time and the appearance of the clock on the display:
1. Press the button 4.
2. T
ouch the “Settings” key.
3. T
ouch the “System” key.
4. T
ouch the “Clock/Date” key.
The following settings can be adjusted:
•
T
ime Format: The clock can be set to 12 hours or 24 hours.
•
Date F
ormat: The date can be changed to one of two different formats.
• Cloc
k Mode: From here, the clock mode options are:
·
Manual: Allows for the option “Set Clock/Date Manually”. Touch this to begin
setting the clock manually using the “+” or “–” to adjust the hours, minu\
tes, day
and month up or down.
·
T
ime Zone: Touch the “Time Zone” key
5
to choose from the applicable time zone list
and/or touch the “Daylight Savings Time” key
to switch between on and off.
·
Auto: Automatically sets the clock to the
vehicle’s current location.
Press the BACK button 6 to return to the
previous screen.
For more information, refer to the “Monitor, climate, audio, phone and voice recognition systems (section 4)” of
your Owner’s Manual.
5
2
ESSE NTIAL I N FOR MATION
1
46
3
2027886_16b_Titan_US_pQRG_010716.indd 121/7/16 2:02 PM
To view detailed instructional videos regarding these and other features, please go to www.nissanownersinfo.mobi.
Page 22 of 40
20
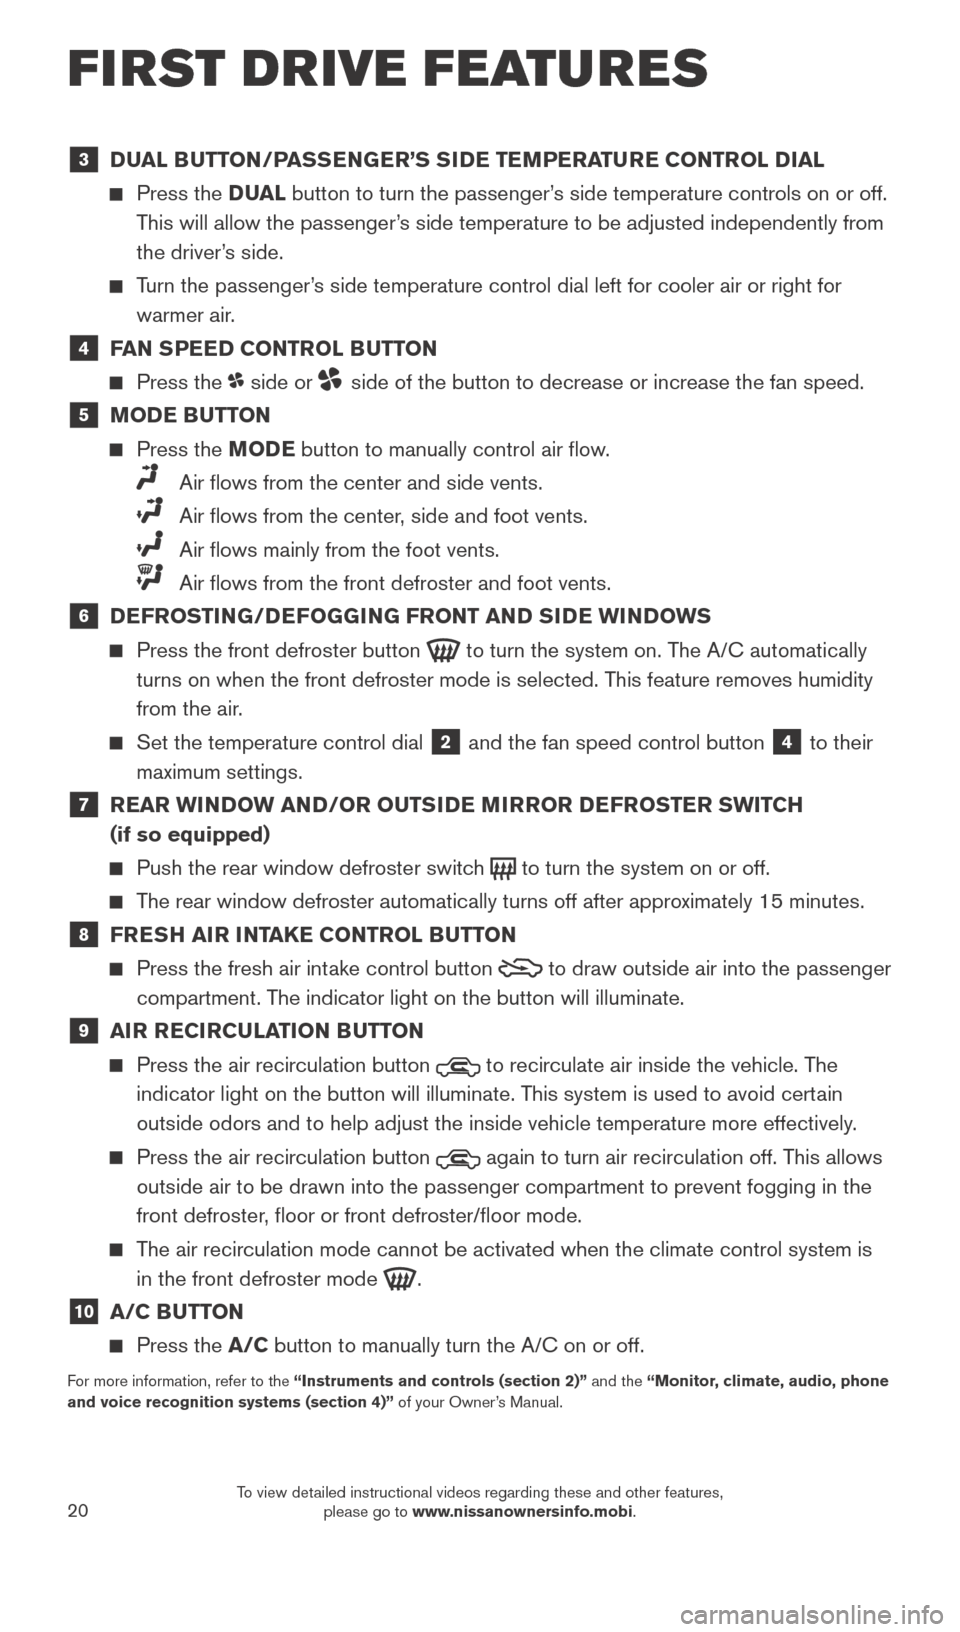
3 DUAL BUTTON/PASSENGER’S SIDE TEMPERATURE CONTROL DIAL
Press the D UAL button to turn the passenger’s side temperature controls on or off.
This will allow the passenger’s side temperature to be adjusted independently from
the driver’s side.
Turn the passenger’s side temperature control dial left for cooler air or right for warmer air.
4 FAN SPEED CONTROL BUTTON
Press the side or side of the button to decrease or increase the fan speed.
5 MODE BUTTON
Press the MODE button to manually control air flow.
Air flows from the center and side vents.
Air flows from the center , side and foot vents.
Air flows mainly from the foot vents.
Air flows from the front defroster and foot vents.
6 DEFROSTING/DEFOGGING FRONT AND SIDE WINDOWS
Press the front defroster button to turn the system on. The A/C automatically
turns on when the front defroster mode is selected. This feature removes humidity
from the air.
Set the temperature control dial 2 and the fan speed control button 4 to their
maximum settings.
7 REAR WINDOW AND/OR OUTSIDE MIRROR DEFROSTER SWITCH (if so equipped)
Push the rear window defroster switc h to turn the system on or off.
The rear window defroster automatically turns off after approximately 15 minutes.
8 FRESH AIR INTAKE CONTROL BUTTON
Press the fresh air intake control button to draw outside air into the passenger
compartment. The indicator light on the button will illuminate.
9 AIR RECIRCULATION BUTTON
Press the air recirculation button to recirculate air inside the vehicle. The
indicator light on the button will illuminate. This system is used to avoid certain
outside odors and to help adjust the inside vehicle temperature more eff\
ectively.
Press the air recirculation button again to turn air recirculation off. This allows
outside air to be drawn into the passenger compartment to prevent foggin\
g in the
front defroster, floor or front defroster/floor mode.
The air recirculation mode cannot be activated when the climate control s\
ystem is in the front defroster mode
.
10 A/C BUTTON
Press the A/C button to manually turn the A/C on or off.
For more information, refer to the “Instruments and controls (section 2)” and the “Monitor, climate, audio, phone
and voice recognition systems (section 4)” of your Owner’s Manual.
FIRST DRIVE FEATURES
2027886_16b_Titan_US_pQRG_010716.indd 201/7/16 2:03 PM
To view detailed instructional videos regarding these and other features, please go to www.nissanownersinfo.mobi.
Page 23 of 40
21
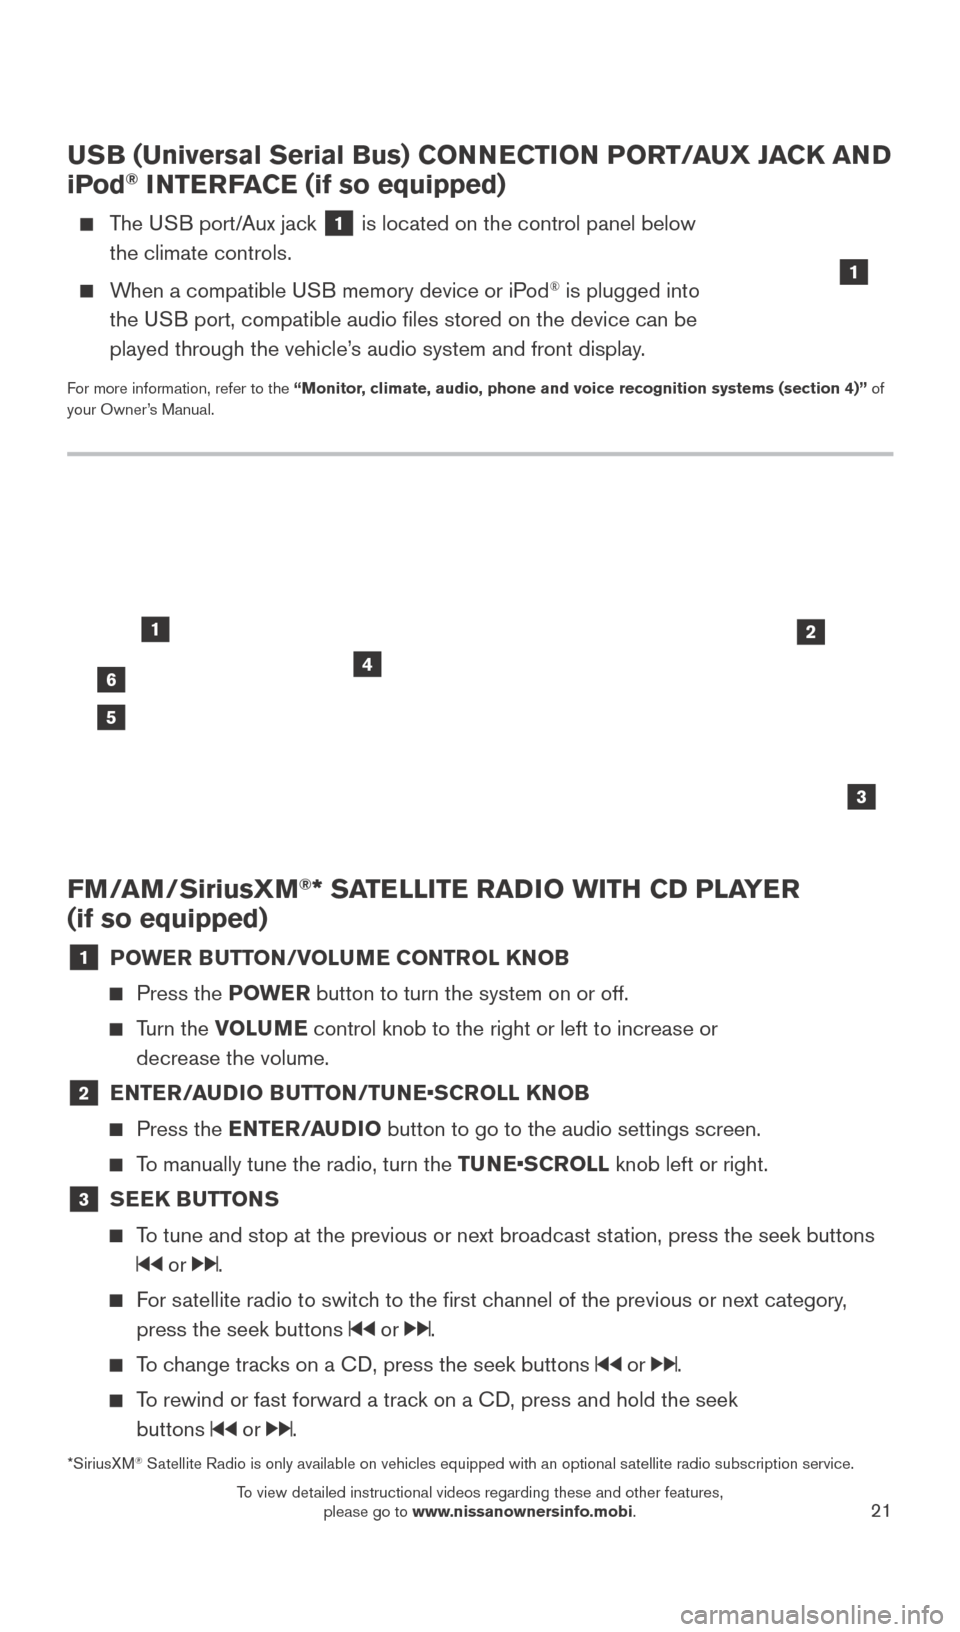
FM/AM/SiriusXM®* SATELLITE RADIO WITH CD PLAYER
(if so equipped)
1 POWER BUTTON/VOLUME CONTROL KNOB
Press the POWE R button to turn the system on or off.
Turn the VOLUME control knob to the right or left to increase or
decrease the volume.
2 E NTER/AUDIO BUTTON/TUNE•SCROLL KNOB
Press the
ENTER/AUDIO button to go to the audio settings screen.
To manually tune the radio, turn the TUNE•SCROLL knob left or right.
3 SEEK BUTTONS
To tune and stop at the previous or next broadcast station, press the seek buttons
or .
For satellite radio to switch to the first channel of the previous or next category,
press the seek buttons
or .
To change tracks on a CD, press the seek buttons or .
To rewind or fast forward a track on a CD, press and hold the seek buttons
or .
46
2
3
1
5
USB (Universal Serial Bus) CONNECTION PORT/AUX JACK AND
iPod® INTERFACE (if so equipped)
The USB port/Aux jack 1 is located on the control panel below
the climate controls.
When a compatible USB memory device or iPod® is plugged into
the USB port, compatible audio files stored on the device can be
played through the vehicle’s audio system and front display.
For more information, refer to the “Monitor, climate, audio, phone and voice recognition systems (section 4)” of
your Owner’s Manual.
1
*SiriusXM® Satellite Radio is only available on vehicles equipped with an optional s\
atellite radio subscription service.
2027886_16b_Titan_US_pQRG_010716.indd 211/7/16 2:03 PM
To view detailed instructional videos regarding these and other features, please go to www.nissanownersinfo.mobi.
Page 31 of 40
29
RECEIVING/ENDING A CALL
When you receive a phone call, a ring tone sounds through the audio syste\
m.
To accept the call, press the button on the steering wheel.
To reject the call, press the button on the steering wheel.
To hang up the cellular phone at the end of a call or to disconnect durin\
g call placement, press the
button on the steering wheel.
1 Some jurisdictions prohibit the use of cellular telephones while drivin\
g.2 Availability of specific features is dependent upon the phone’s Bluetooth® support. Please refer to your phone owner’s
manual for details. Bluetooth® word mark and logos are owned by Bluetooth SIG, Inc., and any use of such marks by
NISSAN is under license. See www.NissanUSA.com/bluetooth for details.
3 Laws in some jurisdictions may restrict the use of “T ext-to-Speech”. Some applications and features, such as social
networking and texting, may also be restricted. Check local regulations for any requirements before using these features.
Compatible smartphone required. Text rates and/or data usage may apply.
To view detailed instructional videos regarding these and other features, please go\
to www.nissanownersinfo.mobi.
For more information, refer to the “Monitor, climate, audio, phone and voice recognition systems (section 4)” of
your Owner’s Manual.
BLUETOOTH® SYSTEM WITH NAVIGATION1,2 (if so equipped)
Send predefined or custom text mess ages3 through your vehicle’s Bluetooth®,2 system.
Receive texts through your vehicle’s Bluetooth®,2 system that can be read to you.
Bluetooth®,2 Streaming Audio allows you to use a
compatible Bluetooth®,2 device to play audio files
on your device. Your compatible device can be
connected to the vehicle’s audio system, allowing
audio files to play through the vehicle’s speakers.
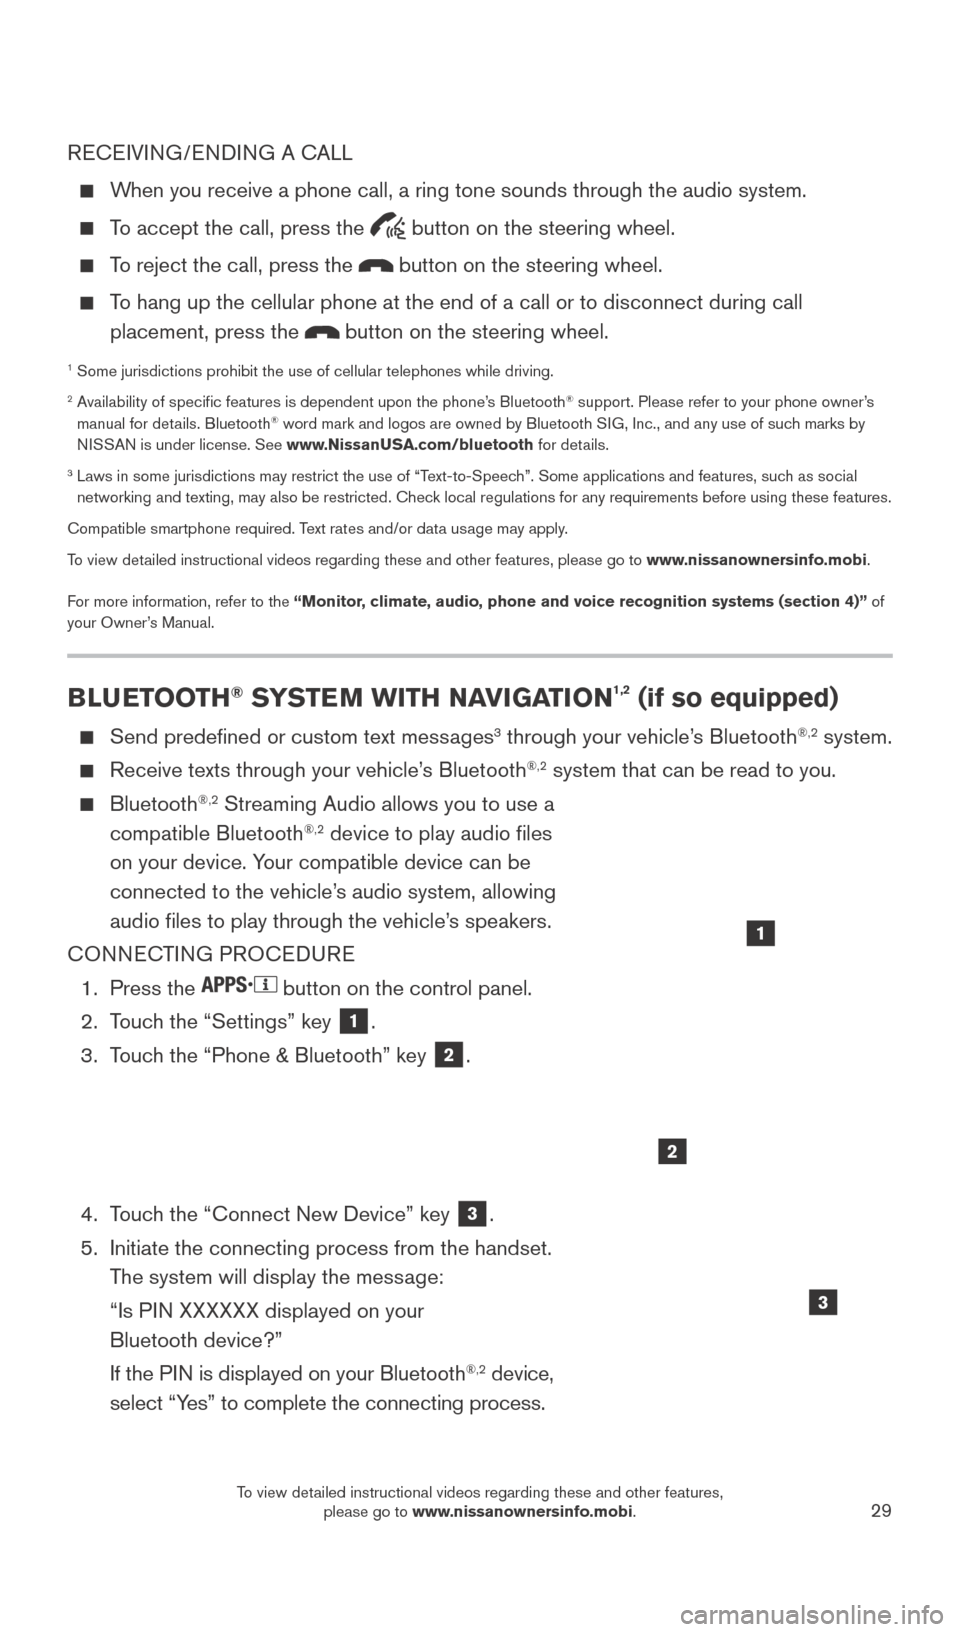
CONNECTING PROCEDURE
1.
Press the button on the control panel.
2.
T
ouch the “Settings” key
1.
3.
T
ouch the “Phone & Bluetooth” key
2.
4.
T
ouch the “Connect New Device” key
3.
5.
Initiate the connecting process from the handset.
T
he system will display the message:
“Is P
IN XXXXXX displayed on your
Bluetooth device?”
If the P
IN is displayed on your Bluetooth
®,2 device,
select “Yes” to complete the connecting process.
1
2
3
2027886_16b_Titan_US_pQRG_010716.indd 291/7/16 2:04 PM
To view detailed instructional videos regarding these and other features, please go to www.nissanownersinfo.mobi.
Page 35 of 40
33
NAVIGATION SYSTEM (if so equipped)
Your Navigation System can calculate a route from your current location t\
o a preferred destination. The real-time map display and turn-by-turn voice guidance will lead you
along the route.
The Navigation System will continually update your vehicle’s position. If you have deviated from the original route, it will recalculate the route from you\
r current location.
To help promote safe driving, some functions cannot be operated or have limited operation when the vehicle speed is above 5 mph (8 km/h). The on-screen text and
keys for these restricted functions will be “grayed-out” or muted \
and cannot be
selected while driving. These functions will become available again when the vehicle
speed is reduced to 5 mph (8 km/h). Voice commands may be available for some of
the restricted functions. For more information, refer to the “Monitor, climate, audio,
phone and voice recognition systems (section 4)” of your Owner’s Manual.
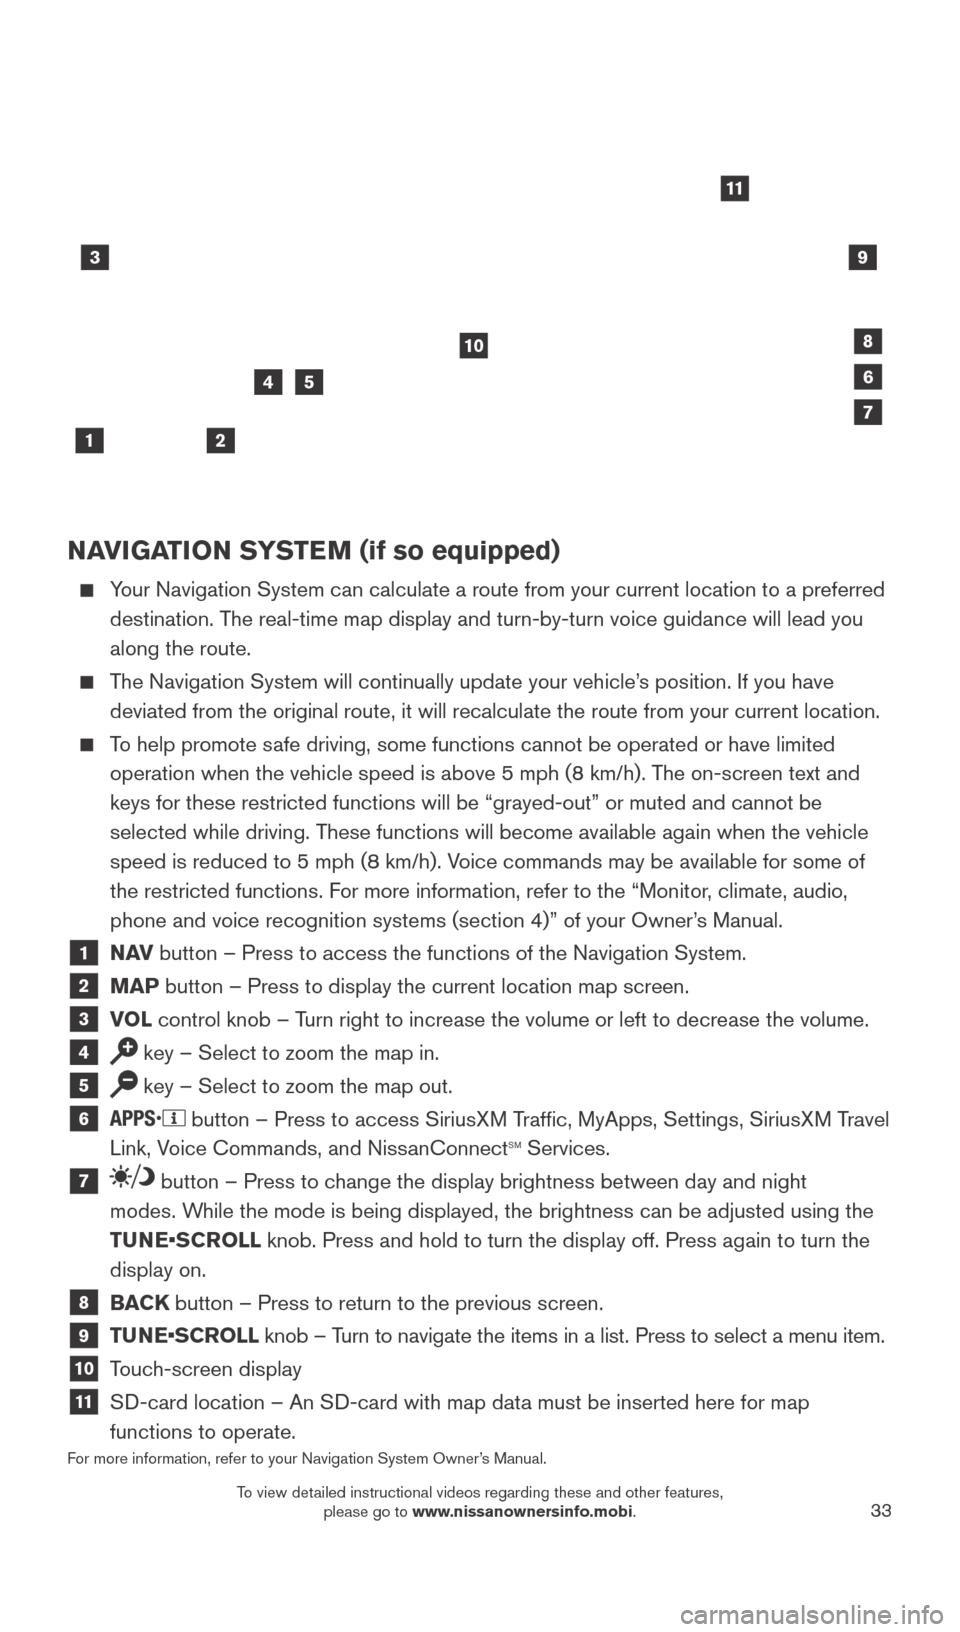
1 NAV button – Press to access the functions of the Navigation System.
2 MAP button – Press to display the current location map screen.
3 VOL control knob – Turn right to increase the volume or left to decrease the volume.
4 key – Select to zoom the map in.
5 key – Select to zoom the map out.
6 button – Press to access SiriusXM Traffic, MyApps, Settings, SiriusXM Travel
Link, Voice Commands, and NissanConnectsm Services.
7 button – Press to change the display brightness between day and night
modes. While the mode is being displayed, the brightness can be adjusted using t\
he
TUNE•SCROLL knob. Press and hold to turn the display off. Press again to turn the
display on.
8 BACK button – Press to return to the previous screen.
9 TUNE•SCROLL knob – Turn to navigate the items in a list. Press to select a menu item.
10 Touch-screen display
11 SD-card location – An SD-card with map data must be inserted here for map
functions to operate.
For more information, refer to your Navigation System Owner’s Manual.
3
2
4
1
10
6
11
5
8
7
9
2027886_16b_Titan_US_pQRG_010716.indd 331/7/16 2:04 PM
To view detailed instructional videos regarding these and other features, please go to www.nissanownersinfo.mobi.