2016 NISSAN TITAN buttons
[x] Cancel search: buttonsPage 23 of 40

21
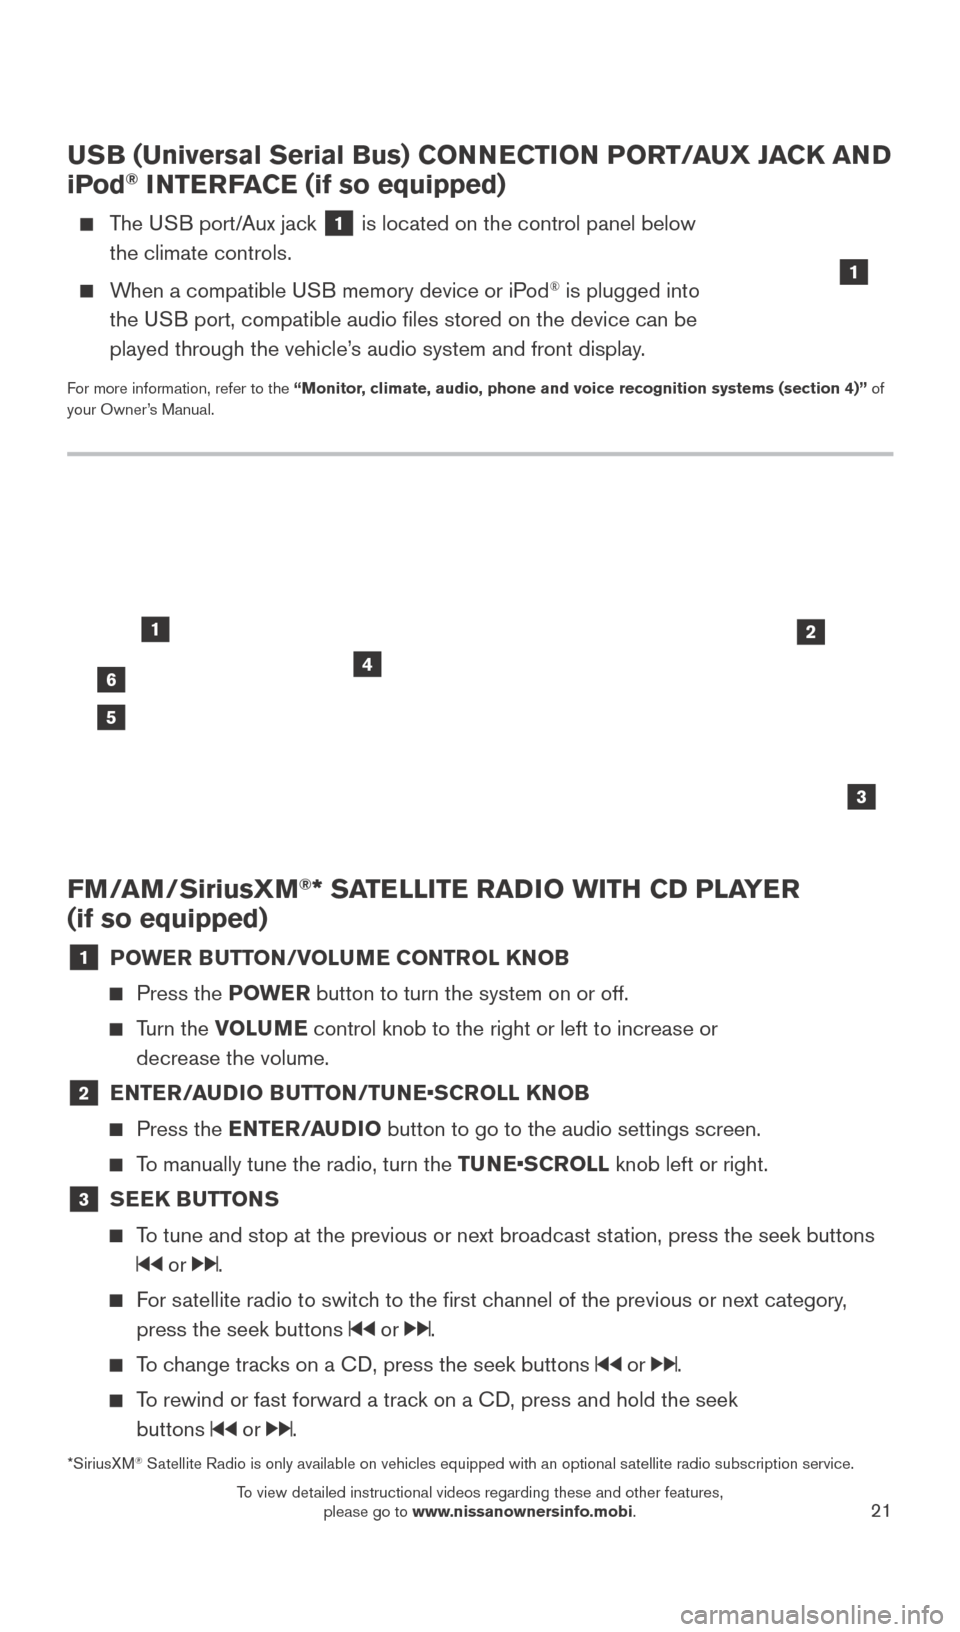
FM/AM/SiriusXM®* SATELLITE RADIO WITH CD PLAYER
(if so equipped)
1 POWER BUTTON/VOLUME CONTROL KNOB
Press the POWE R button to turn the system on or off.
Turn the VOLUME control knob to the right or left to increase or
decrease the volume.
2 E NTER/AUDIO BUTTON/TUNE•SCROLL KNOB
Press the
ENTER/AUDIO button to go to the audio settings screen.
To manually tune the radio, turn the TUNE•SCROLL knob left or right.
3 SEEK BUTTONS
To tune and stop at the previous or next broadcast station, press the seek buttons
or .
For satellite radio to switch to the first channel of the previous or next category,
press the seek buttons
or .
To change tracks on a CD, press the seek buttons or .
To rewind or fast forward a track on a CD, press and hold the seek buttons
or .
46
2
3
1
5
USB (Universal Serial Bus) CONNECTION PORT/AUX JACK AND
iPod® INTERFACE (if so equipped)
The USB port/Aux jack 1 is located on the control panel below
the climate controls.
When a compatible USB memory device or iPod® is plugged into
the USB port, compatible audio files stored on the device can be
played through the vehicle’s audio system and front display.
For more information, refer to the “Monitor, climate, audio, phone and voice recognition systems (section 4)” of
your Owner’s Manual.
1
*SiriusXM® Satellite Radio is only available on vehicles equipped with an optional s\
atellite radio subscription service.
2027886_16b_Titan_US_pQRG_010716.indd 211/7/16 2:03 PM
To view detailed instructional videos regarding these and other features, please go to www.nissanownersinfo.mobi.
Page 26 of 40

24
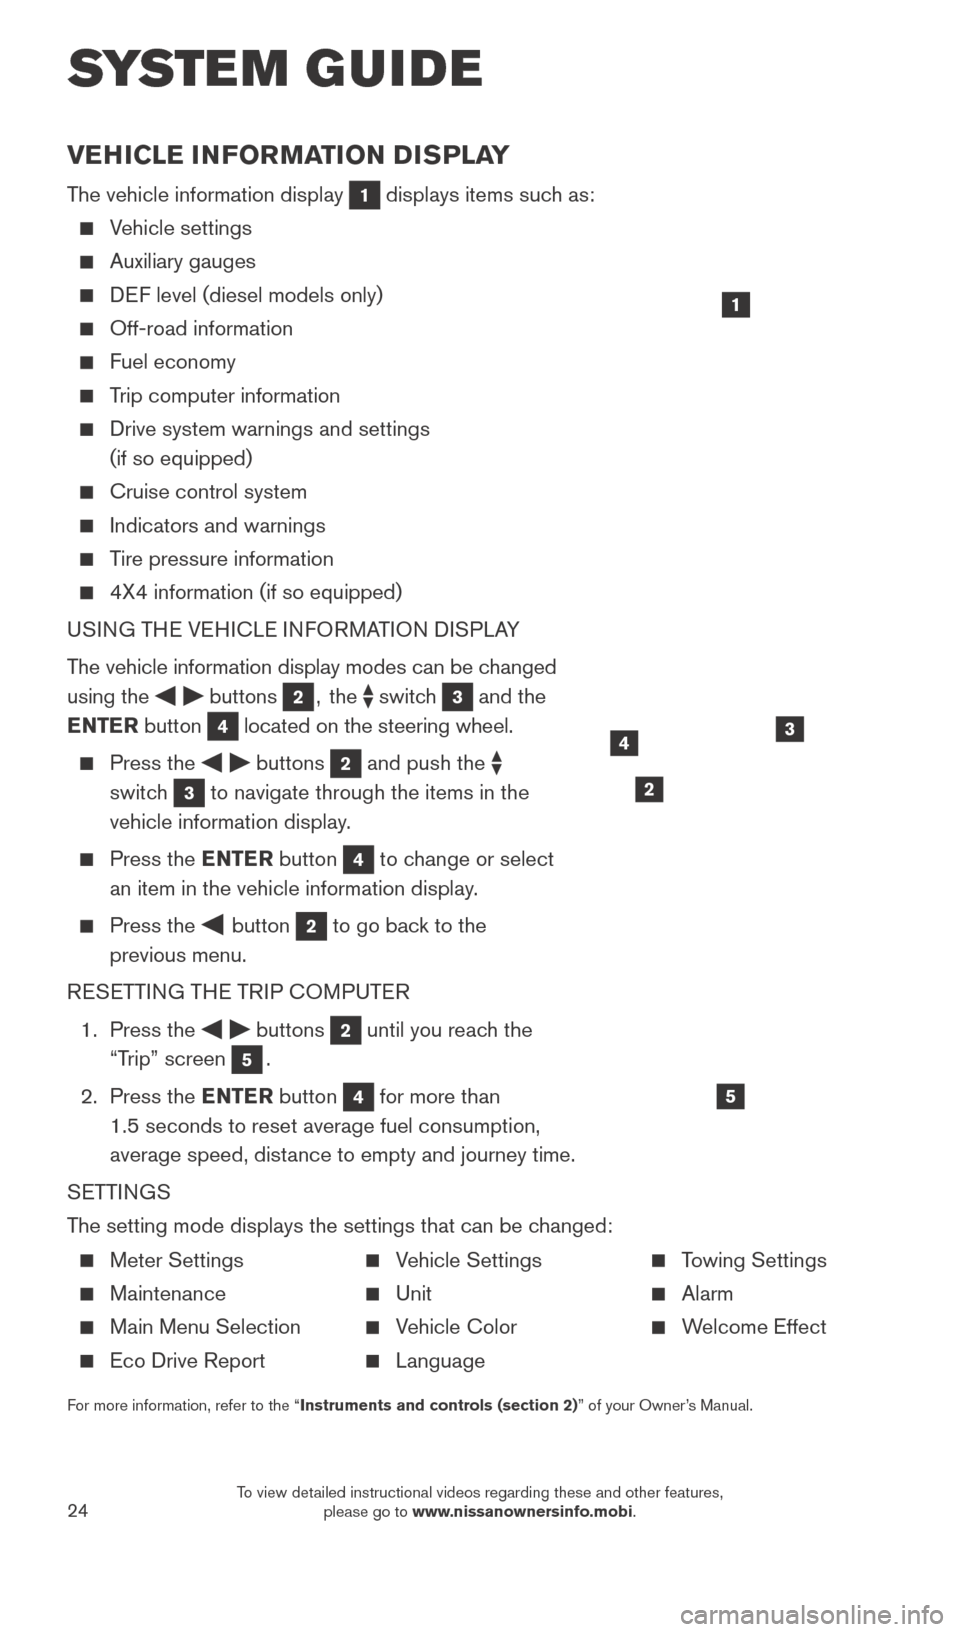
VEHICLE INFORMATION DISPLAY
The vehicle information display 1 displays items such as:
Vehicle settings
Auxiliary gauges
DEF level (diesel models only)
Off-road information
Fuel economy
Trip computer information
Drive system warnings and settings
(if so equipped)
Cruise control system
Indicators and warnings
Tire pressure information
4X4 information (if so equipped)
USI NG THE VEHICLE INFORMATION DISPLAY
The vehicle information display modes can be changed
using the
buttons 2, the switch 3 and the
ENTER button
4 located on the steering wheel.
Press the buttons 2 and push the
switch
3 to navigate through the items in the
vehicle information display.
Press the E NTER button 4 to change or select
an item in the vehicle information display.
Press the button 2 to go back to the
previous menu.
RESETTING THE TRIP COMPUTER
1.
Press the
buttons 2 until you reach the
“Trip” screen
5.
2.
Press the ENTER button
4 for more than
1.5 seconds to reset average fuel consumption,
average speed, distance to empty and journey time.
SETTINGS
The setting mode displays the settings that can be changed:
1
34
5
2
SYS T E M GUIDE
Meter Settings
Maintenance
Main Menu Selection
Eco Drive Report
Vehicle Settings
Unit
Vehicle Color
Language
Towing Settings
Alarm
Welcome Effect
For more information, refer to the “Instruments and controls (section 2)” of your Owner’s Manual.
2027886_16b_Titan_US_pQRG_010716.indd 241/7/16 2:04 PM
To view detailed instructional videos regarding these and other features, please go to www.nissanownersinfo.mobi.
Page 33 of 40

31
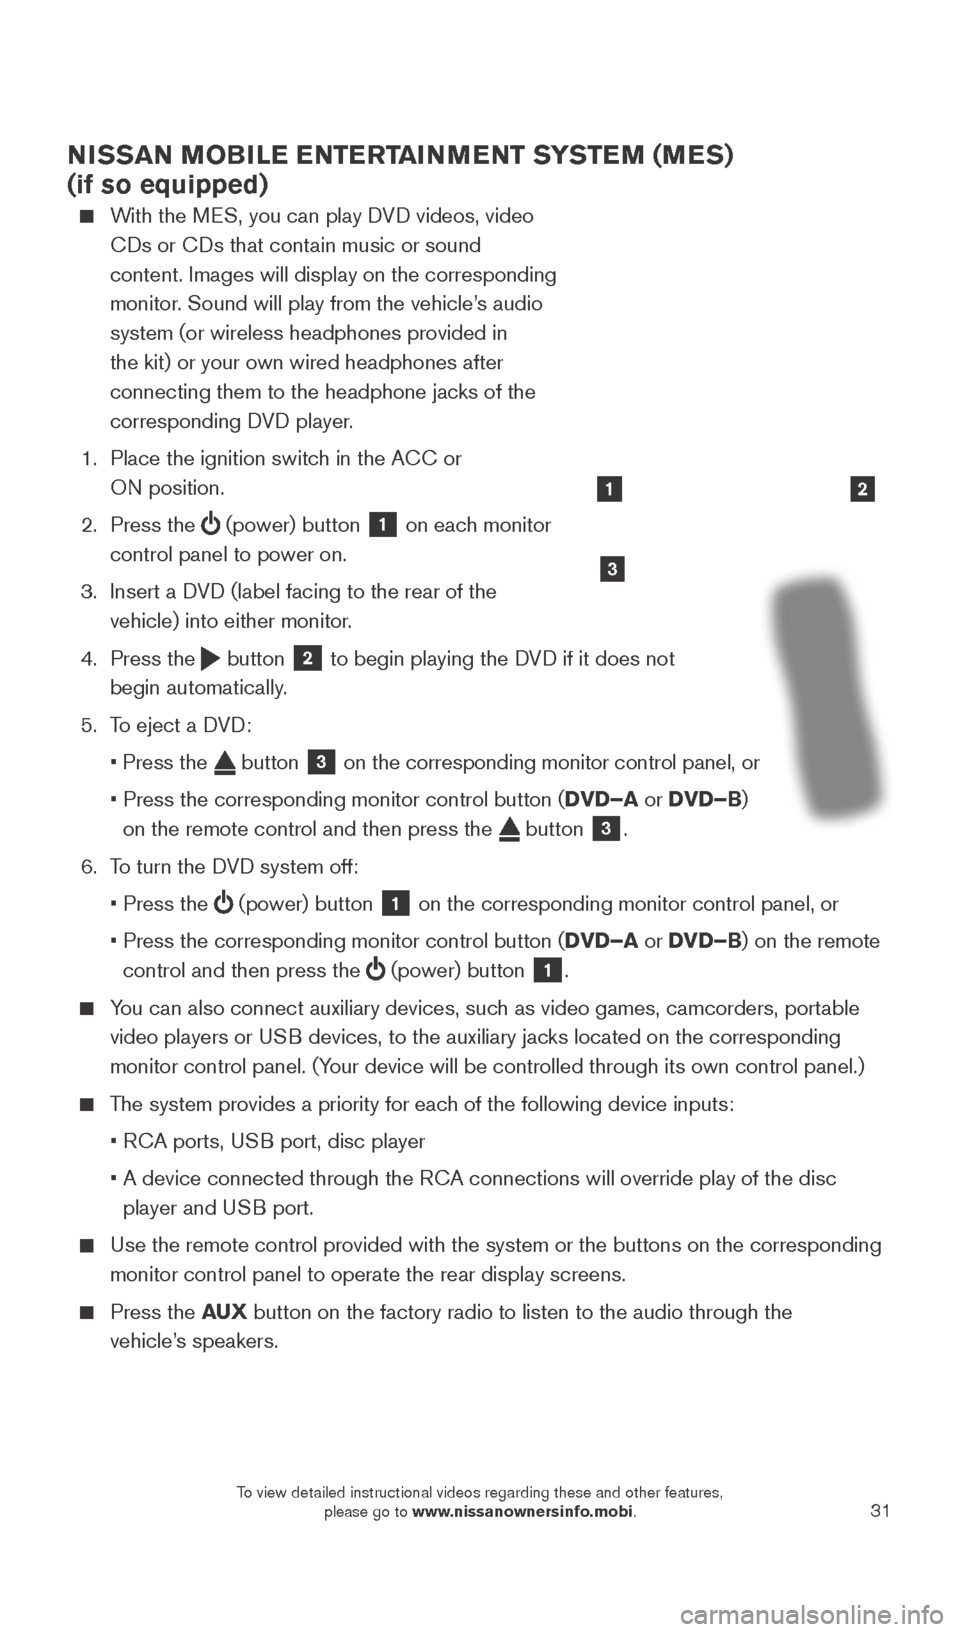
NISSAN MOBILE ENTERTAINMENT SYSTEM (MES)
(if so equipped)
With the MES, you can play DVD videos, video CDs or CDs that contain music or sound
content. Images will display on the corresponding
monitor. Sound will play from the vehicle’s audio
system (or wireless headphones provided in
the kit) or your own wired headphones after
connecting them to the headphone jacks of the
corresponding DVD player.
1.
Place the ignition switc
h in the ACC or
ON position.
2.
Press the
(power) button 1 on each monitor
control panel to power on.
3.
Insert a D
VD (label facing to the rear of the
vehicle) into either monitor.
4.
Press the
button 2 to begin playing the DVD if it does not
begin automatically.
5.
T
o eject a DVD:
•
Press the button 3 on the corresponding monitor control panel, or
•
Press the corresponding monitor control button (
DVD–A or DVD–B)
on the remote control and then press the
button 3.
6.
T
o turn the DVD system off:
•
Press the (power) button 1 on the corresponding monitor control panel, or
•
Press the corresponding monitor control button (
DVD–A or DVD–B) on the remote
control and then press the
(power) button 1.
You can also connect auxiliary devices, such as video games, camcorders, portable
video players or USB devices, to the auxiliary jacks located on the corresponding
monitor control panel. (Your device will be controlled through its own control panel.)
The system provides a priority for each of the following device inputs:
•
R
CA ports, USB port, disc player
•
A device connected through the R
CA connections will override play of the disc
player and USB port.
Use the remote control provided with the system or the buttons on the co\
rresponding
monitor control panel to operate the rear display screens.
Press the AU X button on the factory radio to listen to the audio through the
vehicle’s speakers.
3
21
2027886_16b_Titan_US_pQRG_010716.indd 311/7/16 2:04 PM
To view detailed instructional videos regarding these and other features, please go to www.nissanownersinfo.mobi.
Page 36 of 40

34
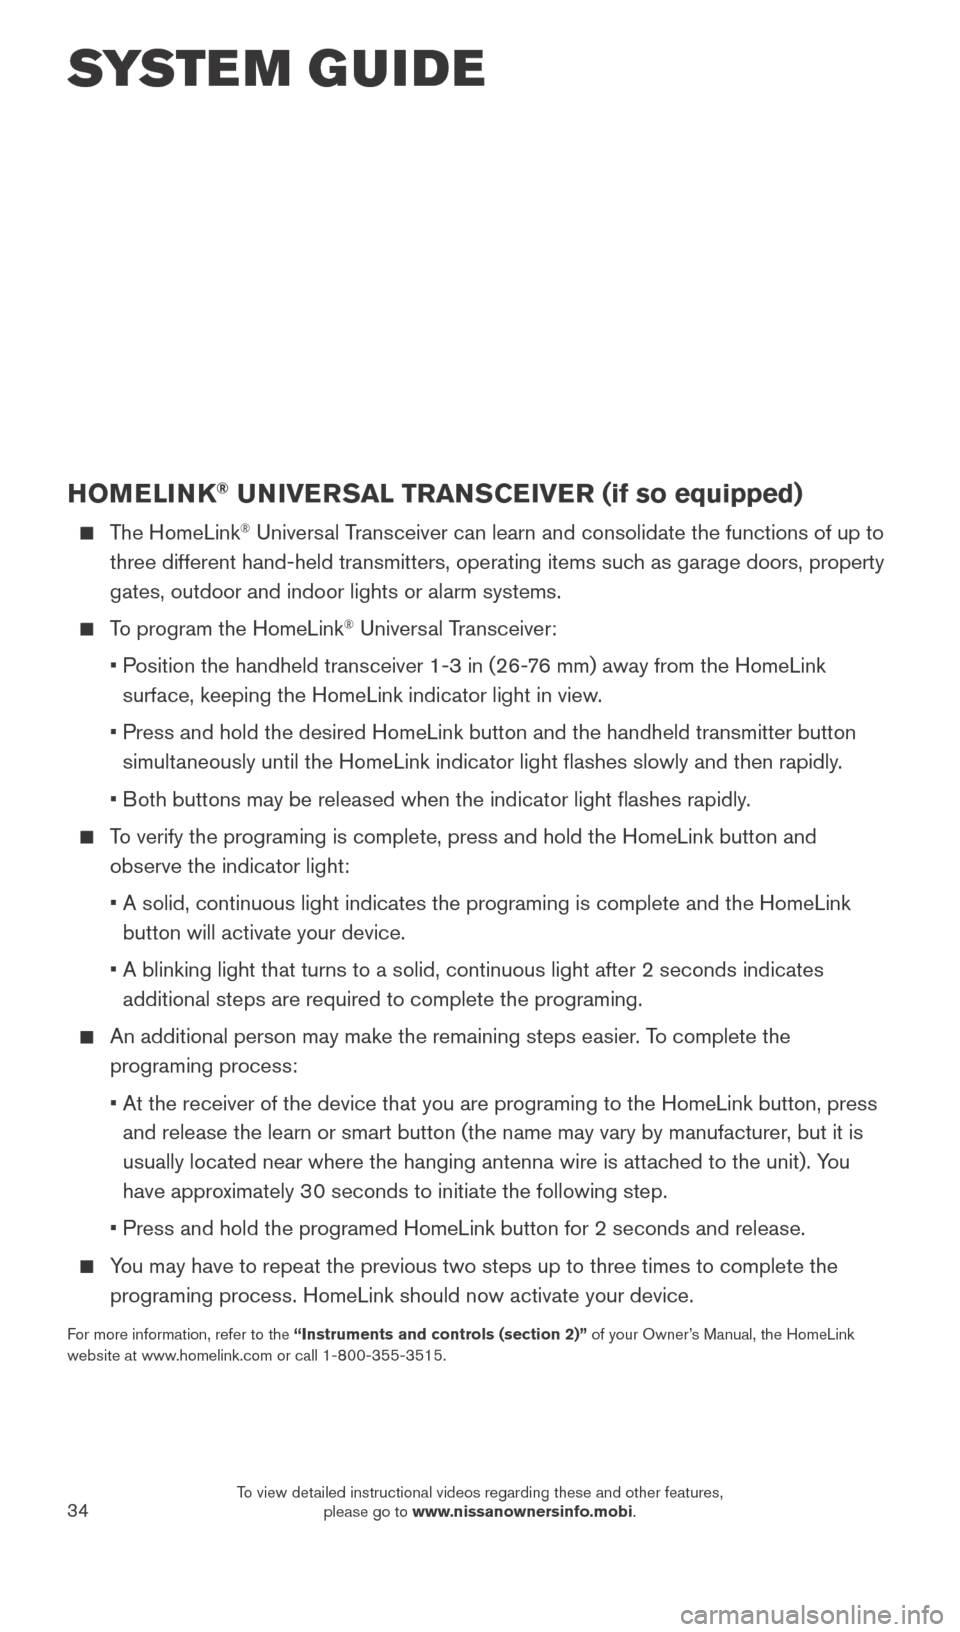
HOMELINK® UNIVERSAL TRANSCEIVER (if so equipped)
The HomeLink® Universal Transceiver can learn and consolidate the functions of up to
three different hand-held transmitters, operating items such as garage doors, property
gates, outdoor and indoor lights or alarm systems.
To program the HomeLink® Universal Transceiver:
•
P
osition the handheld transceiver 1-3 in (26-76 mm) away from the HomeLink
surface, keeping the HomeLink indicator light in view.
•
Press and hold the desired HomeLink button and the handheld transmitter \
button
simult
aneously until the HomeLink indicator light flashes slowly and then ra\
pidly.
•
B
oth buttons may be released when the indicator light flashes rapidly.
To verify the programing is complete, press and hold the HomeLink button \
and observe the indicator light:
•
A solid, continuous light indicates the programing is complete and the H\
omeLink
button will activate your device.
•
A blinking light that turns to a solid, continuous light after 2 seconds\
indicates
additional steps are required to complete the programing.
An additional person may make the remaining steps easier . To complete the
programing process:
•
At the receiver of the device that you are programing to the HomeLink bu\
tton, press
and release the learn or smart button (the name may vary by manufacture\
r
, but it is
usually located near where the hanging antenna wire is attached to the unit). You
have approximately 30 seconds to initiate the following step.
•
Press and hold the programed HomeLink button for 2 seconds and release.
You may have to repeat the previous two steps up to three times to comple\
te the programing process. HomeLink should now activate your device.
For more information, refer to the “Instruments and controls (section 2)” of your Owner’s Manual, the HomeLink
website at www.homelink.com or call 1-800-355-3515.
HOMELINK
SYSTEM GUIDE
2027886_16b_Titan_US_pQRG_010716.indd 341/7/16 2:04 PM
To view detailed instructional videos regarding these and other features, please go to www.nissanownersinfo.mobi.