2016 NISSAN SENTRA turn signal
[x] Cancel search: turn signalPage 262 of 478
phone module when the ignition switch is placed
in the ON position with the previously connected
cellular phone turned on and carried in the ve-
hicle.
NOTE:
Some devices require the user to accept
connections to other Bluetooth® devices. If
your phone does not connect automatic
ally to the system, consult the phone’s
Owner’s Manual for details on device op-
eration.
You can connect up to five different Bluetooth®
cellular phones to the in-vehicle phone module.
However, you can talk on only one cellular phone
at a time.
Before using the Bluetooth® Hands-Free Phone
System, refer to the following notes.● Set up the wireless connection between a
compatible cellular phone and the in-vehicle
phone module before using the hands-free
phone system.
● Some Bluetooth® enabled cellular phones
may not be recognized or work properly.
Please visit www.nissanusa.com/bluetooth
or www.nissan.ca/bluetooth for a recom-
mended phone list and connecting instruc-
tions. ●
You will not be able to use a hands-free
phone under the following conditions:
– Your vehicle is outside of the cellular ser- vice area.
– Your vehicle is in an area where it is difficult to receive a cellular signal; such
as in a tunnel, in an underground parking
garage, near a tall building or in a moun-
tainous area.
– Your cellular phone is locked to prevent it from being dialed.
● When the radio wave condition is not ideal
or ambient sound is too loud, it may be
difficult to hear the other person’s voice dur-
ing a call.
● Do not place the cellular phone in an area
surrounded by metal or far away from the
in-vehicle phone module to prevent tone
quality degradation and wireless connection
disruption.
● While a cellular phone is connected through
the Bluetooth® wireless connection, the
battery power of the cellular phone may dis-
charge quicker than usual. The Bluetooth®
Hands-Free Phone System cannot charge
cellular phones. ●
For additional information, you can visit
www.nissanusa.com/bluetooth or
www.nissan.ca/bluetooth for troubleshoot-
ing help.
● Some cellular phones or other devices may
cause interference or a buzzing noise to
come from the audio system speakers. Stor-
ing the device in a different location may
reduce or eliminate the noise.
● Refer to the cellular phone Owner’s Manual
regarding the telephone charges, cellular
phone antenna and body, etc.
REGULATORY INFORMATION
FCC Regulatory information
– CAUTION: To maintain compliance with FCC’s RF exposure guidelines, use only the
supplied antenna. Unauthorized antenna,
modification, or attachments could damage
the transmitter and may violate FCC regula-
tions.
– Operation is subject to the following two con- ditions:
1. This device may not cause interference and
2. this device must accept any interference, including interference that may cause unde-
sired operation of the device.
Monitor, climate, audio, phone and voice recognition systems4-87
Page 312 of 478
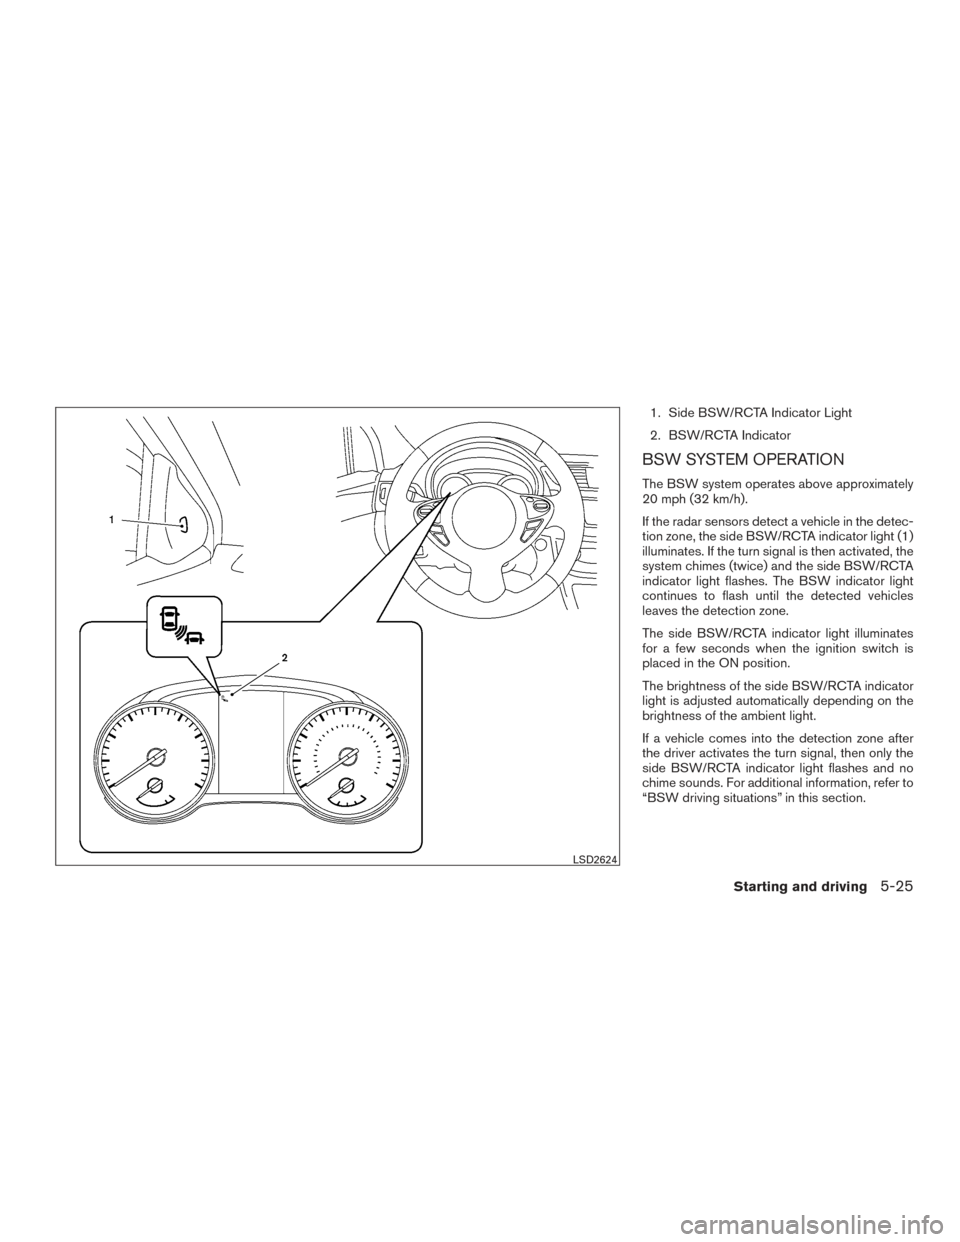
1. Side BSW/RCTA Indicator Light
2. BSW/RCTA Indicator
BSW SYSTEM OPERATION
The BSW system operates above approximately
20 mph (32 km/h).
If the radar sensors detect a vehicle in the detec-
tion zone, the side BSW/RCTA indicator light (1)
illuminates. If the turn signal is then activated, the
system chimes (twice) and the side BSW/RCTA
indicator light flashes. The BSW indicator light
continues to flash until the detected vehicles
leaves the detection zone.
The side BSW/RCTA indicator light illuminates
for a few seconds when the ignition switch is
placed in the ON position.
The brightness of the side BSW/RCTA indicator
light is adjusted automatically depending on the
brightness of the ambient light.
If a vehicle comes into the detection zone after
the driver activates the turn signal, then only the
side BSW/RCTA indicator light flashes and no
chime sounds. For additional information, refer to
“BSW driving situations” in this section.
LSD2624
Starting and driving5-25
Page 316 of 478
BSW DRIVING SITUATIONS
Indicator
on
Indicator
off
Indicator
flashing
Another vehicle approaching from
behind
Illustration 1:The side BSW/RCTA indicator
light illuminates if a vehicle enters the detection
zone from behind in an adjacent lane.
Illustration 2:If the driver activates the turn
signal when another vehicle is in the detection
zone, then the system chimes (twice) and the
side indicator light flashes.
NOTE:
● The radar sensors may not detect vehicles
which are approaching rapidly from behind.
● If the driver activates the turn signal before a
vehicle enters the detection zone, the side
indicator light will flash but no chime will
sound when the other vehicle is detected.
Illustration 1 – Approaching from behind
LSD2299
Illustration 2 – Approaching from behind
LSD2300
Starting and driving5-29
Page 317 of 478
Overtaking another vehicle
Illustration 3:The side indicator light illumi-
nates if you overtake a vehicle and that vehicle
stays in the detection zone for approximately
2 seconds. Illustration 4:
If the driver activates the turn
signal while another vehicle is in the detection
zone, then the system chimes (twice) and the
side indicator light flashes.
NOTE:
● When overtaking several vehicles in a row,
the vehicles after the first vehicle may not be
detected if they are traveling close together.
● The radar sensors may not detect slower
moving vehicles if they are passed quickly. ●
If the driver activates the turn signal before a
vehicle enters the detection zone, the side
indicator light will flash but no chime will
sound when the other vehicle is detected.
Illustration 3 – Overtaking another vehicle
LSD2302
Illustration 4 – Overtaking another vehicle
LSD2303
5-30Starting and driving
Page 318 of 478
Entering from the side
Illustration 5:The side indicator light illumi-
nates if a vehicle enters the detection zone from
either side. Illustration 6:
If the driver activates the turn
signal while another vehicle is in the detection
zone, then the system chimes (twice) and the
side indicator light flashes.
NOTE:
● If the driver activates the turn signal before a
vehicle enters the detection zone, the side
indicator light will flash but no chime will
sound when the other vehicle is detected. ●
The radar sensors may not detect a vehicle
which is traveling at about the same speed
as your vehicle when it enters the detection
zone.
Illustration 5 – Entering from the side
LSD2305
Illustration 6 – Entering from the side
LSD2308
Starting and driving5-31
Page 367 of 478
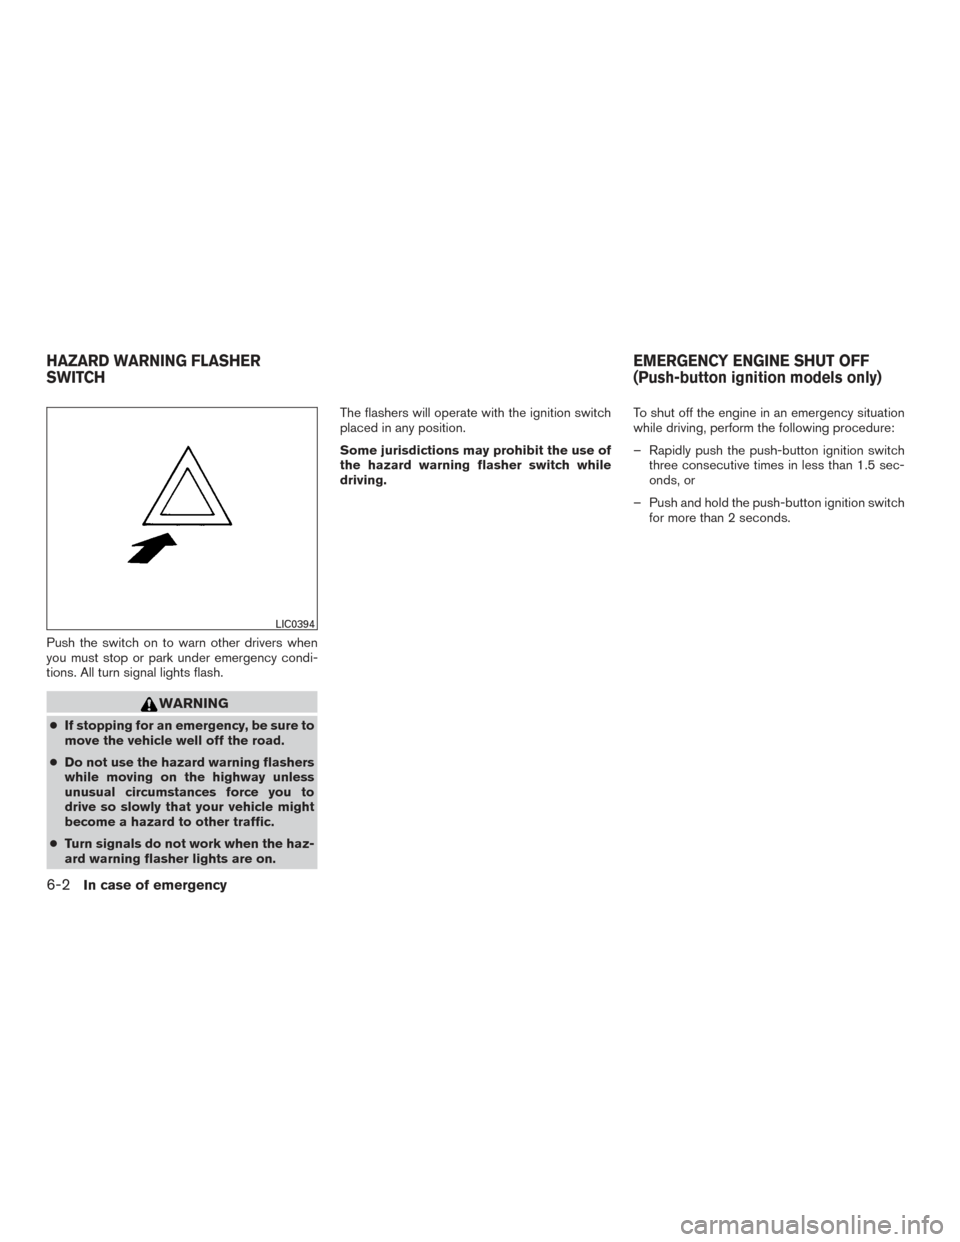
Push the switch on to warn other drivers when
you must stop or park under emergency condi-
tions. All turn signal lights flash.
WARNING
●If stopping for an emergency, be sure to
move the vehicle well off the road.
● Do not use the hazard warning flashers
while moving on the highway unless
unusual circumstances force you to
drive so slowly that your vehicle might
become a hazard to other traffic.
● Turn signals do not work when the haz-
ard warning flasher lights are on. The flashers will operate with the ignition switch
placed in any position.
Some jurisdictions may prohibit the use of
the hazard warning flasher switch while
driving.
To shut off the engine in an emergency situation
while driving, perform the following procedure:
– Rapidly push the push-button ignition switch
three consecutive times in less than 1.5 sec-
onds, or
– Push and hold the push-button ignition switch for more than 2 seconds.
LIC0394
HAZARD WARNING FLASHER
SWITCH EMERGENCY ENGINE SHUT OFF
(Push-button ignition models only)
6-2In case of emergency
Page 368 of 478
TIRE PRESSURE MONITORING
SYSTEM (TPMS)
This vehicle is equipped with TPMS. It monitors
tire pressure of all tires except the spare. When
the low tire pressure warning light is lit, and the
CHECK TIRE PRES warning message is dis-
played in the odometer, one or more of your tires
is significantly under-inflated. If the vehicle is
being driven with low tire pressure, the TPMS will
activate and warn you of it by the low tire pressure
warning light. This system will activate only when
the vehicle is driven at speeds above 16 mph
(25 km/h). For additional information, refer to
“Warning lights, indicator lights and audible re-
minders” in the “Instruments and controls” sec-
tion, and “Tire Pressure Monitoring System
(TPMS)” in the “Starting and driving” sections of
this manual.
WARNING
●Radio waves could adversely affect
electric medical equipment. Those who
use a pacemaker should contact the
electric medical equipment manufac-
turer for the possible influences before
use. ●
If the low tire pressure warning light
illuminates while driving, avoid sudden
steering maneuvers or abrupt braking,
reduce vehicle speed, pull off the road
to a safe location and stop the vehicle
as soon as possible. Driving with under-
inflated tires may permanently damage
the tires and increase the likelihood of
tire failure. Serious vehicle damage
could occur and may lead to an accident
and could result in serious personal in-
jury. Check the tire pressure for all four
tires. Adjust the tire pressure to the
recommended COLD tire pressure
shown on the Tire and Loading Informa-
tion label to turn the low tire pressure
warning light OFF. If you have a flat tire,
replace it with a spare tire as soon as
possible.
● Since the spare tire is not equipped with
the TPMS, when a spare tire is mounted
or a wheel is replaced, the TPMS will
not function and the low tire pressure
warning light will flash for approxi-
mately one minute. The light will remain
on after one minute. Have your tires
replaced and/or TPMS system reset as
soon as possible. It is recommended
that you visit a NISSAN dealer for these
services. ●
Replacing tires with those not originally
specified by NISSAN could affect the
proper operation of the TPMS.
● Do not inject any tire liquid or aerosol
tire sealant into the tires, as this may
cause a malfunction of the tire pressure
sensors.
CHANGING A FLAT TIRE
If you have a flat tire, follow the instructions be-
low:
Stopping the vehicle
1. Safely move the vehicle off the road and
away from traffic.
2. Turn on the hazard warning flashers.
3. Park on a level surface and apply the parking brake. Shift the manual transmission into R
(Reverse) , or the CVT into P (Park) .
4. Turn off the engine.
5. Raise the hood to warn other traffic and to signal professional road assistance person-
nel that you need assistance.
6. Have all passengers get out of the vehicle and stand in a safe place, away from traffic
and clear of the vehicle.
FLAT TIRE
In case of emergency6-3
Page 390 of 478
When driving in areas using road salt or other
corrosive materials, check lubrication frequently.
Lights*Clean the headlights on a regular basis.
Make sure that the headlights, stop lights, tail
lights, turn signal lights, and other lights are all
operating properly and installed securely. Also
check headlight aim.
Road wheel nuts (lug nuts)* When checking
the tires, make sure no wheel nuts are missing,
and check for any loose wheel nuts. Tighten if
necessary.
Tire rotation* Tires should be rotated every
5,000 miles (8,000 km).
Tires* Check the pressure with a gauge often
and always prior to long distance trips. If neces-
sary, adjust the pressure in all tires, including the
spare, to the pressure specified. Check carefully
for damage, cuts or excessive wear.
Tire Pressure Monitoring System (TPMS)
transmitter components Replace the TPMS
transmitter grommet seal, valve core and cap
when the tires are replaced due to wear or age.
Wheel alignment and balance If the vehicle
should pull to either side while driving on a
straight and level road, or if you detect uneven or
abnormal tire wear, there may be a need for wheel alignment. If the steering wheel or seat vibrates at
normal highway speeds, wheel balancing may be
needed.
● For additional information regarding tires,
refer to “Important Tire Safety Information”
(US) or “Tire Safety Information” (Canada) in
the Warranty Information Booklet.
Windshield Clean the windshield on a regular
basis. Check the windshield at least every six
months for cracks or other damage. Have a dam-
aged windshield repaired by a qualified repair
facility.
Windshield wiper blades* Check for cracks or
wear if they do not wipe properly.
Inside the vehicle
The maintenance items listed here should be
checked on a regular basis, such as when per-
forming periodic maintenance, cleaning the ve-
hicle, etc.
Additional information on the following
items with an “*” is found in this section.
Accelerator pedal Check the pedal for smooth
operation and make sure the pedal does not bind
or require uneven effort. Keep the floor mat away
from the pedal. Brake pedal
Check the pedal for smooth opera-
tion. If the brake pedal suddenly goes down fur-
ther than normal, the pedal feels spongy or the
vehicle seems to take longer to stop, have your
vehicle checked immediately. It is recommended
that you visit a NISSAN dealer for this service.
Keep the floor mat away from the pedal.
Brakes Check that the brakes do not pull the
vehicle to one side when applied.
Continuously Variable Transmission (CVT)
P (Park) position mechanism On a fairly
steep hill, check that the vehicle is held securely
with the shift lever in the P (Park) position without
applying any brakes.
Parking brake Check the parking brake opera-
tion regularly. The vehicle should be securely held
on a fairly steep hill with only the parking brake
applied. If the parking brake needs adjustment, it
is recommended that you visit a NISSAN dealer
for this service.
Seats Check seat position controls such as seat
adjusters, seatback recliner, etc., to ensure they
operate smoothly and all latches lock securely in
every position. Check that the head
restraints/headrests move up and down
smoothly and the locks (if so equipped) hold
securely in all latched positions.
Maintenance and do-it-yourself8-3