2016 NISSAN PATHFINDER fog light
[x] Cancel search: fog lightPage 241 of 540
NOTE:● Odors from inside and outside the vehicle
can build up in the air conditioner unit. Odor
can enter the passenger compartment
through the vents.
● When parking, set the heater and air condi-
tioner controls to turn off air recirculation to
allow fresh air into the passenger compart-
ment. This should help reduce odors inside
the vehicle.
AUTOMATIC OPERATION
Cooling and/or dehumidified heating
(AUTO)
This mode may be used all year round as the
system automatically works to keep a constant
temperature. Air flow distribution and fan speed
are also controlled automatically.
1. Press the AUTO button on. (The indicator on the button will illuminate and AUTO will be
displayed.)
2. Operate the driver’s side temperature con- trol buttons.
● Adjust the temperature display to about
75°F (24°C) for normal operation. ●
The temperature of the passenger compart-
ment will be maintained automatically. Air
flow distribution and fan speed are also con-
trolled automatically.
● A visible mist may be seen coming from the
ventilators in hot, humid conditions as the air
is cooled rapidly. This does not indicate a
malfunction.
3. You can individually set driver’s and front passenger’s side temperature using each
temperature control button. When the DUAL
button or passenger’s side temperature but-
ton is pressed, the DUAL indicator will come
on. To turn off the passenger’s side tempera-
ture control, press the DUAL button.Heating (A/C OFF)
The air conditioner does not activate. When you
need to heat only, use this mode.
1. Press the A/C button. (A/C OFF will be displayed and A/C indicator will turn off.)
2. Operate the temperature control buttons to set the desired temperature.
● The temperature of the passenger compart-
ment will be maintained automatically. Air
flow distribution and fan speed are also con-
trolled automatically. ●
Do not set the temperature lower than the
outside air temperature. Otherwise the sys-
tem may not work properly.
● Not recommended if windows fog up.
Dehumidified defrosting or defogging
1. Press thefront defroster button on.
(The indicator light on the button will come
on.)
2. Operate the temperature control buttons to set the desired temperature.
● To quickly remove ice from the outside of the
windows, use the
fan speed control
dial to set the fan speed to maximum.
● As soon as possible after the windshield is
clean, press the AUTO button to return to
the automatic mode.
● When the
front defroster button is
pressed, the air conditioner will automati-
cally be turned on at outside temperatures
above 36°F (2°C) . The air recirculate mode
automatically turns off, allowing outside air
to be drawn into the passenger compart-
ment to further improve the defogging per-
formance.
4-44Monitor, climate, audio, phone and voice recognition systems
Page 242 of 540
Remote start logic
Vehicles equipped with automatic climate con-
trols and remote start function may go into auto-
matic heating or cooling mode when remote start
is activated depending on outside and cabin tem-
peratures. During this period, the climate control
display and buttons will be inoperable until igni-
tion switch is turned on.
MANUAL OPERATION
Fan speed control
Turn thefan speed control dial to manually
control the fan speed.
Press the AUTO button to return to automatic
control of the fan speed.
Air recirculation
Press theair recirculation button to recir-
culate interior air inside the vehicle.
The air recirculation cannot be activated when
the air conditioner is in the
front defogging
mode.
Automatic intake air control
In the AUTO mode, the intake air will be con-
trolled automatically. To manually control the in-
take air, press the
air recirculation button.
To return to the automatic control mode, press
and hold the
air recirculation button for about 2 seconds. The indicator light will flash
twice, and then the intake air will be controlled
automatically.
Air flow control
Pressing the MODE button manually controls air
flow and selects the air outlet:
— Air flows from center and side
vents.
— Air flows from center and sidevents and foot outlets.
— Air flows mainly from foot outlets.
— Air flows from defroster and footoutlets.
— Air flows from defroster outlets.
To turn system off
Press the ON-OFF button.
Rear window and outside mirror (if so
equipped) defroster switch
For additional information, refer to “Rear window
and outside mirror (if so equipped) defroster
switch” in the “Instruments and controls” section
of this manual.
OPERATING TIPS
●When the engine coolant temperature and
outside air temperature are low, the air flow
from the foot outlets may not operate for a
maximum of 150 seconds. However, this is
not a malfunction. After the coolant tempera-
ture warms up, air flow from the foot outlets
will operate normally.
Monitor, climate, audio, phone and voice recognition systems4-45
Page 247 of 540
NOTE:● Odors from inside and outside the vehicle
can build up in the air conditioner unit. Odor
can enter the passenger compartment
through the vents.
● When parking, set the heater and air condi-
tioner controls to turn off air recirculation to
allow fresh air into the passenger compart-
ment. This should help reduce odors inside
the vehicle.
AUTOMATIC OPERATION
Cooling and/or dehumidified heating
(AUTO)
This mode may be used all year round as the
system automatically works to keep a constant
temperature. Air flow distribution and fan speed
are also controlled automatically.
1. Press the AUTO button on. (The indicator on the button will illuminate and AUTO will be
displayed.)
2. Turn the temperature control dial to the left or right to set the desired temperature.
● Adjust the temperature display to about
75°F (24°C) for normal operation. ●
The temperature of the passenger compart-
ment will be maintained automatically. Air
flow distribution and fan speed are also con-
trolled automatically.
● A visible mist may be seen coming from the
vents in hot, humid conditions as the air is
cooled rapidly. This does not indicate a mal-
function.
3. You can individually set driver’s and front passenger’s side temperature using each
temperature control dial. When the DUAL
button or passenger’s side temperature dial
is turned, the DUAL indicator will come on.
To turn off the passenger’s side temperature
control, press the DUAL button.Heating (A/C OFF)
The air conditioner does not activate. When you
need to heat only, use this mode.
1. Press the A/C button. The A/C indicator will turn off.
2. Turn the temperature control dial to set the desired temperature.
● The temperature of the passenger compart-
ment will be maintained automatically. Air
flow distribution and fan speed are also con-
trolled automatically. ●
Do not set the temperature lower than the
outside air temperature. Otherwise, the sys-
tem may not work properly.
● Not recommended if windows fog up.
Dehumidified defrosting or defogging
1. Press thefront defroster button on.
(The indicator light on the button will come
on.)
2. Turn the temperature control dial to set the desired temperature.
● To quickly remove ice from the outside of the
windows, use the
fan speed control
dial to set the fan speed to maximum.
● As soon as possible after the windshield is
clean, press the AUTO button to return to
the automatic mode.
● When the
front defroster button is
pressed, the air conditioner will automati-
cally be turned on at outside temperatures
above 36°F (2°C) . The air recirculate mode
automatically turns off, allowing outside air
to be drawn into the passenger compart-
ment to further improve the defogging per-
formance.
4-50Monitor, climate, audio, phone and voice recognition systems
Page 248 of 540
Remote start logic
Vehicles equipped with automatic climate con-
trols and remote start function may go into auto-
matic heating or cooling mode when remote start
is activated depending on outside and cabin tem-
peratures. During this period, the climate control
display and buttons will be inoperable until igni-
tion switch is turned on.
MANUAL OPERATION
Fan speed control
Turn thefan speed control dial to manually
control the fan speed.
Press the AUTO button to return to automatic
control of the fan speed.
Air recirculation
Press theair recirculation button to recir-
culate interior air inside the vehicle.
The air recirculation cannot be activated when
the air conditioner is in the
front defogging
mode.
Automatic intake air control
In the AUTO mode, the intake air will be con-
trolled automatically. To manually control the in-
take air, press the
air recirculation button.
To return to the automatic control mode, press
and hold the
air recirculation button for about 2 seconds. The indicator light will flash
twice, and then the intake air will be controlled
automatically.
Air flow control
Pressing the MODE button manually controls air
flow and selects the air outlet:
— Air flows from center and side
vents.
— Air flows from center and sidevents and foot outlets.
— Air flows mainly from foot outlets.
— Air flows from defroster and footoutlets.
— Air flows from defroster outlets.
To turn system off
Press the ON-OFF button.
Rear window and outside mirror (if so
equipped) defroster switch
For additional information, refer to “Rear window
and outside mirror (if so equipped) defroster
switch” in the “Instruments and controls” section
of this manual.
OPERATING TIPS
●When the engine coolant temperature and
outside air temperature are low, the air flow
from the foot outlets may not operate for a
maximum of 150 seconds. However, this is
not a malfunction. After the coolant tempera-
ture warms up, air flow from the foot outlets
will operate normally.
Monitor, climate, audio, phone and voice recognition systems4-51
Page 444 of 540
8 Maintenance and do-it-yourself
Maintenance requirements..........................8-2
General maintenance ..............................8-2
Explanation of general maintenance items .........8-2
Maintenance precautions ...........................8-5
Engine compartment check locations ................8-7
Engine cooling system .............................8-8
Checking engine coolant level ...................8-9
Changing engine coolant ........................8-9
Engine oil ........................................ 8-10
Checking engine oil level .......................8-10
Changing engine oil ........................... 8-11
Changing engine oil filter .......................8-12
Continuously Variable Transmission (CVT) fluid ......8-13
Power steering fluid ............................... 8-13
Brake fluid ....................................... 8-14
Windshield-washer fluid ........................... 8-15
Windshield-washer fluid reservoir ...............8-15
Battery .......................................... 8-15
Jump starting ................................. 8-17
Drive belt ........................................ 8-17
Spark plugs ...................................... 8-18
Replacing spark plugs ......................... 8-18Air cleaner
....................................... 8-19
In-cabin microfilter ............................. 8-19
Windshield wiper blades .......................... 8-19
Cleaning ..................................... 8-19
Replacing .................................... 8-20
Brakes .......................................... 8-21
Fuses ........................................... 8-22
Engine compartment ........................... 8-22
Passenger compartment .......................8-23
Battery replacement .............................. 8-24
NISSAN Intelligent Key® .......................8-24
Lights ........................................... 8-26
Headlights .................................... 8-26
Fog lights (if so equipped) ......................8-26
Exterior and interior lights .......................8-27
Wheels
and tires ................................. 8-29
Tire pressure .................................. 8-29
Tire labeling ................................... 8-32
Types of tires .................................. 8-35
Tire chains .................................... 8-36
Changing wheels and tires .....................8-36
Page 469 of 540
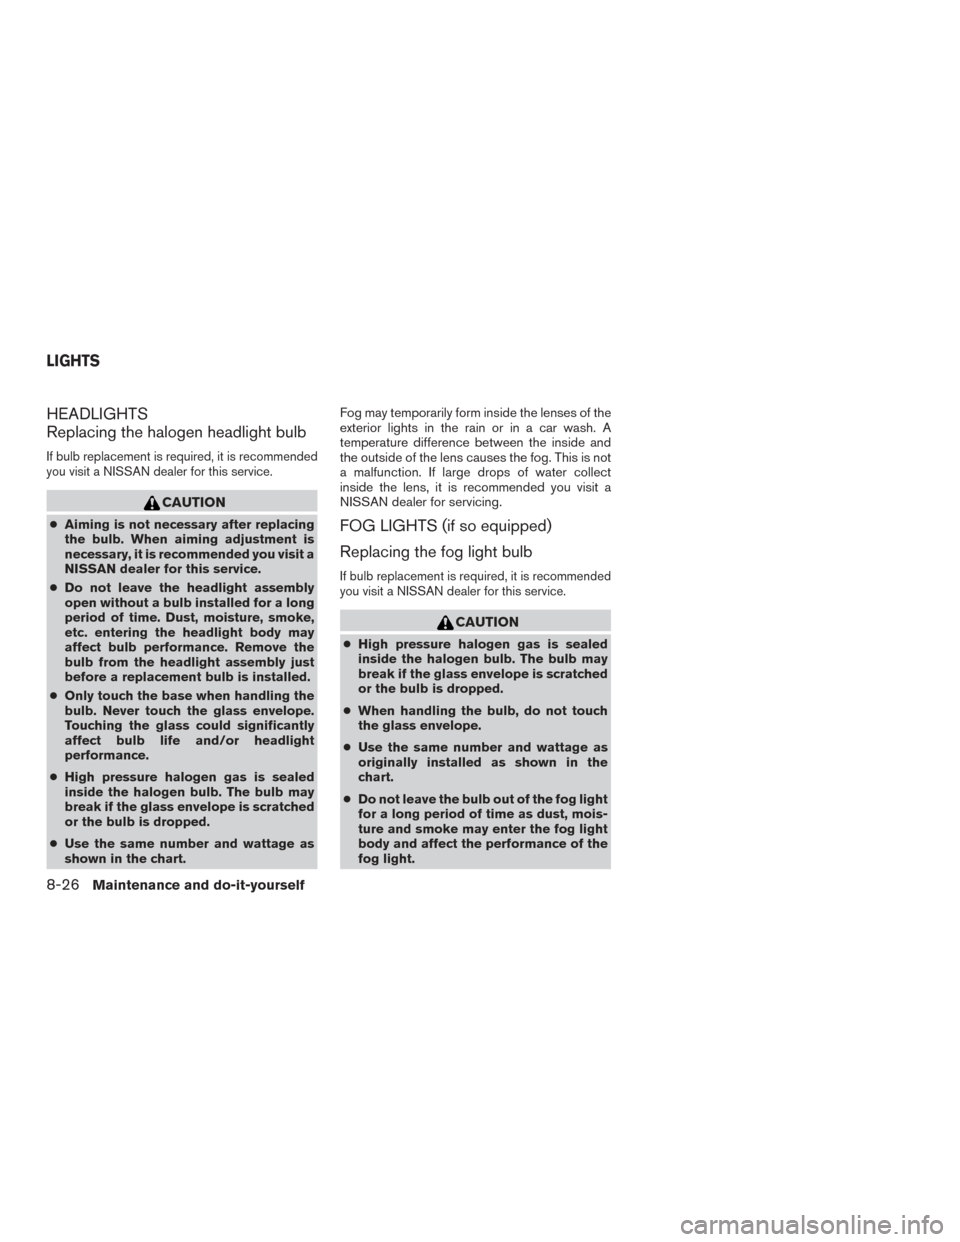
HEADLIGHTS
Replacing the halogen headlight bulb
If bulb replacement is required, it is recommended
you visit a NISSAN dealer for this service.
CAUTION
●Aiming is not necessary after replacing
the bulb. When aiming adjustment is
necessary, it is recommended you visit a
NISSAN dealer for this service.
● Do not leave the headlight assembly
open without a bulb installed for a long
period of time. Dust, moisture, smoke,
etc. entering the headlight body may
affect bulb performance. Remove the
bulb from the headlight assembly just
before a replacement bulb is installed.
● Only touch the base when handling the
bulb. Never touch the glass envelope.
Touching the glass could significantly
affect bulb life and/or headlight
performance.
● High pressure halogen gas is sealed
inside the halogen bulb. The bulb may
break if the glass envelope is scratched
or the bulb is dropped.
● Use the same number and wattage as
shown in the chart. Fog may temporarily form inside the lenses of the
exterior lights in the rain or in a car wash. A
temperature difference between the inside and
the outside of the lens causes the fog. This is not
a malfunction. If large drops of water collect
inside the lens, it is recommended you visit a
NISSAN dealer for servicing.FOG LIGHTS (if so equipped)
Replacing the fog light bulb
If bulb replacement is required, it is recommended
you visit a NISSAN dealer for this service.
CAUTION
●
High pressure halogen gas is sealed
inside the halogen bulb. The bulb may
break if the glass envelope is scratched
or the bulb is dropped.
● When handling the bulb, do not touch
the glass envelope.
● Use the same number and wattage as
originally installed as shown in the
chart.
● Do not leave the bulb out of the fog light
for a long period of time as dust, mois-
ture and smoke may enter the fog light
body and affect the performance of the
fog light.
LIGHTS
8-26Maintenance and do-it-yourself
Page 470 of 540
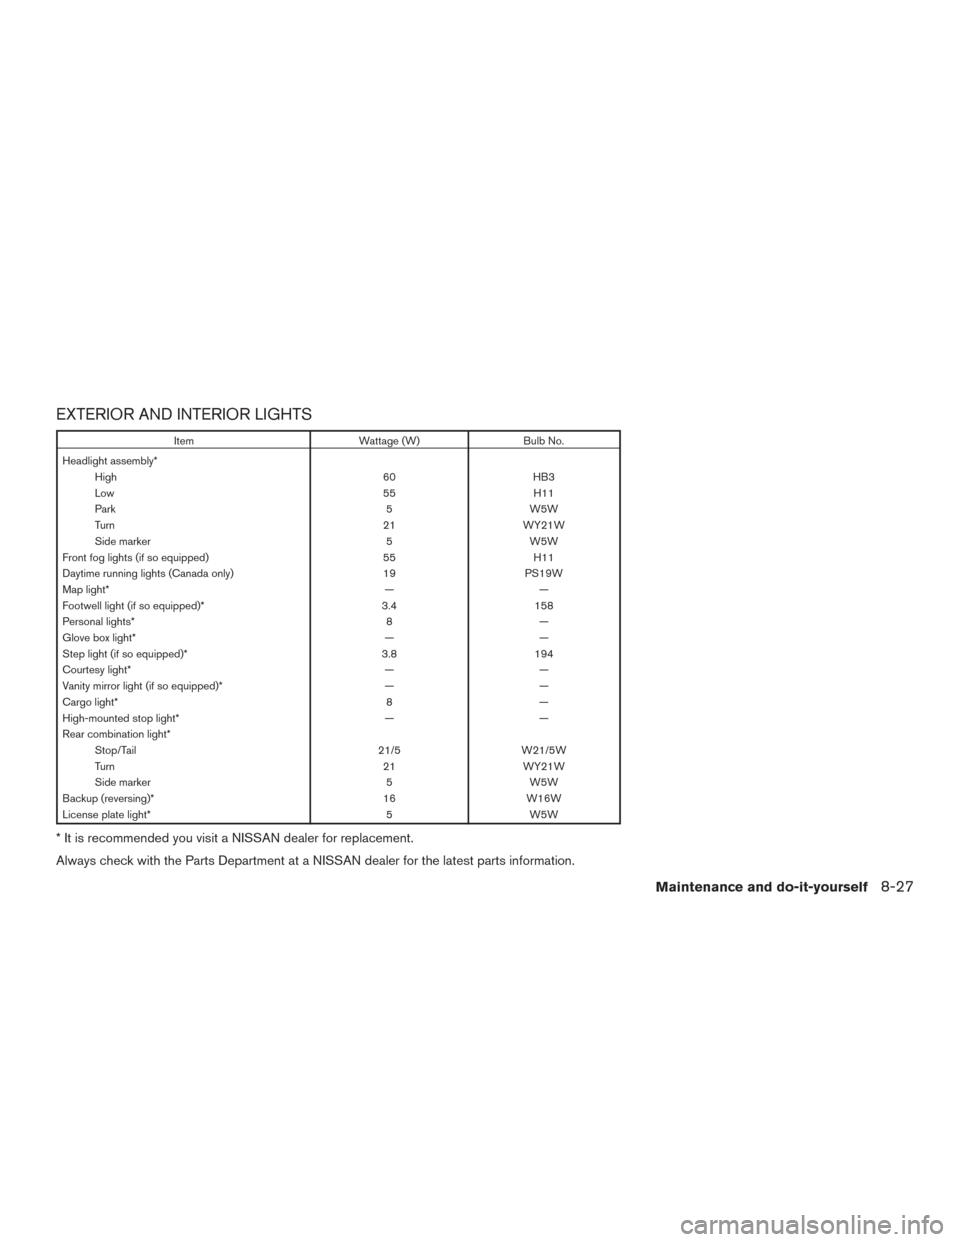
EXTERIOR AND INTERIOR LIGHTS
ItemWattage (W)Bulb No.
Headlight assembly* High 60HB3
Low 55H11
Park 5W5W
Turn 21WY21W
Side marker 5W5W
Front fog lights (if so equipped) 55H11
Daytime running lights (Canada only) 19PS19W
Map light* ——
Footwell light (if so equipped)* 3.4158
Personal lights* 8—
Glove box light* ——
Step light (if so equipped)* 3.8194
Courtesy light* ——
Vanity mirror light (if so equipped)* ——
Cargo light* 8—
High-mounted stop light* ——
Rear combination light* Stop/Tail 21/5W21/5W
Turn 21WY21W
Side marker 5W5W
Backup (reversing)* 16W16W
License plate light* 5W5W
* It is recommended you visit a NISSAN dealer for replacement.
Always check with the Parts Department at a NISSAN dealer for the latest parts information.
Maintenance and do-it-yourself8-27
Page 471 of 540
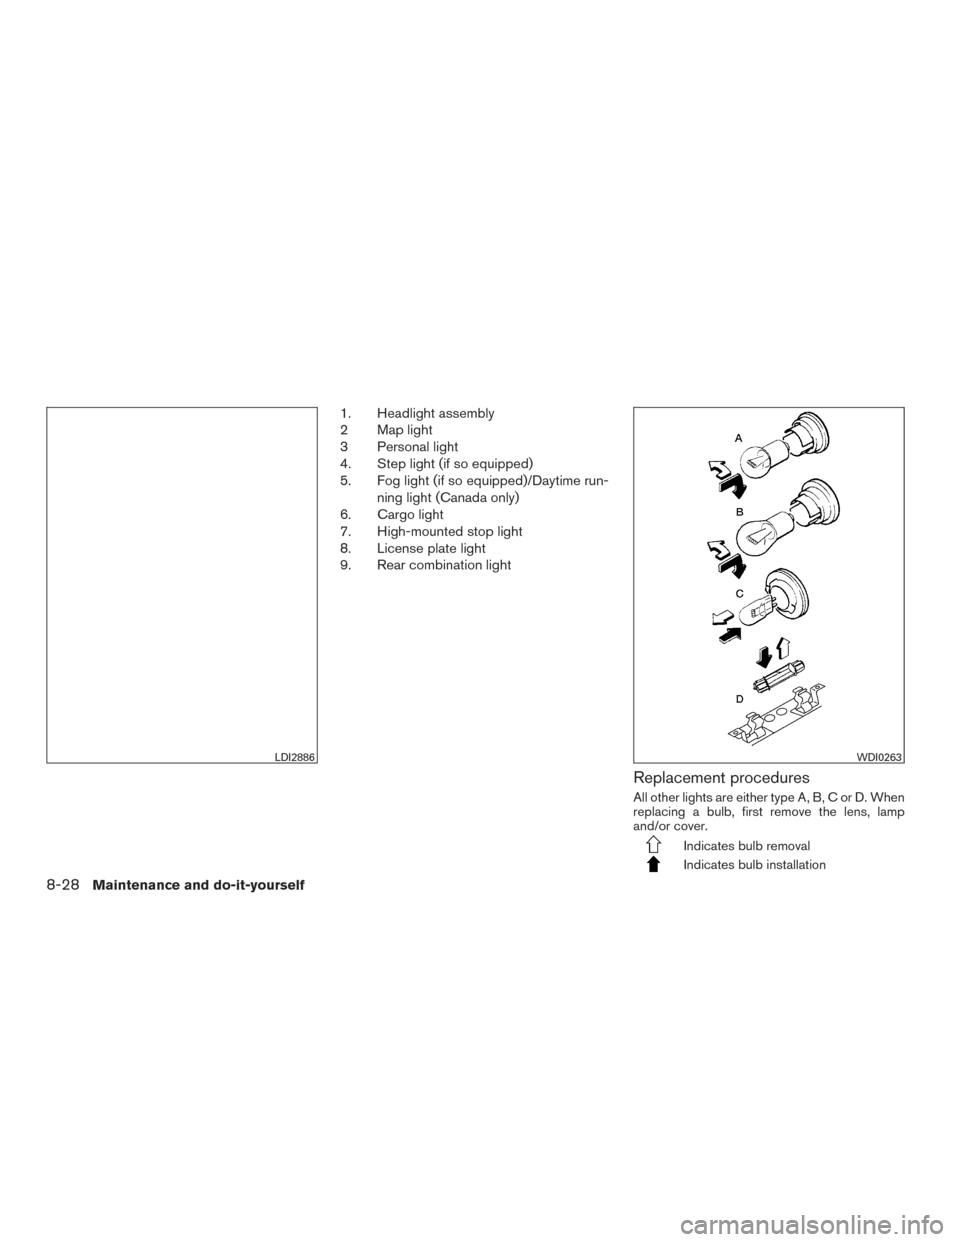
1. Headlight assembly
2 Map light
3 Personal light
4. Step light (if so equipped)
5. Fog light (if so equipped)/Daytime run-ning light (Canada only)
6. Cargo light
7. High-mounted stop light
8. License plate light
9. Rear combination light
Replacement procedures
All other lights are either type A, B, C or D. When
replacing a bulb, first remove the lens, lamp
and/or cover.
Indicates bulb removal
Indicates bulb installation
LDI2886WDI0263
8-28Maintenance and do-it-yourself