Page 14 of 380
1. Map lights (P. 2-48)
2. Sun visors (P. 3-16)
3. Inside mirror (P. 3-17)
4. Steering wheel (P. 3-15)
5. Glove box (P. 2-38)
6. Console box (if so equipped) (P. 2-38)
7. Front seats (P. 1-2)
8. Cup holders (mounted to lower seatframe) (2nd row shown; 3rd and 4th
rows similar) (P. 2-38)
9. Rear seat configurations (P. 1-2)
Refer to the page number indicated in pa-
rentheses for operating details.
LII2024
PASSENGER COMPARTMENT
Illustrated table of contents0-5
Page 15 of 380
1. Headlight switch (P. 2-27)
2. Vents (P. 4-17)
3. Fog light switch (if so equipped)(P. 2-29)
4. Wiper and washer (P. 2-25) Turn signal switch (P. 2-29)
5. Steering wheel switch for audio
control/Bluetooth® Hands-Free Phone
System (if so equipped) (P. 4-29)
6. Driver supplemental air bag (P. 1-51) Horn (P. 2-30)
7. Meters and gauges (P. 2-3) Warning and indicator lights (P. 2-11)
8. Cruise control main/set switches
(if so equipped) (P. 5-17)
9. Shift lever (P. 5-13)
10. Storage tray (P. 2-38)
11. Audio system controls (P. 4-37) Navigation system* (if so equipped)
(P. 4-29)
12. Storage tray (P. 2-38)
13. Glove box (P. 2-41)
14. Hazard warning flasher switch (P. 6-2)
15. iPod® player/USB input jack
(if so equipped) (P. 4-29)
16. Climate controls (P. 4-18)
LIC2198
INSTRUMENT PANEL
0-6Illustrated table of contents
Page 79 of 380

Supplemental front-impact air bag
system
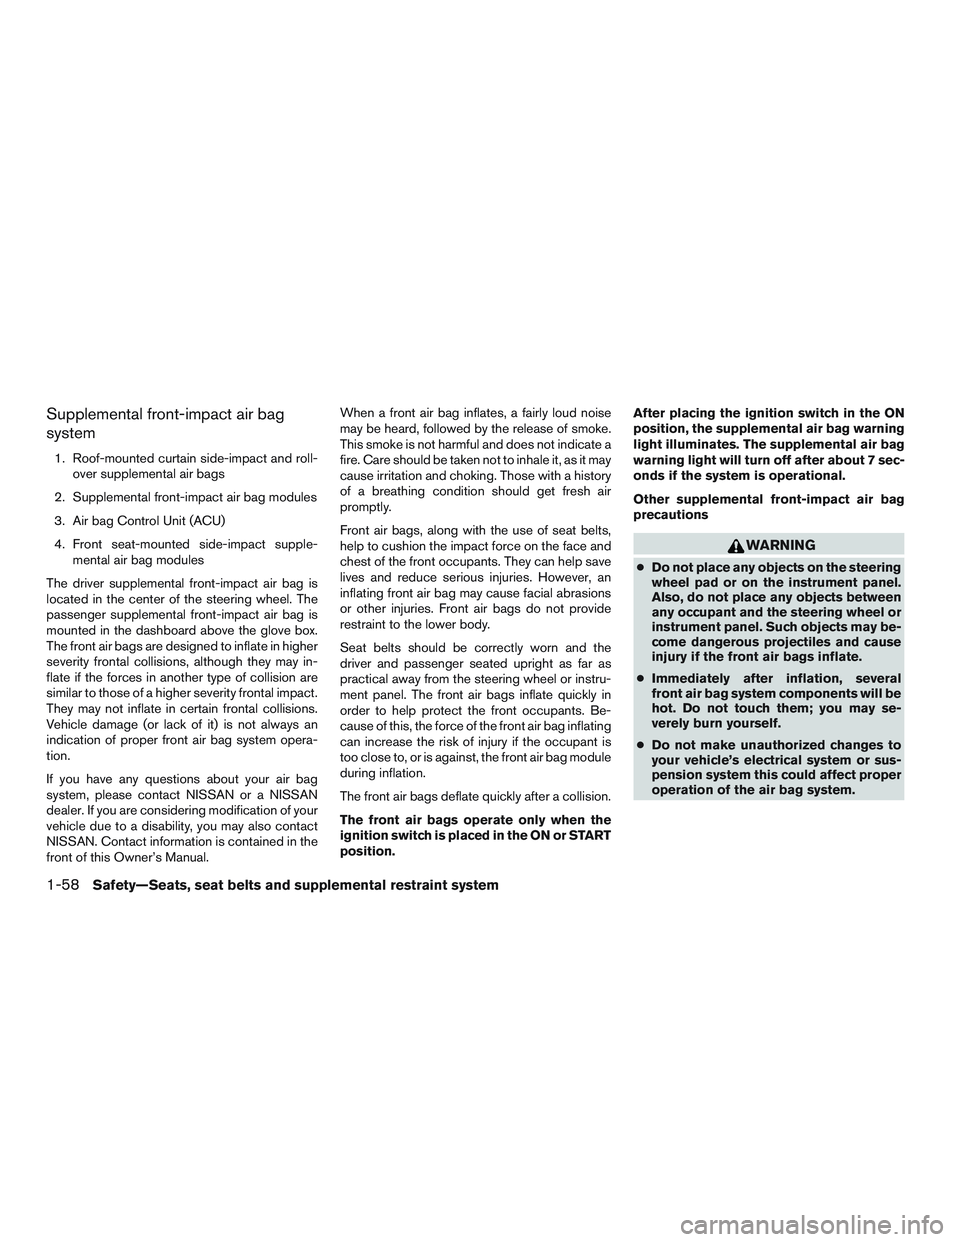
1. Roof-mounted curtain side-impact and roll-over supplemental air bags
2. Supplemental front-impact air bag modules
3. Air bag Control Unit (ACU)
4. Front seat-mounted side-impact supple- mental air bag modules
The driver supplemental front-impact air bag is
located in the center of the steering wheel. The
passenger supplemental front-impact air bag is
mounted in the dashboard above the glove box.
The front air bags are designed to inflate in higher
severity frontal collisions, although they may in-
flate if the forces in another type of collision are
similar to those of a higher severity frontal impact.
They may not inflate in certain frontal collisions.
Vehicle damage (or lack of it) is not always an
indication of proper front air bag system opera-
tion.
If you have any questions about your air bag
system, please contact NISSAN or a NISSAN
dealer. If you are considering modification of your
vehicle due to a disability, you may also contact
NISSAN. Contact information is contained in the
front of this Owner’s Manual. When a front air bag inflates, a fairly loud noise
may be heard, followed by the release of smoke.
This smoke is not harmful and does not indicate a
fire. Care should be taken not to inhale it, as it may
cause irritation and choking. Those with a history
of a breathing condition should get fresh air
promptly.
Front air bags, along with the use of seat belts,
help to cushion the impact force on the face and
chest of the front occupants. They can help save
lives and reduce serious injuries. However, an
inflating front air bag may cause facial abrasions
or other injuries. Front air bags do not provide
restraint to the lower body.
Seat belts should be correctly worn and the
driver and passenger seated upright as far as
practical away from the steering wheel or instru-
ment panel. The front air bags inflate quickly in
order to help protect the front occupants. Be-
cause of this, the force of the front air bag inflating
can increase the risk of injury if the occupant is
too close to, or is against, the front air bag module
during inflation.
The front air bags deflate quickly after a collision.
The front air bags operate only when the
ignition switch is placed in the ON or START
position.
After placing the ignition switch in the ON
position, the supplemental air bag warning
light illuminates. The supplemental air bag
warning light will turn off after about 7 sec-
onds if the system is operational.
Other supplemental front-impact air bag
precautions
WARNING
●
Do not place any objects on the steering
wheel pad or on the instrument panel.
Also, do not place any objects between
any occupant and the steering wheel or
instrument panel. Such objects may be-
come dangerous projectiles and cause
injury if the front air bags inflate.
● Immediately after inflation, several
front air bag system components will be
hot. Do not touch them; you may se-
verely burn yourself.
● Do not make unauthorized changes to
your vehicle’s electrical system or sus-
pension system this could affect proper
operation of the air bag system.
1-58Safety—Seats, seat belts and supplemental restraint system
Page 86 of 380
Instrument panel storage trays . .................2-38
Under-seat storage ............................ 2-39
Sunglasses holder (if so equipped) ..............2-39
Cup holders .................................. 2-40
Glove box .................................... 2-41
Seat pocket (if so equipped) ....................2-42
Console box (if so equipped) ...................2-42
Storage bin ................................... 2-45Grocery hooks . .
.............................. 2-45
Windows ........................................ 2-46
Power windows (if so equipped) ................2-46
Manual windows (if so equipped) ................2-47
Manual vent windows .......................... 2-48
Interior lights ..................................... 2-48
Map lights .................................... 2-49
Page 87 of 380
1. Headlight switch (P. 2-27)
2. Vents (P. 4-17)
3. Fog light switch (if so equipped)(P. 2-29)
4. Wiper and washer (P. 2-25) Turn signal switch (P. 2-29)
5. Steering wheel switch for audio
control/Bluetooth® Hands-Free Phone
System (if so equipped) (P. 4-29)
6. Driver supplemental air bag (P. 1-51) Horn (P. 2-30)
7. Meters and gauges (P. 2-3) Warning and indicator lights (P. 2-11)
8. Cruise control main/set switches
(if so equipped) (P. 5-17)
9. Shift lever (P. 5-13)
10. Storage tray (P. 2-38)
11. Audio system controls (P. 4-37) Navigation system* (if so equipped)
(P. 4-29)
12. Storage tray (P. 2-38)
13. Glove box (P. 2-41)
14. Hazard warning flasher switch (P. 6-2)
15. iPod® player/USB input jack
(if so equipped) (P. 4-29)
16. Climate controls (P. 4-18)
LIC2198
INSTRUMENT PANEL
2-2Instruments and controls
Page 126 of 380
CAUTION
●Do not use bottle holder for any other
objects that could be thrown about in
the vehicle and possibly injure people
during sudden braking or an accident.
● Do not use bottle holder for open liquid
containers.
GLOVE BOX
Open the glove box by pulling the handle.
WARNING
Keep glove box lid closed while driving to
help prevent injury in an accident or a
sudden stop.
Front row — bottle holder
LIC2981
3rd row - bottle holder
LIC2201LIC2068
Instruments and controls2-41
Page 130 of 380

CAUTION
Properly stow and secure the console if it
is not stored outside the vehicle.
To install the center console: 1. Stop the vehicle and place the ignition switch in the OFF position.
2. Remove the six bolts from the floor mounting holes.
For customers without 120V proceed to step 5. 3. Remove the cap from the harness connector located at the bottom corner of the driver’s
seat and place the cap in the glove box for
future use.
4. Connect the harness from the console to the connector at the bottom of the driver’s seat .
This may need to be accessed from the
driver’s door side of the seat by reaching
underneath the seat.
5. Securely tighten six bolts, four bolts located inside the console and the two in the front
storage tray.
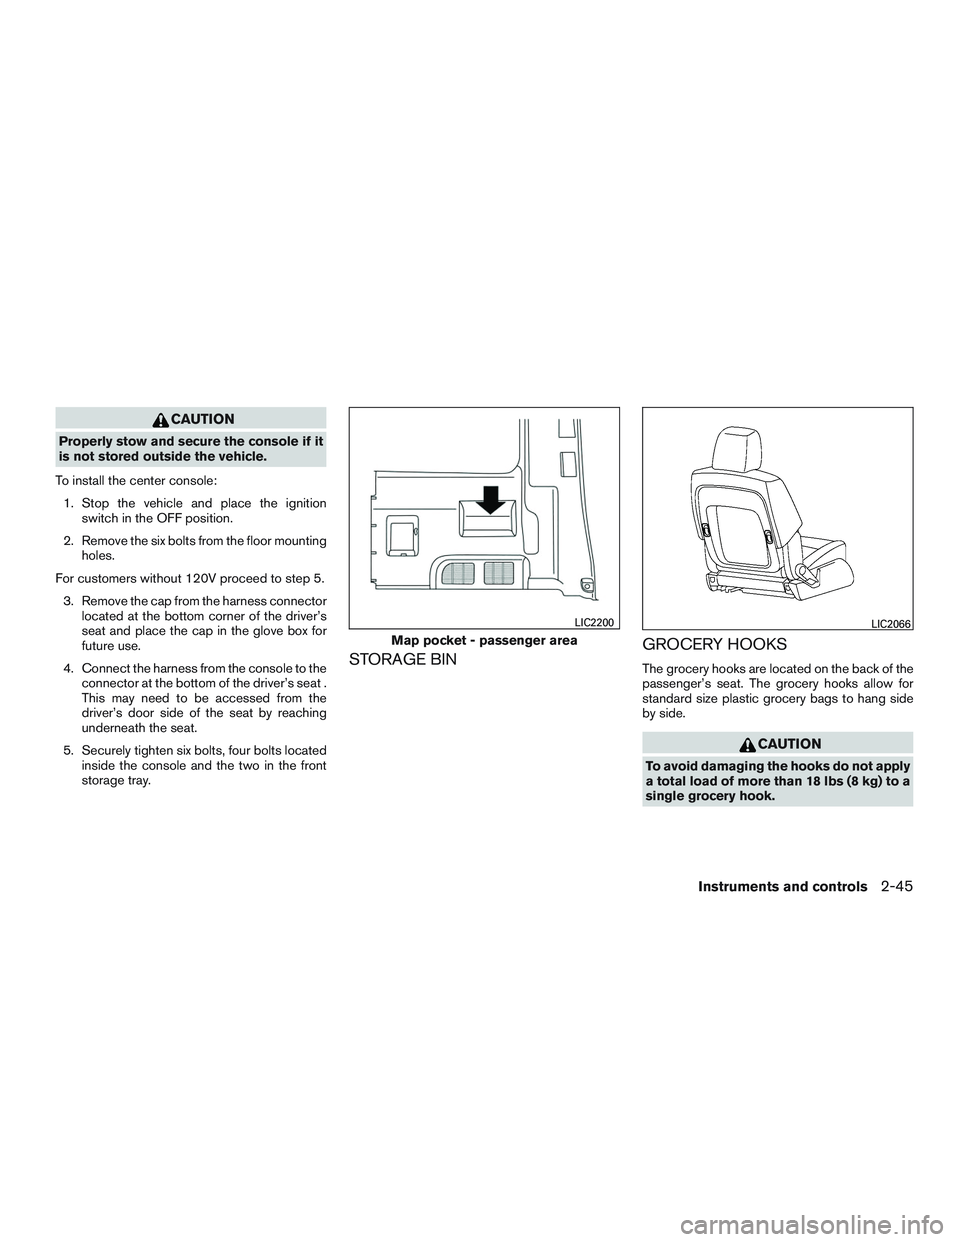
STORAGE BIN GROCERY HOOKSThe grocery hooks are located on the back of the
passenger’s seat. The grocery hooks allow for
standard size plastic grocery bags to hang side
by side.
CAUTION
To avoid damaging the hooks do not apply
a total load of more than 18 lbs (8 kg) to a
single grocery hook.
Map pocket - passenger area
LIC2200LIC2066
Instruments and controls2-45
Page 316 of 380

The air cleaner filter should not be cleaned and
reused. Replace it according to the maintenance
log shown in the “NISSAN Service and Mainte-
nance Guide.”
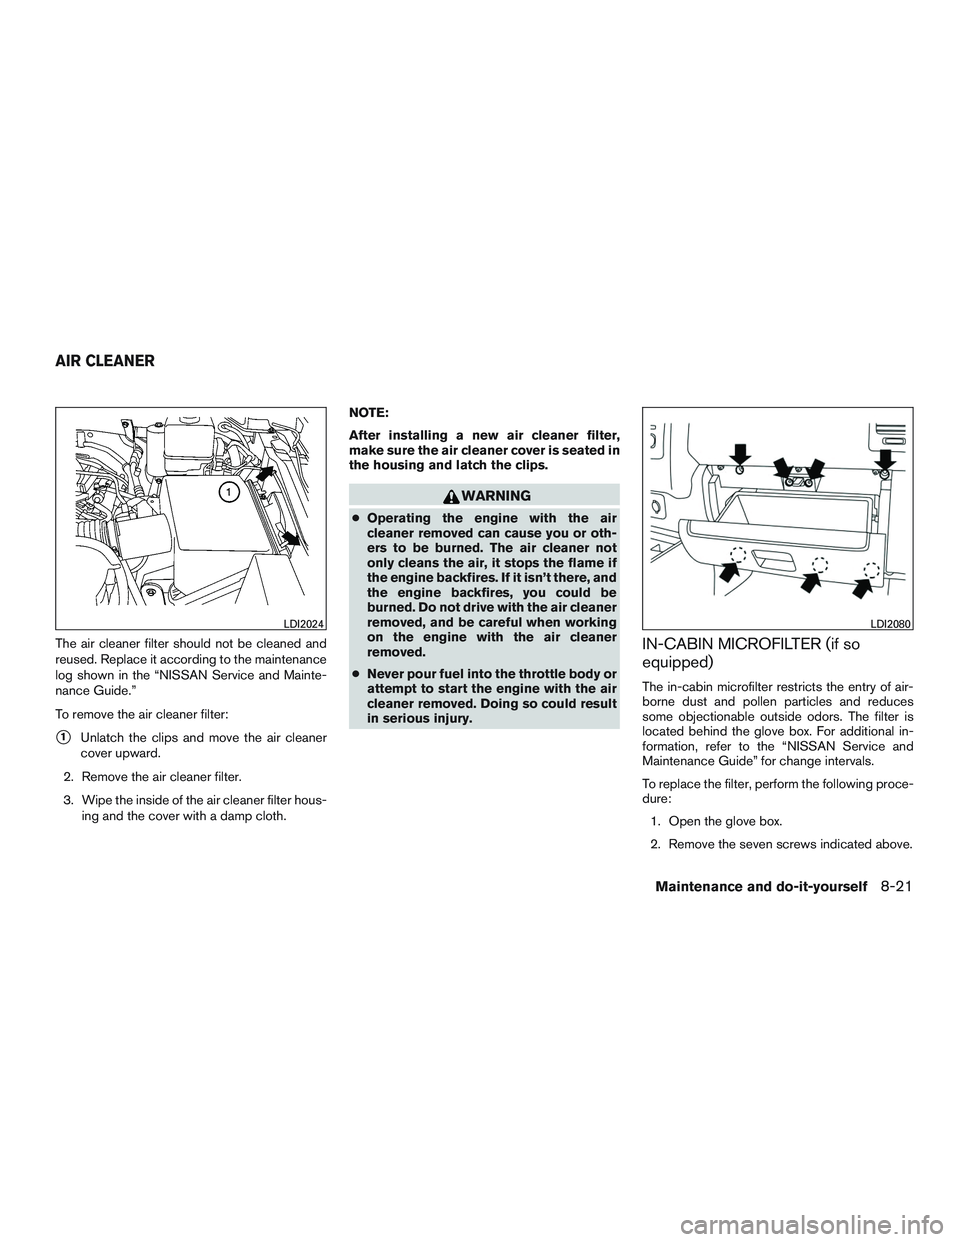
To remove the air cleaner filter:
�1Unlatch the clips and move the air cleaner
cover upward.
2. Remove the air cleaner filter.
3. Wipe the inside of the air cleaner filter hous- ing and the cover with a damp cloth. NOTE:
After installing a new air cleaner filter,
make sure the air cleaner cover is seated in
the housing and latch the clips.
WARNING
●
Operating the engine with the air
cleaner removed can cause you or oth-
ers to be burned. The air cleaner not
only cleans the air, it stops the flame if
the engine backfires. If it isn’t there, and
the engine backfires, you could be
burned. Do not drive with the air cleaner
removed, and be careful when working
on the engine with the air cleaner
removed.
● Never pour fuel into the throttle body or
attempt to start the engine with the air
cleaner removed. Doing so could result
in serious injury.
IN-CABIN MICROFILTER (if so
equipped)
The in-cabin microfilter restricts the entry of air-
borne dust and pollen particles and reduces
some objectionable outside odors. The filter is
located behind the glove box. For additional in-
formation, refer to the “NISSAN Service and
Maintenance Guide” for change intervals.
To replace the filter, perform the following proce-
dure:
1. Open the glove box.
2. Remove the seven screws indicated above.
LDI2024LDI2080
AIR CLEANER
Maintenance and do-it-yourself8-21