2016 NISSAN MURANO HYBRID steering
[x] Cancel search: steeringPage 24 of 36
22
SYSTEM GUIDE
TRIP COMPUTER
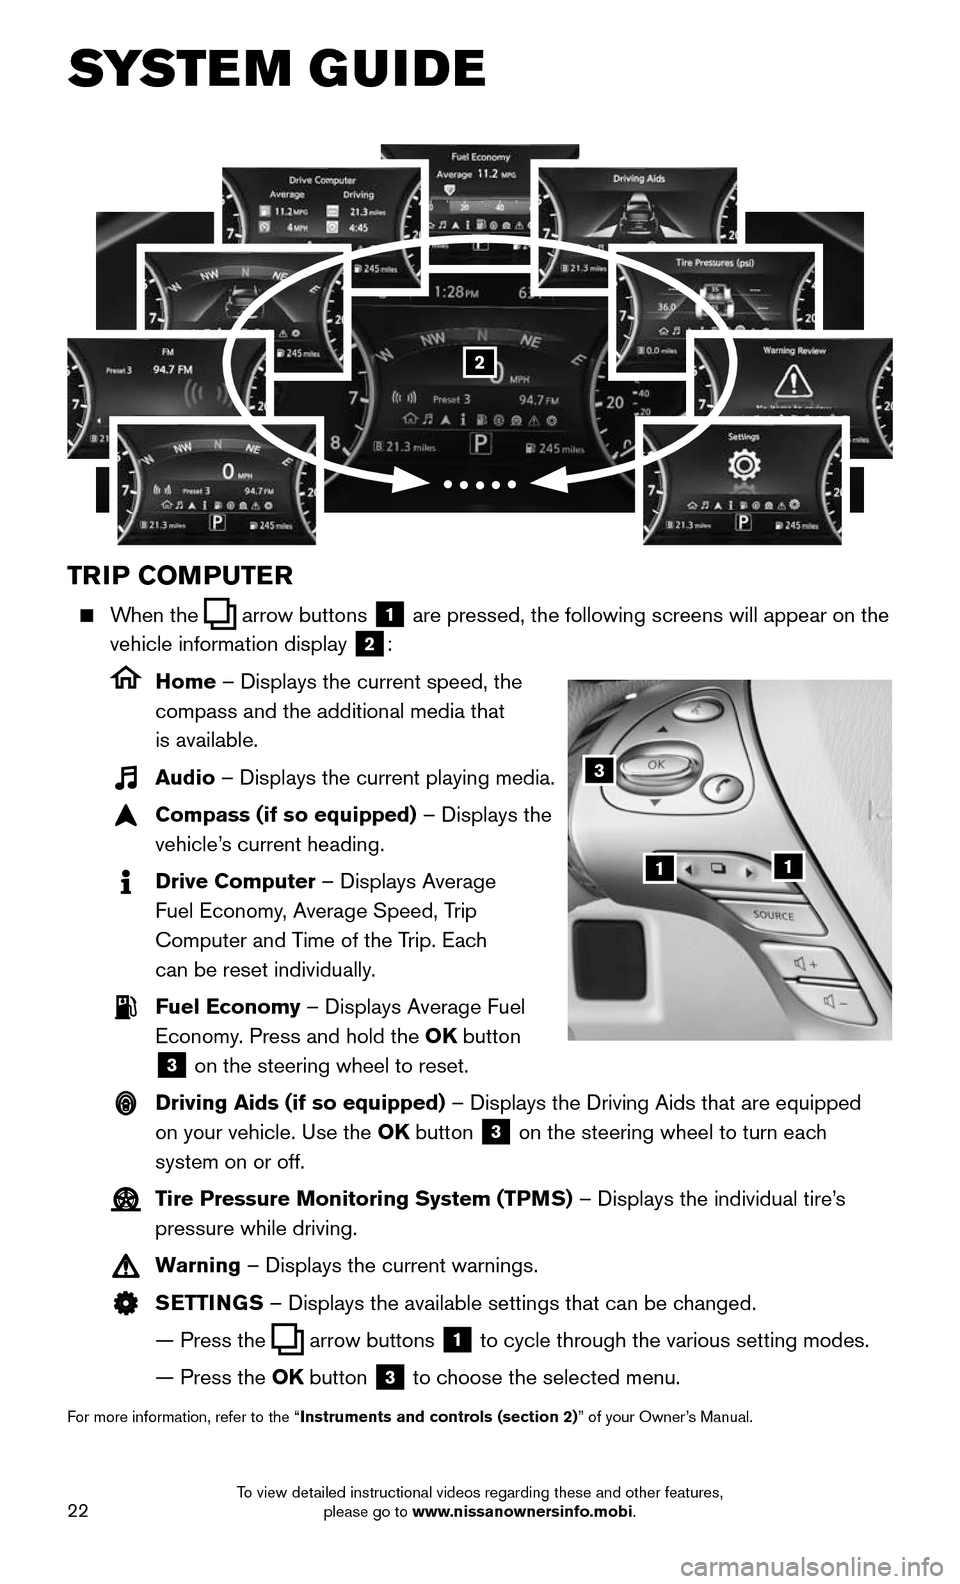
When the arrow buttons 1 are pressed, the following screens will appear on the
vehicle information display
2:
Home – Displays the current speed, the
compass and the additional media that
is available.
Audio – Displays the current playing media.
Compass (if so equipped) – Displays the
vehicle’s current heading.
Drive Computer – Displays Average
Fuel Economy, Average Speed, Trip
Computer and Time of the Trip. Each
can be reset individually.
Fuel Economy – Displays Average Fuel
Economy. Press and hold the OK button
3 on the steering wheel to reset.
Driving Aids (if so equipped) – Displays the Driving Aids that are equipped
on your vehicle. Use the OK button
3 on the steering wheel to turn each
system on or off.
Tire Pressure Monitoring System (TPMS) – Displays the individual tire’s
pressure while driving.
Warning – Displays the current warnings.
SETTINGS – Displays the available settings that can be changed.
— Press the arrow buttons 1 to cycle through the various setting modes.
— Press the OK button 3 to choose the selected menu.
For more information, refer to the “Instruments and controls (section 2)” of your Owner’s Manual.
3
11
2
To view detailed instructional videos regarding these and other features, please go to www.nissanownersinfo.mobi.
Page 25 of 36
23
HANDS-FREE TEXT MESSAGING ASSISTANT1,2
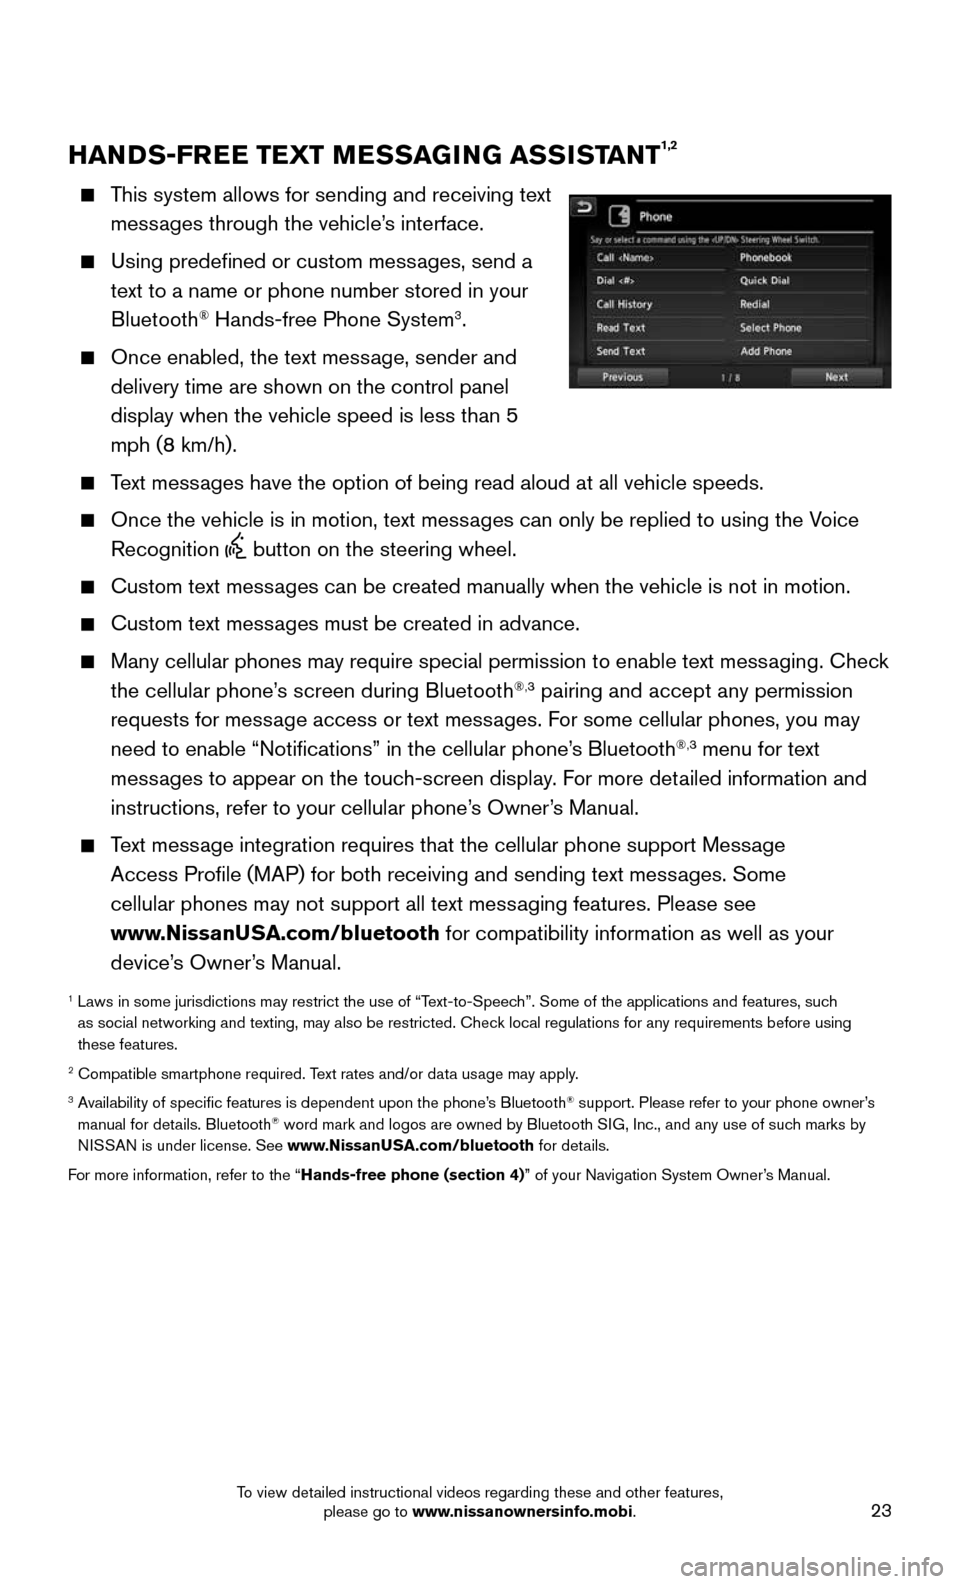
This system allows for sending and receiving text
messages through the vehicle’s interface.
Using predefined or custom messages, send a
text to a name or phone number stored in your
Bluetooth® Hands-free Phone System3.
Once enabled, the text message, sender and
delivery time are shown on the control panel
display when the vehicle speed is less than 5
mph (8 km/h).
Text messages have the option of being read aloud at all vehicle speeds.
Once the vehicle is in motion, text mess ages can only be replied to using the Voice
Recognition button on the steering wheel.
Custom text messages can be created manually when the vehicle is not in motion.
Custom text messages must be created in advance.
Many cellular phones may require special permission to enable text mess aging. Check
the cellular phone’s screen during Bluetooth®,3 pairing and accept any permission
requests for message access or text messages. For some cellular phones, you may
need to enable “Notifications” in the cellular phone’s Bluetooth
®,3 menu for text
messages to appear on the touch-screen display. For more detailed information and
instructions, refer to your cellular phone’s Owner’s Manual.
Text message integration requires that the cellular phone support Message
Access Profile (MAP) for both receiving and sending text messages. Some
cellular phones may not support all text messaging features. Please see
www.NissanUSA.com/bluetooth for compatibility information as well as your
device’s Owner’s Manual.
1 Laws in some jurisdictions may restrict the use of “T ext-to-Speech”. Some of the applications and features, such
as social networking and texting, may also be restricted. Check local regulations for any requirements before using
these features.
2 Compatible smartphone required. Text rates and/or data usage may apply.3 Availability of specific features is dependent upon the phone’s Bluetooth® support. Please refer to your phone owner’s
manual for details. Bluetooth® word mark and logos are owned by Bluetooth SIG, Inc., and any use of such marks by
NISSAN is under license. See www.NissanUSA.com/bluetooth for details.
For more information, refer to the “Hands-free phone (section 4)” of your Navigation System Owner’s Manual.
To view detailed instructional videos regarding these and other features, please go to www.nissanownersinfo.mobi.
Page 27 of 36
25
BLUETOOTH® HANDS-FREE PHONE SYSTEM1
A cellular telephone should not be used
while driving so full attention may be given to
vehicle operation.
2
SYSTEM OPERATING TIPS
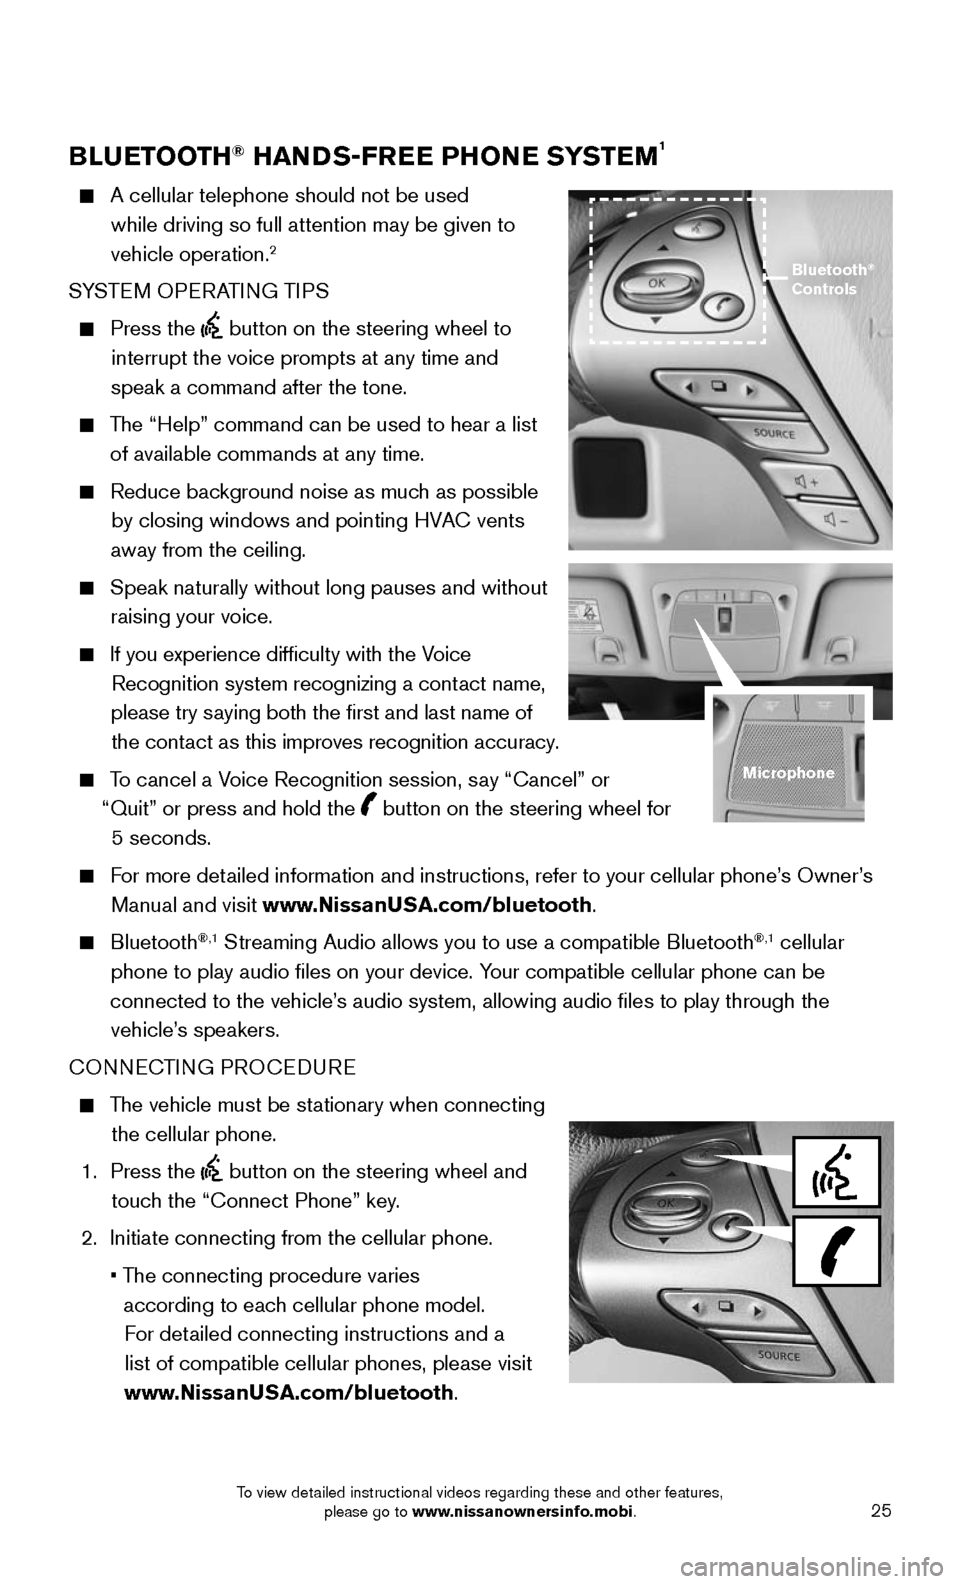
Press the button on the steering wheel to
interrupt the voice prompts at any time and
speak a command after the tone.
The “Help” command can be used to hear a list
of available commands at any time.
Reduce bac kground noise as much as possible
by closing windows and pointing HVAC vents
away from the ceiling.
Speak naturally without long pauses and without
raising your voice.
If you experience difficulty with the V oice
Recognition system recognizing a contact name,
please try saying both the first and last name of the contact as this improves recognition accuracy.
To cancel a Voice Recognition session, say “Cancel” or
“Quit” or press and hold the
button on the steering wheel for
5 seconds.
For more detailed information and instructions, refer to your cellular phone’s Owner’s
Manual and visit www.NissanUSA.com/bluetooth.
Bluetooth®,1 Streaming Audio allows you to use a compatible Bluetooth®,1 cellular
phone to play audio files on your device. Your compatible cellular phone can be
connected to the vehicle’s audio system, allowing audio files to play through the vehicle’s speakers.
CONNECTING PROCEDURE
The vehicle must be stationary when connecting
the cellular phone.
1. Press the button on the steering wheel and
touch the “Connect Phone” key.
2. Initiate connecting from the cellular phone.
• The connecting procedure varies
according to each cellular phone model. For detailed connecting instructions and a list of compatible cellular phones, please visit
www.NissanUSA.com/bluetooth.
Bluetooth®
Controls
Microphone
To view detailed instructional videos regarding these and other features, please go to www.nissanownersinfo.mobi.
Page 28 of 36
26
SYSTEM GUIDE
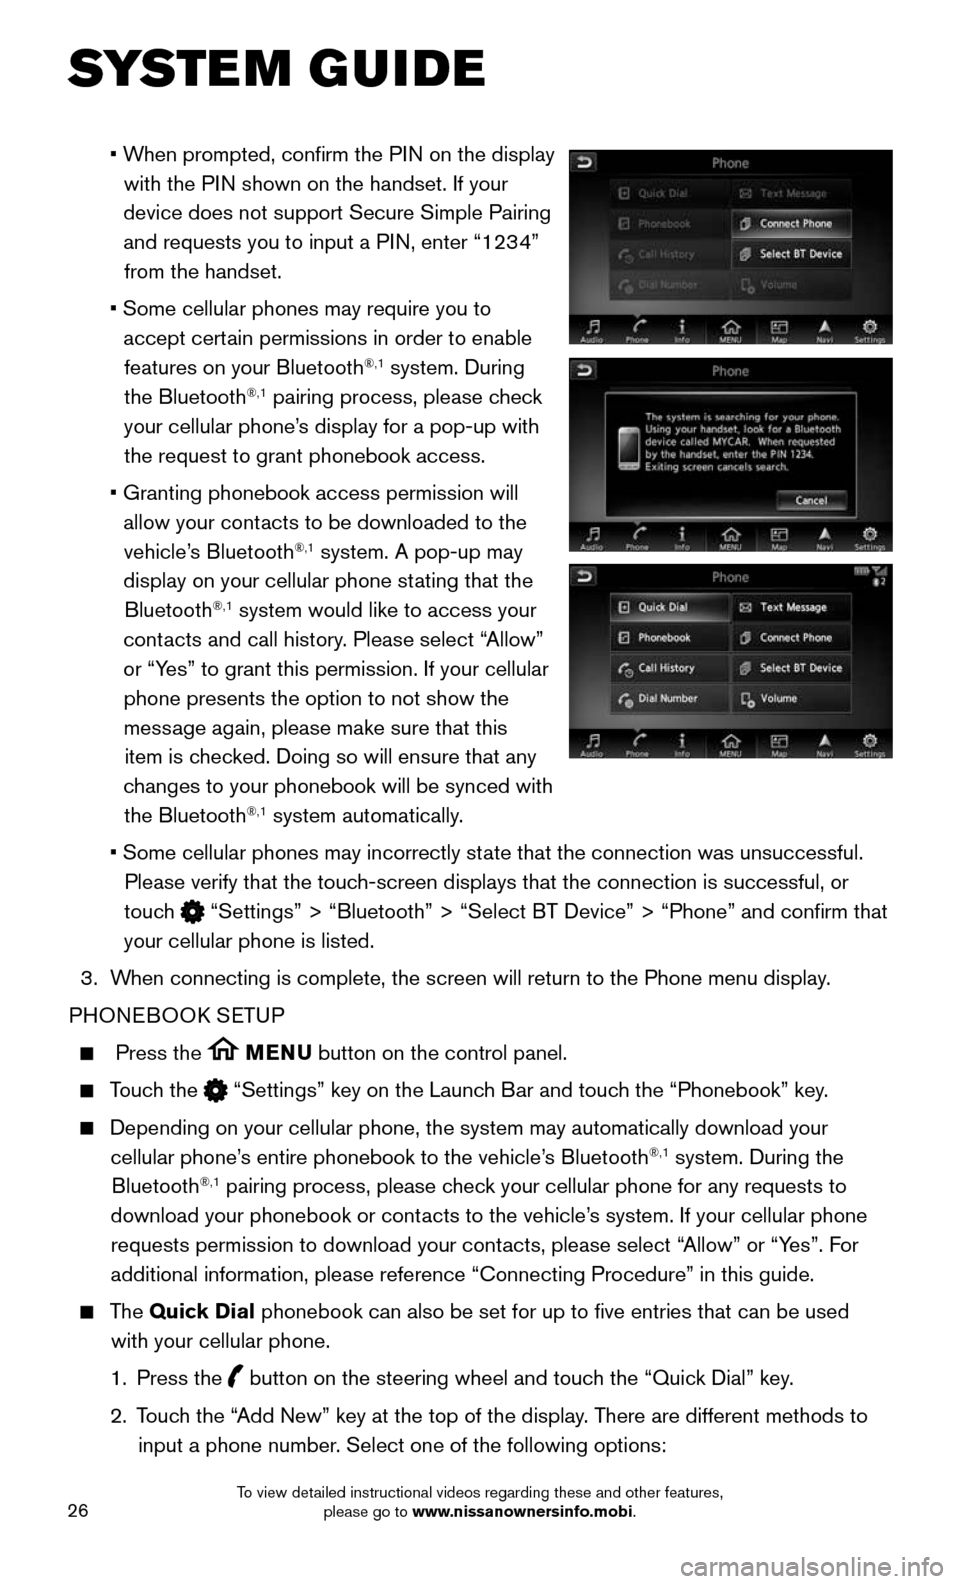
• When prompted, confirm the PIN on the display
with the PIN shown on the handset. If your
device does not support Secure Simple Pairing and requests you to input a PIN, enter “1234” from the handset.
• Some cellular phones may require you to
accept certain permissions in order to enable
features on your Bluetooth®,1 system. During
the Bluetooth®,1 pairing process, please check
your cellular phone’s display for a pop-up with the request to grant phonebook access.
• Granting phonebook access permission will
allow your contacts to be downloaded to the
vehicle’s Bluetooth®,1 system. A pop-up may
display on your cellular phone stating that the Bluetooth
®,1 system would like to access your
contacts and call history. Please select “Allow”
or “Yes” to grant this permission. If your cellular phone presents the option to not show the message again, please make sure that this item is checked. Doing so will ensure that any
changes to your phonebook will be synced with the Bluetooth
®,1 system automatically.
• Some cellular phones may incorrectly st ate that the connection was unsuccessful.
Please verify that the touch-screen displays that the connection is successful, or
touch
“Settings” > “Bluetooth” > “Select BT Device” > “P\
hone” and confirm that
your cellular phone is listed.
3. When connecting is complete, the screen will return to the Phone menu dis\
play.
PHONEBOOK SETUP
Press the MENU button on the control panel.
Touch the “Settings” key on the Launch Bar and touch the “Phonebook” key.
Depending on your cellular phone, the system may automatically download \
your
cellular phone’s entire phonebook to the vehicle’s Bluetooth®,1 system. During the
Bluetooth®,1 pairing process, please check your cellular phone for any requests to
download your phonebook or contacts to the vehicle’s system. If your cellular phone requests permission to download your contacts, please select “Allow” or “Yes”. For
additional information, please reference “Connecting Procedure” in\
this guide.
The Quick Dial phonebook can also be set for up to five entries that can be used
with your cellular phone.
1. Press the button on the steering wheel and touch the “Quick Dial” key.
2. Touch the “Add New” key at the top of the display. There are different methods to
input a phone number. Select one of the following options:
To view detailed instructional videos regarding these and other features, please go to www.nissanownersinfo.mobi.
Page 29 of 36
27
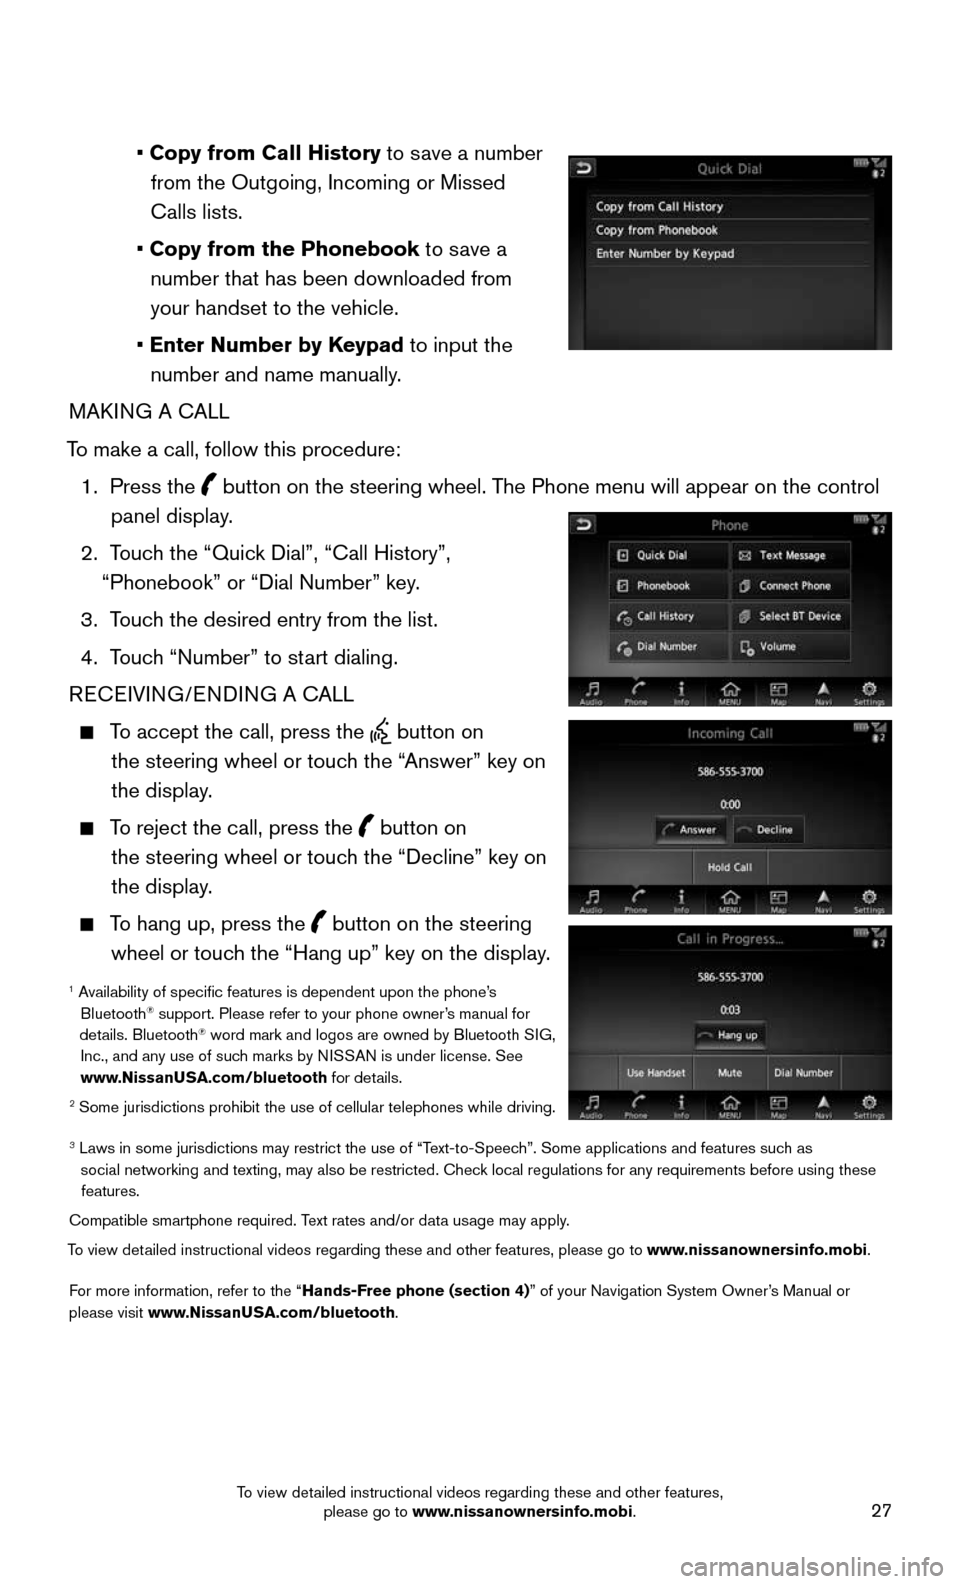
• Copy from Call History to save a number from the Outgoing, Incoming or Missed
Calls lists.
• Copy from the Phonebook to save a number that has been downloaded from your handset to the vehicle.
• Enter Number by Keypad to input the number and name manually.
MAKING A CALL
To make a call, follow this procedure:
1. Press the button on the steering wheel. The Phone menu will appear on the control
panel display.
2. Touch the “Quick Dial”, “Call History”,
“Phonebook” or “Dial Number” key.
3. Touch the desired entry from the list.
4. Touch “Number” to start dialing.
RECEIVING/ENDING A CALL
To accept the call, press the button on
the steering wheel or touch the “Answer” key on
the display.
To reject the call, press the button on
the steering wheel or touch the “Decline” key on
the display.
To hang up, press the button on the steering
wheel or touch the “Hang up” key on the display.
1 Availability of specific features is dependent upon the phone’s Bluetooth® support. Please refer to your phone owner’s manual for
details. Bluetooth® word mark and logos are owned by Bluetooth SIG,
Inc., and any use of such marks by NISSAN is under license. See
www.NissanUSA.com/bluetooth for details.
2 Some jurisdictions prohibit the use of cellular telephones while drivin\
g.
3 Laws in some jurisdictions may restrict the use of “T ext-to-Speech”. Some applications and features such as
social networking and texting, may also be restricted. Check local regulations for any requirements before using these features.
Compatible smartphone required. Text rates and/or data usage may apply.
To view detailed instructional videos regarding these and other features, please go\
to www.nissanownersinfo.mobi.
For more information, refer to the “Hands-Free phone (section 4)” of your Navigation System Owner’s Manual or
please visit www.NissanUSA.com/bluetooth.
To view detailed instructional videos regarding these and other features, please go to www.nissanownersinfo.mobi.
Page 32 of 36
30
SYSTEM GUIDE
10 Compass - Map view can be changed by touching the compass when on the
main map screen.
SETTING DESTINATION
You can set a destination with your Navigation System using the touch-screen display or
Voice Recognition.
Touch-screen Display
• Touch the “Navi” key on the Launch Bar.
Voice Recognition
• Press the button on the steering wheel, and after the tone, say “Navigation”. From
here, the system will give you the options available for setting a desti\
nation.
The fastest route is set as default; to change this to a minimized freeway or shortest
distance route, go to “Settings” > “Navigation” > “Route Sett\
ings”.
SETTING A DESTINATION USING POINTS OF INTEREST (POI)
Touch-screen Display
• Touch the “Navi” key on the Launch Bar.
• Touch the “Points of Interest” key and then select one of the displayed options f\
or
choosing your destination.
Voice Recognition
• Press the button on the steering wheel, and after the tone, say “Navigation” then
say “Points of Interest”. From here, the system will give you the options a\
vailable for
setting a POI.
For more information, refer to your Navigation System Owner’s Manual.
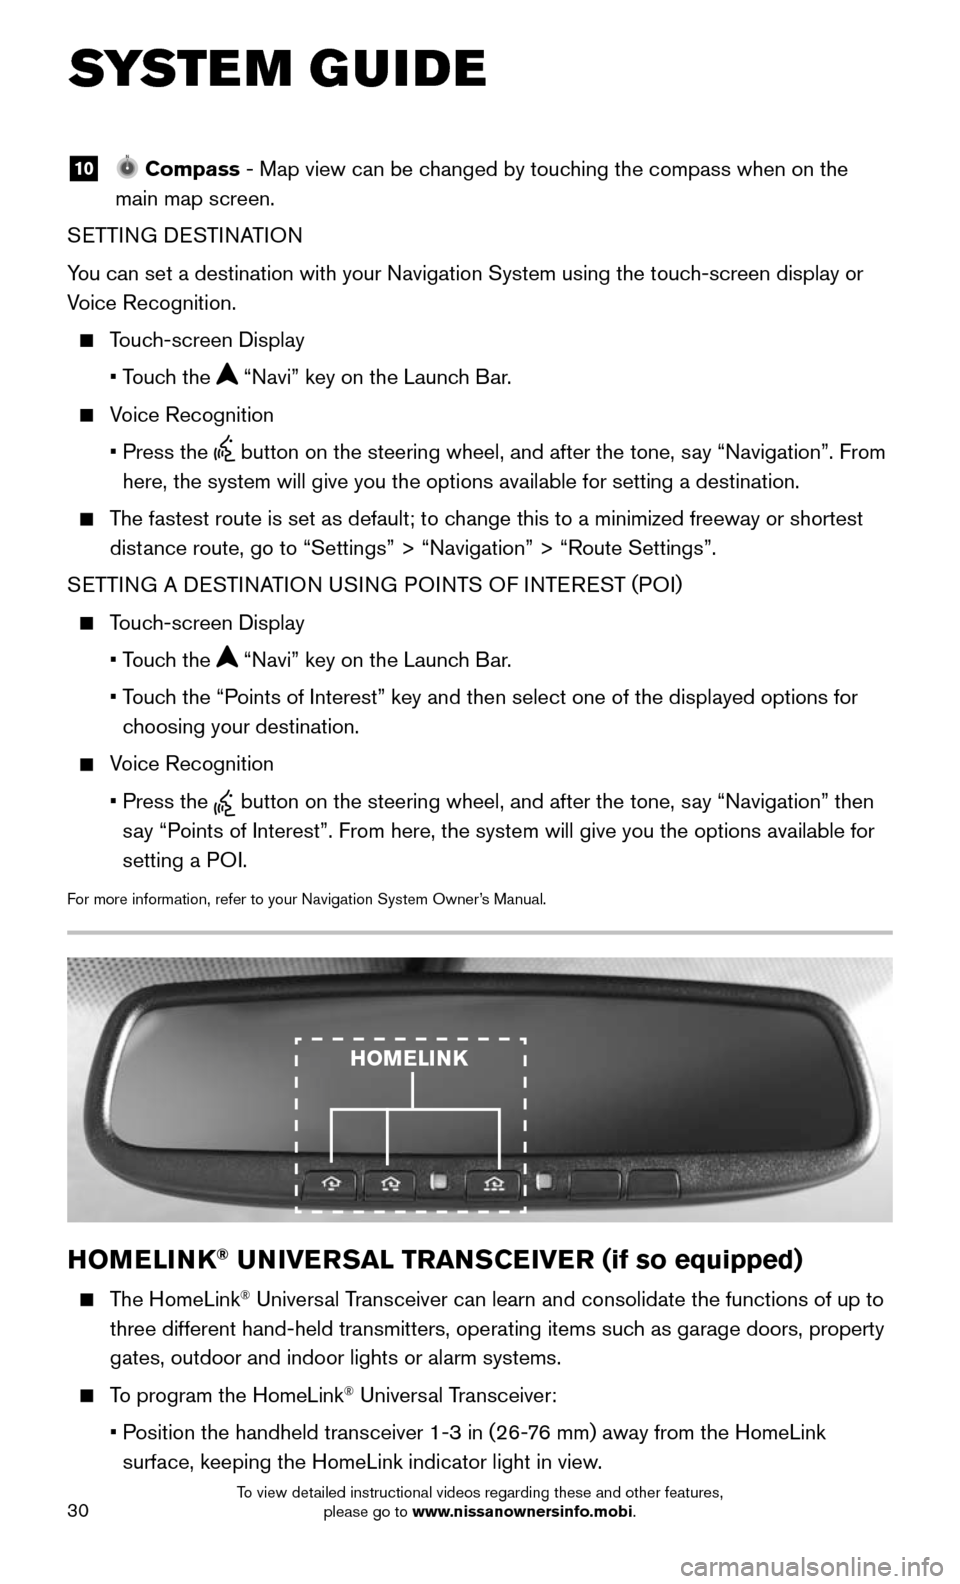
HOMELINK® UNIVERSAL TRANSCEIVER (if so equipped)
The HomeLink® Universal Transceiver can learn and consolidate the functions of up to
three different hand-held transmitters, operating items such as garage doors, property
gates, outdoor and indoor lights or alarm systems.
To program the HomeLink® Universal Transceiver:
• Position the handheld transceiver 1-3 in (26-76 mm) away from the HomeLink
surface, keeping the HomeLink indicator light in view.
HOMELINK
To view detailed instructional videos regarding these and other features, please go to www.nissanownersinfo.mobi.