2016 NISSAN LEAF radio
[x] Cancel search: radioPage 269 of 437
SATELLITE RADIO RECEPTION
When the satellite radio is used for the first time
or the battery has been replaced, the satellite
radio may not work properly. This is not a mal-
function. Wait more than 10 minutes with satellite
radio ON and the vehicle outside of any metal or
large building for satellite radio to receive all of
the necessary data.
No satellite radio reception is available and “NO
SAT” is displayed when the SAT band option is
selected unless optional satellite receiver and
antenna are installed and a SiriusXM® Satellite
Radio service subscription is active. Satellite ra-
dio is not available in Alaska, Hawaii and Guam.
Satellite radio performance may be affected if
cargo carried on the roof blocks the satellite radio
signal.
If possible, do not put cargo over the satellite
antenna.
A build up of ice on the satellite radio antenna can
affect satellite radio performance. Remove the
ice to restore satellite radio reception.
AUDIO OPERATION PRECAUTIONS
Compact disc (CD) player
CAUTION
• Do not force a compact disc into the CD insert slot. This could damage the
CD and/or CD player.
• Trying to load a CD with the CD door closed could damage the CD and/or
CD player.
• Only one CD can be loaded into the CD player at a time.
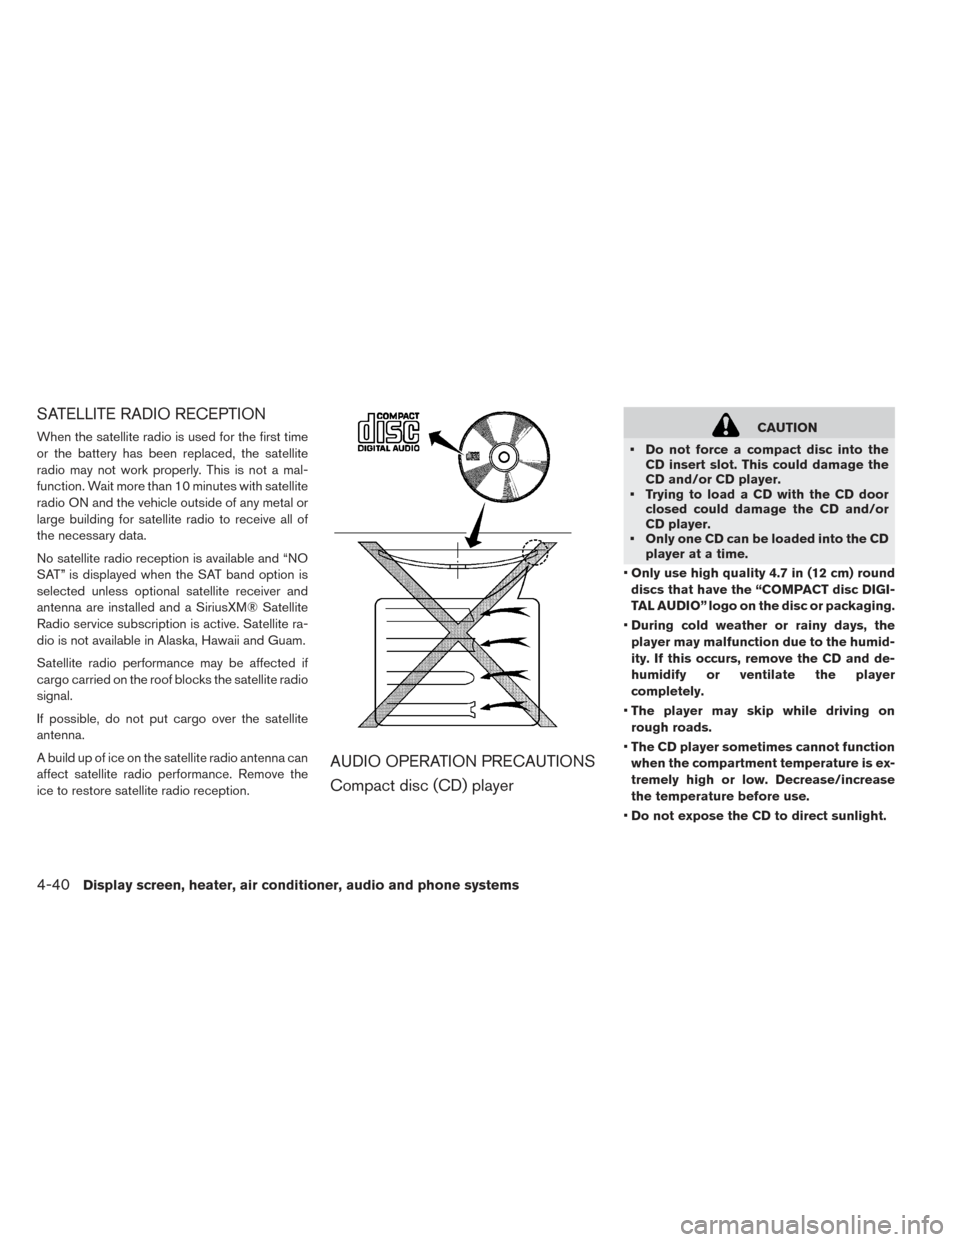
• Only use high quality 4.7 in (12 cm) round
discs that have the “COMPACT disc DIGI-
TAL AUDIO” logo on the disc or packaging.
• During cold weather or rainy days, the
player may malfunction due to the humid-
ity. If this occurs, remove the CD and de-
humidify or ventilate the player
completely.
• The player may skip while driving on
rough roads.
• The CD player sometimes cannot function
when the compartment temperature is ex-
tremely high or low. Decrease/increase
the temperature before use.
• Do not expose the CD to direct sunlight.
4-40Display screen, heater, air conditioner, audio and phone systems
Page 276 of 437
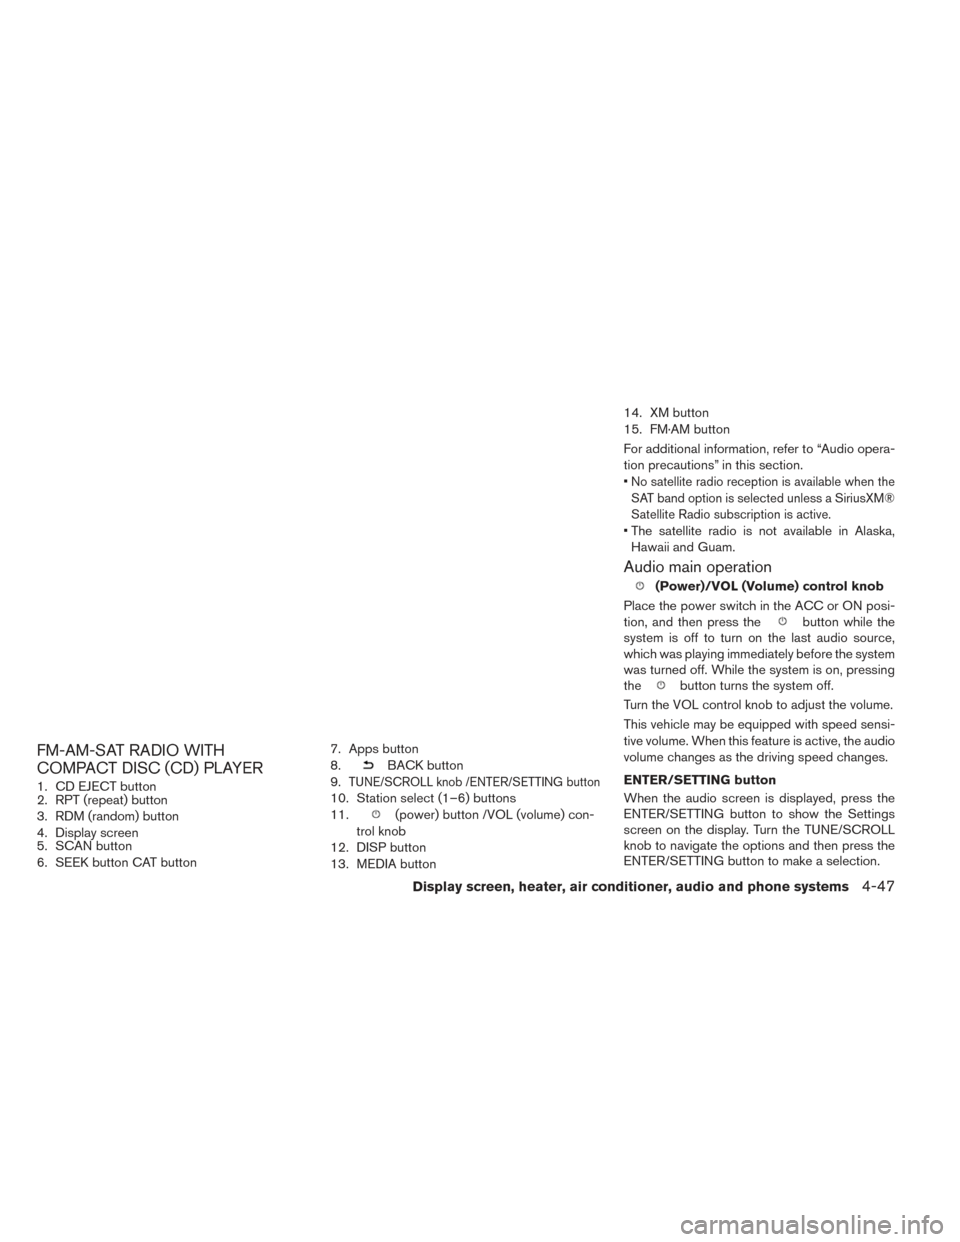
FM-AM-SAT RADIO WITH
COMPACT DISC (CD) PLAYER
1. CD EJECT button
2. RPT (repeat) button
3. RDM (random) button
4. Display screen
5. SCAN button
6. SEEK button CAT button7. Apps button
8.
BACK button
9.
TUNE/SCROLL knob /ENTER/SETTING button
10. Station select (1–6) buttons
11.
(power) button /VOL (volume) con-
trol knob
12. DISP button
13. MEDIA button 14. XM button
15. FM·AM button
For additional information, refer to “Audio opera-
tion precautions” in this section.
•
No satellite radio reception is available when the
SAT band option is selected unless a SiriusXM®
Satellite Radio subscription is active.
• The satellite radio is not available in Alaska, Hawaii and Guam.
Audio main operation
(Power)/VOL (Volume) control knob
Place the power switch in the ACC or ON posi-
tion, and then press the
button while the
system is off to turn on the last audio source,
which was playing immediately before the system
was turned off. While the system is on, pressing
the
button turns the system off.
Turn the VOL control knob to adjust the volume.
This vehicle may be equipped with speed sensi-
tive volume. When this feature is active, the audio
volume changes as the driving speed changes.
ENTER/SETTING button
When the audio screen is displayed, press the
ENTER/SETTING button to show the Settings
screen on the display. Turn the TUNE/SCROLL
knob to navigate the options and then press the
ENTER/SETTING button to make a selection.
Display screen, heater, air conditioner, audio and phone systems4-47
Page 277 of 437
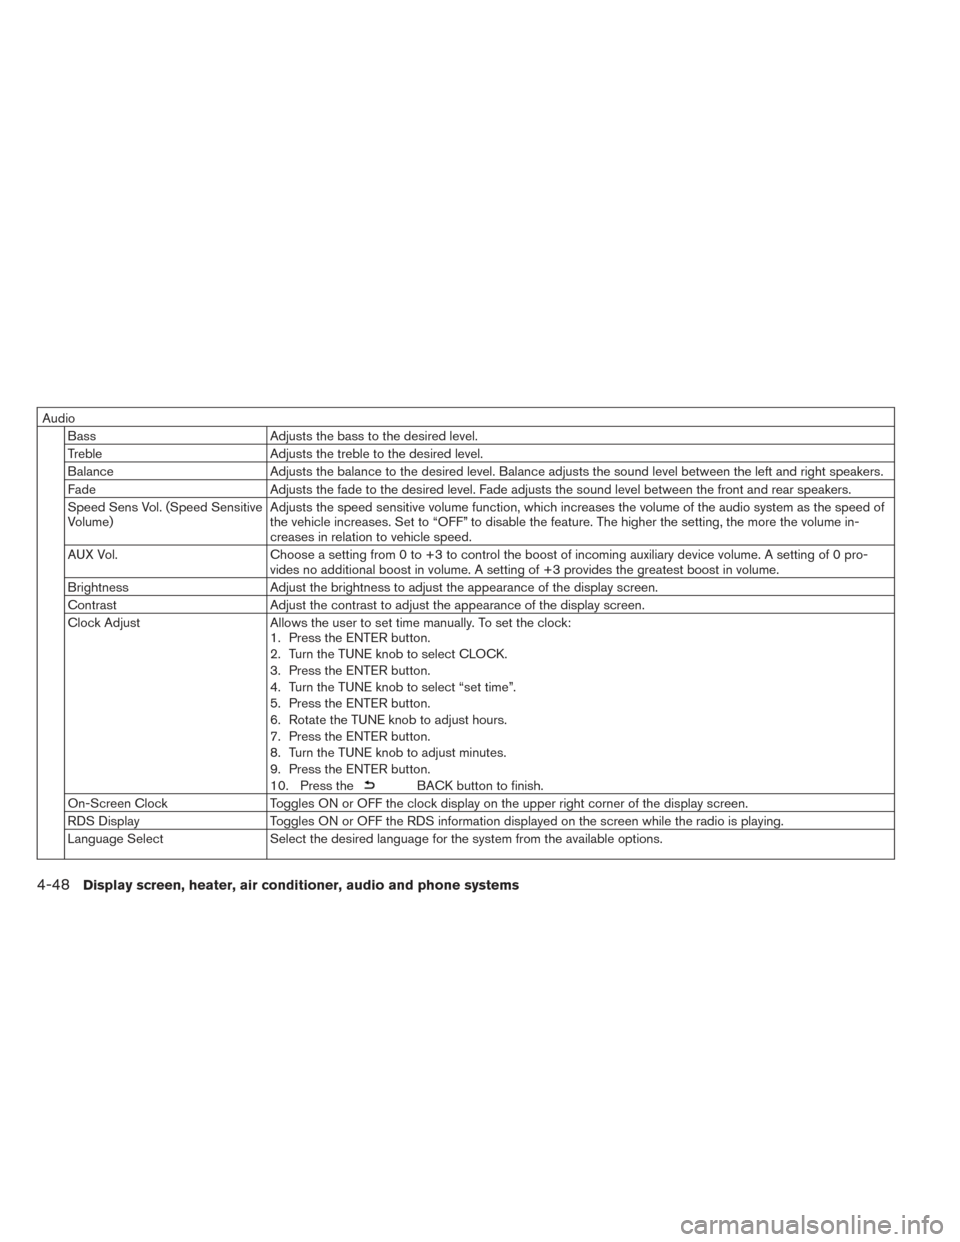
AudioBass Adjusts the bass to the desired level.
Treble Adjusts the treble to the desired level.
Balance Adjusts the balance to the desired level. Balance adjusts the sound level between the left and right speakers.
Fade Adjusts the fade to the desired level. Fade adjusts the sound level between the front and rear speakers.
Speed Sens Vol. (Speed Sensitive
Volume) Adjusts the speed sensitive volume function, which increases the volume of the audio system as the speed of
the vehicle increases. Set to “OFF” to disable the feature. The higher the setting, the more the volume in-
creases in relation to vehicle speed.
AUX Vol. Choose a setting from 0 to +3 to control the boost of incoming auxiliary device volume. A setting of 0 pro-
vides no additional boost in volume. A setting of +3 provides the greatest boost in volume.
Brightness Adjust the brightness to adjust the appearance of the display screen.
Contrast Adjust the contrast to adjust the appearance of the display screen.
Clock Adjust Allows the user to set time manually. To set the clock:
1. Press the ENTER button.
2. Turn the TUNE knob to select CLOCK.
3. Press the ENTER button.
4. Turn the TUNE knob to select “set time”.
5. Press the ENTER button.
6. Rotate the TUNE knob to adjust hours.
7. Press the ENTER button.
8. Turn the TUNE knob to adjust minutes.
9. Press the ENTER button.
10. Press the
BACK button to finish.
On-Screen Clock Toggles ON or OFF the clock display on the upper right corner of the display screen.
RDS Display Toggles ON or OFF the RDS information displayed on the screen while the radio is playing.
Language Select Select the desired language for the system from the available options.
4-48Display screen, heater, air conditioner, audio and phone systems
Page 278 of 437
Bass, treble, balance and fade can also be ad-
justed by pressing the ENTER/SETTING button
and turning the TUNE/SCROLL control knob to
select the item to adjust. When the desired item
is shown on the display, turn the tuning to adjust
and then press the ENTER/SETTING button until
the display returns to the main audio screen. If the
button is not pressed for approximately 10 sec-
onds, the radio or CD display will automatically
reappear.
DISP button
Display of the screen can be canceled by press-
ing the DISP button. You can then listen to music
that is being played back. If you want to display
the screen again, either press the DISP button
once more or press the FM·AM, XM Satellite
Radio or CD·AUX button.
MEDIA button
Pressing the MEDIA button will switch the dis-
plays as follows:
iPod®/USB→Bluetooth
Audio→AUX→CD→iPod®/USB
BACK button
When the BACK button is pressed, it returns to
the previous display. APPS button
Press the APPS button to launch the Smart-
phone Integration Mode. For additional informa-
tion, refer to “NissanConnect
SMMobile Apps” in
this section.
FM-AM-SAT radio operation
FM●AM band select
Pressing the radio band select button will change
the band as follows:
AM→FM1→FM2→AM
XM band select
Pressing the XM band select button will change
the band as follows:
XM1→XM2→XM3→XM1
When the XM band select button is pressed
while the power switch is in the ACC or ON
position, the radio will come on at the channel last
played.
The last station played will also come on when
the
button is pressed to radio ON.
*When the XM button is pressed, the satellite
radio mode will be skipped unless a SiriusXM®
Satellite Radio service subscription is active. Satellite radio is not available in Alaska, Hawaii
and Guam.
If a compact disc is playing when the XM button
is pressed, the compact disc will automatically be
turned off and the last radio station played will
come on.
TUNE/SCROLL knob (Tuning)
Turn the TUNE/SCROLL knob to the left or right
for manual tuning.
SEEK tuning
Press the SEEK/CAT
orbutton or to
tune from low to high or high to low frequencies
and to stop at the next broadcasting station.
SCAN tuning
Press the SCAN button to stop at each broad-
casting station for 5 seconds. SCAN will appear
on the screen while the radio is scan tuning.
Pressing the button again during this 5 second
period will stop SCAN tuning and the radio will
remain tuned to that station. If the SCAN button is
not pressed within 5 seconds, SCAN tuning
moves to the next station.
Display screen, heater, air conditioner, audio and phone systems4-49
Page 279 of 437
1 to 6 Station memory operations
Six stations can be set for the AM band. Twelve
stations can be set for the FM band (6 for FM1, 6
for FM2) . Eighteen channels can be set for the
satellite radio (6 for XM1, 6 for XM2, 6 for XM3) .
1. Choose the radio band AM, FM1 or FM2using the FM·AM select button, or choose the
satellite band XM1, XM2 or XM3 using the
XM button.
2. Tune to the desired station using manual, SEEK or SCAN tuning. Press and hold any of
the desired station memory buttons (1 – 6)
until the preset number is updated on the
display and the sound is briefly muted.
3. The channel indicator will then come on and the sound will resume. Programming is now
complete.
4. Other buttons can be set in the same manner.
If the battery cable is disconnected, or if the fuse
opens, the radio memory will be canceled. In that
case, reset the desired stations.Compact disc (CD) player operation
Place the power switch in the ACC or ON posi-
tion and insert the Compact Disc (CD) into the
slot with the label side facing up. The CD will be
guided automatically into the slot and start play-
ing.
After loading the CD, the number of tracks on the
CD and the play time will appear on the display.
If the radio is already operating, it will automati-
cally turn off and the CD will play.
If the system has been turned off while the CD
was playing, pressing the PWR button will start
the CD.
Do not use 3.1 in (8 cm) discs.
SEEK/CAT buttons
When the FF or REW button is pressed for more
than 1.5 seconds while the CD is being played,
the CD will play while fast forwarding or rewind-
ing. When the button is released, the CD will
return to normal play speed.
When the FF or REW button is pressed for less
than 1.5 seconds while the CD is being played,
the next track or the beginning of the current track
on the CD will be played. Repeat (RPT)
When the RPT play button is pressed while the
CD is played, the play pattern can be changed as
follows:
(CD)
Normal↔1 Track Repeat
(CD with compressed audio files)
Normal→1 Folder Repeat→1 Track Repeat-
→Normal
Random (RDM)
When the RDM play button is pressed while a
CD is being played, the play pattern can be
changed as follows:
(CD)
Normal↔1 Disc Random
(CD with compressed audio files)
Normal→1 Disc Random→1 Folder Random-
→Normal
CD EJECT
When the CD EJECT button is pressed with a
compact disc loaded, the CD will be ejected.
When this button is pressed while the CD is
being played, the CD will be ejected.
4-50Display screen, heater, air conditioner, audio and phone systems
Page 284 of 437
RANDOM (RDM)
When the RDM play button is pressed while a
track is being played, the play pattern can be
changed as follows:
Shuffle Off→Track Shuffle→Album Shuffle-
→Shuffle Off
BACK button
When the
BACK button is pressed, it
returns to the previous display.
BLUETOOTH® STREAMING AUDIO
(MODELS WITHOUT NAVIGATION
SYSTEM)
If you have a compatible Bluetooth® audio de-
vice that is capable of playing audio files, the
device can be connected to the vehicle’s audio
system so that the audio files on the device play
through the vehicle’s speakers. For additional
information, refer to “FM-AM-SAT radio with
compact disc (CD) player” in this section.
Note
For additional information regarding
Bluetooth® Streaming Audio, refer to
the Cellular Phone Owner’s Manual.
Connecting Bluetooth® audio
To connect your Bluetooth® audio device to the
vehicle, follow the procedure below:
1. Press the ENTER/SETTING button.
2. Select “Bluetooth”.
3. Select “Add Phone”. This same screen can be accessed to remove, replace or select a dif-
ferent Bluetooth® device.
4. The system acknowledges the command and asks you to initiate connecting from the phone
handset. The connecting procedure of the
cellular phone varies according to each cellu-
lar phone model. For additional information,
refer to the cellular phone’s Owner’s Manual.
You can also visit
www.NissanUSA.com/bluetooth for instruc-
tions on connecting NISSAN-recommended
cellular phones.
Audio main operation:
To switch to the Bluetooth® audio mode, press
the MEDIA button repeatedly until the
Bluetooth® audio mode is displayed on the
screen. Use the vehicle audio controls or the
Bluetooth® device’s controls to play, pause, skip
or reverse tracks.
AUX DEVICE PLAYER OPERATION
The AUX input jack is located on the lower part of
the instrument panel. The AUX input jack accepts
any standard analog audio input such as from a
portable cassette tape/CD player, MP3 player or
laptop computer.
NISSAN strongly recommends using a stereo
mini plug when connecting your music device to
the audio system. Music may not play properly
when monaural cable is used.
To switch the AUX mode, press the MEDIA but-
ton until the AUX mode is selected, while the
power switch is in the “ON” or “ACC” position.
Display screen, heater, air conditioner, audio and phone systems4-55
Page 287 of 437
Registering with NissanConnectsm
Mobile Apps
To use the Smartphone Integration feature, it is
necessary for the user to register. In order to
register, visit the NissanConnect
smMobile Apps
website, www.nissanusa.com/connect/ or
https://canada.nissanconnect.com and sign up
or create an account through the prompts on the
NissanConnect Mobile Apps. Once registered,
download the NissanConnect Mobile Apps from
your compatible phone’s application download
source and then log into the application. If you
already have an account created through the
App, please log in.
Connect phone
To use this feature, a compatible smartphone
must be connected via Bluetooth® to the vehicle.
For additional information, refer to “Bluetooth®
Hands-Free Phone System without Navigation
System” in this section.
Note
Apple iPhones® and Android phones
must be paired via Bluetooth® for Nis-
sanConnect Mobile Apps to function.
Application download
Once connected, the NissanConnect Mobile
App will search your phone to determine which
compatible applications are currently installed.
The user will then choose which apps they want
to bring into their vehicle from the list of apps
within the “Manage My Apps” section of the
NissanConnect Mobile App on their smartphone.
The vehicle will then download the in-vehicle
interface for each of these compatible
applications. Once downloaded, the user can
access their selected smartphone applications
through the vehicle display. For additional
information on application availability visit
www.nissanusa.com/connect/ or
www.ca/nissanconnect or
www.nissan.ca/nissanconnect/fr.
CAR PHONE OR CB RADIO
When installing a CB, ham radio or car phone in
your vehicle, be sure to observe the following
precautions; otherwise, the new equipment may
adversely affect the engine control system and
other electronic parts.
WARNING
• A cellular phone should not be used for any purpose while driving so full
attention may be given to vehicle op-
eration. Some jurisdictions prohibit
the use of cellular phones while driv-
ing.
• If you must make a call while your vehicle is in motion, the hands free
cellular phone operational mode is
highly recommended. Exercise ex-
treme caution at all times so full atten-
tion may be given to vehicle operation.
• If you are unable to devote full atten- tion to vehicle operation while talking
on the phone, pull off the road to a safe
location and stop your vehicle.
4-58Display screen, heater, air conditioner, audio and phone systems
Page 288 of 437
CAUTION
• Keep the antenna as far away as pos- sible from the electronic control mod-
ules.
• Keep the antenna wire more than 8 in (20 cm) away from the electronic con-
trol system harnesses. Do not route
the antenna wire next to any harness.
• Adjust the antenna standing-wave ra- tio as recommended by the manufac-
turer.
• Connect the ground wire from the CB radio chassis to the body.
• For details, consult a NISSAN certified LEAF dealer.WARNING
• Use a phone after stopping your ve- hicle in a safe location. If you have to
use a phone while driving, exercise ex-
treme caution at all times so full atten-
tion may be given to vehicle operation.
• If you are unable to devote full atten- tion to vehicle operation while talking
on the phone, pull off the road to a safe
location and stop your vehicle.
CAUTION
To avoid draining the vehicle battery, use
a phone after the READY to drive indica-
tor light is on.
BLUETOOTH® HANDS-FREE PHONE
SYSTEM WITHOUT NAVIGATION
SYSTEM (IF SO EQUIPPED)
Display screen, heater, air conditioner, audio and phone systems4-59