2016 NISSAN ALTIMA reset
[x] Cancel search: resetPage 2 of 32
*See your Owner’s Manual for information.
9
16
1
2
4
4
5
181920
21
22
10
17
15
11
7
8
Behind
steering wheel
Behind
steering wheel
Behind
steering wheel
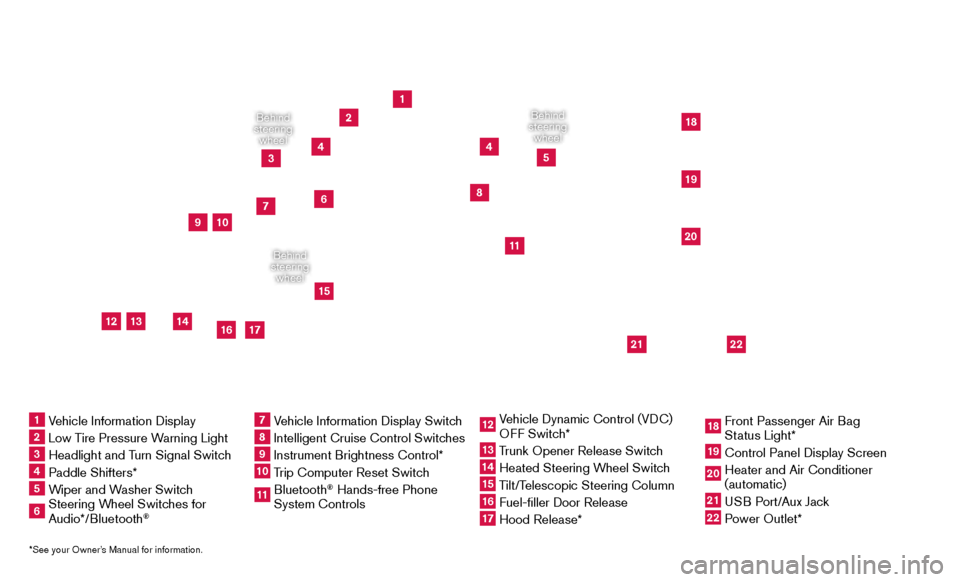
1 Vehicle Information Display2 Low Tire Pressure Warning Light3 Headlight and Turn Signal Switc h4 Paddle Shifters*5 Wiper and Washer Switch
6 Steering Wheel Switches for Audio*/Bluetooth
®
7 Vehicle Information Display Switch8 Intelligent Cruise Control Switches9 Instrument Brightness Control*
10 Trip Computer Reset Switch
11 Bluetooth
® Hands-free Phone
System Controls
12 Vehicle Dynamic Control (VDC)
O FF Switch*13 Trunk Opener Release Switch
14 Heated Steering Wheel Switc h15 Tilt/Telescopic Steering Column
16 Fuel-filler Door Release
17 Hood Release*
18 Front Passenger Air Bag
St
atus Light*19 Control Panel Display Screen
20 Heater and Air Conditioner
(automatic)
21 USB Port/Aux Jack
22 Power Outlet*
3
12
13
14
6
Page 10 of 32
8
LOOSE FUEL CAP
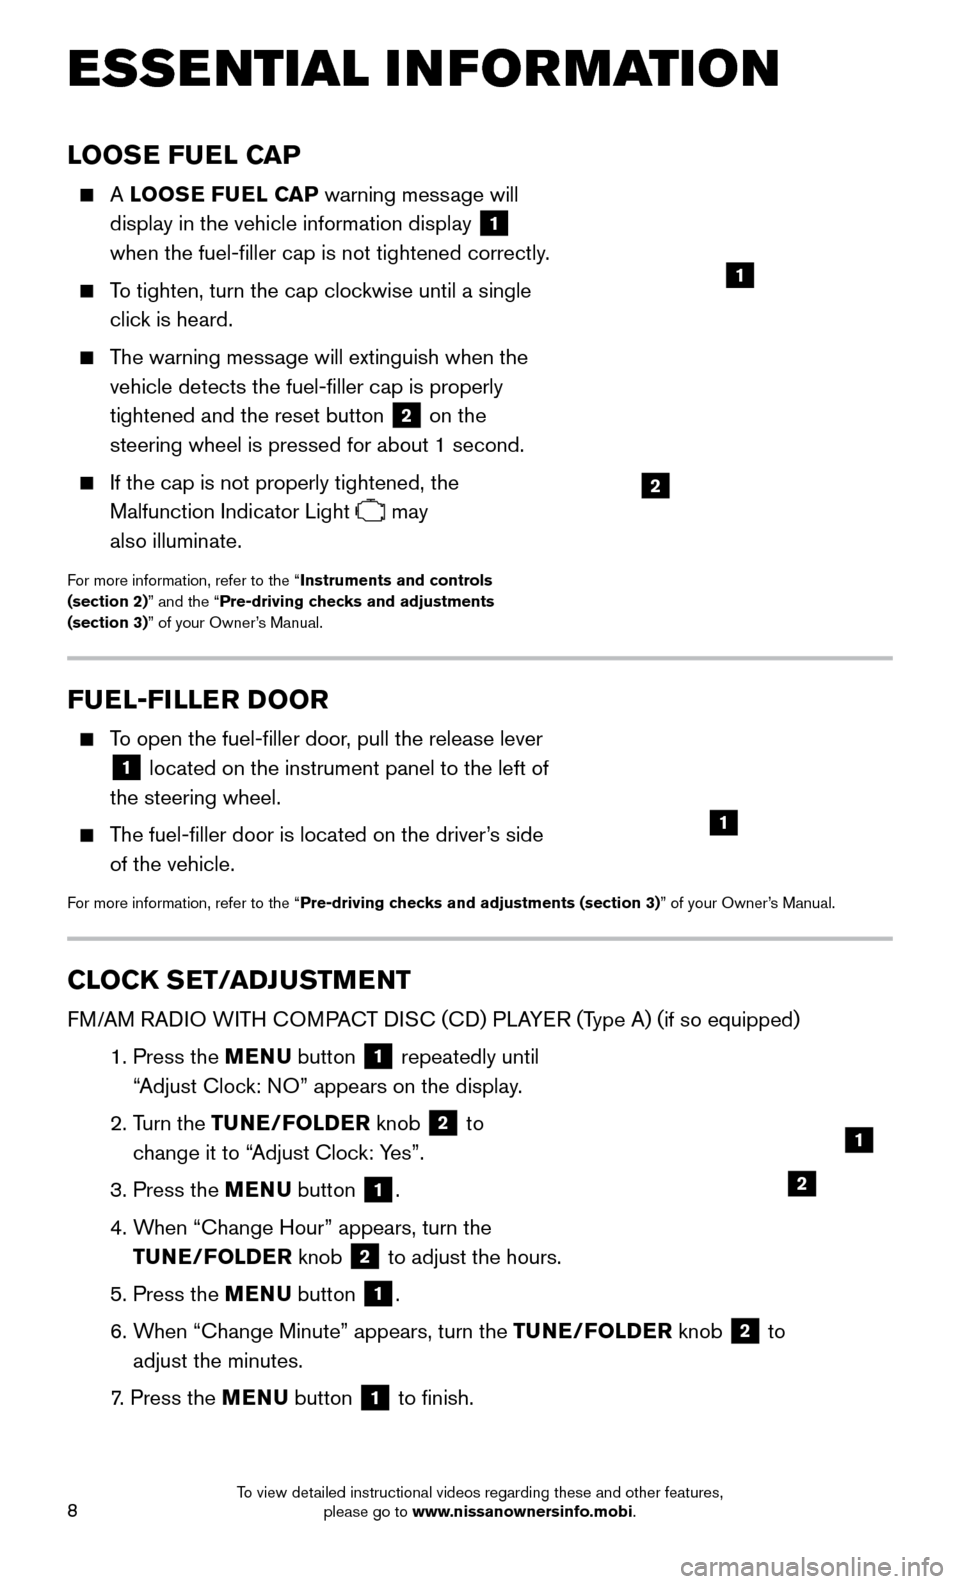
A LOOSE FUEL CAP warning mess age will
display in the vehicle information display
1
when the fuel-filler cap is not tightened correctly.
To tighten, turn the cap clockwise until a single
clic k is heard.
The warning message will extinguish when the
vehicle detects the fuel-filler cap is properly
tightened and the reset button
2 on the
steering wheel is pressed for about 1 second.
If the cap is not properly tightened, the
Malfunction Indicator Light
may
also illuminate.
For more information, refer to the “Instruments and controls
(section 2)” and the “Pre-driving checks and adjustments
(section 3)” of your Owner’s Manual.
2
1
FUEL-FILLER DOOR
To open the fuel-filler door, pull the release lever
1 located on the instrument panel to the left of
the steering wheel.
The fuel-filler door is located on the driver’s side
of the vehicle.
For more information, refer to the “Pre-driving checks and adjustments (section 3)” of your Owner’s Manual.
1
CLOCK SET/ADJUSTMENT
FM/AM RADIO WITH COMPACT DISC (CD) PLAYER (Type A) (if so equipped)
1. Press the MENU button 1 repeatedly until
“Adjust Clock: NO” appears on the display.
2. Turn the
TUNE/FOLDER knob
2 to
change it to “Adjust Clock: Yes”.
3. Press the MENU button 1.
4. When “Change Hour
” appears, turn the
TUNE/FOLDER knob
2 to adjust the hours.
5. Press the MENU
button 1.
6. When “Change Minute” appears, turn the
TUNE/FOLDER knob
2 to
adjust the minutes.
7. Press the MENU button 1 to finish.
ESSE NTIAL I N FOR MATION
2
1
To view detailed instructional videos regarding these and other features, please go to www.nissanownersinfo.mobi.
Page 19 of 32
17
USB (Universal Serial Bus) CONNECTION PORT/AUX JACK AND
iPod® INTERFACE (if so equipped)
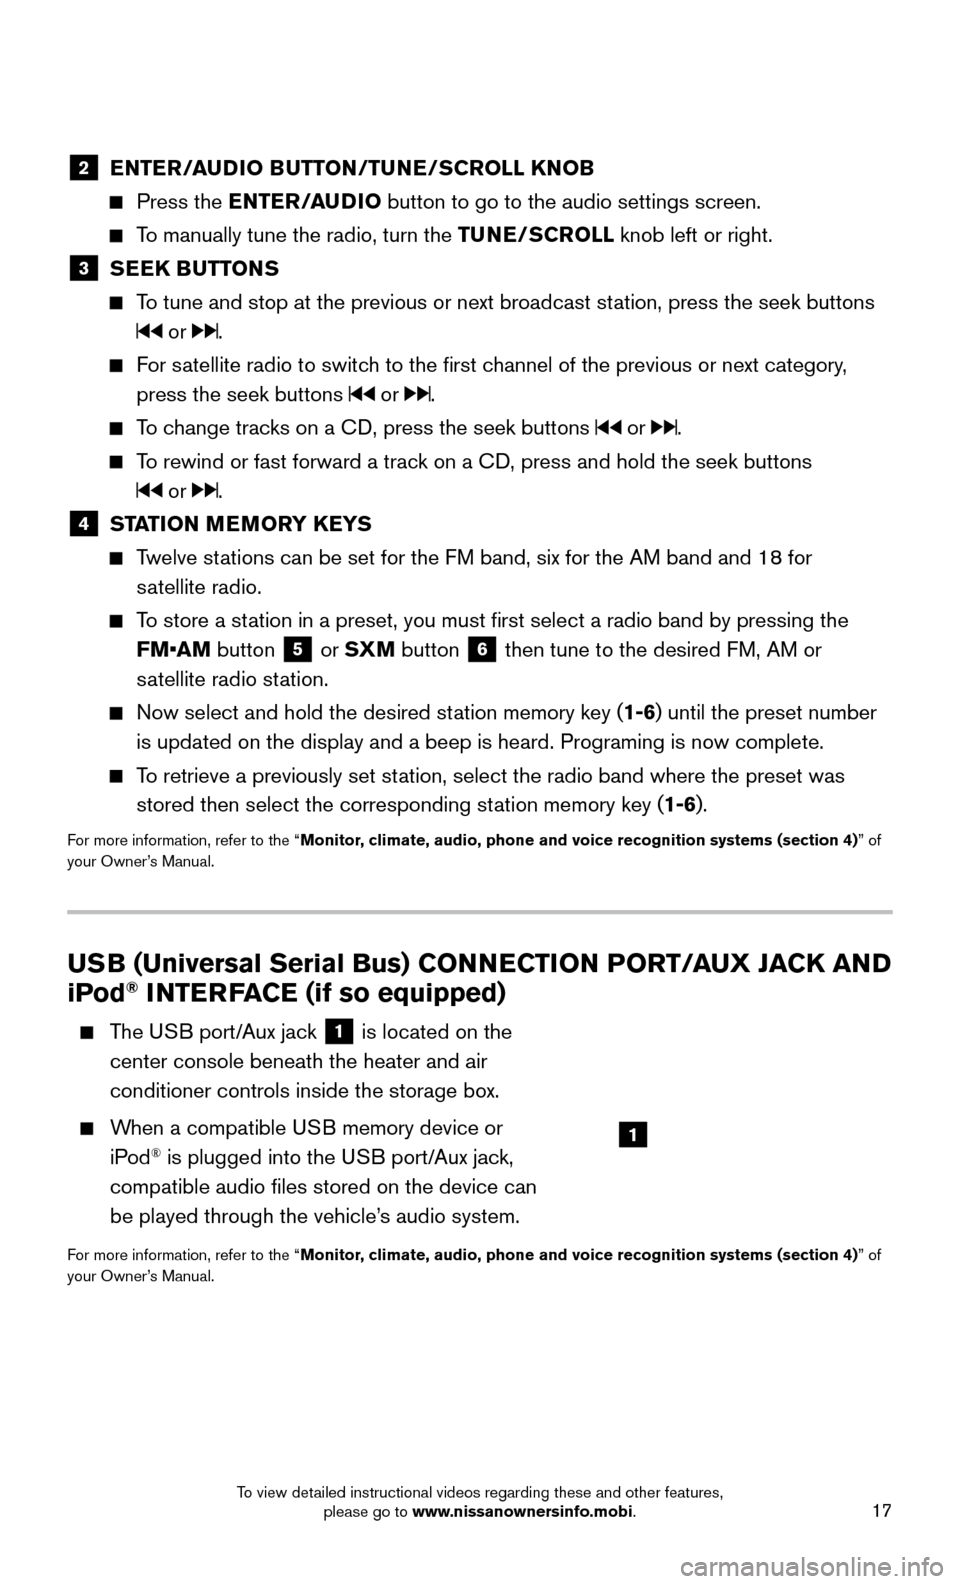
The USB port/Aux jack 1 is located on the
center console beneath the heater and air
conditioner controls inside the storage box.
When a compatible USB memory device or
iP od® is plugged into the USB port/Aux jack,
compatible audio files stored on the device can
be played through the vehicle’s audio system.
For more information, refer to the “Monitor, climate, audio, phone and voice recognition systems (section 4) ” of
your Owner’s Manual.
2 ENTER/AUDIO BUTTON/TUNE/SCROLL KNOB
Press the EN TER/AUDIO button to go to the audio settings screen.
To manually tune the radio, turn the TUNE/SCROLL knob left or right.
3 SEEK BUTTONS
To tune and stop at the previous or next broadcast station, press the seek buttons
or .
For satellite radio to switch to the first channel of the previous or next category,
press the seek buttons
or .
To change tracks on a CD, press the seek buttons or .
To rewind or fast forward a track on a CD, press and hold the seek buttons
or .
4 STATION MEMORY KEYS
Twelve stations can be set for the FM band, six for the AM band and 18 for
s
atellite radio.
To store a station in a preset, you must first select a radio band by pressing the \
FM•AM button
5 or SXM button 6 then tune to the desired FM, AM or
satellite radio station.
Now select and hold the desired station memory key ( 1-6) until the preset number
is updated on the display and a beep is heard. Programing is now complet\
e.
To retrieve a previously set station, select the radio band where the preset was
stored then select the corresponding st ation memory key (1-6).
For more information, refer to the “Monitor, climate, audio, phone and voice recognition systems (section 4) ” of
your Owner’s Manual.
1
To view detailed instructional videos regarding these and other features, please go to www.nissanownersinfo.mobi.
Page 20 of 32
18
TILT AND TELESCOPIC STEERING WHEEL
Release the lock lever by pulling it down.
Adjust the steering wheel forward or backward
by moving it to the desired position.
Adjust the steering wheel up or down to the
desired position.
Lock the steering wheel in place by pushing the loc
k
lever up firmly.
For more information, refer to the “Pre-driving checks and
adjustments (section 3)” of your Owner’s Manual.
CRUISE CONTROL (if so equipped)
The cruise control system enables you to set a
const ant cruising speed once the vehicle has
reached 25 mph (40 km/h).
The system will automatically maintain the set
speed until you t ap the brake pedal, accelerate,
cancel or turn the system off.
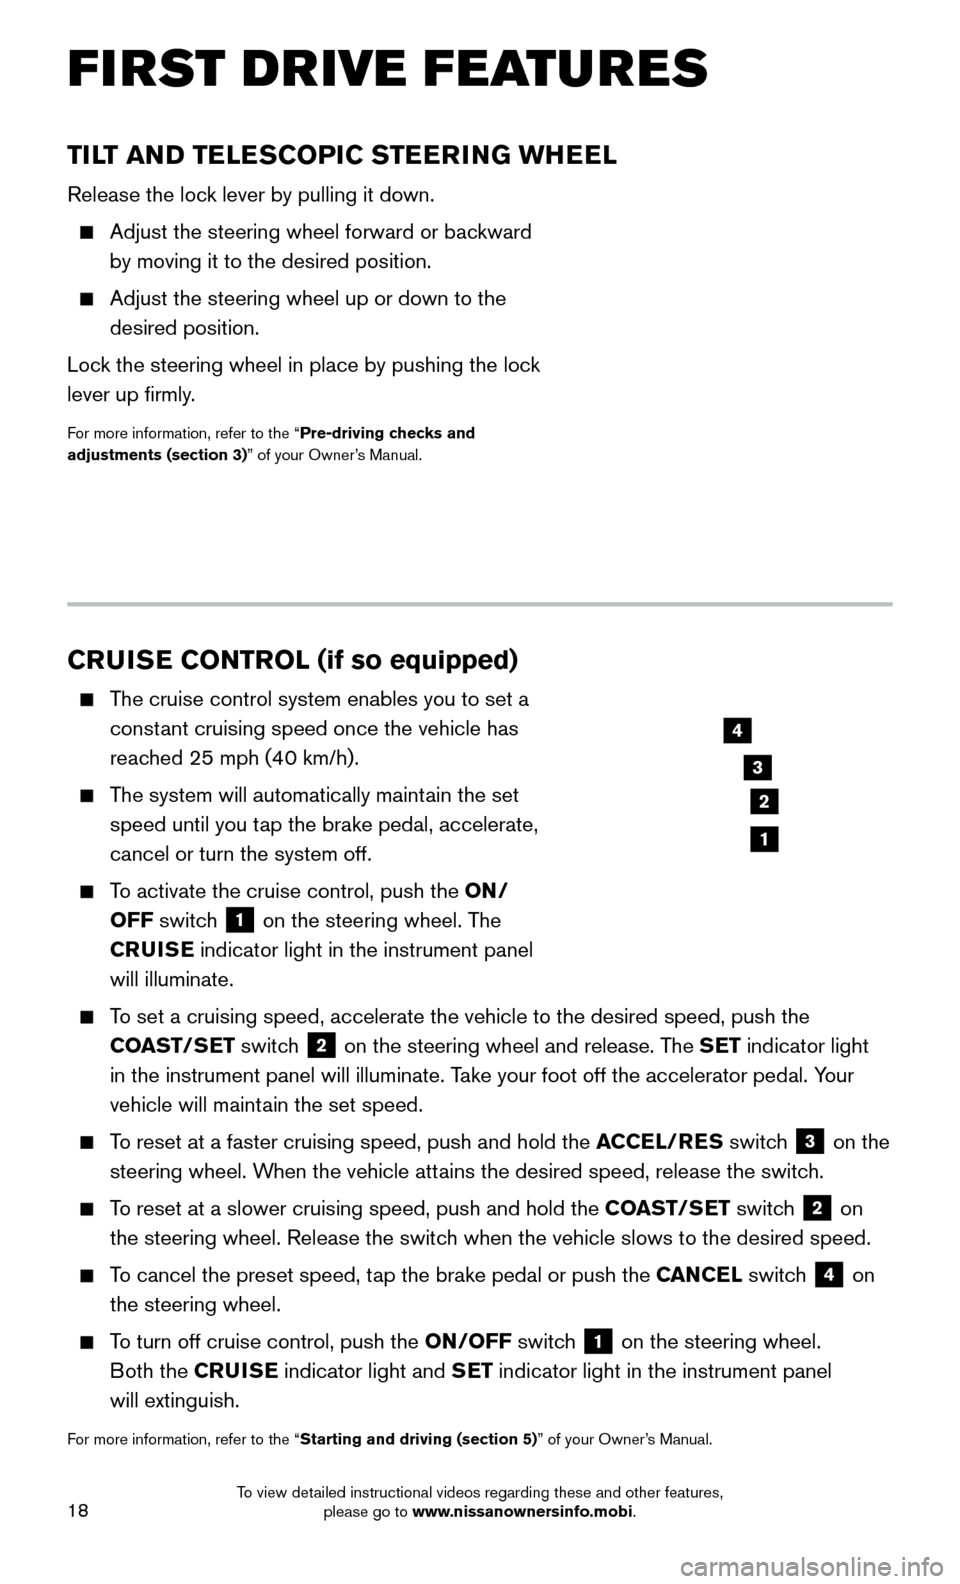
To activate the cruise control, push the ON/
OFF switch
1 on the steering wheel. The
CRUISE indicator light in the instrument panel
will illuminate.
To set a cruising speed, accelerate the vehicle to the desired speed, pus\
h the
CO AST/SET switch
2 on the steering wheel and release. The SET indicator light
in the instrument panel will illuminate. Take your foot off the accelerator pedal. Your
vehicle will maintain the set speed.
To reset at a faster cruising speed, push and hold the ACCEL/RES switc h 3 on the
steering wheel. When the vehicle attains the desired speed, release the switch.
To reset at a slower cruising speed, push and hold the COAST/SET switch 2 on
the steering wheel. Release the switch when the vehicle slows to the desired speed.
To cancel the preset speed, tap the brake pedal or push the CANCEL switch 4 on
the steering wheel.
To turn off cruise control, push the ON/OFF switch 1 on the steering wheel.
Both the CRUISE indicator light and SET indicator light in the instrument panel
will extinguish.
For more information, refer to the “Starting and driving (section 5)” of your Owner’s Manual.
3
2
4
1
FIRST DRIVE FEATURES
To view detailed instructional videos regarding these and other features, please go to www.nissanownersinfo.mobi.
Page 21 of 32
19
INTELLIGENT CRUISE CONTROL (ICC) (if so equipped)
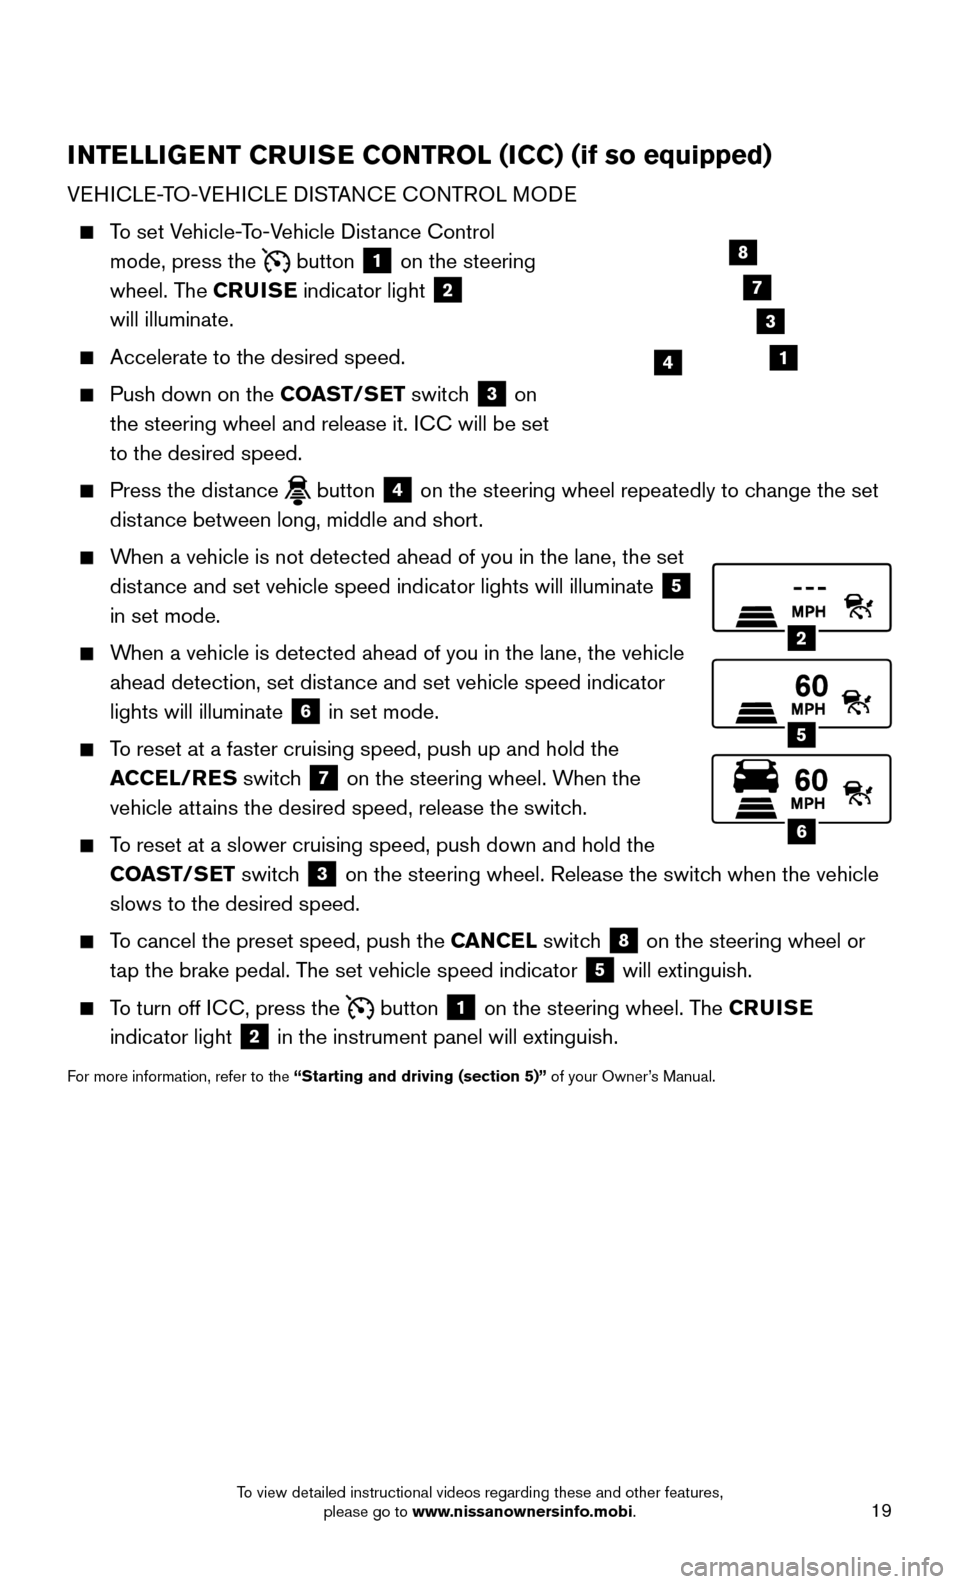
VEHICLE-TO-VEHICLE DISTANCE CONTROL MODE
To set Vehicle-To-Vehicle Distance Control
mode, press the
button 1 on the steering
wheel. The CRUISE indicator light 2
will illuminate.
Accelerate to the desired speed.
Push down on the CO AST/SET switch 3 on
the steering wheel and release it. ICC will be set
to the desired speed.
Press the distance button 4 on the steering wheel repeatedly to change the set
distance between long, middle and short.
When a vehicle is not detected ahead of you in the lane, the set
dist ance and set vehicle speed indicator lights will illuminate
5
in set mode.
When a vehicle is detected ahead of you in the lane, the vehicle
ahead detection, set dist ance and set vehicle speed indicator
lights will illuminate
6 in set mode.
To reset at a faster cruising speed, push up and hold the
A CCEL/RES switch
7 on the steering wheel. When the
vehicle attains the desired speed, release the switch.
To reset at a slower cruising speed, push down and hold the
CO AST/SET switch
3 on the steering wheel. Release the switch when the vehicle
slows to the desired speed.
To cancel the preset speed, push the CANCEL switch 8 on the steering wheel or
tap the brake pedal. The set vehicle speed indicator
5 will extinguish.
To turn off ICC, press the button 1 on the steering wheel. The CRUISE
indicator light 2 in the instrument panel will extinguish.
For more information, refer to the “Starting and driving (section 5)” of your Owner’s Manual.
2
5
6
14
8
7
3
To view detailed instructional videos regarding these and other features, please go to www.nissanownersinfo.mobi.
Page 22 of 32
20
VEHICLE INFORMATION DISPLAY
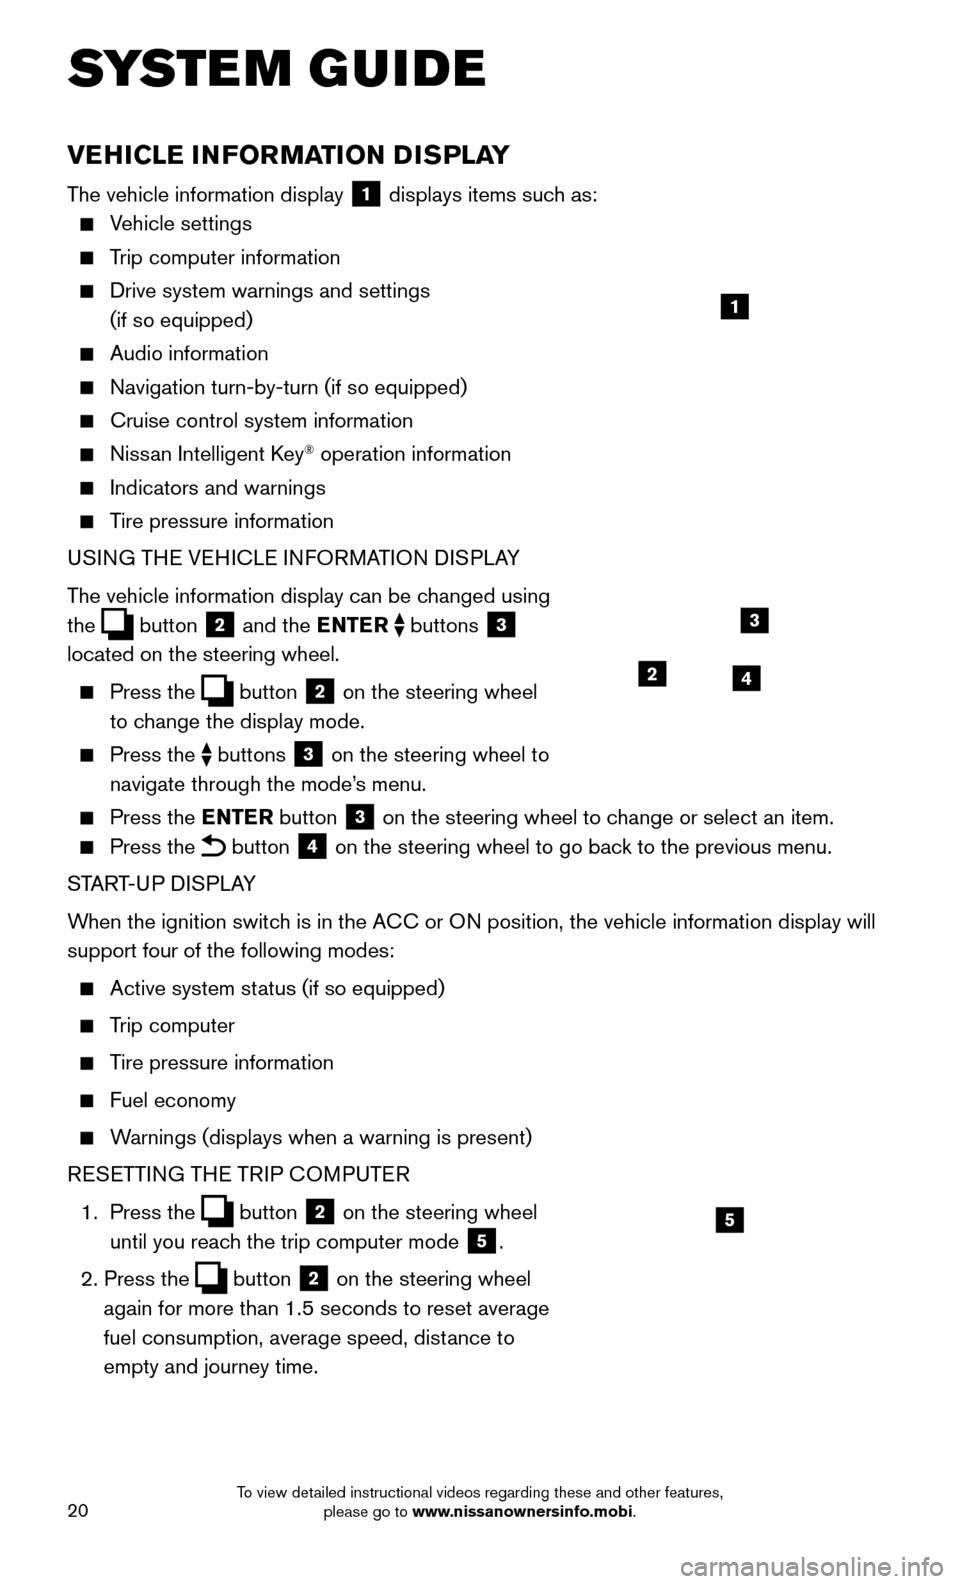
The vehicle information display 1 displays items such as:
Vehicle settings
Trip computer information
Drive system warnings and settings
(if so equipped)
Audio information
Navigation turn-by-turn (if so equipped)
Cruise control system information
Nissan Intelligent Key® operation information
Indicators and warnings
Tire pressure information
USI NG THE VEHICLE INFORMATION DISPLAY
The vehicle information display can be changed using
the
button 2 and the ENTER buttons 3
located on the steering wheel.
Press the button 2 on the steering wheel
to change the display mode.
Press the buttons 3 on the steering wheel to
navigate through the mode’s menu.
Press the E NTER button 3 on the steering wheel to change or select an item.
Press the button 4 on the steering wheel to go back to the previous menu.
START-UP DISPLAY
When the ignition switch is in the ACC or ON position, the vehicle information display will
support four of the following modes:
Active system status (if so equipped)
Trip computer
Tire pressure information
Fuel economy
Warnings (displays when a warning is present)
R
ESETTING THE TRIP COMPUTER
1.
Press
the
button 2 on the steering wheel
until you reach the trip computer mode
5.
2. Press the button 2 on the steering wheel
again for more than 1.5 seconds to reset average
fuel consumption, average speed, distance to
empty and journey time.
1
3
42
5
SYSTEM GUIDE
To view detailed instructional videos regarding these and other features, please go to www.nissanownersinfo.mobi.
Page 23 of 32

21
SETTINGS
The setting mode allows you to change the information displayed in the vehicle
information display:
Driver Assistance (if so equipped) Alarms
Vehicle Settings Language
Main Menu Selection Unit
Body Color Welcome Effects
Maintenance Factory Reset
For more information, refer to the “Instruments and controls (section 2)” of your Owner’s Manual.
NISSANCONNECTSM MOBILE APPS1 (if so equipped)
Press the MENU button on the control panel, touch the “Info” key on the Launch Bar
and then touch the NissanConnectSM Mobile Apps key.
1. Start by creating a Niss
an Owner Portal account at owners.NissanUSA.com.
2.
Next, download the NissanConnect Mobile Apps companion app from Google Play or
the Apple App Store.
3.
Launch the app and sign-in with the email user name and password you created \
when
registering on the Niss
an Owner Portal website.
FOR S
YSTEM WITH NAVIGATION
• iPhone®,2: Please connect via USB when using an iPhone® with NissanConnect
Mobile Apps.
• Android®,3: Please connect via Bluetooth®,4 when using an Android® device with
NissanConnect Mobile Apps.
FOR S
YSTEM WITH NAVIGATION
• iPhone®: Please connect via Bluetooth®,4 when using an iPhone® with
NissanConnect Mobile Apps.
• Android®: Please connect via Bluetooth®,4 when using an Android® device with
NissanConnect Mobile Apps.
For more information on how to pair your cellular phone and set up NissanConnect
Mobile Apps, visit: www.NissanUSA.com/connect/support.
1 Only use features when safe to do so. App availability is dependent upon vehicle model, trim lev\
el, pac kaging,
and/or options. See www.NissanUSA.com/Connect for complete app availability details. Compatible smartphone
required. Cellular network and GPS signals not available in all areas and/or at all times. NISSAN is not responsible for
associated costs, if any, for continued operation due to cellular network or other third party t\
ermination/changes. Cellular
or other third party provider may terminate/restrict respective service \
without notice. Subscription Agreement required.
See www.NissanUSA.com/connect for details. Text rates and/or data usage may apply.
2 iPhone is registered trademark of Apple, Inc. All rights reserved. iPhon\
e not included.3 Android® is a registered trademark of Google, Inc.4 Availability of specific features is dependent upon the cellular phone’\
s Bluetooth® support. Please refer to your cellular
phone’s Owner’s Manual for details. Bluetooth® word mark and logos are owned by Bluetooth SIG, Inc., and any use of
such marks by NISSAN is under license. See www.NissanUSA.com/bluetooth for details.
For more information, refer to the “Monitor, climate, audio, phone and voice recognition systems (section 4) ” of
your Owner’s Manual or the “Information (section 5)” of your Navigation System Owner’s Manual.
To view detailed instructional videos regarding these and other features, please go to www.nissanownersinfo.mobi.