2016 NISSAN ALTIMA display
[x] Cancel search: displayPage 207 of 491
Compact disc with MP3 or WMA
Terms● MP3 — MP3 is short for Moving Pictures
Experts Group Audio Layer 3. MP3 is the
most well-known compressed digital audio
file format. This format allows for near “CD
quality” sound, but at a fraction of the size of
normal audio files. MP3 conversion of an
audio track from CD-ROM can reduce the
file size by approximately a 10:1 ratio with
virtually no perceptible loss in quality. MP3
compression removes the redundant and
irrelevant parts of a sound signal that the
human ear doesn’t hear.
● WMA — Windows Media Audio (WMA)* is a
compressed audio format created by Micro-
soft as an alternative to MP3. The WMA
codec offers greater file compression than
the MP3 codec, enabling storage of more
digital audio tracks in the same amount of
space when compared to MP3s at the same
level of quality.
● Bit rate — Bit rate denotes the number of
bits per second used by a digital music file.
The size and quality of a compressed digital
audio file is determined by the bit rate used
when encoding the file. ●
Sampling frequency — Sampling frequency
is the rate at which the samples of a signal
are converted from analog to digital (A/D
conversion) per second.
● Multisession — Multisession is one of the
methods for writing data to media. Writing
data once to the media is called a single
session, and writing more than once is called
a multisession.
● ID3/WMA Tag — The ID3/WMA tag is the
part of the encoded MP3 or WMA file that
contains information about the digital music
file such as song title, artist, encoding bit
rate, track time duration, etc. ID3 tag infor-
mation is displayed on the Artist/song title
line on the display.
* Windows® and Windows Media® are regis-
tered trademarks and trademarks in the United
States of America and other countries of Micro-
soft Corporation of the USA.
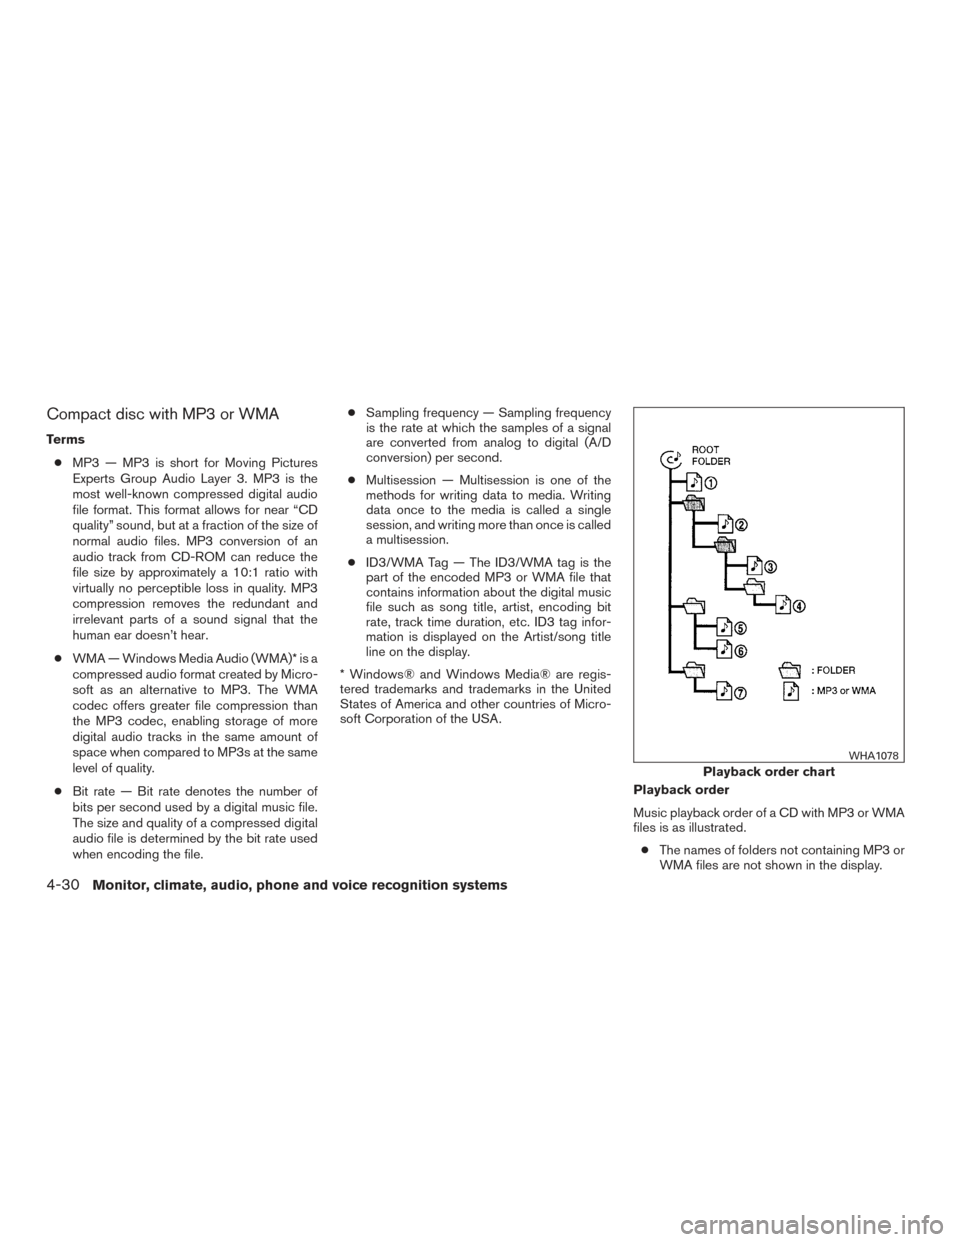
Playback order
Music playback order of a CD with MP3 or WMA
files is as illustrated.● The names of folders not containing MP3 or
WMA files are not shown in the display.
Playback order chart
WHA1078
4-30Monitor, climate, audio, phone and voice recognition systems
Page 208 of 491
●If there is a file in the top level of the disc,
“Root Folder” is displayed.
● The playback order is the order in which the
files were written by the writing software.
Therefore, the files might not play in the
desired order.
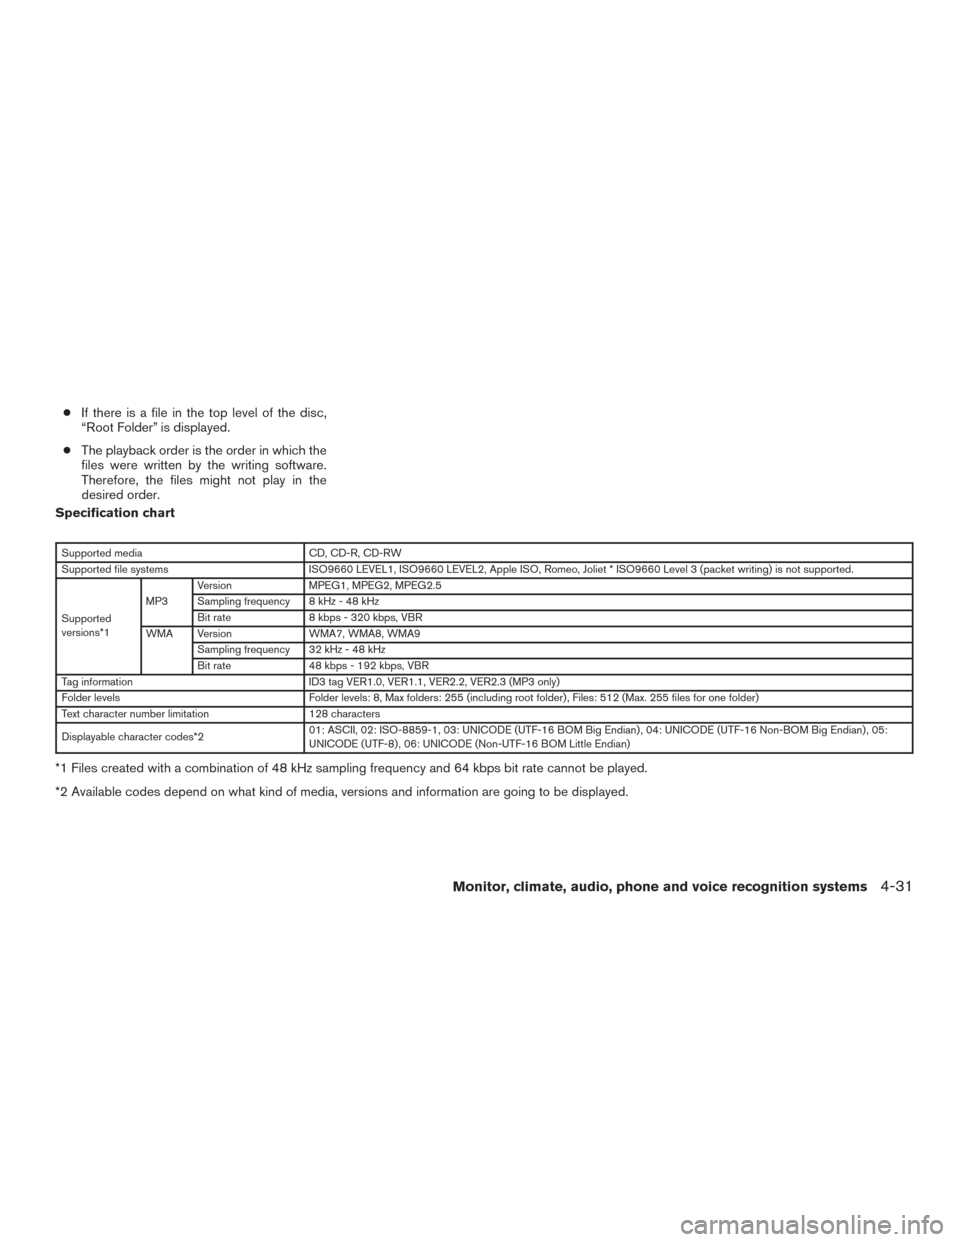
Specification chart
Supported media CD, CD-R, CD-RW
Supported file systems ISO9660 LEVEL1, ISO9660 LEVEL2, Apple ISO, Romeo, Joliet * ISO9660 Level 3 (packet writing) is not supported.
Supported
versions*1 MP3
Version
MPEG1, MPEG2, MPEG2.5
Sampling frequency 8 kHz - 48 kHz
Bit rate 8 kbps - 320 kbps, VBR
WMA Version WMA7, WMA8, WMA9
Sampling frequency 32 kHz - 48 kHz
Bit rate 48 kbps - 192 kbps, VBR
Tag information ID3 tag VER1.0, VER1.1, VER2.2, VER2.3 (MP3 only)
Folder levels Folder levels: 8, Max folders: 255 (including root folder) , Files: 512 (Max. 255 files for one folder)
Text character number limitation 128 characters
Displayable character codes*2 01: ASCII, 02: ISO-8859-1, 03: UNICODE (UTF-16 BOM Big Endian) , 04: UNICODE (UTF-16 Non-BOM Big Endian) , 05:
UNICODE (UTF-8) , 06: UNICODE (Non-UTF-16 BOM Little Endian)
*1 Files created with a combination of 48 kHz sampling frequency and 64 kbps bit rate cannot be played.
*2 Available codes depend on what kind of media, versions and information are going to be displayed.
Monitor, climate, audio, phone and voice recognition systems4-31
Page 210 of 491
USB (Universal Serial Bus)
Connection Port (if so equipped)
WARNING
Do not connect, disconnect or operate the
USB device while driving. Doing so can be
a distraction. If distracted you could lose
control of your vehicle and cause an acci-
dent or serious injury.
CAUTION
●Do not force the USB device into the
USB port. Inserting the USB device
tilted or up-side-down into the port may
damage the port. Make sure that the
USB device is connected correctly into
the USB port.
● Do not grab the USB port cover (if so
equipped) when pulling the USB device
out of the port. This could damage the
port and the cover.
● Do not leave the USB cable in a place
where it can be pulled unintentionally.
Pulling the cable may damage the port.
The vehicle is not equipped with a USB device.
USB devices should be purchased separately as
necessary. This system cannot be used to format USB de-
vices. To format a USB device, use a personal
computer.
In some jurisdictions, the USB device for the front
seats plays only sound without images for regu-
latory reasons, even when the vehicle is parked.
This system supports various USB memory de-
vices, USB hard drives and iPod® players. Some
USB devices may not be supported by this sys-
tem.
● Partitioned USB devices may not play cor-
rectly.
● Some characters used in other languages
(Chinese, Japanese, etc.) may not appear
properly in the display. Using English lan-
guage characters with a USB device is rec-
ommended.
General notes for USB (if so equipped) use: ● For additional information, refer to your de-
vice manufacturer’s owner information re-
garding the proper use and care of the de-
vice.
Notes for iPod® (if so equipped) use:
iPod® is a trademark of Apple Inc., registered in
the U.S. and other countries. ●
Improperly plugging in the iPod® may cause
a checkmark to be displayed on and off
(flickering) . Always make sure that the
iPod® is connected properly.
● An iPod® nano (1st Generation) may remain
in fast forward or rewind mode if it is con-
nected during a seek operation. In this case,
please manually reset the iPod®.
● An iPod® nano (2nd Generation) will con-
tinue to fast-forward or rewind if it is discon-
nected during a seek operation.
● An incorrect song title may appear when the
Play Mode is changed while using an iPod®
nano (2nd Generation) .
● Audiobooks may not play in the same order
as they appear on an iPod®.
● Large video files cause slow responses in an
iPod®. The vehicle center display may mo-
mentarily black out, but will soon recover.
● If an iPod® automatically selects large video
files while in the shuffle mode, the vehicle
center display may momentarily black out,
but will soon recover.
Monitor, climate, audio, phone and voice recognition systems4-33
Page 212 of 491
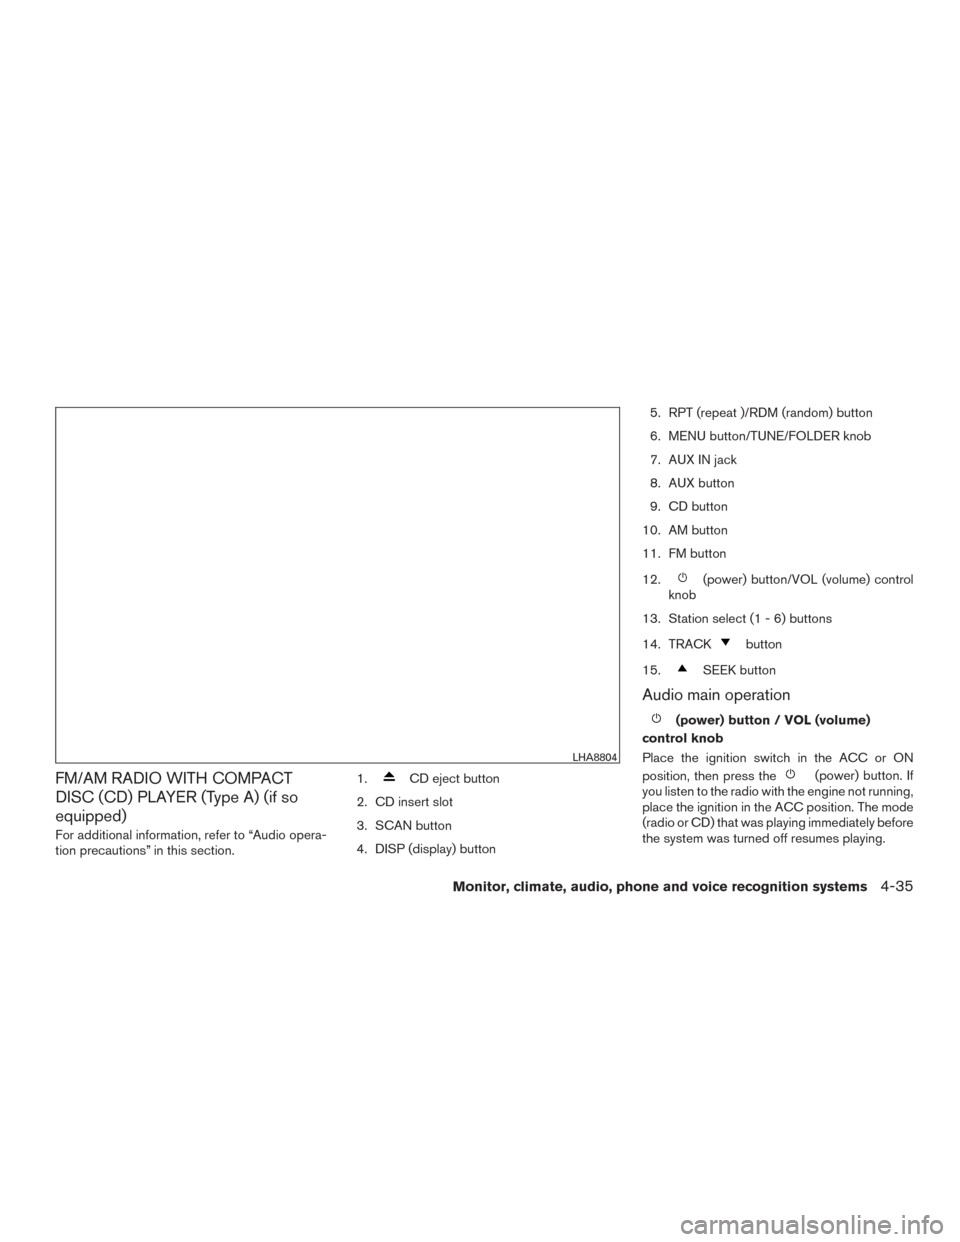
FM/AM RADIO WITH COMPACT
DISC (CD) PLAYER (Type A) (if so
equipped)
For additional information, refer to “Audio opera-
tion precautions” in this section.1.
CD eject button
2. CD insert slot
3. SCAN button
4. DISP (display) button 5. RPT (repeat )/RDM (random) button
6. MENU button/TUNE/FOLDER knob
7. AUX IN jack
8. AUX button
9. CD button
10. AM button
11. FM button
12.
(power) button/VOL (volume) control
knob
13. Station select (1 - 6) buttons
14. TRACK
button
15.
SEEK button
Audio main operation
(power) button / VOL (volume)
control knob
Place the ignition switch in the ACC or ON
position, then press the
(power) button. If
you listen to the radio with the engine not running,
place the ignition in the ACC position. The mode
(radio or CD) that was playing immediately before
the system was turned off resumes playing.
LHA8804
Monitor, climate, audio, phone and voice recognition systems4-35
Page 213 of 491
When no CD is loaded, the radio comes on.
Pressing the
(power) button again turns
the system off.
Turn the VOL (volume) control knob to the right to
increase volume or to the left to decrease volume.
MENU button (Bass, Treble, Balance,
Fade, Speed Sensitive Volume and Clock)
Press the MENU button to change the mode as
follows:
Bass →Treble →Balance →Fade →Spd. Sen.
Vol. (Speed Sensitive Volume) →AUX IN Volume
→ Clock →Clock Adjust
To adjust the Bass, Treble, Fade and Balance,
press the MENU button until the desired mode
appears in the display. Press the
SEEK or
TRACK
button to adjust the setting to the
desired level (-5 to +5) . Balance adjusts the
sound between the right and left speakers. Fade
adjusts the sound between the front and rear
speakers.
Once you have adjusted the sound quality to the
desired level, press the MENU button repeatedly
until the radio or CD display reappears. Other-
wise, the radio or CD display will automatically
reappear after about 10 seconds.
Speed Sensitive Volume adjusts the volume of
the audio system as the vehicle’s driving speed
changes. It can be set as follows: OFF
→LOW →MID →HIGH
DISP (display) button
Press the DISP (display) button while a CD is
playing to change the text shown in the audio
display as follows:
For CDs:
Running Time →Album Title: →Artist Name: →
Song Title
For MP3 CDs:
Running Time →Folder Title: →Album Title: →
Artist Name: →Song Title:
If the text information is too long to fully be dis-
played on the screen; press and hold the DISP
button for longer than 1.5 seconds to scroll
through the rest of the text.
Press the DISP (display) button while the radio is
playing to toggle the audio display between sta-
tion number and RDS.
Clock operation
To turn the clock display on or off, press the
MENU button repeatedly until “Clock” appears
on the display. Turn the TUNE/FOLDER knob to
toggle the setting (ON or OFF) . Clock set
1. Press the MENU button repeatedly until “Adjust Clock: NO” appears on the display.
2. Turn the TUNE/FOLDER knob to change to “Adjust Clock: YES”.
3. Press the MENU button.
4. When “Change Hour” appears, turn the TUNE/FOLDER knob to adjust the hours.
5. Press MENU button.
6. When “Change Minute” appears, turn the TUNE/FOLDER knob to adjust minutes.
7. Press MENU button to finish.
The display will return to the regular clock display
after 10 seconds if no further adjustment is per-
formed.
FM/AM radio operation
AM and FM buttons
Press the AM button to change the band to AM.
If another audio source is playing when the AM
button is pressed, the audio source playing will
automatically be turned off and the last radio
station played will begin playing.
4-36Monitor, climate, audio, phone and voice recognition systems
Page 214 of 491
Press the FM button to change the band as
follows:
FM1→FM2 →FM1
If another audio source is playing when the FM
button is pressed, the audio source playing will
automatically be turned off and the last radio
station played will begin playing.
SEEK and TRACK (tuning) buttons
Press the SEEK button
to tune from low to
high frequencies and stop at the next broadcast-
ing station.
Press the TRACK button
to tune from high
to low frequencies and stop at the next broad-
casting station.
Press and hold either button to seek at a faster
speed.
SCAN (tuning) button
Press the SCAN button. SCAN illuminates in the
display window. Scan tuning begins from low to
high frequencies. Scan tuning stops for 5 sec-
onds at each broadcasting station that has suffi-
cient signal strength. When scanning, SCAN
blinks in the display. Pressing the SCAN button
again during this 5 second period stops scan
tuning and the radio remains tuned to that station. TUNE/FOLDER knob tuning
Turn the TUNE/FOLDER knob to the left or right
for manual tuning.
1 to 6 Station memory operations
Twelve stations can be set for the FM band (6 for
FM1, 6 for FM2) and six stations can be set for
the AM band.
1. Choose the radio band AM, FM1 or FM2 using the AM or FM button.
2. Tune to the desired station using manual, SEEK or SCAN tuning. Press and hold any
of the desired station memory buttons (1 –
6) until a beep sound is heard.
3. The channel indicator will then come on and the sound will resume. Programming is now
complete.
4. Other buttons can be set in the same man- ner.
If the battery cable is disconnected or if the fuse
opens, the radio memory will be canceled. In that
case, reset the desired stations.
Compact disc (CD) player operation
Place the ignition switch in the ACC or ON
position, and carefully insert the compact disc into the slot with the label side up. The compact
disc is automatically pulled into the slot and starts
to play.
If the radio is already operating, it automatically
turns off and the compact disc begins to play.
CD button
When the CD button is pressed with a compact
disc loaded and the radio playing, the radio turns
off and the last used compact disc starts to play.
SEEK and TRACK (Fast
Forward, Rewind) buttons
When the SEEK button
or TRACKbutton is pressed while the compact disc is play-
ing, the compact disc plays at an increased
speed while fast forwarding or rewinding. When
the button is released, the compact disc returns
to normal play speed.
SEEK and TRACK buttons
When the SEEK
button is pressed while
the compact disc is playing, the next track follow-
ing the present one starts to play from the begin-
ning. Press the SEEK
button several times
to skip several tracks. Each time the button is
pressed, the CD advances one additional track.
The track number appears in the display window.
Monitor, climate, audio, phone and voice recognition systems4-37
Page 216 of 491
FM/AM RADIO WITH COMPACT
DISC (CD) PLAYER (Type B) (if so
equipped)
For additional information, refer to “Audio opera-
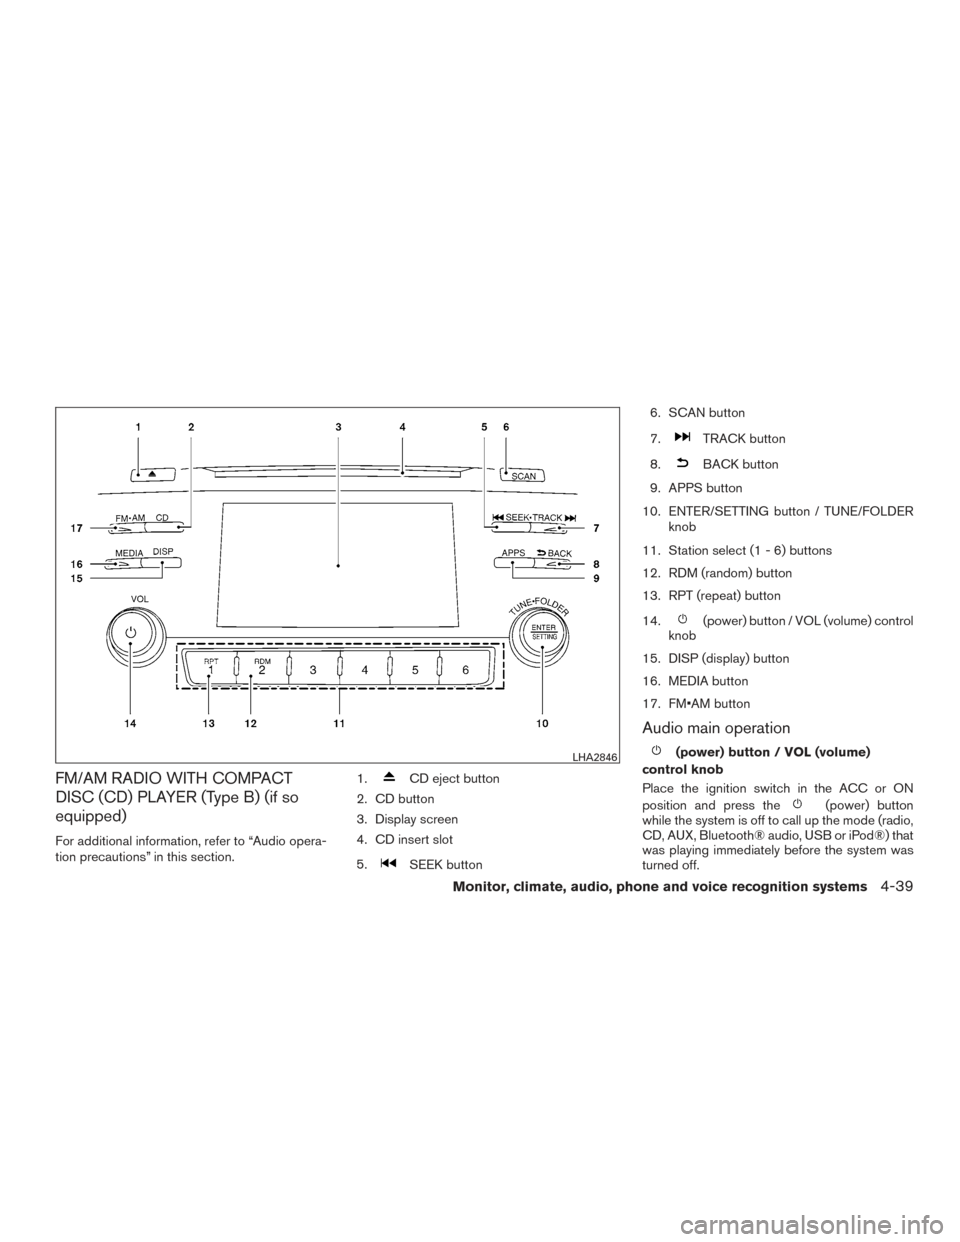
tion precautions” in this section.1.
CD eject button
2. CD button
3. Display screen
4. CD insert slot
5.
SEEK button 6. SCAN button
7.
TRACK button
8.
BACK button
9. APPS button
10. ENTER/SETTING button / TUNE/FOLDER knob
11. Station select (1 - 6) buttons
12. RDM (random) button
13. RPT (repeat) button
14.
(power) button / VOL (volume) control
knob
15. DISP (display) button
16. MEDIA button
17. FM•AM button
Audio main operation
(power) button / VOL (volume)
control knob
Place the ignition switch in the ACC or ON
position and press the
(power) button
while the system is off to call up the mode (radio,
CD, AUX, Bluetooth® audio, USB or iPod®) that
was playing immediately before the system was
turned off.
LHA2846
Monitor, climate, audio, phone and voice recognition systems4-39
Page 217 of 491
To turn the system off, press the(power)
button.
Turn the VOL (volume) control knob to adjust the
volume.
This vehicle is equipped with Speed Sensitive
Volume. When this feature is active, the audio
volume changes as the driving speed changes. ENTER/SETTING button
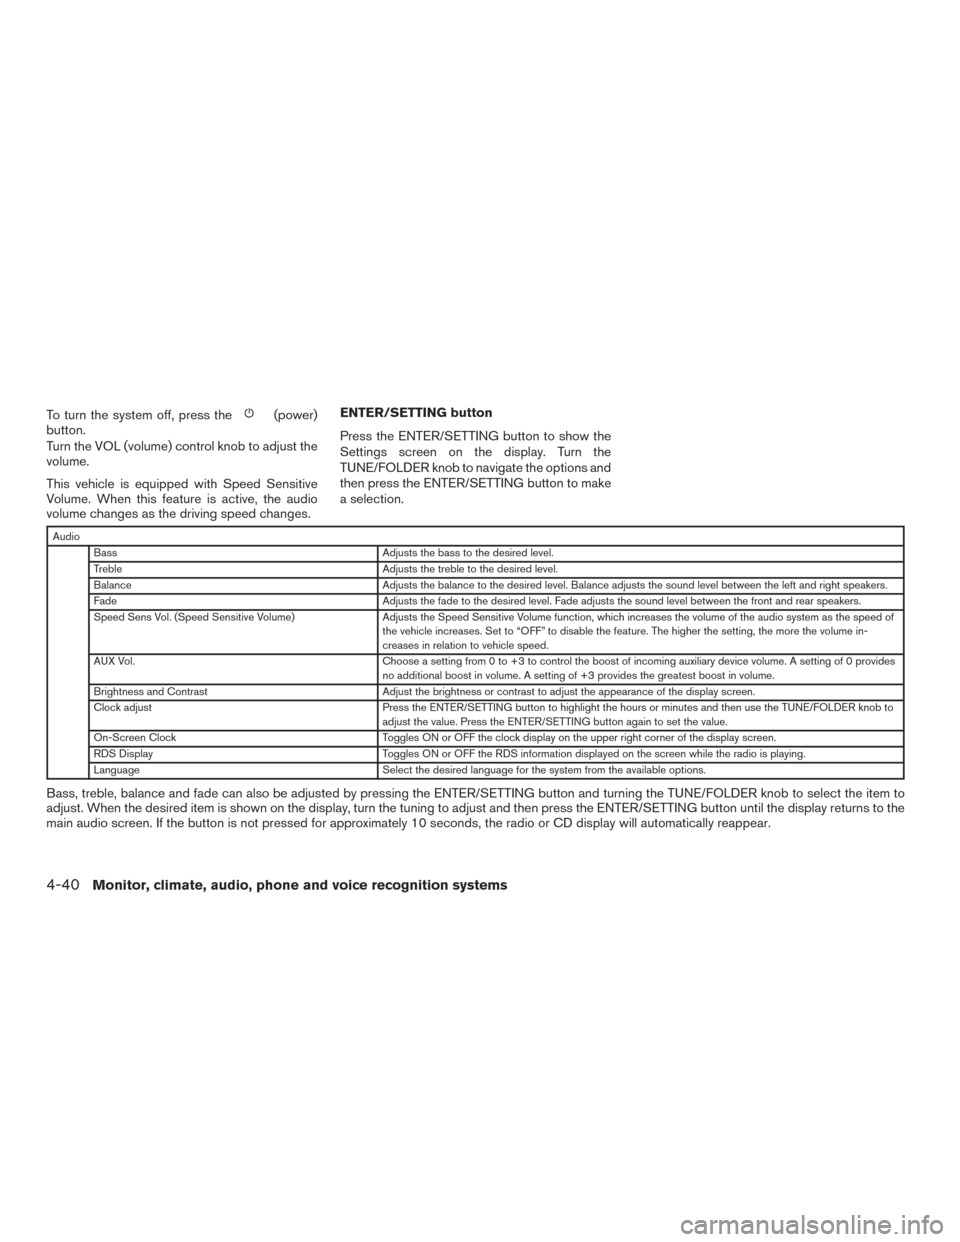
Press the ENTER/SETTING button to show the
Settings screen on the display. Turn the
TUNE/FOLDER knob to navigate the options and
then press the ENTER/SETTING button to make
a selection.
Audio
Bass Adjusts the bass to the desired level.
Treble Adjusts the treble to the desired level.
Balance Adjusts the balance to the desired level. Balance adjusts the sound level between the left and right speakers.
Fade Adjusts the fade to the desired level. Fade adjusts the sound level between the front and rear speakers.
Speed Sens Vol. (Speed Sensitive Volume) Adjusts the Speed Sensitive Volume function, which increases the volume of the audio system as the speed of
the vehicle increases. Set to “OFF” to disable the feature. The higher the setting, the more the volume in-
creases in relation to vehicle speed.
AUX Vol. Choose a setting from 0 to +3 to control the boost of incoming auxiliary device volume. A setting of 0 provides
no additional boost in volume. A setting of +3 provides the greatest boost in volume.
Brightness and Contrast Adjust the brightness or contrast to adjust the appearance of the display screen.
Clock adjust Press the ENTER/SETTING button to highlight the hours or minutes and then use the TUNE/FOLDER knob to
adjust the value. Press the ENTER/SETTING button again to set the value.
On-Screen Clock Toggles ON or OFF the clock display on the upper right corner of the display screen.
RDS Display Toggles ON or OFF the RDS information displayed on the screen while the radio is playing.
Language Select the desired language for the system from the available options.
Bass, treble, balance and fade can also be adjusted by pressing the ENTER/SETTING button and turning the TUNE/FOLDER knob to select the item to
adjust. When the desired item is shown on the display, turn the tuning to adjust and then press the ENTER/SETTING button until the display returns to the
main audio screen. If the button is not pressed for approximately 10 seconds, the radio or CD display will automatically reappear.
4-40Monitor, climate, audio, phone and voice recognition systems