2016 NISSAN 370Z COUPE navigation
[x] Cancel search: navigationPage 171 of 428
4-10Center display, heater, air conditioner, audio, phone and voice recognition systems
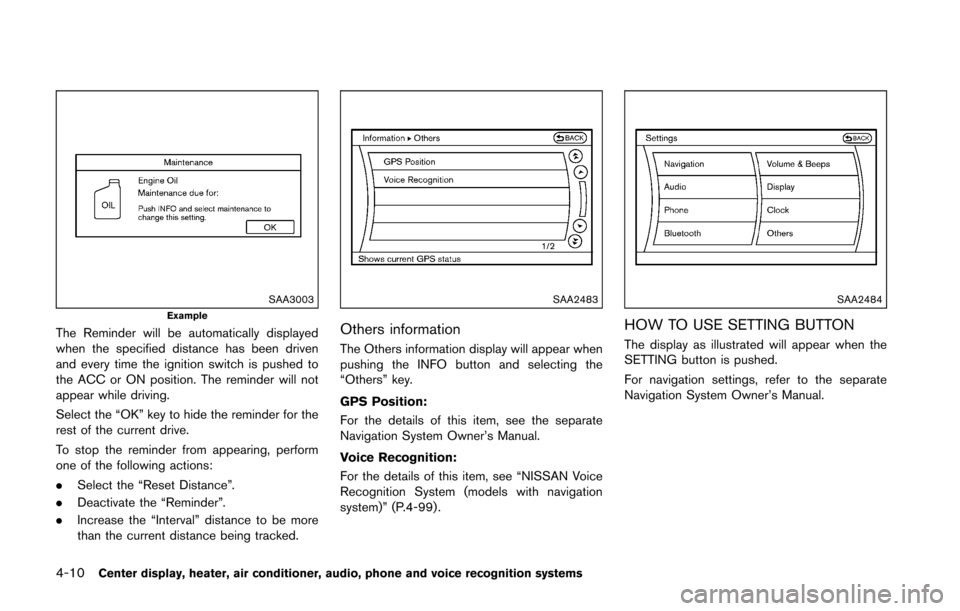
SAA3003Example
The Reminder will be automatically displayed
when the specified distance has been driven
and every time the ignition switch is pushed to
the ACC or ON position. The reminder will not
appear while driving.
Select the “OK” key to hide the reminder for the
rest of the current drive.
To stop the reminder from appearing, perform
one of the following actions:
.Select the “Reset Distance”.
. Deactivate the “Reminder”.
. Increase the “Interval” distance to be more
than the current distance being tracked.
SAA2483
Others information
The Others information display will appear when
pushing the INFO button and selecting the
“Others” key.
GPS Position:
For the details of this item, see the separate
Navigation System Owner’s Manual.
Voice Recognition:
For the details of this item, see “NISSAN Voice
Recognition System (models with navigation
system)” (P.4-99) .
SAA2484
HOW TO USE SETTING BUTTON
The display as illustrated will appear when the
SETTING button is pushed.
For navigation settings, refer to the separate
Navigation System Owner’s Manual.
Page 172 of 428
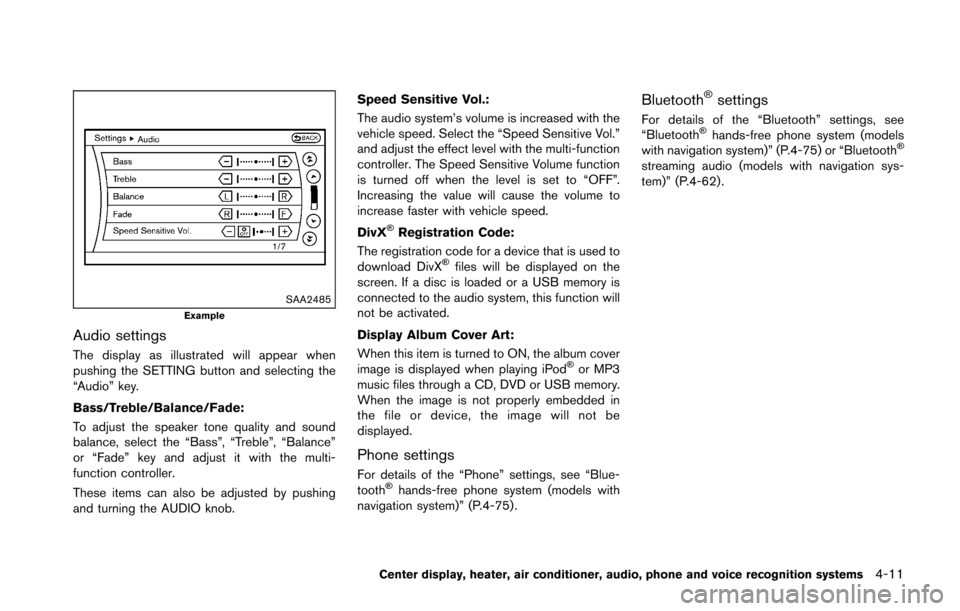
SAA2485Example
Audio settings
The display as illustrated will appear when
pushing the SETTING button and selecting the
“Audio” key.
Bass/Treble/Balance/Fade:
To adjust the speaker tone quality and sound
balance, select the “Bass”, “Treble”, “Balance”
or “Fade” key and adjust it with the multi-
function controller.
These items can also be adjusted by pushing
and turning the AUDIO knob.Speed Sensitive Vol.:
The audio system’s volume is increased with the
vehicle speed. Select the “Speed Sensitive Vol.”
and adjust the effect level with the multi-function
controller. The Speed Sensitive Volume function
is turned off when the level is set to “OFF”.
Increasing the value will cause the volume to
increase faster with vehicle speed.
DivX
�ŠRegistration Code:
The registration code for a device that is used to
download DivX
�Šfiles will be displayed on the
screen. If a disc is loaded or a USB memory is
connected to the audio system, this function will
not be activated.
Display Album Cover Art:
When this item is turned to ON, the album cover
image is displayed when playing iPod
�Šor MP3
music files through a CD, DVD or USB memory.
When the image is not properly embedded in
the file or device, the image will not be
displayed.
Phone settings
For details of the “Phone” settings, see “Blue-
tooth�Šhands-free phone system (models with
navigation system)” (P.4-75) .
Bluetooth�Šsettings
For details of the “Bluetooth” settings, see
“Bluetooth�Šhands-free phone system (models
with navigation system)” (P.4-75) or “Bluetooth�Š
streaming audio (models with navigation sys-
tem)” (P.4-62).
Center display, heater, air conditioner, audio, phone and voice recognition systems4-11
Page 173 of 428
4-12Center display, heater, air conditioner, audio, phone and voice recognition systems
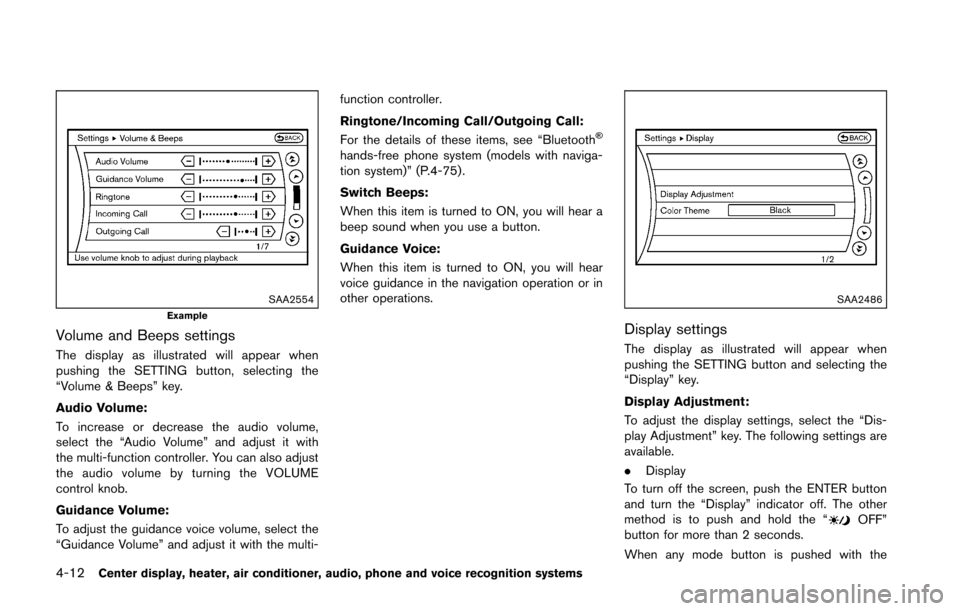
SAA2554Example
Volume and Beeps settings
The display as illustrated will appear when
pushing the SETTING button, selecting the
“Volume & Beeps” key.
Audio Volume:
To increase or decrease the audio volume,
select the “Audio Volume” and adjust it with
the multi-function controller. You can also adjust
the audio volume by turning the VOLUME
control knob.
Guidance Volume:
To adjust the guidance voice volume, select the
“Guidance Volume” and adjust it with the multi-function controller.
Ringtone/Incoming Call/Outgoing Call:
For the details of these items, see “Bluetooth
�Š
hands-free phone system (models with naviga-
tion system)” (P.4-75).
Switch Beeps:
When this item is turned to ON, you will hear a
beep sound when you use a button.
Guidance Voice:
When this item is turned to ON, you will hear
voice guidance in the navigation operation or in
other operations.
SAA2486
Display settings
The display as illustrated will appear when
pushing the SETTING button and selecting the
“Display” key.
Display Adjustment:
To adjust the display settings, select the “Dis-
play Adjustment” key. The following settings are
available.
.
Display
To turn off the screen, push the ENTER button
and turn the “Display” indicator off. The other
method is to push and hold the “
OFF”
button for more than 2 seconds.
When any mode button is pushed with the
Page 174 of 428
screen off, the screen turns on for further
operation. The screen will turn off automatically
5 seconds after the operation is finished.
To turn on the screen, set this item to the ON
position, or push and hold the “
OFF”
button.
. Brightness/Contrast/Background Color
To adjust the brightness and contrast of the
screen, select the “Brightness” or “Contrast”
key.
Then, you can adjust the brightness and contrast
using the multi-function controller.
For information on the “Background Color” key,
refer to the separate Navigation System Own-
er’s Manual.
For Roadster models:
Depending on the driver’s seat position, the
display could be hard to read. Adjust the
brightness and contrast of the display on the
setting screen.
Color Theme:
Choose the theme color of the menu screen
from “Black”, “Blue” or “Red”.
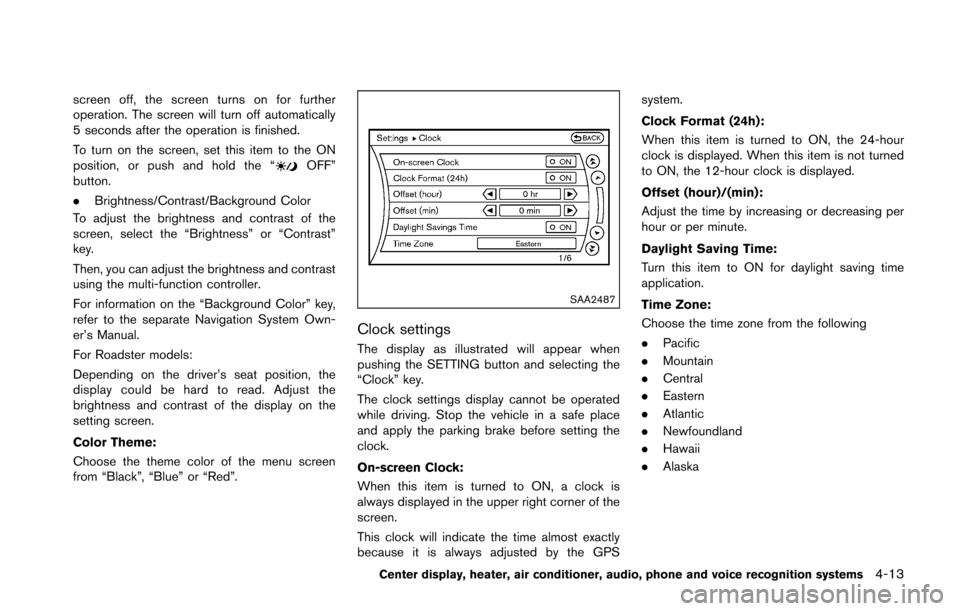
SAA2487
Clock settings
The display as illustrated will appear when
pushing the SETTING button and selecting the
“Clock” key.
The clock settings display cannot be operated
while driving. Stop the vehicle in a safe place
and apply the parking brake before setting the
clock.
On-screen Clock:
When this item is turned to ON, a clock is
always displayed in the upper right corner of the
screen.
This clock will indicate the time almost exactly
because it is always adjusted by the GPS system.
Clock Format (24h):
When this item is turned to ON, the 24-hour
clock is displayed. When this item is not turned
to ON, the 12-hour clock is displayed.
Offset (hour)/(min):
Adjust the time by increasing or decreasing per
hour or per minute.
Daylight Saving Time:
Turn this item to ON for daylight saving time
application.
Time Zone:
Choose the time zone from the following
.
Pacific
. Mountain
. Central
. Eastern
. Atlantic
. Newfoundland
. Hawaii
. Alaska
Center display, heater, air conditioner, audio, phone and voice recognition systems4-13
Page 176 of 428
SAA2490
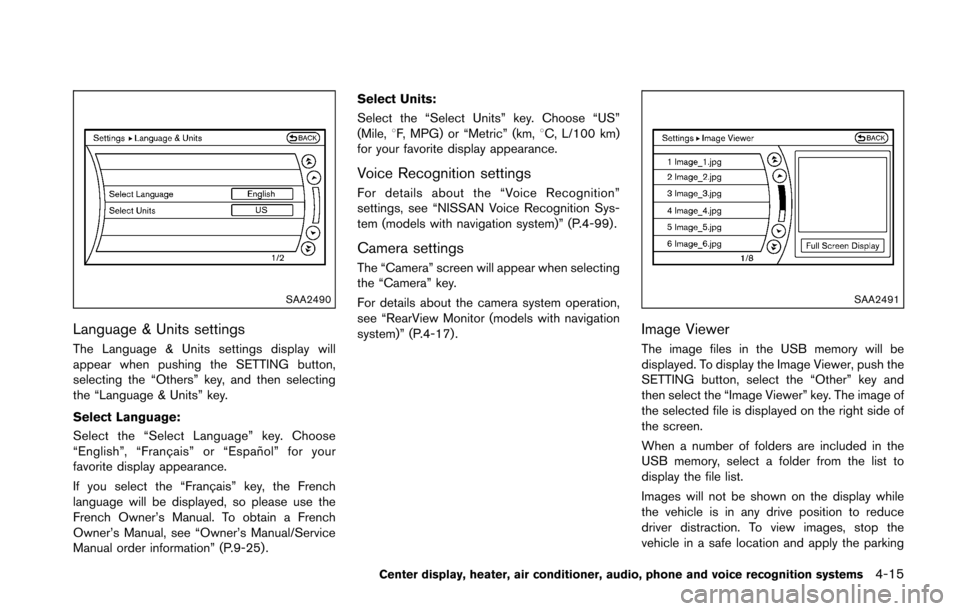
Language & Units settings
The Language & Units settings display will
appear when pushing the SETTING button,
selecting the “Others” key, and then selecting
the “Language & Units” key.
Select Language:
Select the “Select Language” key. Choose
“English”, “Franc¸ ais” or “Espan˜
ol” for your
favorite display appearance.
If you select the “Franc¸ ais” key, the French
language will be displayed, so please use the
French Owner’s Manual. To obtain a French
Owner’s Manual, see “Owner’s Manual/Service
Manual order information” (P.9-25) . Select Units:
Select the “Select Units” key. Choose “US”
(Mile, 8F, MPG) or “Metric” (km, 8C, L/100 km)
for your favorite display appearance.
Voice Recognition settings
For details about the “Voice Recognition”
settings, see “NISSAN Voice Recognition Sys-
tem (models with navigation system)” (P.4-99) .
Camera settings
The “Camera” screen will appear when selecting
the “Camera” key.
For details about the camera system operation,
see “RearView Monitor (models with navigation
system)” (P.4-17) .
SAA2491
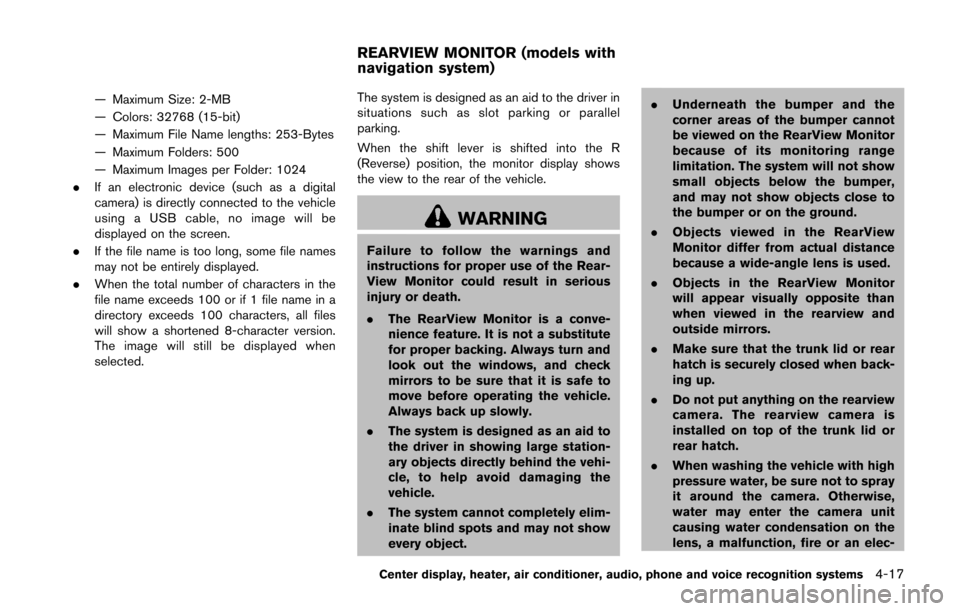
Image Viewer
The image files in the USB memory will be
displayed. To display the Image Viewer, push the
SETTING button, select the “Other” key and
then select the “Image Viewer” key. The image of
the selected file is displayed on the right side of
the screen.
When a number of folders are included in the
USB memory, select a folder from the list to
display the file list.
Images will not be shown on the display while
the vehicle is in any drive position to reduce
driver distraction. To view images, stop the
vehicle in a safe location and apply the parking
Center display, heater, air conditioner, audio, phone and voice recognition systems4-15
Page 178 of 428
— Maximum Size: 2-MB
— Colors: 32768 (15-bit)
— Maximum File Name lengths: 253-Bytes
— Maximum Folders: 500
— Maximum Images per Folder: 1024
. If an electronic device (such as a digital
camera) is directly connected to the vehicle
using a USB cable, no image will be
displayed on the screen.
. If the file name is too long, some file names
may not be entirely displayed.
. When the total number of characters in the
file name exceeds 100 or if 1 file name in a
directory exceeds 100 characters, all files
will show a shortened 8-character version.
The image will still be displayed when
selected. The system is designed as an aid to the driver in
situations such as slot parking or parallel
parking.
When the shift lever is shifted into the R
(Reverse) position, the monitor display shows
the view to the rear of the vehicle.
WARNING
Failure to follow the warnings and
instructions for proper use of the Rear-
View Monitor could result in serious
injury or death.
.
The RearView Monitor is a conve-
nience feature. It is not a substitute
for proper backing. Always turn and
look out the windows, and check
mirrors to be sure that it is safe to
move before operating the vehicle.
Always back up slowly.
. The system is designed as an aid to
the driver in showing large station-
ary objects directly behind the vehi-
cle, to help avoid damaging the
vehicle.
. The system cannot completely elim-
inate blind spots and may not show
every object. .
Underneath the bumper and the
corner areas of the bumper cannot
be viewed on the RearView Monitor
because of its monitoring range
limitation. The system will not show
small objects below the bumper,
and may not show objects close to
the bumper or on the ground.
. Objects viewed in the RearView
Monitor differ from actual distance
because a wide-angle lens is used.
. Objects in the RearView Monitor
will appear visually opposite than
when viewed in the rearview and
outside mirrors.
. Make sure that the trunk lid or rear
hatch is securely closed when back-
ing up.
. Do not put anything on the rearview
camera. The rearview camera is
installed on top of the trunk lid or
rear hatch.
. When washing the vehicle with high
pressure water, be sure not to spray
it around the camera. Otherwise,
water may enter the camera unit
causing water condensation on the
lens, a malfunction, fire or an elec-
Center display, heater, air conditioner, audio, phone and voice recognition systems4-17
REARVIEW MONITOR (models with
navigation system)
Page 186 of 428
SAA2493
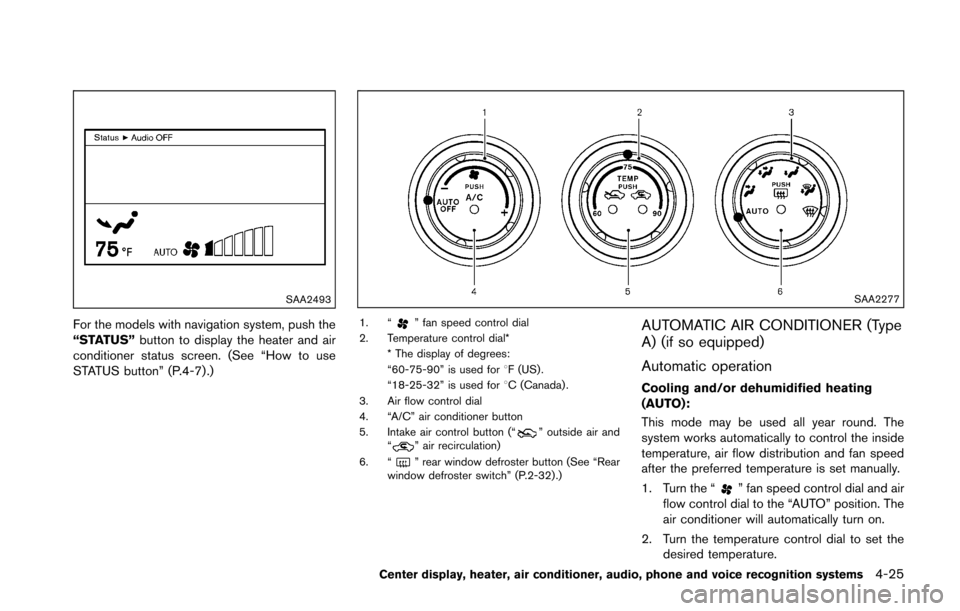
For the models with navigation system, push the
“STATUS”button to display the heater and air
conditioner status screen. (See “How to use
STATUS button” (P.4-7) .)
SAA2277
1. “” fan speed control dial
2. Temperature control dial* * The display of degrees:
“60-75-90” is used for 8F (US) .
“18-25-32” is used for 8C (Canada) .
3. Air flow control dial
4. “A/C” air conditioner button
5. Intake air control button (“
” outside air and
“” air recirculation)
6. “
” rear window defroster button (See “Rear
window defroster switch” (P.2-32) .)
AUTOMATIC AIR CONDITIONER (Type
A) (if so equipped)
Automatic operation
Cooling and/or dehumidified heating
(AUTO):
This mode may be used all year round. The
system works automatically to control the inside
temperature, air flow distribution and fan speed
after the preferred temperature is set manually.
1. Turn the “
” fan speed control dial and air
flow control dial to the “AUTO” position. The
air conditioner will automatically turn on.
2. Turn the temperature control dial to set the desired temperature.
Center display, heater, air conditioner, audio, phone and voice recognition systems4-25
Page 193 of 428
4-32Center display, heater, air conditioner, audio, phone and voice recognition systems
.During cold weather or rainy days, the player
may malfunction due to the humidity. If this
occurs, remove the CD and dehumidify or
ventilate the player completely.
. The player may skip while driving on rough
roads.
. The CD player sometimes cannot function
when the passenger compartment tempera-
ture is extremely high. Decrease the tem-
perature before use.
. Only use high quality 4.7 in (12 cm) round
discs that have the “COMPACT disc DIGI-
TAL AUDIO” logo on the disc or packaging.
. Do not expose the CD to direct sunlight.
. CDs that are of poor quality, dirty, scratched,
covered with fingerprints, or that have pin
holes may not work properly.
. The following CDs may not work properly:
— Copy control compact discs (CCCD)
— Recordable compact discs (CD-R)
— Rewritable compact discs (CD-RW)
. Do not use the following CDs as they may
cause the CD player to malfunction.
— 3.1 in (8 cm) discs
— CDs that are not round
— CDs with a paper label
— CDs that are warped, scratched, or have
abnormal edges .
This audio system can only play prerecorded
CDs. It has no capabilities to record or burn
CDs.
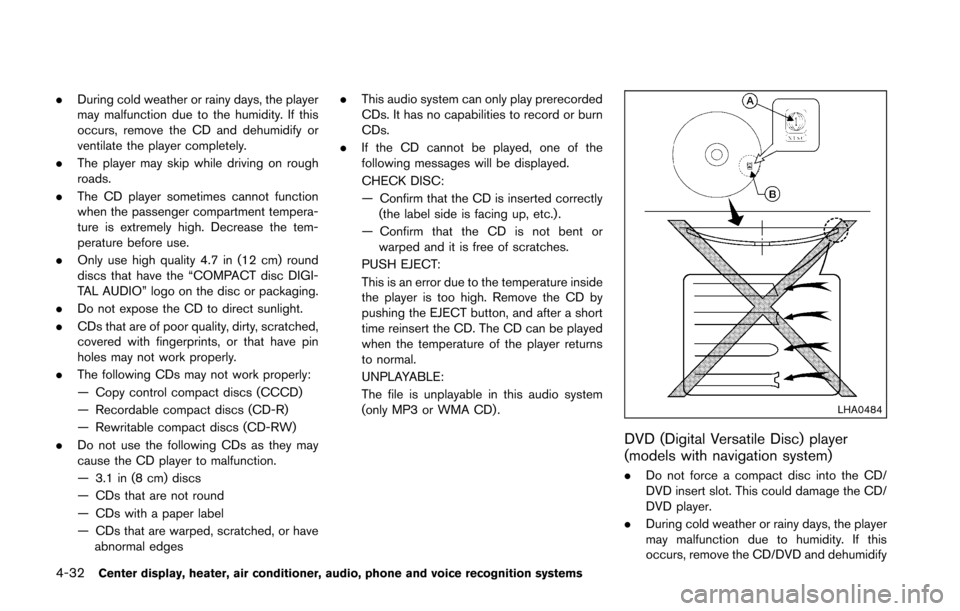
. If the CD cannot be played, one of the
following messages will be displayed.
CHECK DISC:
— Confirm that the CD is inserted correctly
(the label side is facing up, etc.) .
— Confirm that the CD is not bent or warped and it is free of scratches.
PUSH EJECT:
This is an error due to the temperature inside
the player is too high. Remove the CD by
pushing the EJECT button, and after a short
time reinsert the CD. The CD can be played
when the temperature of the player returns
to normal.
UNPLAYABLE:
The file is unplayable in this audio system
(only MP3 or WMA CD) .
LHA0484
DVD (Digital Versatile Disc) player
(models with navigation system)
. Do not force a compact disc into the CD/
DVD insert slot. This could damage the CD/
DVD player.
. During cold weather or rainy days, the player
may malfunction due to humidity. If this
occurs, remove the CD/DVD and dehumidify