2016 MERCEDES-BENZ SL ROADSTER wheel bolt torque
[x] Cancel search: wheel bolt torquePage 24 of 333

LIM (Distance Pilot DISTRONIC) .... 163
LIM (variable limiter) ...................... 170
Parking brake ................................ 248
PASSENGER AIR BAG ...................... 40
Reserve fuel ................................... 249
Seat belt ........................................ 244
Tyre pressure monitor ................... 252
Warning triangle ................................ 287
Washer fluid
Display messag e............................ 242
Wheel and tyre combinations
Tyres .............................................. 317
Wheel bolt tightening torque ........... 316
Wheel chock ...................................... 313
Wheels
Changing a whee l.......................... 312
Changing/replacing ....................... 312
Checking ........................................ 304
Cleaning ......................................... 284
Emergency spare wheel ................. 318
Fitting a new wheel ........................ 316
Fitting a wheel ............................... 313
Important safety notes .................. 304
Information on driving .................... 304
Overview ........................................ 304
Removing a whee l.......................... 315
Storing ........................................... 313
Tightening torque ........................... 316
Wheel size/tyre size ...................... 317
Windows
Cleaning ......................................... 284
see Side windows
Windscreen
Demisting ...................................... 126
Windscreen washer fluid
see Windscreen washer system
Windscreen washer system
Important safety notes .................. 326
Topping up ..................................... 280
Windscreen wipers
Display message ............................ 242
Problem (malfunction) ................... 121
Replacing the wiper blades ............ 119
Switching on/of f........................... 118
Winter operation
Important safety notes .................. 306
Overview ........................................ 306
Slippery road surfaces ................... 159 Snow chains .................................. 307
Winter tyres
Limiting the speed (on-board com-
puter) ............................................. 211
M+S tyres ...................................... 306
Wiper blades
Cleaning ......................................... 284
Important safety notes .................. 119
Replacing ....................................... 119
Workshop
see Qualified specialist workshop Z
ZONE function Switching on/of f........................... 126 Index
21
Page 317 of 333

must be positioned vertically, directly under
the jacking point of the vehicle.
Observe the following when raising the vehicle:
R only use the vehicle-specific jack that has
been tested and approved by Mercedes-Benz
to raise the vehicle. If the jack is used incor-
rectly, it could tip over while the vehicle is
raised.
R the jack is designed only to raise and hold the
vehicle for a short time while a wheel is being
changed. It is not permissible to use it to per- form maintenance work under the vehicle.
R avoid changing the wheel on uphill and down-
hill slopes.
R before raising the vehicle, safeguard it from
rolling away by applying the parking brake and
positioning wheel chocks. Do not release the parking brake while the vehicle is raised.
R the jack must be placed on a firm, flat and
non-slip surface. On a loose surface, a large,
flat load-bearing underlay must be used. On a
slippery surface, a non-slip underlay must be
used, e.g. rubber mats.
R do not use wooden blocks or similar objects
as a jack underlay. Otherwise, the jack will not
be able to achieve its load-bearing capacity
due to the restricted height.
R make sure that the distance between the
underside of the tyres and the ground does
not exceed 3 cm.
R never place your hands or feet under the
raised vehicle.
R do not lie under the vehicle.
R do not start the engine when the vehicle is
raised.
R do not open or close a door or the boot lid
when the vehicle is raised.
R make sure that no persons are present in the
vehicle when the vehicle is raised.
Vehicles with light-alloy wheels and hub
caps: the wheel bolts are covered by a hub cap.
Before you can unscrew the wheel bolts, you
must remove the hub cap. Two different variants
can be fitted. X
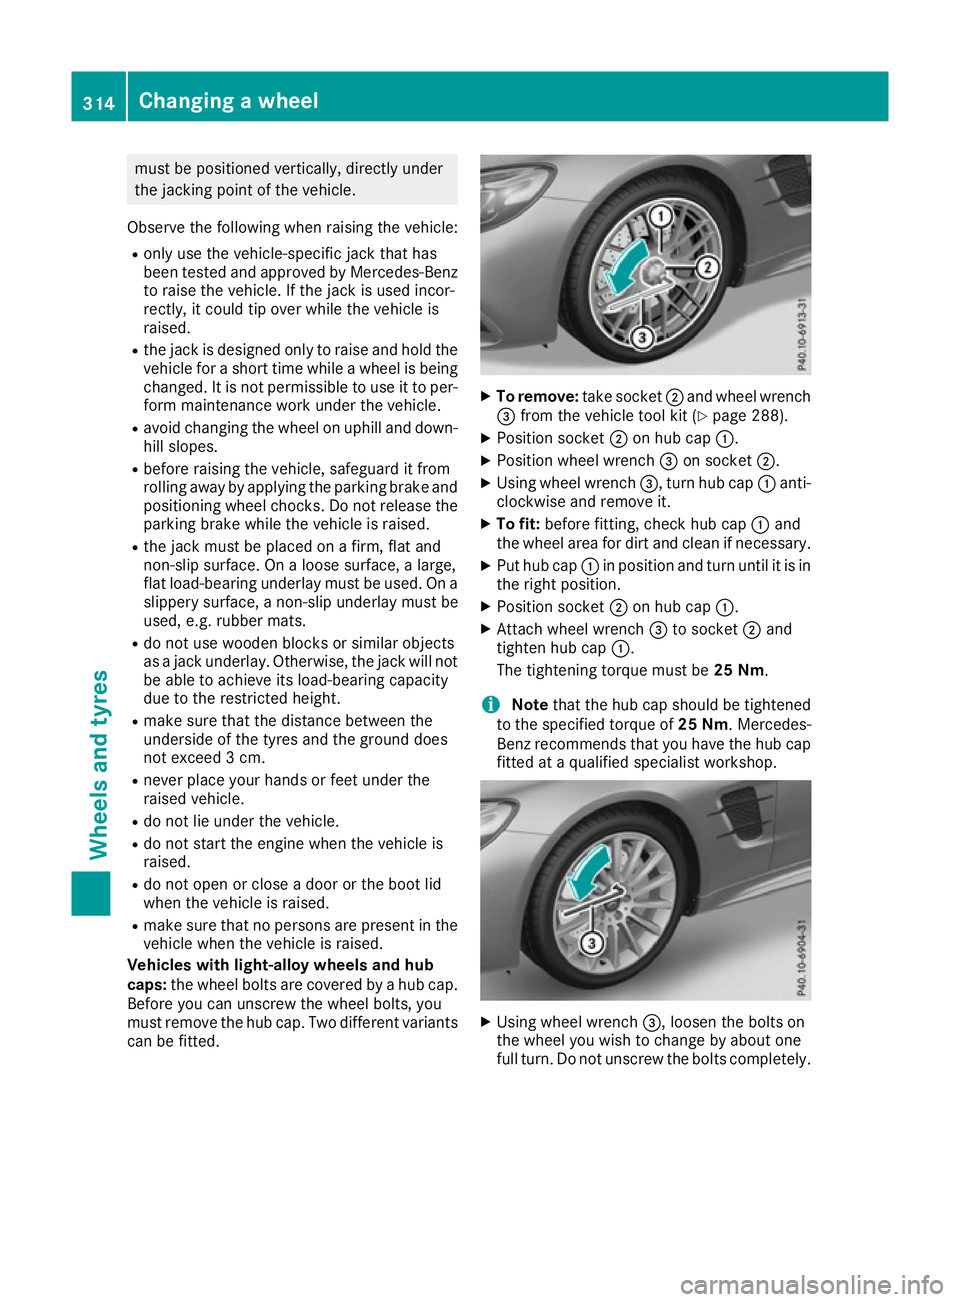
To remove: take socket;and wheel wrench
= from the vehicle tool kit (Y page 288).
X Position socket ;on hub cap :.
X Position wheel wrench =on socket ;.
X Using wheel wrench =, turn hub cap:anti-
clockwise and remove it.
X To fit: before fitting, check hub cap :and
the wheel area for dirt and clean if necessary.
X Put hub cap :in position and turn until it is in
the right position.
X Position socket ;on hub cap :.
X Attach wheel wrench =to socket ;and
tighten hub cap :.
The tightening torque must be 25 Nm.
i Note
that the hub cap should be tightened
to the specified torque of 25 Nm. Mercedes-
Benz recommends that you have the hub cap
fitted at a qualified specialist workshop. X
Using wheel wrench =, loosen the bolts on
the wheel you wish to change by about one
full turn. Do not unscrew the bolts completely. 314
Changing a wheelWheels and tyres
Page 319 of 333

Fitting a new wheel
G
WARNING
Oiled or greased wheel bolts or damaged
wheel bolts/hub threads can cause the wheel bolts to come loose. As a result, you could
lose a wheel while driving. There is a risk of
accident.
Never oil or grease wheel bolts. In the event ofdamage to the threads, contact a qualified
specialist workshop immediately. Have the
damaged wheel bolts or hub threads
replaced/renewed. Do not continue driving. G
WARNING
If you tighten the wheel bolts or wheel nuts
when the vehicle is raised, the jack could tip
over. There is a risk of injury.
Only tighten the wheel bolts or wheel nuts
when the vehicle is on the ground.
It is imperative to observe the instructions and
safety notes on "Changing a wheel"
(Y page 312).
Only use wheel bolts that have been designed
for the wheel and the vehicle. For safety rea-
sons, Mercedes-Benz recommends that you
only use wheel bolts which have been approved for Mercedes-Benz vehicles and the respective
wheel.
! Mercedes AMG vehicles:
when removing
and fitting a wheel, the wheel rim may strike
the ceramic brake disc and damage it. There-
fore, take precautions and have a second per- son assist you. Alternatively, you can use a
second centring pin. X
Clean the wheel and wheel hub contact sur-
faces.
X Slide the wheel to be mounted onto the cen-
tring pin and push it on.
X Tighten the wheel bolts until they are finger-
tight.
X Unscrew the centring pin.
X Tighten the last wheel bolt until it is finger-
tight.
X Vehicles with a collapsible emergency
spare wheel:
inflate the collapsible emer-
gency spare wheel (Y page 319).
Only then lower the vehicle.
Lowering the vehicle G
WARNING
The wheels could work loose if the wheel nuts and bolts are not tightened to the specified
tightening torque. There is a risk of accident.
Have the tightening torque immediately
checked at a qualified specialist workshop
after a wheel is changed.
! Vehicles with a collapsible emergency
spare wheel: Inflate the collapsible emer-
gency spare wheel using the tyre inflation
compressor before lowering the vehicle. The
rim could otherwise be damaged.
X Turn the crank of the jack anti-clockwise until
the vehicle is once again standing firmly on
the ground.
X Place the jack to one side. X
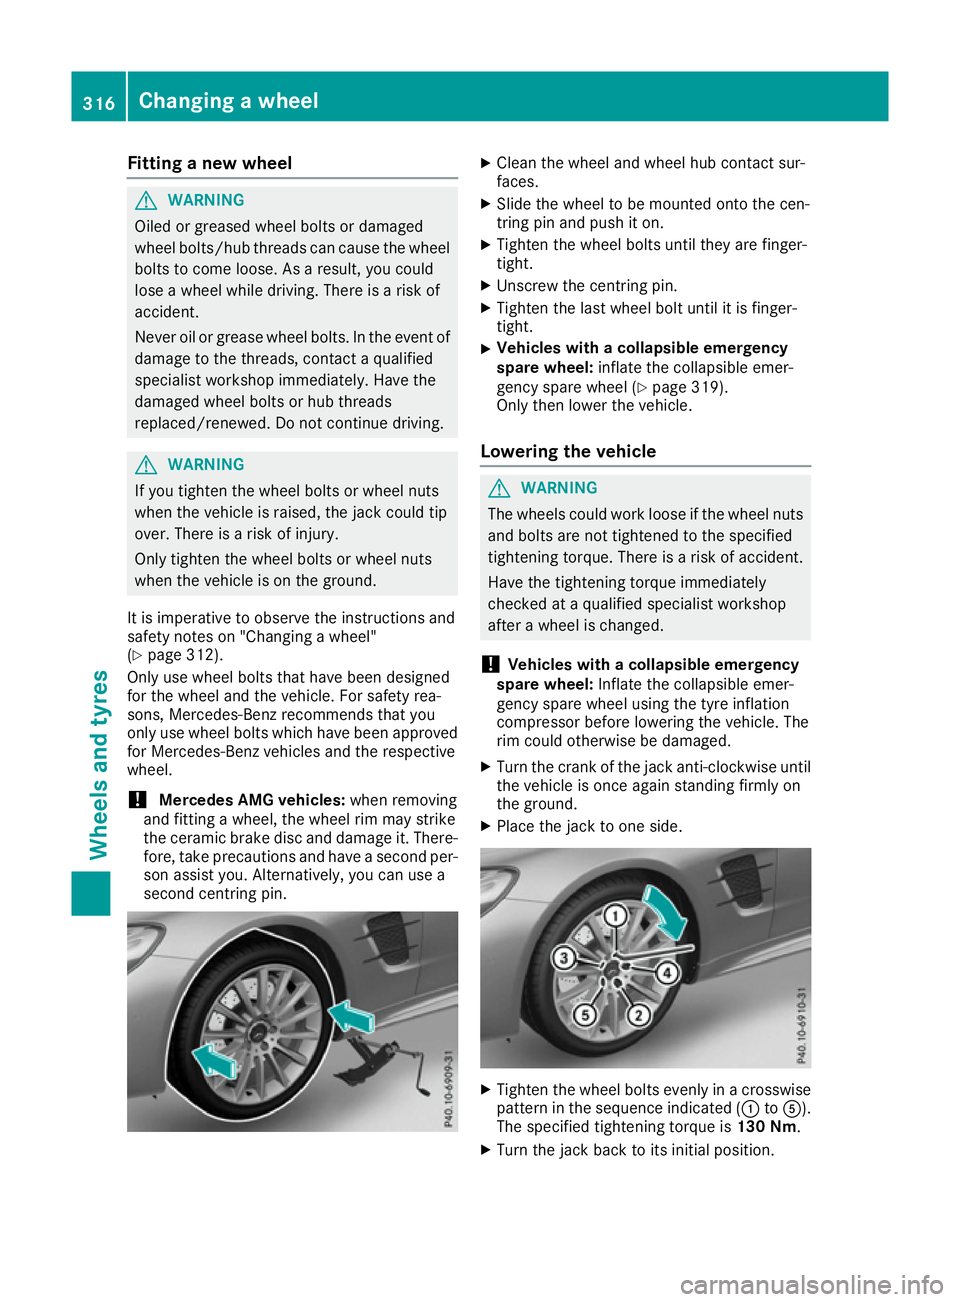
Tighten the wheel bolts evenly in a crosswise
pattern in the sequence indicated (: toA).
The specified tightening torque is 130 Nm.
X Turn the jack back to its initial position. 316
Changing a wheelWheels and ty
res