2016 MERCEDES-BENZ SL ROADSTER steering wheel
[x] Cancel search: steering wheelPage 151 of 333
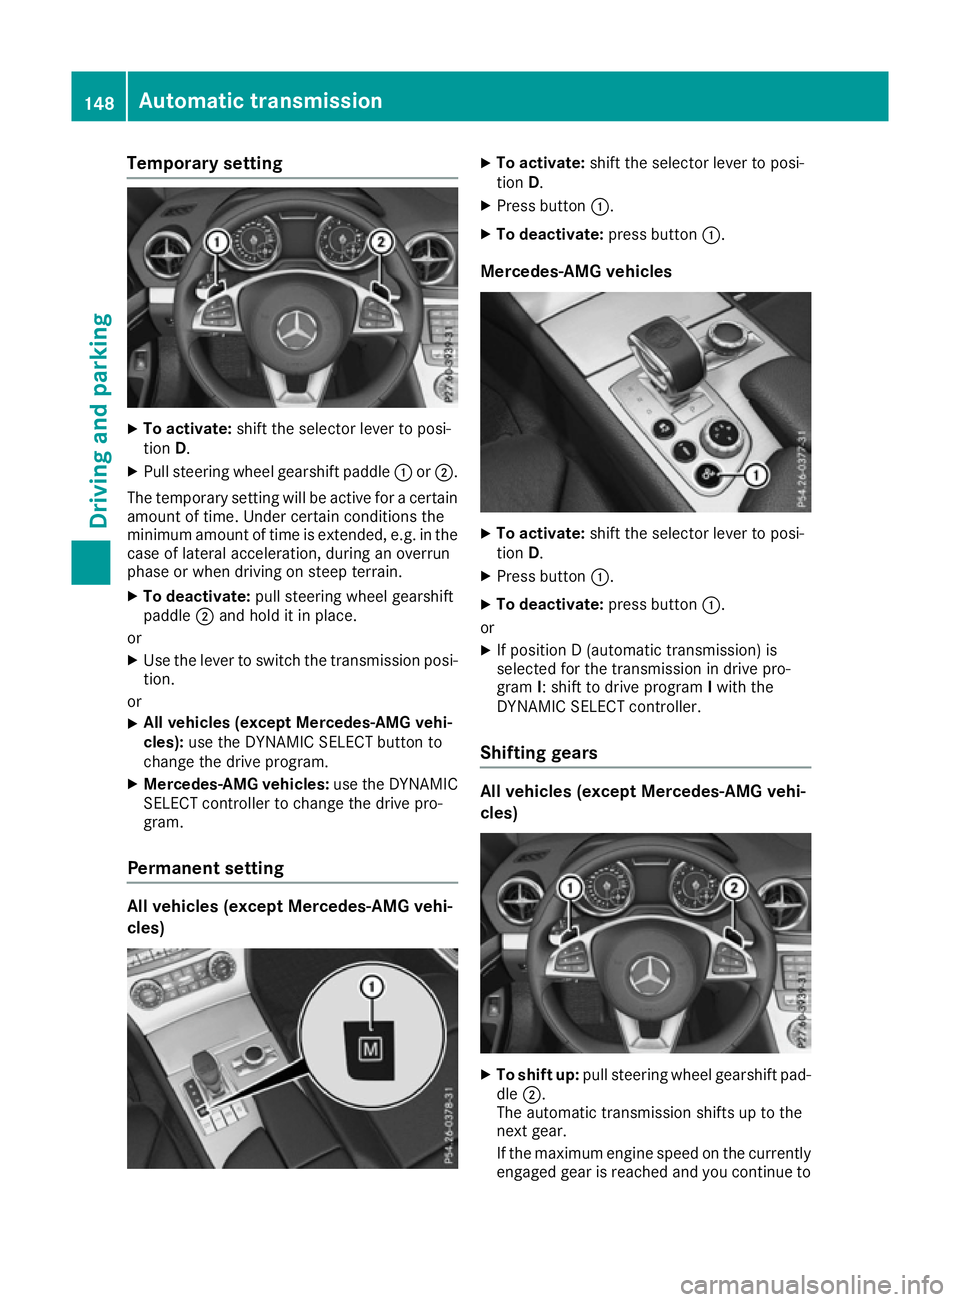
Temporary setting
X
To activate: shift the selector lever to posi-
tion D.
X Pull steering wheel gearshift paddle :or;.
The temporary setting will be active for a certain amount of time. Under certain conditions the
minimum amount of time is extended, e.g. in the
case of lateral acceleration, during an overrun
phase or when driving on steep terrain.
X To deactivate: pull steering wheel gearshift
paddle ;and hold it in place.
or X Use the lever to switch the transmission posi-
tion.
or X All vehicles (except Mercedes-AMG vehi-
cles):
use the DYNAMIC SELECT button to
change the drive program.
X Mercedes-AMG vehicles: use the DYNAMIC
SELECT controller to change the drive pro-
gram.
Permanent setting All vehicles (except Mercedes-AMG vehi-
cles) X
To activate: shift the selector lever to posi-
tion D.
X Press button :.
X To deactivate: press button:.
Mercedes-AMG vehicles X
To activate: shift the selector lever to posi-
tion D.
X Press button :.
X To deactivate: press button:.
or X If position D (automatic transmission) is
selected for the transmission in drive pro-
gram I: shift to drive program Iwith the
DYNAMIC SELECT controller.
Shifting gears All vehicles (except Mercedes-AMG vehi-
cles)
X
To shift up: pull steering wheel gearshift pad-
dle ;.
The automatic transmission shifts up to the
next gear.
If the maximum engine speed on the currently engaged gear is reached and you continue to 148
Automatic transmissionDriving an
d parking
Page 152 of 333
accelerate, the automatic transmission auto-
matically shifts up in order to prevent engine
damage.
X To shift down: pull steering wheel gearshift
paddle :.
The automatic transmission shifts down to
the next gear.
Automatic downshifting occurs when coast-
ing.
If the engine exceeds the maximum engine
speed when shifting down, the automatic
transmission protects against engine damage
by not shifting down.
Mercedes-AMG vehicles
! If manual gearshifting is permanently acti-
vated, the automatic transmission does not
shift up automatically even when the engine
limiting speed for the current gear is reached. When the engine limiting speed is reached,
the fuel supply is cut to prevent the engine
from overrevving. Always make sure that the
engine speed does not reach the red area of
the rev counter. There is otherwise a risk of
engine damage. X
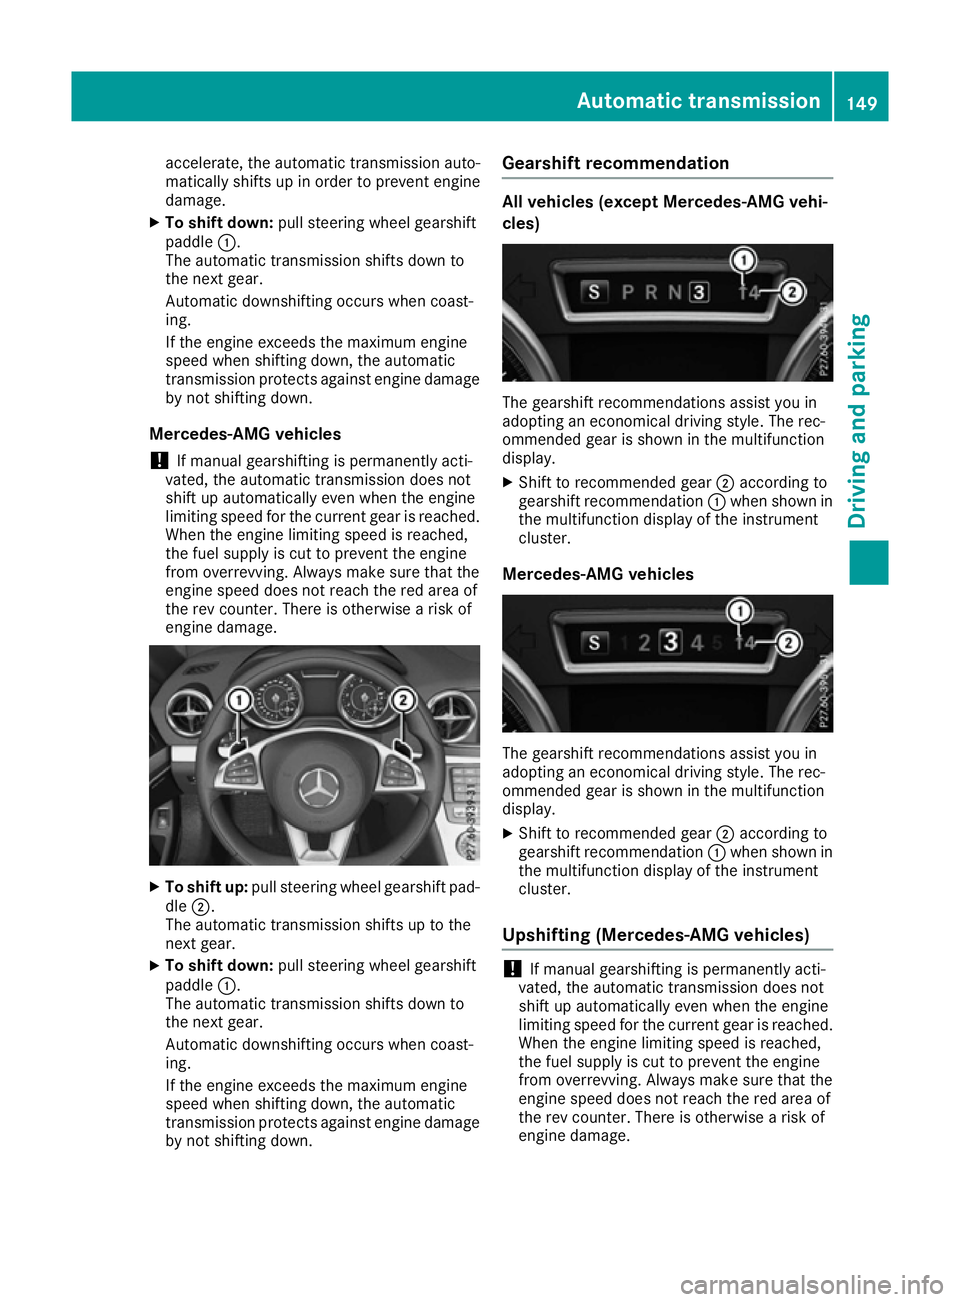
To shift up: pull steering wheel gearshift pad-
dle ;.
The automatic transmission shifts up to the
next gear.
X To shift down: pull steering wheel gearshift
paddle :.
The automatic transmission shifts down to
the next gear.
Automatic downshifting occurs when coast-
ing.
If the engine exceeds the maximum engine
speed when shifting down, the automatic
transmission protects against engine damage by not shifting down. Gearshift recommendation All vehicles (except Mercedes-AMG vehi-
cles)
The gearshift recommendations assist you in
adopting an economical driving style. The rec-
ommended gear is shown in the multifunction
display.
X Shift to recommended gear ;according to
gearshift recommendation :when shown in
the multifunction display of the instrument
cluster.
Mercedes-AMG vehicles The gearshift recommendations assist you in
adopting an economical driving style. The rec-
ommended gear is shown in the multifunction
display.
X Shift to recommended gear ;according to
gearshift recommendation :when shown in
the multifunction display of the instrument
cluster.
Upshifting (Mercedes-AMG vehicles) !
If manual gearshifting is permanently acti-
vated, the automatic transmission does not
shift up automatically even when the engine
limiting speed for the current gear is reached. When the engine limiting speed is reached,
the fuel supply is cut to prevent the engine
from overrevving. Always make sure that the
engine speed does not reach the red area of
the rev counter. There is otherwise a risk of
engine damage. Automatic transmission
149Driving and parking Z
Page 153 of 333
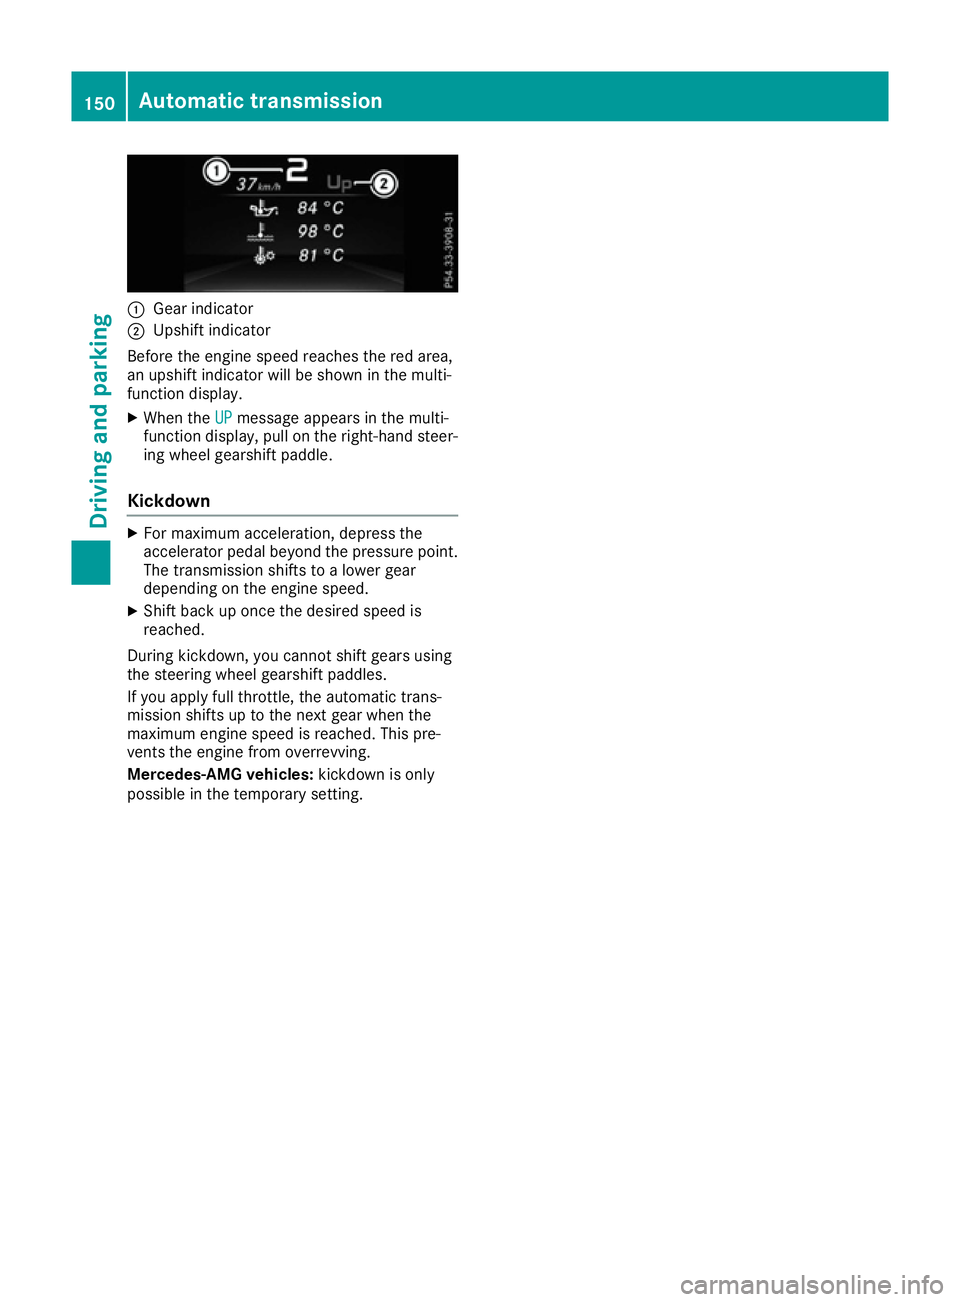
:
Gear indicator
; Upshift indicator
Before the engine speed reaches the red area,
an upshift indicator will be shown in the multi-
function display.
X When the UP
UPmessage appears in the multi-
function display, pull on the right-hand steer- ing wheel gearshift paddle.
Kickdown X
For maximum acceleration, depress the
accelerator pedal beyond the pressure point.
The transmission shifts to a lower gear
depending on the engine speed.
X Shift back up once the desired speed is
reached.
During kickdown, you cannot shift gears using
the steering wheel gearshift paddles.
If you apply full throttle, the automatic trans-
mission shifts up to the next gear when the
maximum engine speed is reached. This pre-
vents the engine from overrevving.
Mercedes-AMG vehicles: kickdown is only
possible in the temporary setting. 150
Automatic transmissionDriving and parking
Page 162 of 333
Winter driving
G
WARNING
If you shift down on a slippery road surface in an attempt to increase the engine's braking
effect, the drive wheels could lose their grip.
This increases the risk of skidding and having
an accident.
Do not shift down for additional engine brak-
ing on a slippery road surface. G
DANGER
If the exhaust pipe is blocked or adequate
ventilation is not possible, poisonous gases
such as carbon monoxide (CO) may enter the vehicle. This is the case, e.g. if the vehicle
becomes trapped in snow. There is a risk of
fatal injury.
If you leave the engine or the auxiliary heating
running, make sure the exhaust pipe and area
around the vehicle are clear of snow. To
ensure an adequate supply of fresh air, open a window on the side of the vehicle that is not
facing into the wind.
! Take care not to damage the sealing strip
and the moulding on the side of the rear win- dow when scraping ice off the rear window.
Have your vehicle winterproofed at a qualified
specialist workshop at the onset of winter.
You should drive particularly carefully on slip-
pery road surfaces. Avoid sudden acceleration,
steering and braking manoeuvres. Do not use
cruise control.
If the vehicle threatens to skid or cannot be
stopped when moving at low speed:
X Shift the transmission to position N.
X Try to bring the vehicle under control by using
corrective steering.
The outside temperature indicator is not
designed to serve as an ice-warning device and
is therefore unsuitable for that purpose.
Changes in the outside temperature are dis-
played after a short delay.
Indicated temperatures just above the freezing
point do not guarantee that the road surface is
free of ice. The road may still be icy, especially in wooded areas or on bridges. The vehicle could
skid if you fail to adapt your driving style. Always adapt your driving style and drive at a speed to
suit the prevailing weather conditions.
You should pay special attention to road condi-
tions when temperatures are around freezing
point.
Further information on driving with snow chains (Y page 307).
Further information on driving with summer
tyres (Y page 306).
Observe the notes in the "Winter operation" sec-
tion (Y page 306). Driving systems
Cruise control
General notes Cruise control maintains a constant road speed
for you. It brakes automatically in order to avoid
exceeding the set speed. On long and steep
downhill gradients, especially if the vehicle is
laden, you must select a lower gear in good time.
By doing so, you will make use of the braking
effect of the engine. This relieves the load on the brake system and prevents the brakes from
overheating and wearing too quickly.
Use cruise control only if road and traffic con-
ditions make it appropriate to maintain a steady speed for a prolonged period. You can set any
road speed above 30 km/h.
Important safety notes If you fail to adapt your driving style, cruise con-
trol can neither reduce the risk of accident nor
override the laws of physics. Cruise control can-
not take road, weather and traffic conditions
into account. Cruise control is only an aid. You
are responsible for the distance to the vehicle in
front, for vehicle speed, for braking in good time and for maintaining lane.
Do not use cruise control:
R in road and traffic conditions which do not
allow you to maintain a constant speed, e.g.
heavy traffic or winding roads.
R on slippery roads. Braking or accelerating
may cause the drive wheels to lose traction
and the vehicle could then skid.
R when there is poor visibility, e.g. due to fog,
heavy rain or snow. Driving systems
159Driving and parking Z
Page 172 of 333

In a speed range from 0 - 60 km/h, Stop&Go
Pilot focuses on the vehicle in front, taking into
account lane markings, e.g. when following vehi-
cles in a traffic jam.
At speeds of more than 60 km/h, the Steering
Pilot focuses on detected lane markings (left
and right), only focusing on the vehicle in front if detected lane markings are not present at
speeds of up to 130 km/h.
If these conditions are not present, Steering
Pilot and Stop&Go Pilot cannot provide assis-
tance.
Distance Pilot DISTRONIC must be active in
order for the function to be available.
Important safety notes If you fail to adapt your driving style, Distance
Pilot DISTRONIC with Steering Pilot and
Stop&Go Pilot can neither reduce the risk of an
accident nor override the laws of physics. It can-
not take into account road, weather or traffic
conditions. Distance Pilot DISTRONIC with
Steering Pilot and Stop&Go Pilot is only an aid.
You are responsible for the distance to the vehi- cle in front, for vehicle speed, for braking in good
time and for staying in lane.
Distance Pilot DISTRONIC with Steering Pilot
and Stop&Go Pilot does not detect road and
traffic conditions and does not detect all road
users. If you are following a vehicle which is
driving towards the edge of the carriageway,
your vehicle could come into contact with the
kerb or other road boundaries. Be particularly
aware of other road users, e.g. cyclists, that are directly next to your vehicle.
Obstacles such as traffic pylons on the lane or
projecting into the lane are not detected.
An inappropriate steering intervention, e.g. after
intentionally driving over a lane marking, can be
corrected at any time if you steer slightly in the opposite direction.
Distance Pilot DISTRONIC with Steering Pilot
and Stop&Go Pilot cannot continuously keep
your vehicle in the lane. In some cases, the
steering intervention is not sufficient to bring
the vehicle back to the lane. In such cases, youmust steer the vehicle yourself to ensure that it
does not leave the lane. The support offered by the system may be
impaired if:
R
there is poor visibility, e.g. due to insufficient
illumination of the road, or due to snow, rain,fog or spray
R there is glare, e.g. from oncoming traffic, the
sun or reflection from other vehicles (e.g. if
the road surface is wet)
R the windscreen is dirty, misted up, damaged
or covered, for instance by a sticker, in the
vicinity of the camera
R there are no lane markings, or several unclear
lane markings are present, e.g. around con-
struction sites
R the lane markings are worn away, dark or cov-
ered up, e.g. by dirt or snow
R the distance to the vehicle in front is too short
and thus the lane markings cannot be detec-
ted
R the lane markings change quickly, e.g. lanes
branch off, cross one another or merge
R the road is narrow and winding
R there are highly variable shade conditions on
the road
The system is switched to passive and no longer assists you by performing steering interventions
if:
R you actively change lanes
R you switch on the turn signal
R you take your hands off the steering wheel or
do not steer for a prolonged period of time
i After you have finished changing lanes,
Steering Pilot and Stop&Go Pilot are auto-
matically active again.
Steering Pilot and Stop&Go Pilot cannot provide
assistance:
R on very sharp corners
R a loss of tyre pressure or a defective tyre has
been detected and displayed
Pay attention also to the important safety notes
on Distance Pilot DISTRONIC (Y page 162).
The steering interventions are carried out with a
limited steering moment. The system requires
the driver to keep his hands on the steering
wheel and to steer himself.
If you do not steer yourself or if you take your
hands off the steering wheel for a prolonged
period of time, the system will first alert you with a visual warning. A steering wheel symbol
appears in the multifunction display. If you have Driving systems
169Driving and parking Z
Page 173 of 333
still not started to steer and have not taken hold
of the steering wheel after five seconds at the
latest, a warning tone also sounds to remind you to take control of the vehicle. Steering Pilot and
Stop&Go Pilot then switch to passive mode. Dis-
tance Pilot DISTRONIC remains active.
Activating Steering Pilot and Stop&Go
Pilot
X Activate Distance Pilot DISTRONIC with
Steering Pilot and Stop&Go Pilot function
using the on-board computer (Y page 207).
The Steering
Steering Pilot Piloton
onmessage appears in
the multifunctional display. The Steering Pilot and Stop&Go Pilot are switched on.
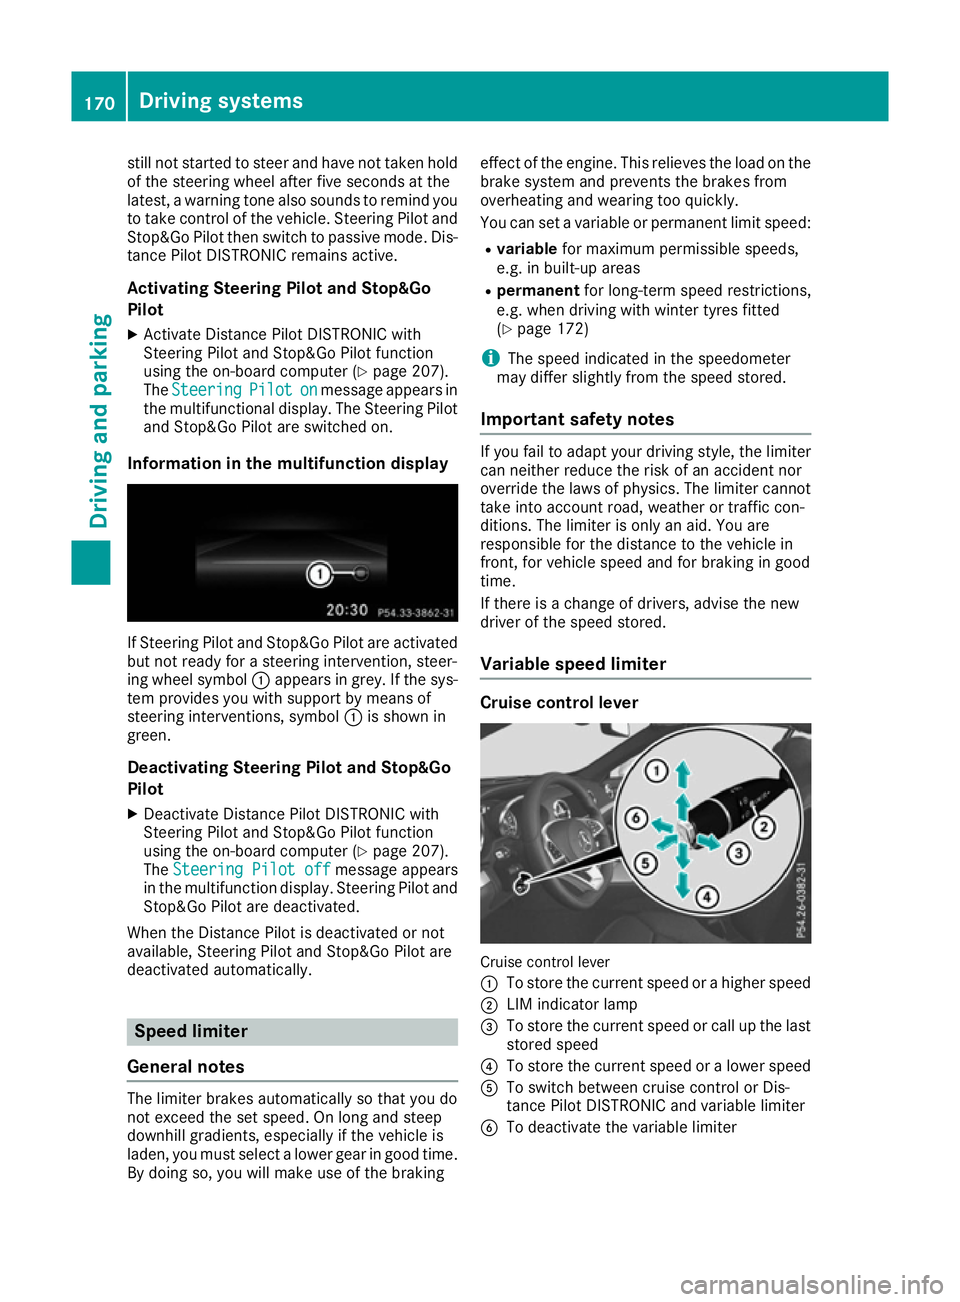
Information in the multifunction display If Steering Pilot and Stop&Go Pilot are activated
but not ready for a steering intervention, steer-
ing wheel symbol :appears in grey. If the sys-
tem provides you with support by means of
steering interventions, symbol :is shown in
green.
Deactivating Steering Pilot and Stop&Go
PilotX Deactivate Distance Pilot DISTRONIC with
Steering Pilot and Stop&Go Pilot function
using the on-board computer (Y page 207).
The Steering Pilot off
Steering Pilot off message appears
in the multifunction display. Steering Pilot and Stop&Go Pilot are deactivated.
When the Distance Pilot is deactivated or not
available, Steering Pilot and Stop&Go Pilot are
deactivated automatically. Speed limiter
General notes The limiter brakes automatically so that you do
not exceed the set speed. On long and steep
downhill gradients, especially if the vehicle is
laden, you must select a lower gear in good time.
By doing so, you will make use of the braking effect of the engine. This relieves the load on the
brake system and prevents the brakes from
overheating and wearing too quickly.
You can set a variable or permanent limit speed:
R variable for maximum permissible speeds,
e.g. in built-up areas
R permanent for long-term speed restrictions,
e.g. when driving with winter tyres fitted
(Y page 172)
i The speed indicated in the speedometer
may differ slightly from the speed stored.
Important safety notes If you fail to adapt your driving style, the limiter
can neither reduce the risk of an accident nor
override the laws of physics. The limiter cannot take into account road, weather or traffic con-
ditions. The limiter is only an aid. You are
responsible for the distance to the vehicle in
front, for vehicle speed and for braking in good
time.
If there is a change of drivers, advise the new
driver of the speed stored.
Variable speed limiter Cruise control lever
Cruise control lever
:
To store the current speed or a higher speed
; LIM indicator lamp
= To store the current speed or call up the last
stored speed
? To store the current speed or a lower speed
A To switch between cruise control or Dis-
tance Pilot DISTRONIC and variable limiter
B To deactivate the variable limiter 170
Driving systemsDriving and parking
Page 177 of 333
Activation conditions
You can activate RACE START if:
R the doors are closed
R the engine is running and the engine and
transmission are at operating temperature.
This is the case when the oil temperature
gauge in the multifunction display is shown in
white (Y page 213).
R ESP ®
is functioning correctly (Y page 67)
R the drive program S,S+ orRace is selected
(Y page 140)
R the steering wheel is in the straight-ahead
position
R the vehicle is stationary and the brake pedal is
depressed (left foot)
R the transmission is in position D
Activating RACE START i
When manual mode (Y
page 147) is active,
the transmission automatically shifts up to
RACE START in the drive program. This func-
tion supports maximum acceleration with
RACE START. After going through an acceler- ating process once from a stationary position,
this function is automatically deactivated.
X Depress the brake pedal with your left foot
and keep it depressed.
X Pull and hold both steering wheel gearshift
paddles.
X The RACE START Confirm: Paddle UP
RACE START Confirm: Paddle UP
Cancel: Paddle DOWN Cancel: Paddle DOWN message appears in
the multifunction display.
X Release both steering wheel gearshift pad-
dles.
i If the activation conditions are no longer ful-
filled, RACE START is cancelled. The RACE RACE
START not possible See Owner's Man‐
START not possible See Owner's Man‐
ual
ual message appears in the multifunction
display.
X To cancel: pull the left steering wheel shift
paddle (Y page 147).
or X To confirm: pull the right steering wheel shift
paddle (Y page 147).
The RACE START available Depress
RACE START available Depress
accelerator
accelerator message appears in the multi-
function display.
i If you do not depress the accelerator pedal
within a few seconds, RACE START is cancel- led. The
RACE START cancelled
RACE START cancelled message
appears in the multifunction display.
X Fully depress the accelerator pedal.
The engine speed increases.
The RACE
RACE START START Release
Release brake
braketo
tostart
start
message appears in the multifunction display.
i If the brake pedal is not released after a
short while, RACE START is cancelled. The
RACE RACE START
START cancelled
cancelled message appears in
the multifunction display.
X Take your foot off the brake, but keep the
accelerator pedal depressed.
The vehicle pulls away at maximum acceler-
ation.
The RACE RACE START
START active
active message appears in
the multifunction display.
RACE START is deactivated when the vehicle
reaches a speed of approximately 50 km/h.
RACE START is deactivated immediately if you
release the accelerator pedal during RACE
START or if any of the activation conditions are
no longer fulfilled. The RACE START not pos‐
RACE START not pos‐
sible See Owner's Manual sible See Owner's Manual orRACE START
RACE START
cancelled
cancelled message appears in the multifunc-
tion display.
i After using it several times in short succes-
sion, RACE START will be unavailable until a
certain distance has been driven. Adaptive Damping System
General notes Suspension with the adaptive adjustable damp-
ing provides improved driving comfort and con-
tinuously controls the calibration of the damp-
ers. The damping characteristics adapt to the
current operating and driving situation.
The damping is tuned individually to each wheel
and depends on:
R your driving style, e.g. sporty
R the road surface conditions
R the selected drive program (Y page 139).174
Driving systemsDriving and pa
rking
Page 181 of 333

X
Switch on the multimedia system. You can
find further information in the separate
COMAND Online operating instructions.
X Press button :.
The driving dynamics display appears in the
multimedia system display.
The following information on the vehicle's oper- ating status is displayed in the driving dynamics display:
R Drive program selected (Y page 139)
R Accelerator pedal position shown in %
R Brake pedal position shown in %
R Steering angle
R Activity of the ABC spring struts
R Vehicle level display (Y page 175)
R Level settings animation
R G-FORCE cross displaying longitudinal and
lateral acceleration (only available in Sportor
Sport Plus drive programs) Active Body Control ABC (Mercedes-
AMG vehicles)
Setting the vehicle level General notes
The vehicle level can be set using the DYNAMIC SELECT controller (Y page 140) or the on-board
computer (Y page 178). The setting always cor-
responds to the last selected function.
In order to reduce fuel consumption and
improve the driving dynamics, the vehicle is low-
ered as its speed increases. In the Sportand
Sport Plus drive programs it is lowered by up to
13 mm, and in the Comfortdrive program by up
to 5 mm compared to the normal vehicle level.
As the speed is reduced, the vehicle is raised to
the set vehicle height.
If the ignition is switched off for less than four
hours, the previously selected drive program is
activated when the engine is next started. If the
ignition is switched off for more than four hours,
the Comfort drive program is activated when
the engine is next started.
Select the normal level for normal road surfaces and the raised level for driving with snow chains
or on particularly poor road surfaces. Important safety notes
The vehicle is slightly lowered when the engine
is switched off. G
WARNING
People's limbs may become trapped if they
are located underneath the vehicle or
between the vehicle body and the tyres when the vehicle is lowering. There is a danger of
injury.
When lowering the vehicle, make sure no one
is underneath the vehicle or in the immediate vicinity of the wheel arches.
! If you have selected the normal level and
switched the engine off, the vehicle is low-
ered. The vehicle is automatically lowered by approximately 10 mm. Make sure when park- ing that you position your vehicle so that it
does not make contact with the kerb as the
vehicle is lowered. Your vehicle could other-
wise be damaged.
Setting the raised level X
Make sure that the engine is running or that it
has been switched off by the ECO start/stop
function.
X Make sure that a speed of 120 km/h is not
exceeded.
X If symbol ; ;is not shown: press=
or ; on the steering wheel to select the
Assist. Assist. menu.
X Press the 9or: button to select
Vehicle level
Vehicle level.
X Press the abutton.
The following message appears: :Vehicle
Vehicle
level Raise with OK
level Raise with OK.
X Press the abutton.
If the engine has been switched off by the ECO
start/stop function, it is now restarted. 178
Driving systemsDriving and parking