2016 MERCEDES-BENZ SL ROADSTER engine
[x] Cancel search: enginePage 193 of 333
:
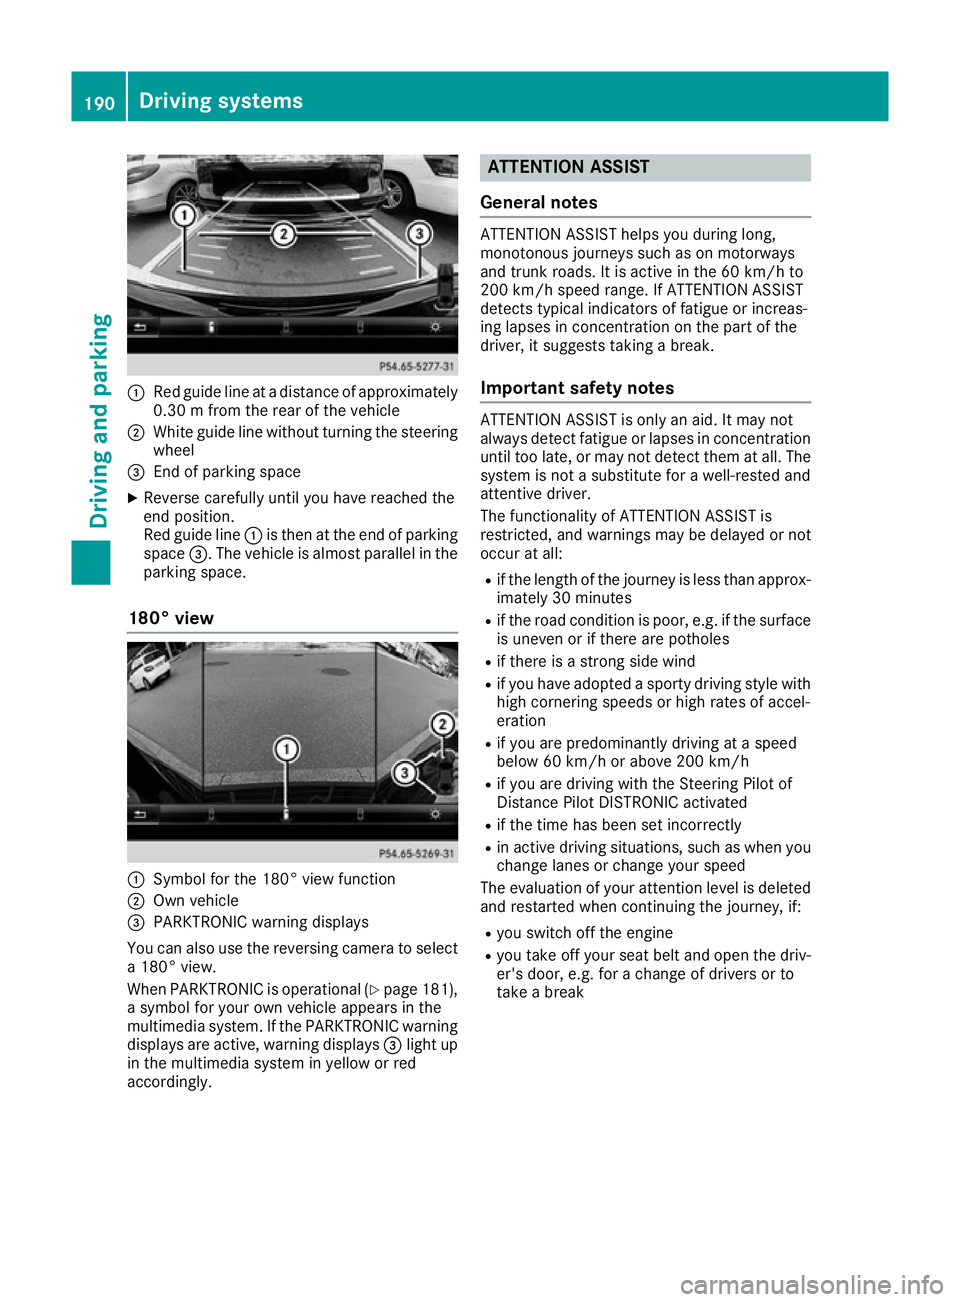
Red guide line at a distance of approximately
0.30 m from the rear of the vehicle
; White guide line without turning the steering
wheel
= End of parking space
X Reverse carefully until you have reached the
end position.
Red guide line :is then at the end of parking
space =. The vehicle is almost parallel in the
parking space.
180° view :
Symbol for the 180° view function
; Own vehicle
= PARKTRONIC warning displays
You can also use the reversing camera to select
a 180° view.
When PARKTRONIC is operational (Y page 181),
a symbol for your own vehicle appears in the
multimedia system. If the PARKTRONIC warning displays are active, warning displays =light up
in the multimedia system in yellow or red
accordingly. ATTENTION ASSIST
General notes ATTENTION ASSIST helps you during long,
monotonous journeys such as on motorways
and trunk roads. It is active in the 60 km/h to
200 km/h speed range. If ATTENTION ASSIST
detects typical indicators of fatigue or increas-
ing lapses in concentration on the part of the
driver, it suggests taking a break.
Important safety notes ATTENTION ASSIST is only an aid. It may not
always detect fatigue or lapses in concentration
until too late, or may not detect them at all. The system is not a substitute for a well-rested and
attentive driver.
The functionality of ATTENTION ASSIST is
restricted, and warnings may be delayed or not
occur at all:
R if the length of the journey is less than approx-
imately 30 minutes
R if the road condition is poor, e.g. if the surface
is uneven or if there are potholes
R if there is a strong side wind
R if you have adopted a sporty driving style with
high cornering speeds or high rates of accel-
eration
R if you are predominantly driving at a speed
below 60 km/h or above 200 km/h
R if you are driving with the Steering Pilot of
Distance Pilot DISTRONIC activated
R if the time has been set incorrectly
R in active driving situations, such as when you
change lanes or change your speed
The evaluation of your attention level is deleted and restarted when continuing the journey, if:
R you switch off the engine
R you take off your seat belt and open the driv-
er's door, e.g. for a change of drivers or to
take a break 190
Driving systemsDriving and pa
rking
Page 194 of 333
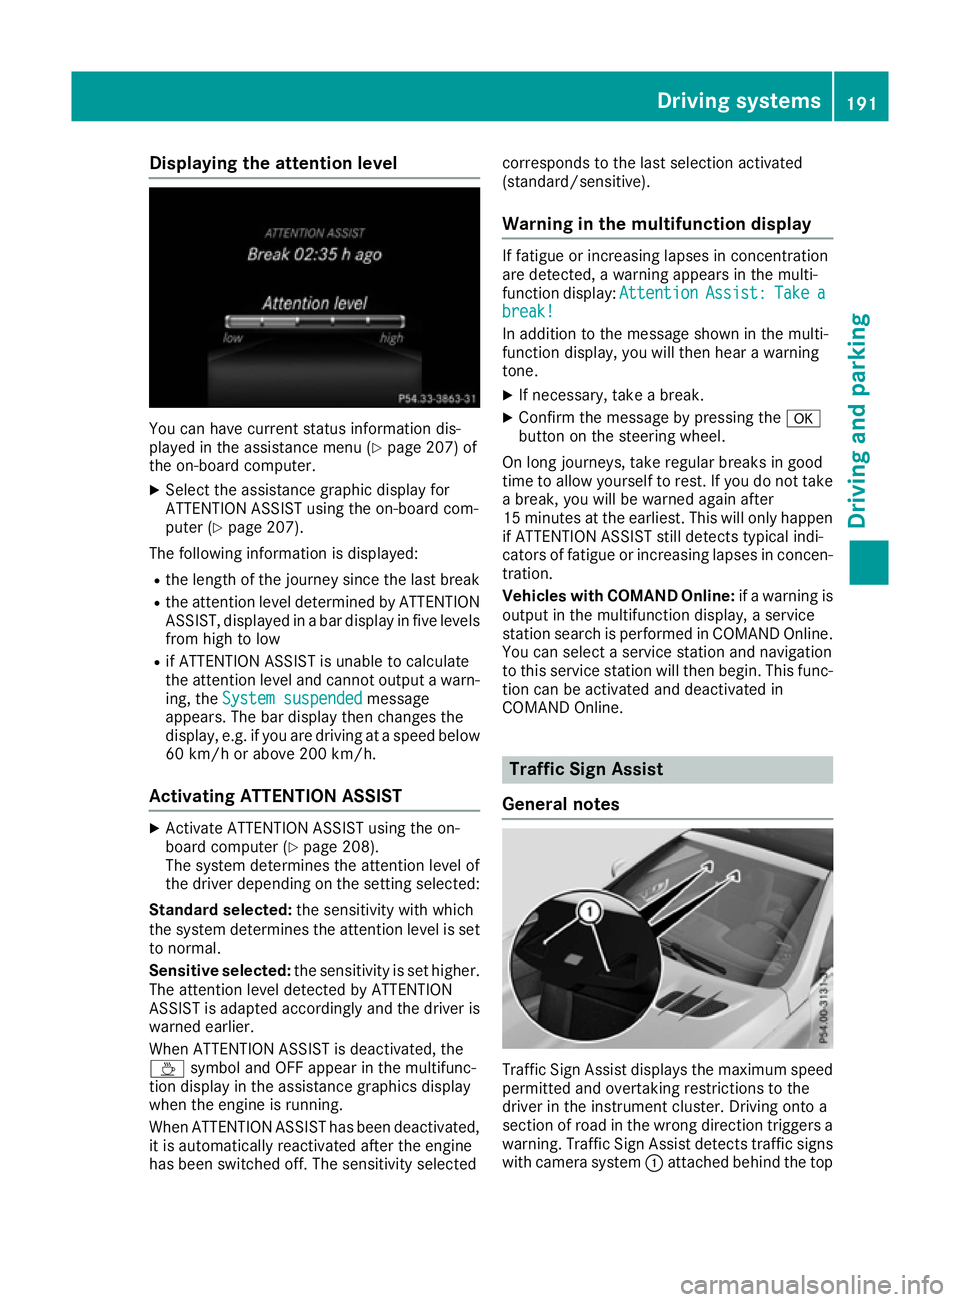
Displaying the attention level
You can have current status information dis-
played in the assistance menu (Y
page 207) of
the on-board computer.
X Select the assistance graphic display for
ATTENTION ASSIST using the on-board com-
puter (Y page 207).
The following information is displayed:
R the length of the journey since the last break
R the attention level determined by ATTENTION
ASSIST, displayed in a bar display in five levels from high to low
R if ATTENTION ASSIST is unable to calculate
the attention level and cannot output a warn-
ing, the System suspended
System suspended message
appears. The bar display then changes the
display, e.g. if you are driving at a speed below
60 km/h or above 200 km/h.
Activating ATTENTION ASSIST X
Activate ATTENTION ASSIST using the on-
board computer (Y page 208).
The system determines the attention level of
the driver depending on the setting selected:
Standard selected: the sensitivity with which
the system determines the attention level is set
to normal.
Sensitive selected: the sensitivity is set higher.
The attention level detected by ATTENTION
ASSIST is adapted accordingly and the driver is
warned earlier.
When ATTENTION ASSIST is deactivated, the
À symbol and OFF appear in the multifunc-
tion display in the assistance graphics display
when the engine is running.
When ATTENTION ASSIST has been deactivated, it is automatically reactivated after the engine
has been switched off. The sensitivity selected corresponds to the last selection activated
(standard/sensitive).
Warning in the multifunction display If fatigue or increasing lapses in concentration
are detected, a warning appears in the multi-
function display:
Attention AttentionAssist:
Assist:Take
Takea
a
break!
break!
In addition to the message shown in the multi-
function display, you will then hear a warning
tone.
X If necessary, take a break.
X Confirm the message by pressing the a
button on the steering wheel.
On long journeys, take regular breaks in good
time to allow yourself to rest. If you do not take a break, you will be warned again after
15 minutes at the earliest. This will only happen
if ATTENTION ASSIST still detects typical indi-
cators of fatigue or increasing lapses in concen- tration.
Vehicles with COMAND Online: if a warning is
output in the multifunction display, a service
station search is performed in COMAND Online. You can select a service station and navigation
to this service station will then begin. This func-
tion can be activated and deactivated in
COMAND Online. Traffic Sign Assist
General notes Traffic Sign Assist displays the maximum speed
permitted and overtaking restrictions to the
driver in the instrument cluster. Driving onto a
section of road in the wrong direction triggers a
warning. Traffic Sign Assist detects traffic signs with camera system :attached behind the top Driving syste
ms
191Driving an d parking Z
Page 202 of 333
Important safety notes
G
WARNING
Operating the integrated information systems and communications equipment in the vehicle
while driving will distract you from traffic con-
ditions. You could then lose control of the
vehicle. There is a risk of an accident.
Only operate these devices if road traffic con-
ditions permit. If you are unsure about the
surrounding conditions, pull over to a safe
location and make entries only while the vehi-
cle is stationary.
You must observe the legal requirements for the country in which you are currently driving whenoperating the on-board computer. G
WARNING
If the instrument cluster has failed or mal-
functioned, you may not recognise function
restrictions relevant to safety. The operating
safety of your vehicle may be impaired. There is a risk of an accident.
Drive on carefully. Have the vehicle checked
at a qualified specialist workshop immedi-
ately.
The on-board computer only shows messages or warnings from certain systems in the multifunc-tion display. You should therefore make sure
your vehicle is operating safely at all times.
If the operating safety of your vehicle is
impaired, park the vehicle safely as soon as pos- sible. Contact a qualified specialist workshop.
For an overview, see the instrument cluster illus-
tration (Y page 32). Displays and operation
Instrument cluster lighting
The lighting in the instrument cluster, in the dis- plays and the controls in the vehicle interior can
be adjusted using the brightness control knob.
The brightness control knob is located on the
bottom left of the instrument cluster
(Y page 32). X
Turn the brightness control knob clockwise or
anti-clockwise.
If you turn the light switch (Y page 113) to the
Ã, TorL position, the brightness
will depend upon the brightness of the ambi-
ent light.
The light sensor in the instrument cluster
automatically controls the brightness of the
multifunction display. In daylight, the displays in the instrument cluster are not illuminated. Speedometer with segments
The segments in the speedometer indicate
which speed range is available.
R Cruise control activated (Y page 159):
The segments light up from the stored speed to the maximum speed.
R Variable speed limiter is activated
(Y page 170):
The segments light up from the start of the
scale to the selected limit speed.
R Distance Pilot DISTRONIC is activated
(Y page 161):
One or two segments in the set speed range
light up.
R Distance Pilot DISTRONIC detects a vehicle in
front moving more slowly than the stored
speed:
The segments between the speed of the vehi-
cle in front and the stored speed light up. Rev counter
! Do not drive in the overrevving range. Doing
so will damage the engine.
The red band in the rev counter indicates the
engine's overrevving range.
The fuel supply is interrupted to protect the
engine when the red band is reached. Outside temperature display
You should pay special attention to road condi-
tions when temperatures are around freezing
point.
Bear in mind that the outside temperature dis-
play indicates the measured air temperature
and not the road surface temperature. Displays and operation
199On-board computer and displays Z
Page 203 of 333
The outside temperature display is in the multi-
function display (Y page 201).
A change in the outside temperature is shown in
the multifunction display after a delay. Coolant temperature gauge
G
WARNING
If you open the bonnet while the engine is
overheating or while there is a fire in the
engine compartment, you could come into
contact with hot gases or other leaking ser-
vice products. There is a danger of injury.
Allow an overheating engine to cool down
before opening the bonnet. If there is a fire in the engine compartment, leave the bonnet
closed and notify the fire brigade.
The coolant temperature gauge is in the instru-
ment cluster on the right-hand side (Y page 32).
Under normal operating conditions and at the
correct coolant level, the coolant temperature
may rise to 120 †.
At high outside temperatures and when driving
uphill, the coolant temperature may rise to the
end of the scale. Operating the on-board computer
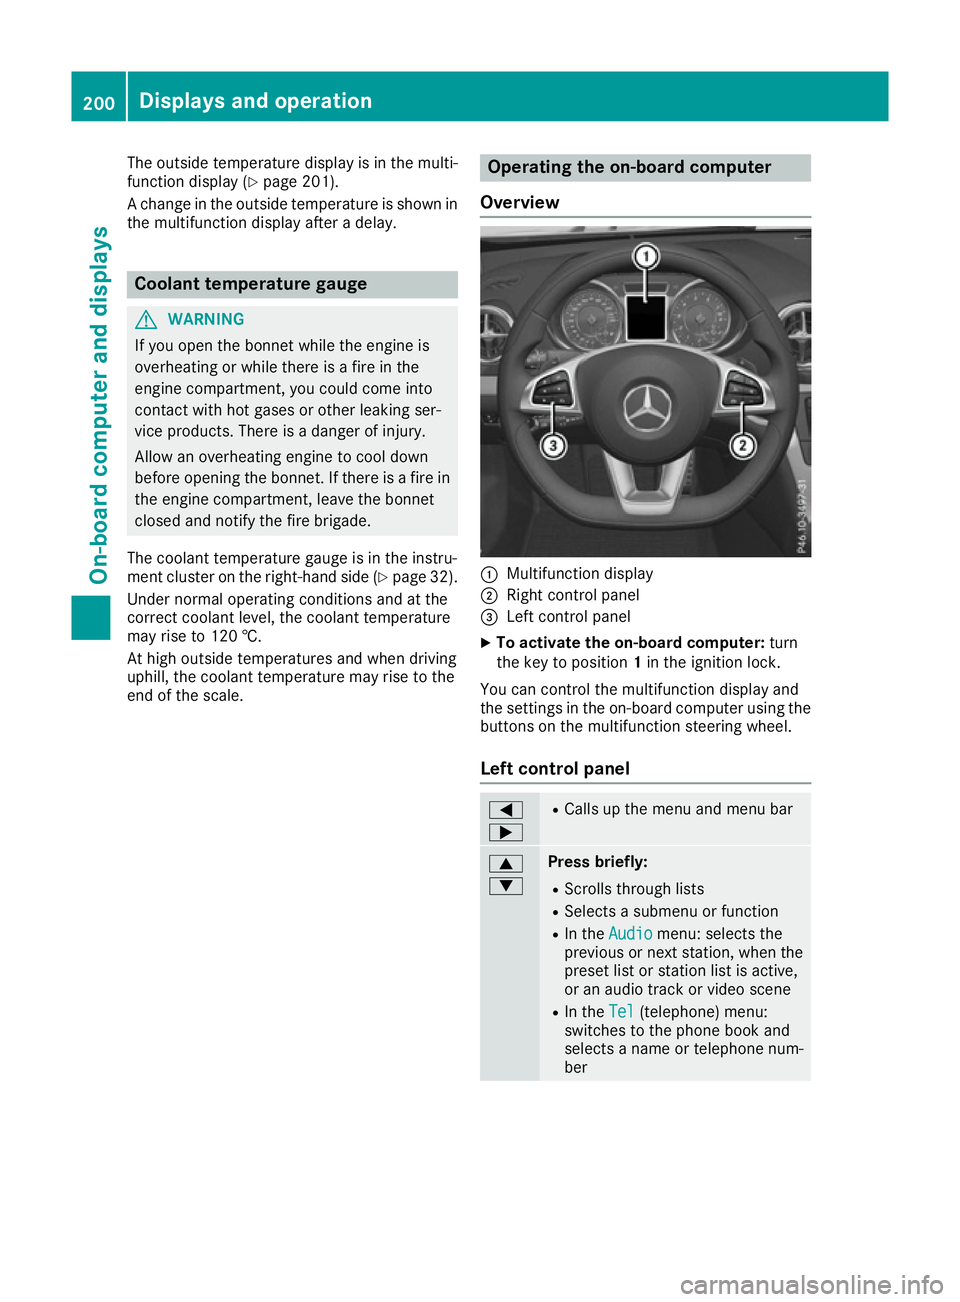
Overview :
Multifunction display
; Right control panel
= Left control panel
X To activate the on-board computer: turn
the key to position 1in the ignition lock.
You can control the multifunction display and
the settings in the on-board computer using the buttons on the multifunction steering wheel.
Left control panel =
; R
Calls up the menu and menu bar 9
: Press briefly:
R Scrolls through lists
R Selects a submenu or function
R In the Audio Audio menu: selects the
previous or next station, when the preset list or station list is active,
or an audio track or video scene
R In the Tel Tel(telephone) menu:
switches to the phone book and
selects a name or telephone num-
ber 200
Displays and operationOn-board computer and displays
Page 206 of 333
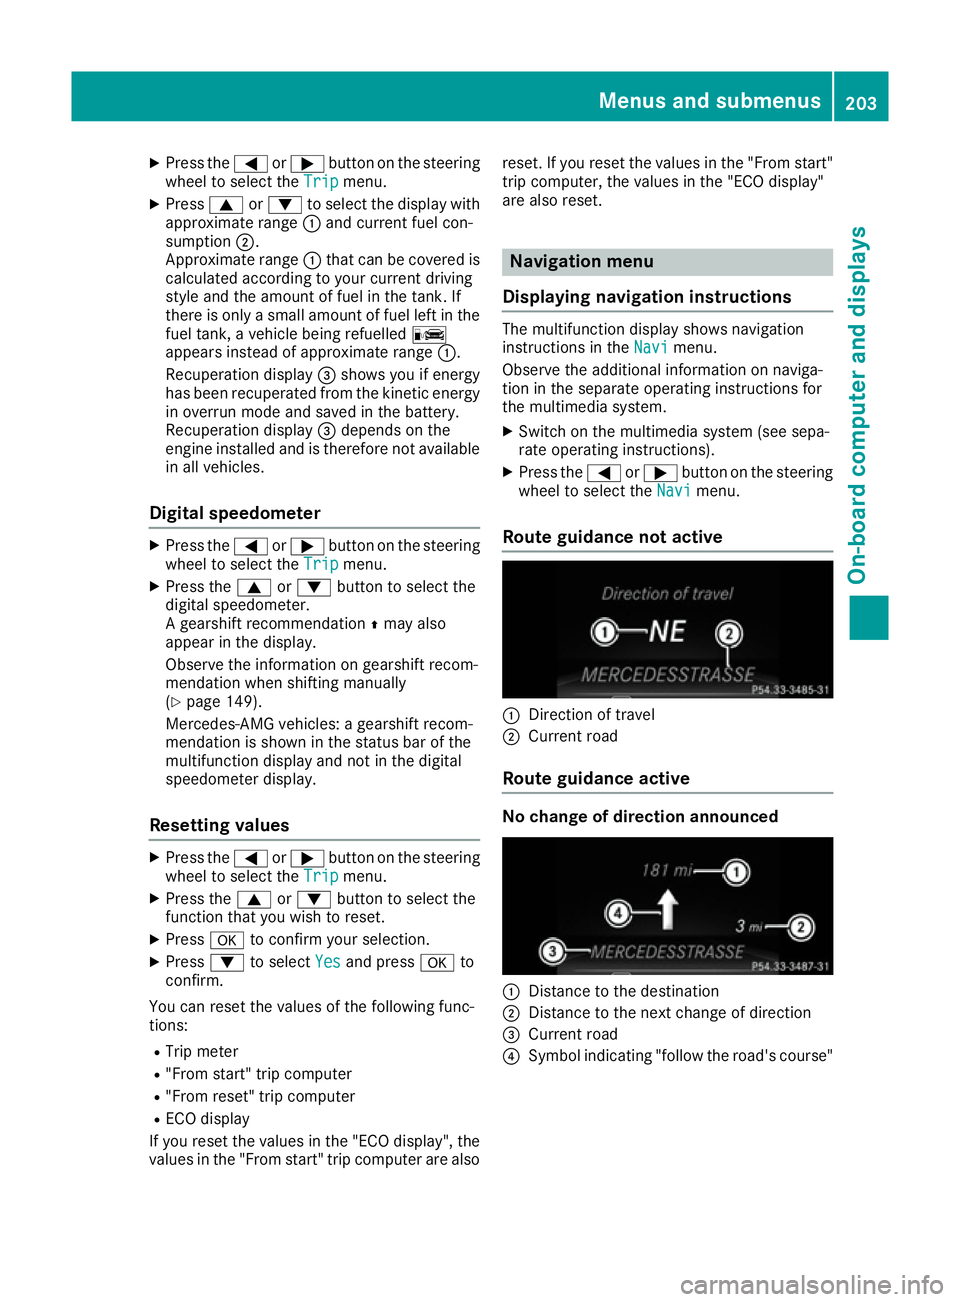
X
Press the =or; button on the steering
wheel to select the Trip
Trip menu.
X Press 9or: to select the display with
approximate range :and current fuel con-
sumption ;.
Approximate range :that can be covered is
calculated according to your current driving
style and the amount of fuel in the tank. If
there is only a small amount of fuel left in the
fuel tank, a vehicle being refuelled C
appears instead of approximate range :.
Recuperation display =shows you if energy
has been recuperated from the kinetic energy in overrun mode and saved in the battery.
Recuperation display =depends on the
engine installed and is therefore not available in all vehicles.
Digital speedometer X
Press the =or; button on the steering
wheel to select the Trip
Trip menu.
X Press the 9or: button to select the
digital speedometer.
A gearshift recommendation Zmay also
appear in the display.
Observe the information on gearshift recom-
mendation when shifting manually
(Y page 149).
Mercedes-AMG vehicles: a gearshift recom-
mendation is shown in the status bar of the
multifunction display and not in the digital
speedometer display.
Resetting values X
Press the =or; button on the steering
wheel to select the Trip
Trip menu.
X Press the 9or: button to select the
function that you wish to reset.
X Press ato confirm your selection.
X Press :to select Yes
Yes and press ato
confirm.
You can reset the values of the following func-
tions: R Trip meter
R "From start" trip computer
R "From reset" trip computer
R ECO display
If you reset the values in the "ECO display", the
values in the "From start" trip computer are also reset. If you reset the values in the "From start"
trip computer, the values in the "ECO display"
are also reset. Navigation menu
Displaying navigation instructions The multifunction display shows navigation
instructions in the
Navi Navimenu.
Observe the additional information on naviga-
tion in the separate operating instructions for
the multimedia system.
X Switch on the multimedia system (see sepa-
rate operating instructions).
X Press the =or; button on the steering
wheel to select the Navi
Navi menu.
Route guidance not active :
Direction of travel
; Current road
Route guidance active No change of direction announced
:
Distance to the destination
; Distance to the next change of direction
= Current road
? Symbol indicating "follow the road's course" Menus and submenus
203On-board computer and displays Z
Page 212 of 333
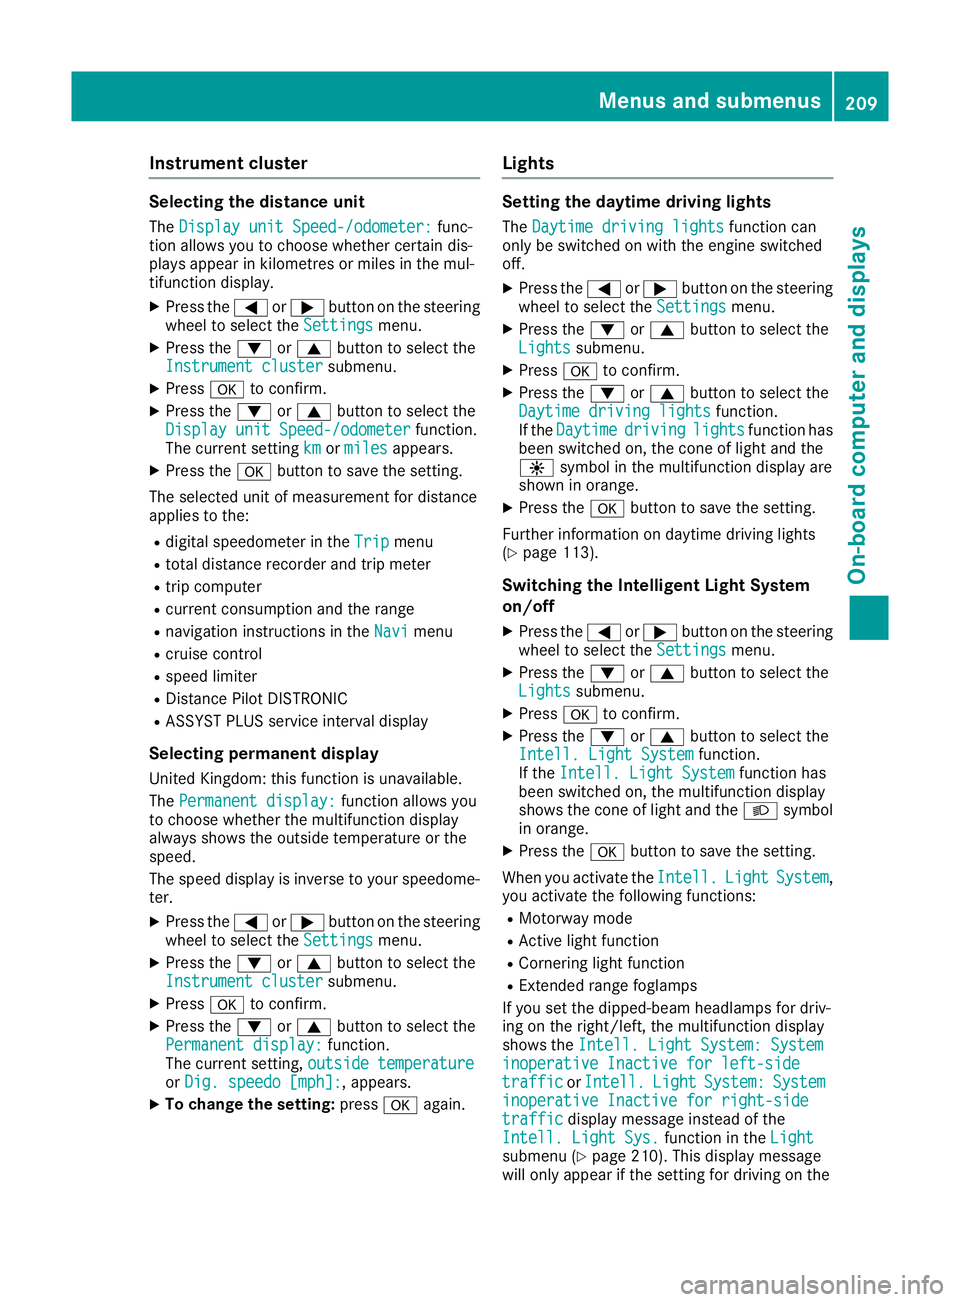
Instrument cluster
Selecting the distance unit
The Display unit Speed-/odometer:
Display unit Speed-/odometer: func-
tion allows you to choose whether certain dis-
plays appear in kilometres or miles in the mul-
tifunction display.
X Press the =or; button on the steering
wheel to select the Settings Settingsmenu.
X Press the :or9 button to select the
Instrument cluster
Instrument cluster submenu.
X Press ato confirm.
X Press the :or9 button to select the
Display unit Speed-/odometer
Display unit Speed-/odometer function.
The current setting km
km ormiles
miles appears.
X Press the abutton to save the setting.
The selected unit of measurement for distance
applies to the: R digital speedometer in the Trip Tripmenu
R total distance recorder and trip meter
R trip computer
R current consumption and the range
R navigation instructions in the Navi
Navimenu
R cruise control
R speed limiter
R Distance Pilot DISTRONIC
R ASSYST PLUS service interval display
Selecting permanent display United Kingdom: this function is unavailable.
The Permanent display:
Permanent display: function allows you
to choose whether the multifunction display
always shows the outside temperature or the
speed.
The speed display is inverse to your speedome-
ter.
X Press the =or; button on the steering
wheel to select the Settings Settingsmenu.
X Press the :or9 button to select the
Instrument cluster
Instrument cluster submenu.
X Press ato confirm.
X Press the :or9 button to select the
Permanent display:
Permanent display: function.
The current setting, outside temperature
outside temperature
or Dig. speedo [mph]:
Dig. speedo [mph]: , appears.
X To change the setting: pressaagain. Lights Setting the daytime driving lights
The Daytime driving lights
Daytime driving lights function can
only be switched on with the engine switched
off.
X Press the =or; button on the steering
wheel to select the Settings Settingsmenu.
X Press the :or9 button to select the
Lights
Lights submenu.
X Press ato confirm.
X Press the :or9 button to select the
Daytime driving lights
Daytime driving lights function.
If the Daytime
Daytime driving
drivinglights
lightsfunction has
been switched on, the cone of light and the
W symbol in the multifunction display are
shown in orange.
X Press the abutton to save the setting.
Further information on daytime driving lights
(Y page 113).
Switching the Intelligent Light System
on/off
X Press the =or; button on the steering
wheel to select the Settings Settingsmenu.
X Press the :or9 button to select the
Lights
Lights submenu.
X Press ato confirm.
X Press the :or9 button to select the
Intell. Light System
Intell. Light System function.
If the Intell. Light System
Intell. Light System function has
been switched on, the multifunction display
shows the cone of light and the Lsymbol
in orange.
X Press the abutton to save the setting.
When you activate the Intell.
Intell. Light LightSystem
System ,
you activate the following functions:
R Motorway mode
R Active light function
R Cornering light function
R Extended range foglamps
If you set the dipped-beam headlamps for driv-
ing on the right/left, the multifunction display
shows the Intell. Light System: System
Intell. Light System: System
inoperative Inactive for left-side inoperative Inactive for left-side
traffic traffic orIntell.
Intell. Light
LightSystem:
System: System
System
inoperative Inactive for right-side
inoperative Inactive for right-side
traffic
traffic display message instead of the
Intell. Light Sys.
Intell. Light Sys. function in theLight
Light
submenu (Y page 210). This display message
will only appear if the setting for driving on the Menus and submenus
209On-board computer and displays Z
Page 213 of 333
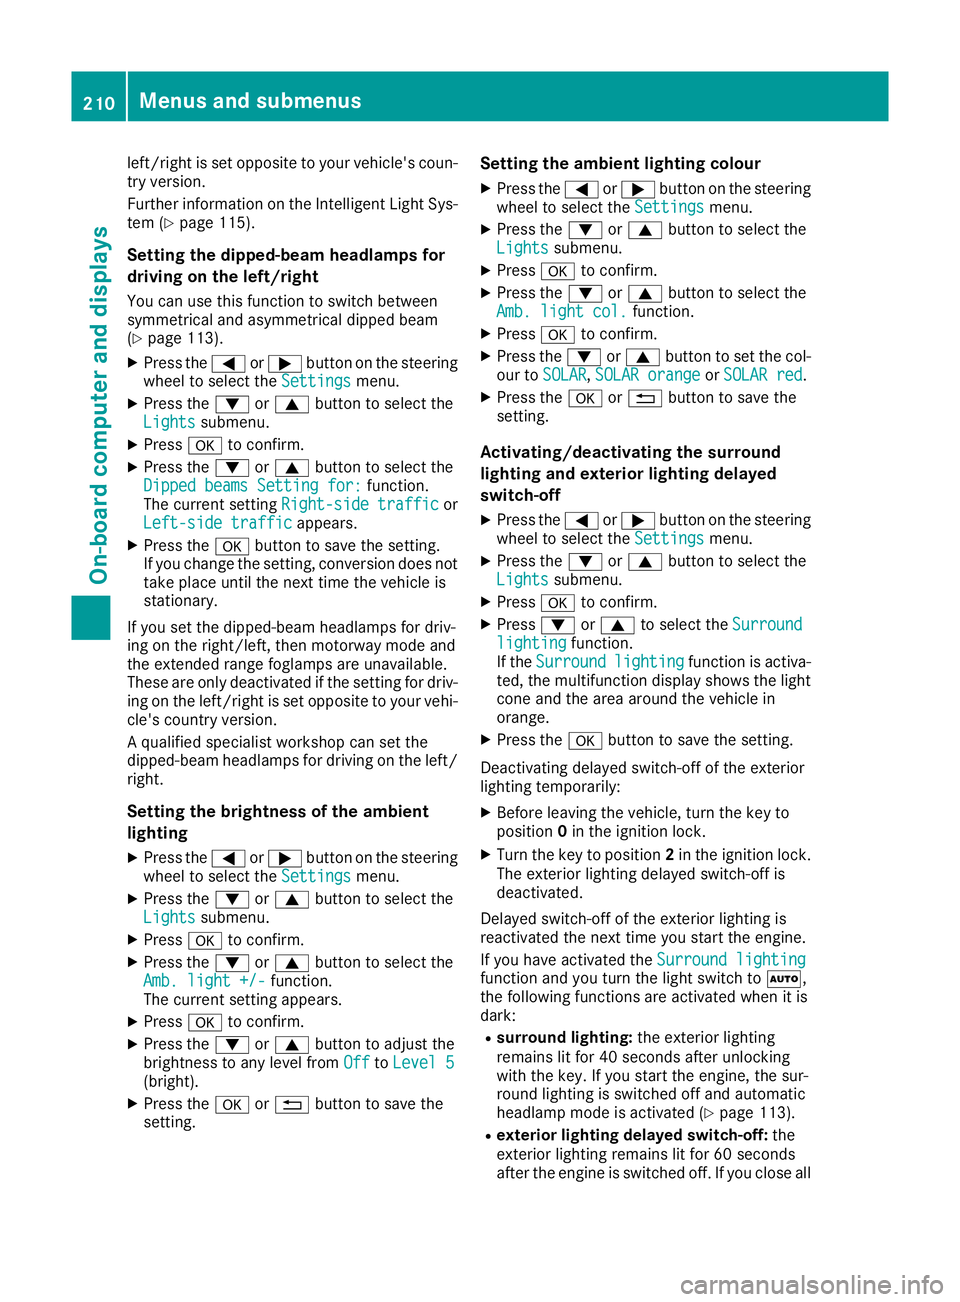
left/right is set opposite to your vehicle's coun-
try version.
Further information on the Intelligent Light Sys-
tem (Y page 115).
Setting the dipped-beam headlamps for
driving on the left/right
You can use this function to switch between
symmetrical and asymmetrical dipped beam
(Y page 113).
X Press the =or; button on the steering
wheel to select the Settings
Settings menu.
X Press the :or9 button to select the
Lights
Lights submenu.
X Press ato confirm.
X Press the :or9 button to select the
Dipped beams Setting for:
Dipped beams Setting for: function.
The current setting Right-side traffic
Right-side traffic or
Left-side traffic Left-side traffic appears.
X Press the abutton to save the setting.
If you change the setting, conversion does not take place until the next time the vehicle is
stationary.
If you set the dipped-beam headlamps for driv-
ing on the right/left, then motorway mode and
the extended range foglamps are unavailable.
These are only deactivated if the setting for driv-
ing on the left/right is set opposite to your vehi-
cle's country version.
A qualified specialist workshop can set the
dipped-beam headlamps for driving on the left/ right.
Setting the brightness of the ambient
lighting
X Press the =or; button on the steering
wheel to select the Settings
Settings menu.
X Press the :or9 button to select the
Lights
Lights submenu.
X Press ato confirm.
X Press the :or9 button to select the
Amb. light +/- Amb. light +/- function.
The current setting appears.
X Press ato confirm.
X Press the :or9 button to adjust the
brightness to any level from Off
OfftoLevel 5
Level 5
(bright).
X Press the aor% button to save the
setting. Setting the ambient lighting colour
X Press the =or; button on the steering
wheel to select the Settings
Settings menu.
X Press the :or9 button to select the
Lights
Lights submenu.
X Press ato confirm.
X Press the :or9 button to select the
Amb. light col.
Amb. light col. function.
X Press ato confirm.
X Press the :or9 button to set the col-
our to SOLAR
SOLAR, SOLAR orange
SOLAR orange orSOLAR red
SOLAR red.
X Press the aor% button to save the
setting.
Activating/deactivating the surround
lighting and exterior lighting delayed
switch-off
X Press the =or; button on the steering
wheel to select the Settings Settingsmenu.
X Press the :or9 button to select the
Lights
Lights submenu.
X Press ato confirm.
X Press :or9 to select the Surround
Surround
lighting
lighting function.
If the Surround
Surround lighting
lightingfunction is activa-
ted, the multifunction display shows the light
cone and the area around the vehicle in
orange.
X Press the abutton to save the setting.
Deactivating delayed switch-off of the exterior
lighting temporarily: X Before leaving the vehicle, turn the key to
position 0in the ignition lock.
X Turn the key to position 2in the ignition lock.
The exterior lighting delayed switch-off is
deactivated.
Delayed switch-off of the exterior lighting is
reactivated the next time you start the engine.
If you have activated the Surround lighting Surround lighting
function and you turn the light switch to Ã,
the following functions are activated when it is
dark:
R surround lighting: the exterior lighting
remains lit for 40 seconds after unlocking
with the key. If you start the engine, the sur-
round lighting is switched off and automatic
headlamp mode is activated (Y page 113).
R exterior lighting delayed switch-off: the
exterior lighting remains lit for 60 seconds
after the engine is switched off. If you close all 210
Menus and submenusOn-board computer and displays
Page 216 of 333
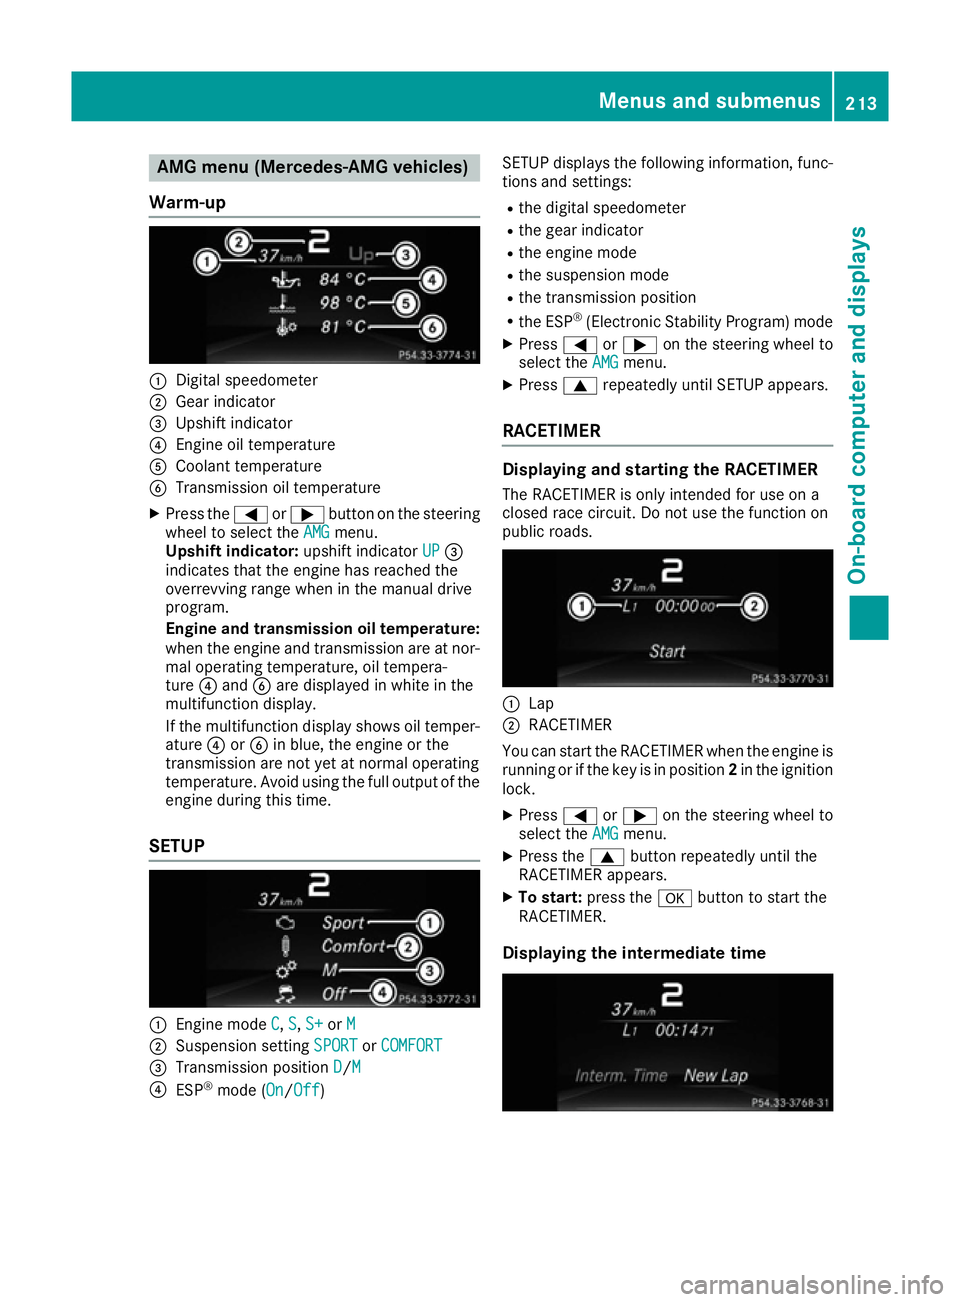
AMG menu (Mercedes-AMG vehicles)
Warm-up :
Digital speedometer
; Gear indicator
= Upshift indicator
? Engine oil temperature
A Coolant temperature
B Transmission oil temperature
X Press the =or; button on the steering
wheel to select the AMG
AMG menu.
Upshift indicator: upshift indicatorUP
UP=
indicates that the engine has reached the
overrevving range when in the manual drive
program.
Engine and transmission oil temperature:
when the engine and transmission are at nor-
mal operating temperature, oil tempera-
ture ?and Bare displayed in white in the
multifunction display.
If the multifunction display shows oil temper- ature ?orB in blue, the engine or the
transmission are not yet at normal operating
temperature. Avoid using the full output of the engine during this time.
SETUP :
Engine mode C C,S
S,S+
S+ orM
M
; Suspension setting SPORT
SPORTorCOMFORT
COMFORT
= Transmission position D
D/ M
M
? ESP ®
mode ( On
On/OffOff) SETUP displays the following information, func-
tions and settings:
R the digital speedometer
R the gear indicator
R the engine mode
R the suspension mode
R the transmission position
R the ESP ®
(Electronic Stability Program) mode
X Press =or; on the steering wheel to
select the AMG
AMG menu.
X Press 9repeatedly until SETUP appears.
RACETIMER Displaying and starting the RACETIMER
The RACETIMER is only intended for use on a
closed race circuit. Do not use the function on
public roads. :
Lap
; RACETIMER
You can start the RACETIMER when the engine is running or if the key is in position 2in the ignition
lock.
X Press =or; on the steering wheel to
select the AMG AMGmenu.
X Press the 9button repeatedly until the
RACETIMER appears.
X To start: press the abutton to start the
RACETIMER.
Displaying the intermediate time Menus and sub
menus
213On-board computer and displays Z