2016 MERCEDES-BENZ S-COUPE spare wheel
[x] Cancel search: spare wheelPage 12 of 410

Checking the oil level using the
dipstick .......................................... 325
Checking the oil level using the
on-board computer ........................ 327
Dis play message ............................ 270
Fill ing capacity .............................. .403
Notes about oil grades ................... 403
Notes on oil level/consumption .... 325
Temperature (on-board computer,
Mercedes-AMG vehicles) ...............2 49
Viscosity ........................................ 403
ESP
®(Electronic Stability Pro-
gram)
AMG menu (on-board computer) ... 250
Characteristics ................................. 73
Deactivating/activating ................... 74
Display message ............................ 252
Function/notes ................................ 73
General notes .................................. 73
Important safety information ........... 73
Warning lamp ................................. 290
ETS/4ETS (Electronic Traction Sys-
tem) ...................................................... 73
Exhaust
see Exhaust pipe
Exhaust check ................................... 174
Exhaust pipe
Cleaning ......................................... 337
Exterior lighting
Cleaning ......................................... 335
see Lights
Exterior mirrors
Adjusting ....................................... 118
Dipping (automatic) ....................... 119
Folding in/out (automatically) ....... 118
Folding in/out (electrically) ........... 118
Out of position (troubleshooting) ... 119
Setting ........................................... 118
Storing settings (memory func-
tion) ............................................... 121
Storing the parking position .......... 119
Eyeglasses compartment ................. 301
F
Features............................................. 304
Filler cap
see Refueling Filling capacities (Technical data)
... 400
Flat tire
Changing a wheel/mounting the
spare wheel ................................... 383
MOExtended tires .......................... 343
Preparing the vehicle ..................... 342
TIREFIT kit ...................................... 344
Floormats ........................................... 320
Frequencies
Mobile phone ................................. 398
Two-way radio ................................ 398
Front-passenger seat
Adjusting from the driver's seat ..... 108
Fuel
Additives ........................................ 402
Consumption statistics .................. 236
Displaying the current consump-
tion ................................................ 235
Displaying the range ...................... 235
Driving tips .................................... 174
Fuel gauge ....................................... 33
Grade (gasoline) ............................ 401
Important safety notes .................. 401
Notes for Mercedes‑AMG vehi-
cles ................................................ 402
Problem (malfunction) ................... 170
Refueling ........................................ 167
Tank content/reserve fuel ............. 401
Fuel level
Calling up the range (on-board
computer) ...................................... 235
Fuel tank
Capacity ........................................ 401
Problem (malfunction) ................... 170
Fuses
Allocation chart ............................. 358
Before changing ............................. 357
Dashboard fuse box ....................... 357
Engine emergency stop ................. 359
Fuse box in the engine compart-
ment .............................................. 358
Fuse box in the front-passenger
footwell .......................................... 357
Fuse box in the trunk ..................... 358
Important safety notes .................. 356
10Index
Page 364 of 410

Useful information
i
This Operator's Manual describes all
models and all standard and optional equip-
ment of your vehicle available at the time of
publication of the Operator's Manual.
Country-specific differences are possible.
Please note that your vehicle may not be
equipped with all features described. This
also applies to safety-related systems and
functions.
iRead the information on qualified special-
ist workshops (
Ypage 26).
Important safety notes
GWARNING
If wheels and tires of the wrong size are used, the wheel brakes or suspension components
may be damaged. There is a risk of an acci-
dent.
Always replace wheels and tires with those
that fulfill the specifications of the original
part.
When replacing wheels, make sure to use the
correct:
Rdesignation
Rmodel
When replacing tires, make sure to use the
correct:
Rdesignation
Rmanufacturer
Rmodel
GWARNING
A flat tire severely impairs the driving, steer-
ing and braking characteristics of the vehicle.
There is a risk of accident.
Tires without run-flat characteristics:
Rdo not drive with a flat tire.
Rimmediately replace the flat tire with your
emergency spare wheel or spare wheel, or
consult a qualified specialist workshop.
Tires with run-flat characteristics:
Rpay attention to the information and warn-
ing notices on MOExtended tires (tires with
run-flat characteristics).
Accessories that are not approved for your
vehicle by Mercedes-Benz or are not being
used correctly can impair the operating
safety.
Before purchasing and using non-approved
accessories, visit a qualified specialist work-
shop and inquire about:
Rsuitability
Rlegal stipulations
Rfactory recommendations
Information on the sizes and types of wheels
and tires for your vehicle can be found under "Wheel/tire combinations" (
Ypage 388).
Information on tire pressure can be found:
Ron the vehicle's Tire and Loading Informa-
tion placard on the B-pillar (
Ypage 372)
Ron the tire pressure label on the fuel filler
flap (
Ypage 168)
Runder "Tire pressure" (Ypage 365)
Operation
Information on driving
Check the tire pressure when the vehicle is
heavily laden and adjust prior to a trip.
While driving, pay attention to vibrations,
noises and unusual handling characteristics,
e.g. pulling to one side. This may indicate that
the wheels or tires are damaged. If you sus-
pect that a tire is defective, reduce your
speed immediately. Stop the vehicle as soon
as possible to check the wheels and tires for
damage. Hidden tire damage could also be
causing the unusual handling characteristics.
If you find no signs of damage, have the tires and wheels checked at a qualified specialist
workshop.
When parking your vehicle, make sure that
the tires do not get deformed by the curb or
362Operation
Wheels and tires
Page 367 of 410

ditions. Only these tires will allow driving
safety systems such as ABS and ESP®to
function optimally in winter. These tires have been developed specifically for driving in
snow.
Use M+S tires of the same make and tread on
all wheels to maintain safe handling charac-
teristics.
Always observe the maximum permissible
speed specified for the M+S tires you have
mounted.
When you have mounted M+S tires:
XCheck the tire pressures (Ypage 368).
XRestart the tire pressure monitor
(
Ypage 371).
Snow chains
GWARNING
If snow chains are installed to the front
wheels, they may drag against the vehicle
body or chassis components. This could
cause damage to the vehicle or the tires.
There is a risk of an accident.
To avoid hazardous situations:
Rnever install snow chains to the front
wheels
Ralways install snow chains in pairs to the
rear wheels.
For safety reasons, Mercedes-Benz recom-
mends that you only use snow chains that
have been specially approved for your vehicle
by Mercedes-Benz, or are of a corresponding
standard of quality.
If you intend to mount snow chains, please
bear the following points in mind:
RSnow chains may not be mounted on all
wheel/tire combinations. Permissible
wheel-tire combinations (
Ypage 388).
ROnly use snow chains when driving on
roads completely covered by snow.
Remove the snow chains as soon as possi- ble when you come to a road that is not
snow-covered.
RLocal regulations may restrict the use of
snow chains. Observe the appropriate reg-
ulations if you wish to mount snow chains.
RDo not exceed the maximum permissible
speed of 30 mph (50 km/h).
ROn vehicles with AIRMATIC (Ypage 197) or
Active Body Control (ABC) (
Ypage 194),
you must drive at raised vehicle level if
snow chains have been installed.
RWhen snow chains are installed, never use Active Parking Assist (
Ypage 202).
You may wish to deactivate ESP
®(Ypage 74)
when pulling away with snow chains installed.
You can thereby allow the wheels to spin in a
controlled manner, achieving an increased
driving force (cutting action).
Tire pressure
Tire pressure specifications
Important safety notes
GWARNING
Underinflated or overinflated tires pose the
following risks:
Rthe tires may burst, especially as the load
and vehicle speed increase.
Rthe tires may wear excessively and/or
unevenly, which may greatly impair tire
traction.
Rthe driving characteristics, as well as steer-
ing and braking, may be greatly impaired.
There is a risk of an accident.
Follow recommended tire inflation pressures
and check the pressure of all the tires includ-
ing the spare wheel:
Rmonthly, at least
Rif the load changes
Rbefore beginning a long journey
Runder different operating conditions, e.g.
off-road driving
Tire pressure365
Wheels and tires
Z
Page 370 of 410

Underinflated or overinflated tires
Underinflated tires
GWARNING
Tires with pressure that is too low can over-
heat and burst as a consequence. In addition, they also suffer from excessive and/or irreg-
ular wear, which can severely impair the brak-
ing properties and the driving characteristics.
There is a risk of an accident.
Avoid tire pressures that are too low in all the
tires, including the spare wheel.
Underinflated tires may:
Roverheat, leading to tire defects
Radversely affect handling
Rwear excessively and/or unevenly
Rhave an adverse effect on fuel consumption
Overinflated tires
GWARNING
Tires with excessively high pressure can burst
because they are damaged more easily by
road debris, potholes etc. In addition, they
also suffer from irregular wear, which can
severely impair the braking properties and the driving characteristics. There is a risk of an
accident.
Avoid tire pressures that are too high in all the
tires, including the spare wheel.
Overinflated tires may:
Rincrease the braking distance
Radversely affect handling
Rwear excessively and/or unevenly
Rhave an adverse effect on ride comfort
Rbe more susceptible to damage
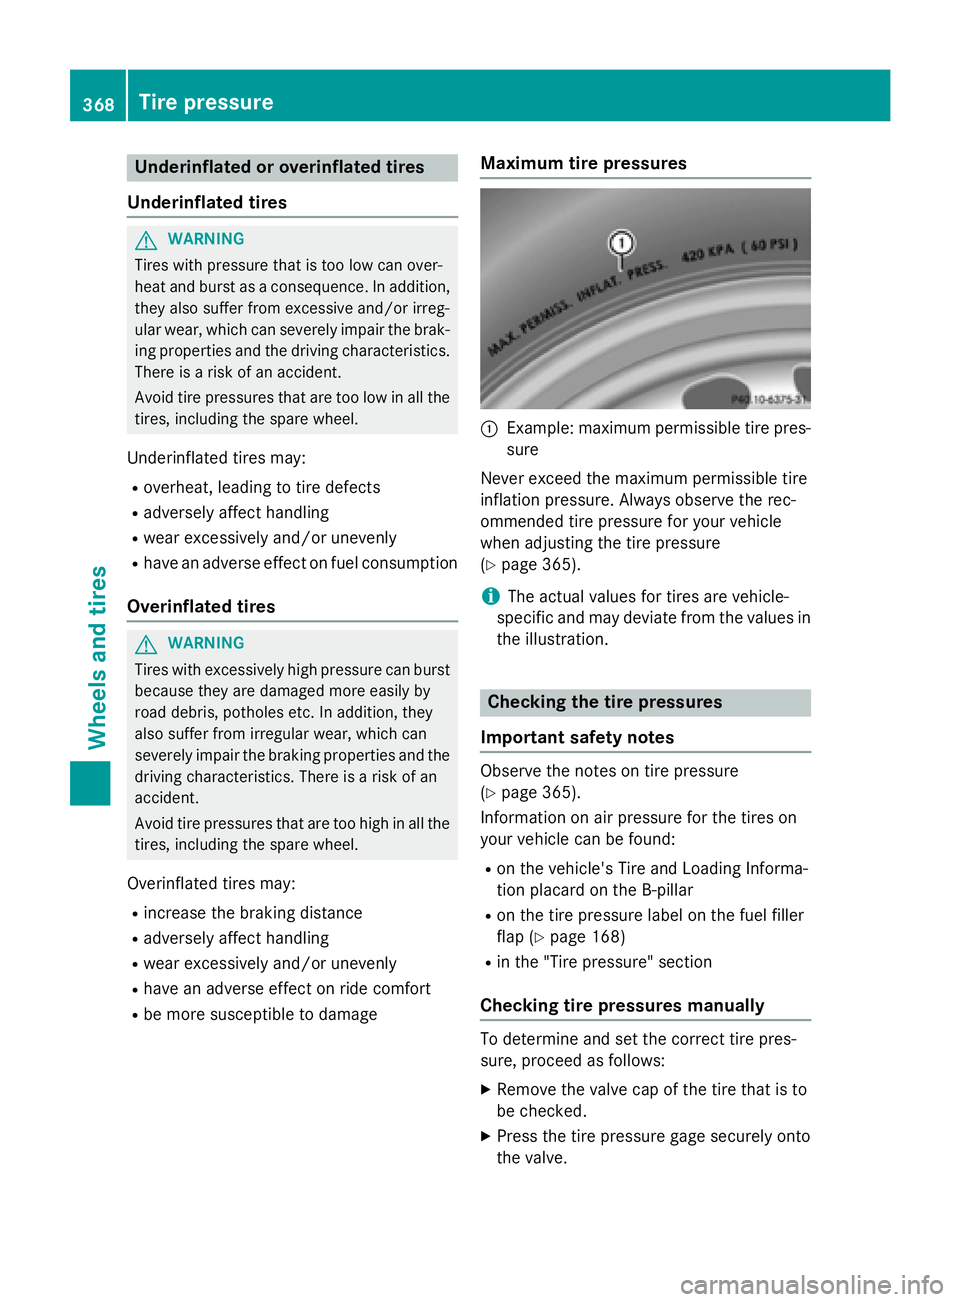
Maximum tire pressures
:Example: maximum permissible tire pres-
sure
Never exceed the maximum permissible tire
inflation pressure. Always observe the rec-
ommended tire pressure for your vehicle
when adjusting the tire pressure
(
Ypage 365).
iThe actual values for tires are vehicle-
specific and may deviate from the values in
the illustration.
Checking the tire pressures
Important safety notes
Observe the notes on tire pressure
(
Ypage 365).
Information on air pressure for the tires on
your vehicle can be found:
Ron the vehicle's Tire and Loading Informa-
tion placard on the B-pillar
Ron the tire pressure label on the fuel filler
flap (
Ypage 168)
Rin the "Tire pressure" section
Checking tire pressures manually
To determine and set the correct tire pres-
sure, proceed as follows:
XRemove the valve cap of the tire that is to
be checked.
XPress the tire pressure gage securely onto
the valve.
368Tire pressure
Wheels and tires
Page 383 of 410

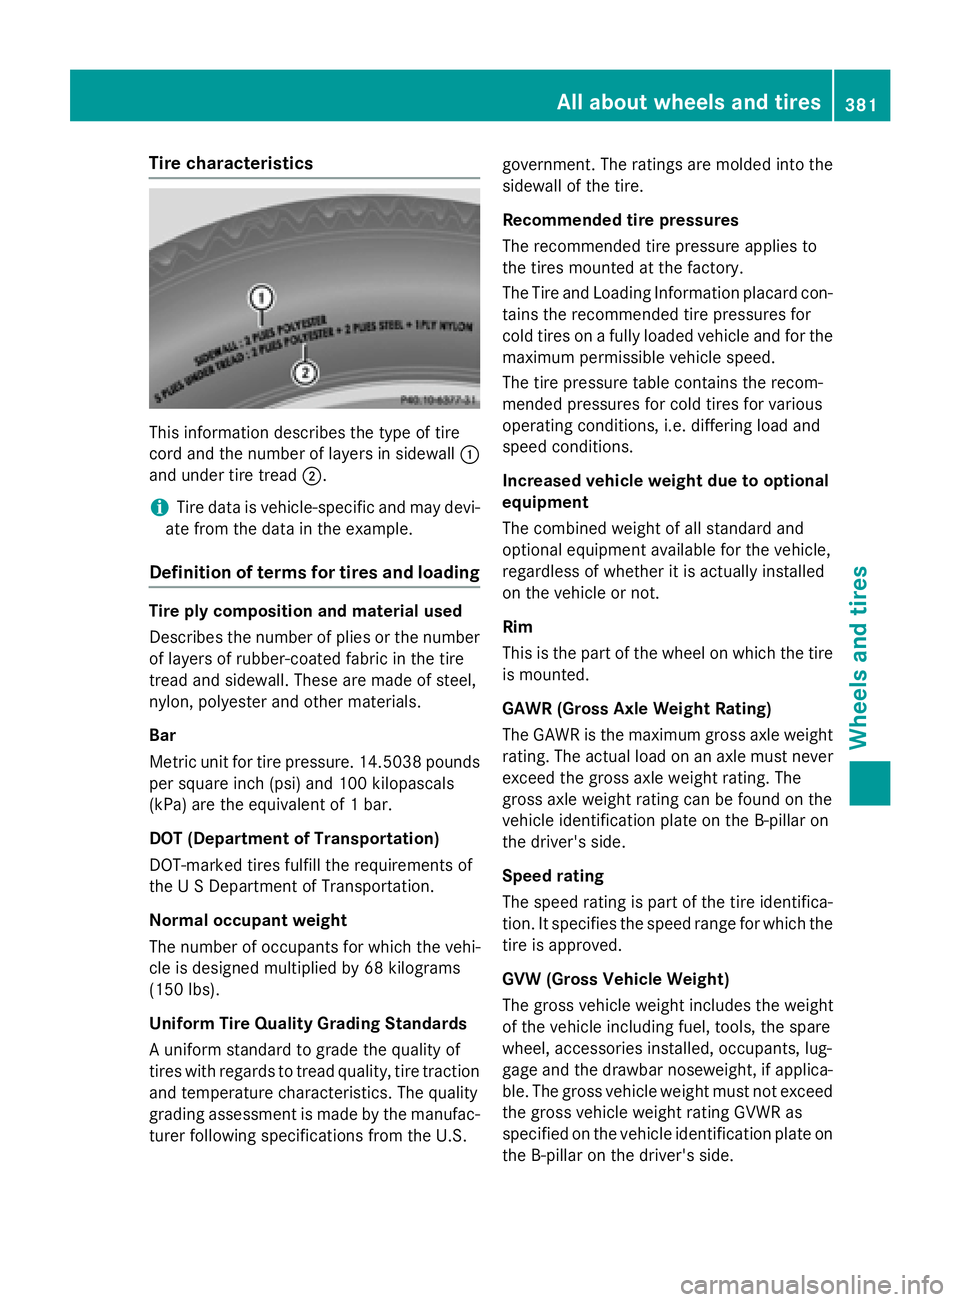
Tire characteristics
This information describes the type of tire
cord and the number of layers in sidewall:
and under tire tread ;.
iTire data is vehicle-specific and may devi-
ate from the data in the example.
Definition of terms for tires and loading
Tire ply composition and material used
Describes the number of plies or the number
of layers of rubber-coated fabric in the tire
tread and sidewall. These are made of steel,
nylon, polyester and other materials.
Bar
Metric unit for tire pressure. 14.5038 pounds
per square inch (psi) and 100 kilopascals
(kPa) are the equivalent of 1 bar.
DOT (Department of Transportation)
DOT-marked tires fulfill the requirements of
the U S Department of Transportation.
Normal occupant weight
The number of occupants for which the vehi-
cle is designed multiplied by 68 kilograms
(150 lb s).
Unifor m Tire Quality Grading Standards
A uniform standard to grade the quality of
tires with regards to tread quality, tire traction
and temperature characteristics. The quality
grading assessment is made by the manufac-
turer following specifications from the U.S. government. The ratings are molded into the
sidewall of the tire.
Recommended tire pressures
The recommended tire pressure applies to
the tires mounted at the factory.
The Tire and Loading Information placard con-
tains the recommended tire pressures for
cold tires on a fully loaded vehicle and for the
maximum permissibl
e ve
hicle speed.
The tire pressure table contains the recom-
mended pressures for cold tires for various
operating conditions, i.e. differing load and
speed conditions.
Increased vehicle weight due to optional
equipment
The combined weight of all standard and
optional equipment available for the vehicle,
regardless of whether it is actually installed
on the vehicle or not.
Rim
This is the part of the wheel on which the tire
is mounted.
GAWR (Gross Axle Weight Rating)
The GAWR is the maximum gross axle weight
rating. The actual load on an axle must never
exceed the gross axle weight rating. The
gross axle weight rating can be found on the
vehicle identification plate on the B-pillar on
the driver's side.
Speed rating
The speed rating is part of the tire identifica-
tion. It specifies the speed range for which the tire is approved.
GVW (Gross Vehicle Weight)
The gross vehicle weight includes the weight
of the vehicle including fuel, tools, the spare
wheel, accessories installed, occupants, lug-
gage and the drawbar noseweight, if applica-
ble. The gross vehicle weight must not exceed
the gross vehi
cle weight rating GVWR as
specified on the vehicle identification plate on the B-pillar on the driver's side.
All about wheels an d tires381
Wheels and tires
Z