2016 MERCEDES-BENZ S-COUPE fuel type
[x] Cancel search: fuel typePage 20 of 410

Button overview ............................... 35
Buttons (on-board computer) ......... 231
Cleaning .........................................338
EASY ENTRY/EXIT feature ............. 116
Important safety notes .................. 114
Paddle shifters ............................... 163
Steering wheel heating .................. 115
Storing settings (memory func-
tion) ............................................... 121
Steering wheel heating
Problem (malfunction) ................... 116
Switching on/off ........................... 115
Steering wheel paddle shifters ........163
Stop&Go Pilot
see DISTRONIC PLUS
Stowage areas ................................... 300
Stowage compartments
Armrest (under) .............................3 02
Center console .............................. 301
Center console in rear compart-
ment .............................................. 302
Cup holders ................................... 304
Door ............................................... 302
Eyeglasses compartment ...............3 01
Glove box ....................................... 301
Important safety information ......... 300
Rear ............................................... 302
Rear seat backrest ......................... 302
Stowage net ................................... 303
see Stowage areas
Stowage net ....................................... 303
Stowage space
Parcel net retainers ....................... 303
Securing a load .............................. 303
Stowage well beneath the trunk
floor .................................................... 303
Summer tires
In winter ........................................ 364
Sun visor ............................................ 305
Suspension tuning
Active Body Control ABC ...............1 95
AIRMATIC ...................................... 198
SETUP (on-board computer) .......... 250
Switching air-recirculation mode
on/off ................................................. 143T
Tachometer ........................................ 230
Tail lamps
Display message ............................ 266
see Lights
Tank content
Fuel gauge ....................................... 33
Technical data
Capacities ...................................... 400
Information ....................................3 98
Tires/wheels ................................. 388
Vehicle data ................................... 406
Telephone
Accepting a call (multifunction
steering wheel) .............................. 242
Display message ............................ 283
Introduction ................................... 241
Menu (on-board computer) ............ 241
Number from the phone book ........2 42
Redialing ........................................ 243
Rejecting/ending a call ................. 242
Temperature
Coolant .......................................... 231
Engine oil (on-board computer,
Mercedes-AMG vehicles) ...............2 49
Outside temperature ......................2 31
Setting (climate control) ................ 140
Transmission oil (on-board com-
puter, Mercedes-AMG vehicles) ..... 249
Tire pressure
Calling up (on-board computer) ..... 369
Checking manually ........................ 368
Display message ............................ 279
Maximum ....................................... 368
Not reached (TIREFIT) .................... 346
Notes ............................................. 367
Reached (TIREFIT) .......................... 346
Recommended ............................... 365
Tire pressure monitor
Checking the tire pressure elec-
tronically ........................................ 370
Function/notes .............................3 69
General notes ................................ 369
Important safety notes .................. 369
Radio type approval for the tire
pressure monitor ........................... 372
Restarting ...................................... 371
18Index
Page 30 of 410
QR codes for the rescue card
The QR codes are secured in the fuel filler flap
and on the opposite side on the B-pillar. In the event of an accident, rescue services can use
the QR code to quickly find the appropriate
rescue card for your vehicle. The current res-
cue card contains the most important infor-
mation about your vehicle in a compact form,
e.g. the routing of the electric cables.
You can find more information under http://
portal.aftersales.i.daimler.com/public/
content/asportal/en/communication/
informationen_fuer/QRCode.html.
Data stored in the vehicle
Data recording
This vehicle is capable of recording diagnostic
information relating to vehicle operation, mal-
functions, and user settings. This may include information about the performance or status
of various systems, including but not limited
to, engine, throttle, steering or brake sys-
tems, that is stored and can be read out with
suitable devices, particularly when the vehi-
cle is serviced. The data obtained is used to
properly diagnose and service your vehicle or
to further optimize and develop vehicle func-
tions.
COMAND/mbrace
If the vehicle is equipped with COMAND or
mbrace, additional data about the vehicle’s
operation, the use of the vehicle in certain
situations, and the location of the vehicle may
be compiled through COMAND or the mbrace
system.
For additional information please refer to the
COMAND User Manual and/or the mbrace
Terms and Conditions.
Event data recorders
This vehicle is equipped with an event data
recorder (EDR). The main purpose of an EDR
is to record data that will assist in under-
standing how a vehicle’s systems performed
in certain crash or near crash-like situations,
such as during air bag deployment or when
hitting a road obstacle. The EDR is designed
to record data related to vehicle dynamics
and safety systems for a short period of time,
typically 30 seconds or less.
The EDR in this vehicle is designed to record
such data as:
Rhow various systems in your vehicle are
operating
Rwhether or not the driver and passenger
seat belts are fastened
Rhow far (if at all) the driver is depressing the
accelerator and/or brake pedal and
Rhow fast the vehicle is traveling
This data can help provide a better under-
standing of the circumstances in which
crashes and injuries occur. NOTE: EDR data is
recorded by your vehicle only if a non-trivial
crash situation occurs; no data is recorded by the EDR under normal driving conditions and
no personal data (e.g., name, gender, age,
and crash location) are recorded. However,
other parties, such as law enforcement, can
combine the EDR data with the type of per-
sonal identification data routinely acquired
during a crash investigation.
To read data recorded by an EDR, special
equipment is required, and access to the vehi-
cle or the EDR is needed. In addition to the
vehicle manufacturer, other parties that have
the special equipment, such as law enforce-
ment, can read the information by accessing
the vehicle or the EDR.
EDR data may be used in civil and criminal
matters as a tool in accident reconstruction,
accident claims, and vehicle safety. Since the
Crash Data Retrieval CDR tool that is used to
extract data from the EDR is commercially
available, Mercedes-Benz USA, LLC
28Introduction
Page 64 of 410
emptive measures to protect the vehicle
occupants.
Important safety notes
The intervention of PRE-SAFE®PLUS cannot
prevent an imminent collision.
The driver is not warned when PRE-SAFE
®
PLUS intervenes.
PRE-SAFE
®PLUS does not intervene if the
vehicle is backing up.
When driving, or when parking or exiting a
parking space with assistance from Active
Parking Assist, PRE-SAFE
®PLUS will not
apply the brakes.
Function
PRE-SAFE®PLUS intervenes in certain situa-
tions if the radar sensor system detects an
imminent head-on or rear-end collision.
PRE-SAFE
®PLUS takes the following meas-
ures depending on the hazardous situation
detected:
Rif the radar sensor system detects that a
head-on collision is imminent, the seat
belts are pre-tensioned.
Rif the radar sensor system detects that a
rear-end collision is imminent:
-the brake pressure is increased if the
driver applies the brakes when the vehi-
cle is stationary.
-the seat belts are pre-tensioned.
The PRE-SAFE
®PLUS braking application is
canceled:
Rif the accelerator pedal is depressed when
a gear is engaged
Rif the risk of a collision passes or is no lon- ger detected
Rif DISTRONIC PLUS indicates an intention
to pull away
If the hazardous situation passes without
resulting in an accident, the original settings
are restored.
Automatic measures after an acci-
dent
Immediately after an accident, the following
measures are implemented, depending on
the type and severity of the impact:
Rthe hazard warning lamps are activated
Rthe emergency lighting is activated
Rthe vehicle doors are unlocked
Rthe front side windows are lowered
Rthe electrically adjustable steering wheel is
raised
Rthe engine is switched off and the fuel sup-
ply is cut off
Rvehicles with mbrace: automatic emer-
gency call
Children in the vehicle
Important safety notes
Accident statistics show that children
secured in the rear seats are safer than chil-
dren secured in the front-passenger seat. For
this reason, Mercedes-Benz strongly advises
that you install a child restraint system on a
rear seat. Children are generally better pro-
tected there.
If a child younger than twelve years old and
under 5 ft (1.50 m) in height is traveling in the
vehicle:
Ralways secure the child in a child restraint
system suitable for Mercedes-Benz vehi-
cles. The child restraint system must be
appropriate to the age, weight and size of
the child
Rbe sure to observe the instructions and
safety notes in this section in addition to
the child restraint system manufacturer's
installation instructions
Rbe sure to observe the instructions and
safety notes on the "Occupant Classifica-
tion System (OCS)" (
Ypage 53)
62Children in the vehicle
Safety
Page 170 of 410
If you or others come into contact with fuel,
observe the following:
RWash away fuel from skin immediately
using soap and water.
RIf fuel comes into contact with your eyes,
immediately rinse them thoroughly with
clean water. Seek medical assistance with-
out delay.
RIf fuel is swallowed, seek medical assis-
tance without delay. Do not induce vomit-
ing.
RImmediately change out of clothing which
has come into contact with fuel.
GWARNING
Electrostatic buildup can create sparks and
ignite fuel vapors. There is a risk of fire and
explosion.
Always touch the vehicle body before opening
the fuel filler flap or touching the fuel pump
nozzle. Any existing electrostatic buildup is
thereby discharged.
Do not get into the vehicle again during the
refueling process. Otherwise, electrostatic
charge could build up again.
!Do not use diesel to refuel vehicles with a
gasoline engine. Do not switch on the igni-
tion if you accidentally refuel with the
wrong fuel. Otherwise, the fuel will enter
the fuel system. Even small amounts of the wrong fuel could result in damage to the
fuel system and the engine. Notify a quali-
fied specialist workshop and have the fuel
tank and fuel lines drained completely.
!Overfilling the fuel tank could damage the
fuel system.
!Take care not to spill any fuel on painted
surfaces. You could otherwise damage the
paintwork.
!Use a filter when refueling from a fuel can.
Otherwise, the fuel lines and/or injection
system could be blocked by particles from
the fuel can. If you overfill the fuel tank, fuel could spray
out when the fuel pump nozzle is removed.
For further information on fuel and fuel quality
(
Ypage 401).
Refueling
General information
Pay attention to the important safety notes
(
Ypage 167).
If you unlock/lock the vehicle from the out-
side, the fuel filler flap also unlocks/locks.
The position of the fuel filler cap is displayed
8 in the instrument cluster. The arrow
next to the filling pump indicates the side of
the vehicle.
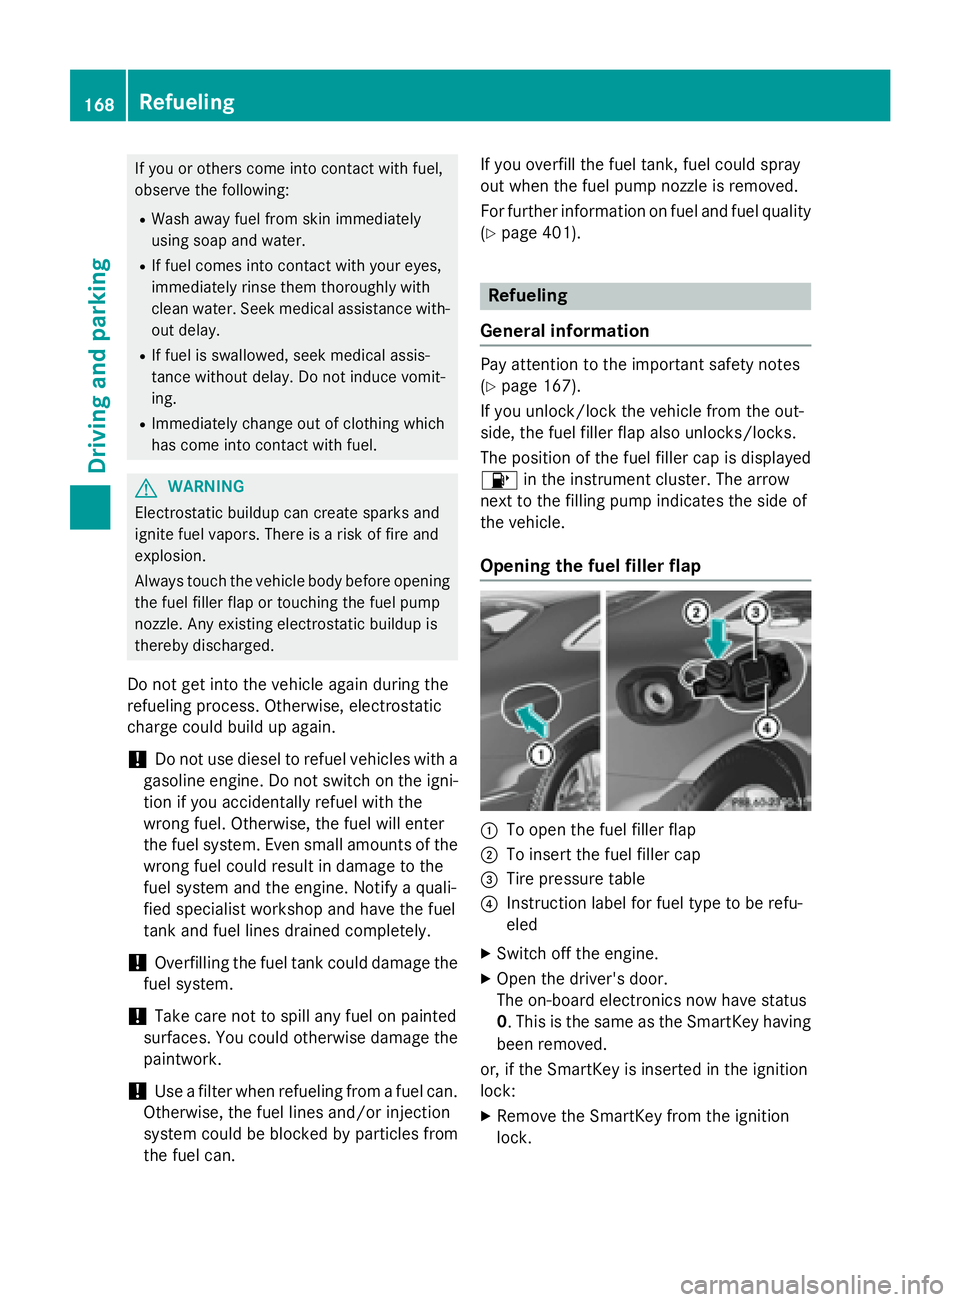
Opening the fuel filler flap
:To open the fuel filler flap
;To insert the fuel filler cap
=Tire pressure table
?Instruction label for fuel type to be refu-
eled
XSwitch off the engine.
XOpen the driver's door.
The on-board electronics now have status
0. This is the same as the SmartKey having
been removed.
or, if the SmartKey is inserted in the ignition
lock:
XRemove the SmartKey from the ignition
lock.
168Refueling
Driving and parking
Page 295 of 410
Engine
Warning/
indicator
lampNSignal type
Possible causes/consequences and M
Solutions
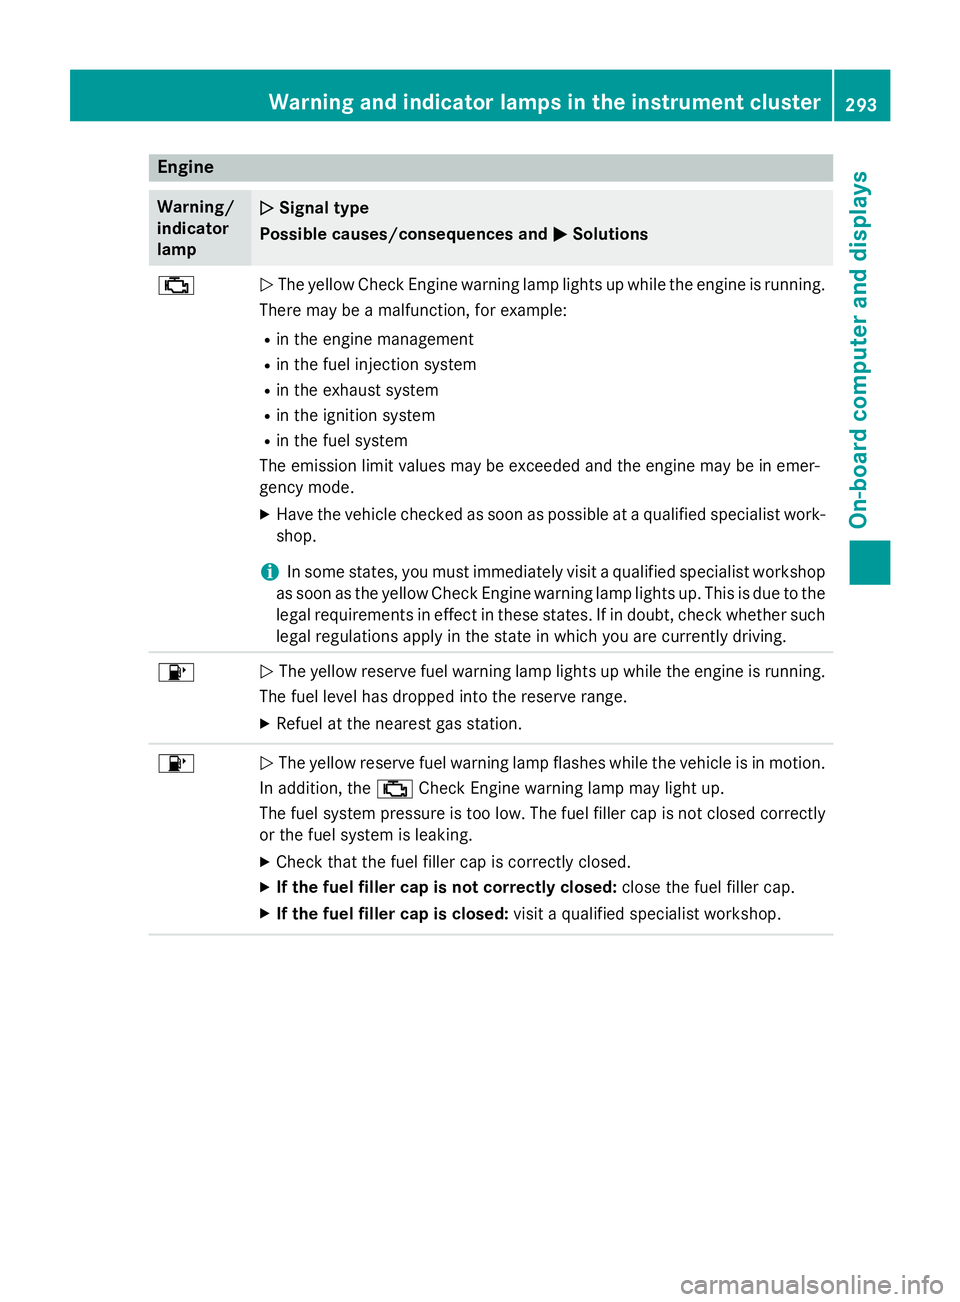
;NThe yellow Check Engine warning lamp lights up while the engine is running.
There may be a malfunction, for example:
Rin the engine management
Rin the fuel injection system
Rin the exhaust system
Rin the ignition system
Rin the fuel system
The emission limit values may be exceeded and the engine may be in emer-
gency mode.
XHave the vehicle checked as soon as possible at a qualified specialist work-
shop.
iIn some states, you must immediately visit a qualified specialist workshop
as soon as the yellow Check Engine warning lamp lights up. This is due to the
legal requirements in effect in these states. If in doubt, check whether such legal regulations apply in the state in which you are currently driving.
8N The yellow reserve fuel warning lamp lights up while the engine is running.
The fuel level has dropped into the reserve range.
XRefuel at the nearest gas station.
8N The yellow reserve fuel warning lamp flashes while the vehicle is in motion.
In addition, the ;Check Engine warning lamp may light up.
The fuel system pressure is too low. The fuel filler cap is not closed correctly
or the fuel system is leaking.
XCheck that the fuel filler cap is correctly closed.
XIf the fuel filler cap is not correctly closed: close the fuel filler cap.
XIf the fuel filler cap is closed:visit a qualified specialist workshop.
Warning and indicator lamps in the instrument cluster293
On-board computer and displays
Z
Page 364 of 410
Useful information
i
This Operator's Manual describes all
models and all standard and optional equip-
ment of your vehicle available at the time of
publication of the Operator's Manual.
Country-specific differences are possible.
Please note that your vehicle may not be
equipped with all features described. This
also applies to safety-related systems and
functions.
iRead the information on qualified special-
ist workshops (
Ypage 26).
Important safety notes
GWARNING
If wheels and tires of the wrong size are used, the wheel brakes or suspension components
may be damaged. There is a risk of an acci-
dent.
Always replace wheels and tires with those
that fulfill the specifications of the original
part.
When replacing wheels, make sure to use the
correct:
Rdesignation
Rmodel
When replacing tires, make sure to use the
correct:
Rdesignation
Rmanufacturer
Rmodel
GWARNING
A flat tire severely impairs the driving, steer-
ing and braking characteristics of the vehicle.
There is a risk of accident.
Tires without run-flat characteristics:
Rdo not drive with a flat tire.
Rimmediately replace the flat tire with your
emergency spare wheel or spare wheel, or
consult a qualified specialist workshop.
Tires with run-flat characteristics:
Rpay attention to the information and warn-
ing notices on MOExtended tires (tires with
run-flat characteristics).
Accessories that are not approved for your
vehicle by Mercedes-Benz or are not being
used correctly can impair the operating
safety.
Before purchasing and using non-approved
accessories, visit a qualified specialist work-
shop and inquire about:
Rsuitability
Rlegal stipulations
Rfactory recommendations
Information on the sizes and types of wheels
and tires for your vehicle can be found under "Wheel/tire combinations" (
Ypage 388).
Information on tire pressure can be found:
Ron the vehicle's Tire and Loading Informa-
tion placard on the B-pillar (
Ypage 372)
Ron the tire pressure label on the fuel filler
flap (
Ypage 168)
Runder "Tire pressure" (Ypage 365)
Operation
Information on driving
Check the tire pressure when the vehicle is
heavily laden and adjust prior to a trip.
While driving, pay attention to vibrations,
noises and unusual handling characteristics,
e.g. pulling to one side. This may indicate that
the wheels or tires are damaged. If you sus-
pect that a tire is defective, reduce your
speed immediately. Stop the vehicle as soon
as possible to check the wheels and tires for
damage. Hidden tire damage could also be
causing the unusual handling characteristics.
If you find no signs of damage, have the tires and wheels checked at a qualified specialist
workshop.
When parking your vehicle, make sure that
the tires do not get deformed by the curb or
362Operation
Wheels and tires
Page 374 of 410
will be displayed in the multifunction dis-
play.
XPress the:button.
The Use Current Pressures as New
Reference Valuesmessage appears in
the multifunction display.
If you wish to confirm the restart:
XPress the abutton.
The Tire Press. Monitor Restarted
message appears in the multifunction dis-
play.
After driving for a few minutes, the system
checks whether the current tire pressures
are within the specified range. The new tire
pressures are then accepted as reference
values and monitored.
If you wish to cancel the restart:
XPress the %button.
The tire pressure values stored at the last
restart will continue to be monitored.
Radio type approval for the tire pres-
sure monitor
CountryRadio type approval number
USAFCC ID: MRXMW2433A
FCC ID: MRXGG4
FCC ID: MRXMC34MA4
CanadaIC: 2546A-MW2433A
IC: 2546A-GG4
IC: 2546A-MC34MA4
Loading the vehicle
Instruction labels for tires and loads
GWARNING
Overloaded tires can overheat, causing a
blowout. Overloaded tires can also impair the steering and driving characteristics and lead
to brake failure. There is a risk of accident.
Observe the load rating of the tires. The load
rating must be at least half of the GAWR of
your vehicle. Never overload the tires by
exceeding the maximum load.
Two instruction labels on your vehicle show
the maximum possible load.
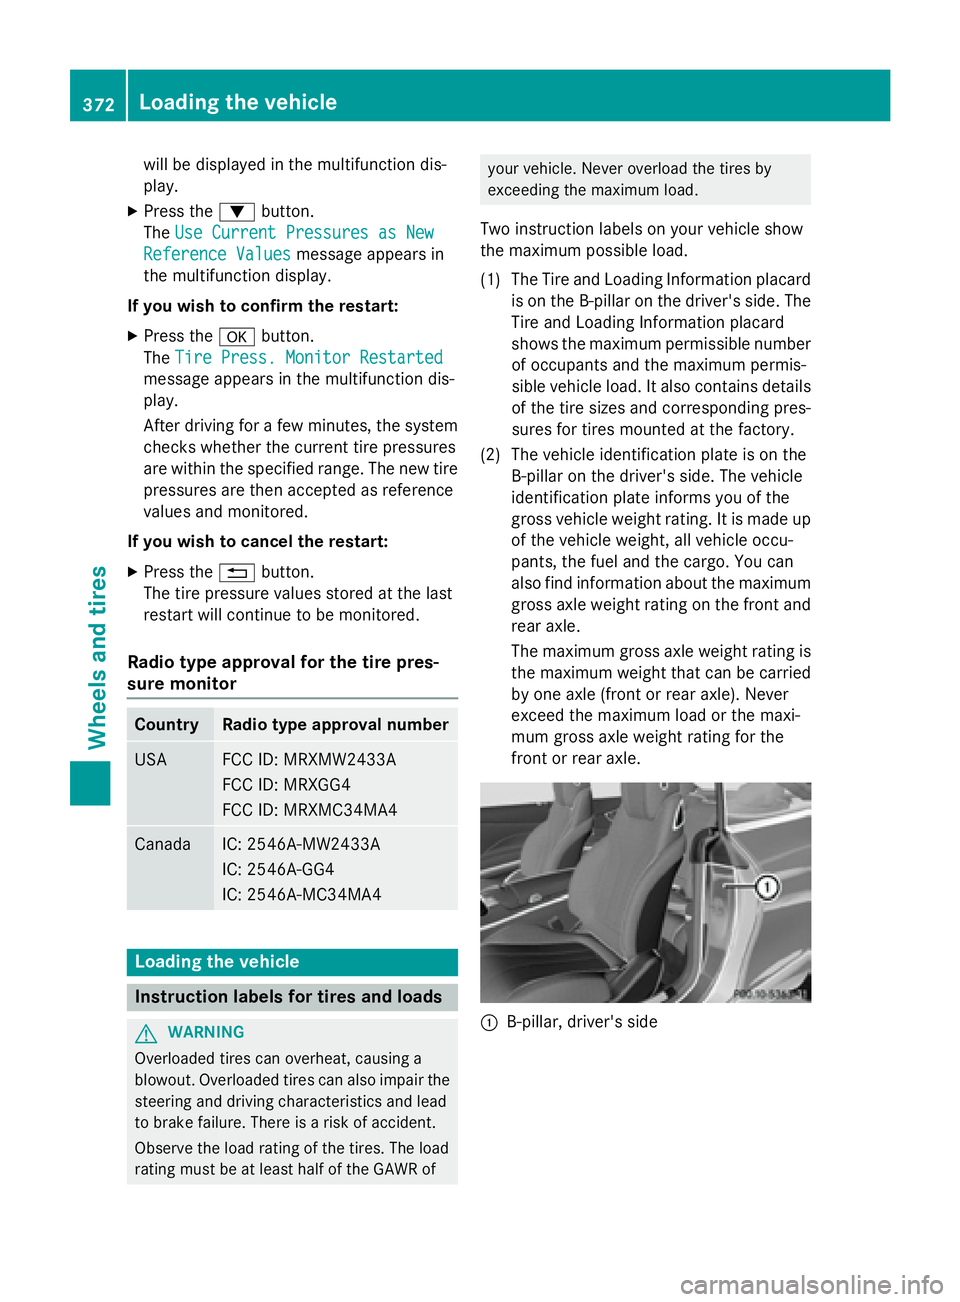
(1) The Tire and Loading Information placard is on the B-pillar on the driver's side. The
Tire and Loading Information placard
shows the maximum permissible numberof occupants and the maximum permis-
sible vehicle load. It also contains details
of the tire sizes and corresponding pres-
sures for tires mounted at the factory.
(2) The vehicle identification plate is on the B-pillar on the driver's side. The vehicle
identification plate informs you of the
gross vehicle weight rating. It is made up
of the vehicle weight, all vehicle occu-
pants, the fuel and the cargo. You can
also find information about the maximum
gross axle weight rating on the front and
rear axle.
The maximum gross axle weight rating is
the maximum weight that can be carried
by one axle (front or rear axle). Never
exceed the maximum load or the maxi-
mum gross axle weight rating for the
front or rear axle.
:B-pillar, driver's side
372Loading the vehicle
Wheels and tires
Page 383 of 410
Tire characteristics
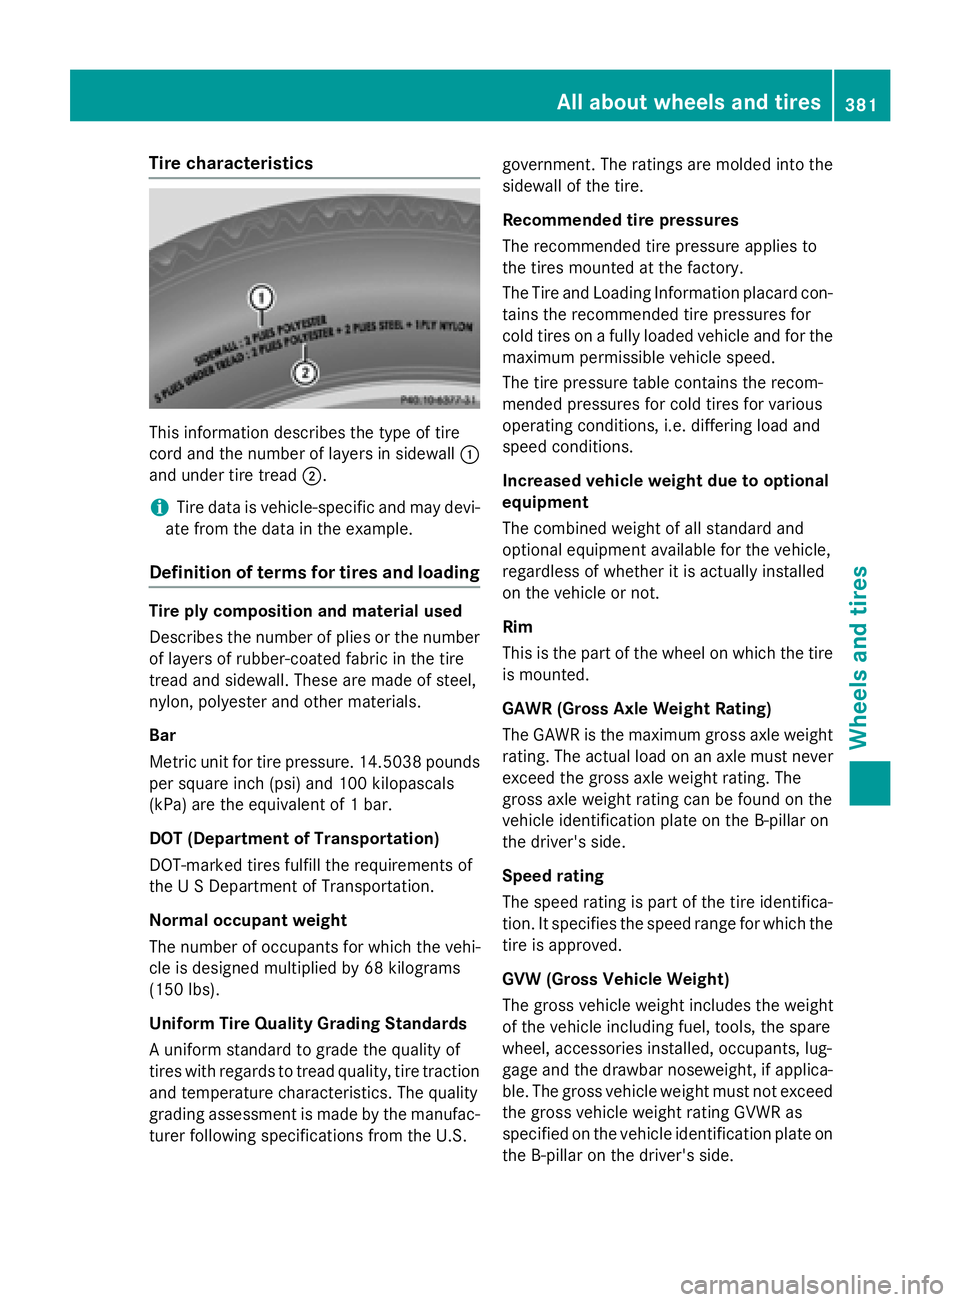
This information describes the type of tire
cord and the number of layers in sidewall:
and under tire tread ;.
iTire data is vehicle-specific and may devi-
ate from the data in the example.
Definition of terms for tires and loading
Tire ply composition and material used
Describes the number of plies or the number
of layers of rubber-coated fabric in the tire
tread and sidewall. These are made of steel,
nylon, polyester and other materials.
Bar
Metric unit for tire pressure. 14.5038 pounds
per square inch (psi) and 100 kilopascals
(kPa) are the equivalent of 1 bar.
DOT (Department of Transportation)
DOT-marked tires fulfill the requirements of
the U S Department of Transportation.
Normal occupant weight
The number of occupants for which the vehi-
cle is designed multiplied by 68 kilograms
(150 lb s).
Unifor m Tire Quality Grading Standards
A uniform standard to grade the quality of
tires with regards to tread quality, tire traction
and temperature characteristics. The quality
grading assessment is made by the manufac-
turer following specifications from the U.S. government. The ratings are molded into the
sidewall of the tire.
Recommended tire pressures
The recommended tire pressure applies to
the tires mounted at the factory.
The Tire and Loading Information placard con-
tains the recommended tire pressures for
cold tires on a fully loaded vehicle and for the
maximum permissibl
e ve
hicle speed.
The tire pressure table contains the recom-
mended pressures for cold tires for various
operating conditions, i.e. differing load and
speed conditions.
Increased vehicle weight due to optional
equipment
The combined weight of all standard and
optional equipment available for the vehicle,
regardless of whether it is actually installed
on the vehicle or not.
Rim
This is the part of the wheel on which the tire
is mounted.
GAWR (Gross Axle Weight Rating)
The GAWR is the maximum gross axle weight
rating. The actual load on an axle must never
exceed the gross axle weight rating. The
gross axle weight rating can be found on the
vehicle identification plate on the B-pillar on
the driver's side.
Speed rating
The speed rating is part of the tire identifica-
tion. It specifies the speed range for which the tire is approved.
GVW (Gross Vehicle Weight)
The gross vehicle weight includes the weight
of the vehicle including fuel, tools, the spare
wheel, accessories installed, occupants, lug-
gage and the drawbar noseweight, if applica-
ble. The gross vehicle weight must not exceed
the gross vehi
cle weight rating GVWR as
specified on the vehicle identification plate on the B-pillar on the driver's side.
All about wheels an d tires381
Wheels and tires
Z