Page 271 of 438

RDistance warning and the autonomous
braking function COLLISION PREVENTION
ASSIST PLUS (
Ypage 71)
RPRE-SAFE®Brake (Ypage 75)
RActive Blind Spot Assist (Ypage 234)
RATTENTION ASSIST (Ypage 228)
RActive Lane Keeping Assist (Ypage 237)
XPress:to display the ATTENTION ASSIST
assessment.
Service menu
Introduction
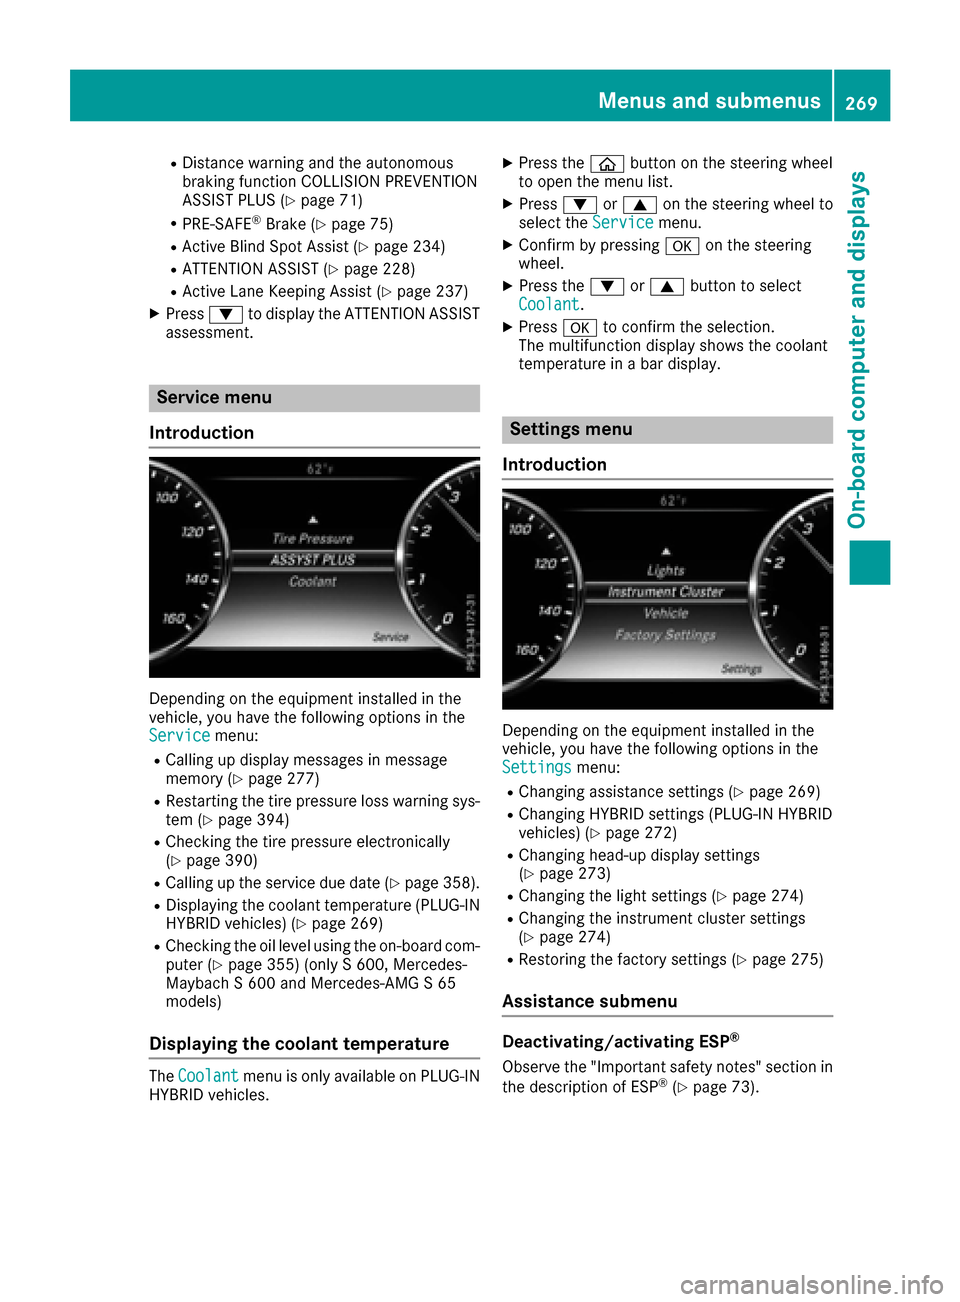
Depending on the equipment installed in the
vehicle, you have the following options in the
Service
menu:
RCalling up display messages in message
memory (Ypage 277)
RRestarting the tire pressure loss warning sys-
tem (Ypage 394)
RChecking the tire pressure electronically
(Ypage 390)
RCalling up the service due date (Ypage 358).
RDisplaying the coolant temperature (PLUG-IN
HYBRID vehicles) (Ypage 269)
RChecking the oil level using the on-board com-
puter (Ypage 355) (only S 600, Mercedes-
Maybach S 600 and Mercedes-AMG S 65
models)
Displaying the coolant temperature
The Coolantmenu is only available on PLUG ‑IN
HYBRID vehicles.
XPress the òbutton on the steering wheel
to open the menu list.
XPress :or9 on the steering wheel to
select the Servicemenu.
XConfirm by pressing aon the steering
wheel.
XPress the :or9 button to select
Coolant.
XPress ato confirm the selection.
The multifunction display shows the coolant
temperature in a bar display.
Settings menu
Introduction
Depending on the equipment installed in the
vehicle, you have the following options in the
Settings
menu:
RChanging assistance settings (Ypage 269)
RChanging HYBRID settings (PLUG-IN HYBRID
vehicles) (Ypage 272)
RChanging head-up display settings
(Ypage 273)
RChanging the light settings (Ypage 274)
RChanging the instrument cluster settings
(Ypage 274)
RRestoring the factory settings (Ypage 275)
Assistance submenu
Deactivating/activating ESP®
Observe the "Important safety notes" section in
the description of ESP®(Ypage 73).
Menus and submenus269
On-board computer and displays
Z
Page 298 of 438

Display messagesPossible causes/consequences andMSolutions
4
CheckEngineOilAtNextRefueling
The engin eoil level has dropped to th eminimum level.
A warning tone also sounds.
!Avoid lon gjourneys wit hto olittl eengin eoil. The engin ewill oth-
erwise be damaged.
XChec kth eoil level when next refueling, at th elatest (Ypage 353).
XIf necessary, add engin eoil (Ypage 355).
If th eengin eoil need stoppin gup mor eoften:
XContac t aqualified specialist workshop and hav eth eengin e
checked.
Information on approve dengin eoils can be obtained from any quali-
fie dspecialist workshop or on th eInternet at http://bevo.mercedes -
benz.com.
4
Check Engine OilLevel (Ad d 1quart)
The engin eoil level has dropped to th eminimum level.
!Avoid lon gjourneys wit hto olittl eengin eoil. The engin ewill oth-
erwise be damaged.
XChec kth eoil level when next refueling, at th elatest (Ypage 353).
XIf necessary, add engin eoil (Ypage 355).
If th eengin eoil need stoppin gup mor eoften:
XContac t aqualified specialist workshop and hav eth eengin e
checked.
Information on approve dengin eoils can be obtained from any quali-
fie dspecialist workshop or on th eInternet at http://bevo.mercedes -
benz.com.
4
Engine Oil LevelLow Sto pVehicl eTurnEngine Off
The engin eoil level is to olow. There is aris kof engin edamage.
XPull ove rand stop th evehicl esafely and switch off th eengine, pay-
ing attention to roa dand traffic conditions.
XSecur eth evehicl eagainst rollin gaway (Ypage 189).
XCheckth eengin eoil level (Ypage 353).
XIf necessary, add engin eoil (Ypage 355).
8
Fue lLevel Low
The fuel level has dropped int oth ereserv erange.
XRefue lat th eneares tgas station .
CThere is only aver ysmall amount of fuel in th efuel tank.
XRefue lat th eneares tgas station without fail .
8
Gas Cap Loose
The fuel filler cap is notclosed correctl yor th efuel system is leaking .
XCheckthat th efuel filler cap is correctl yclosed .
If th efuel filler cap is not correctl yclosed :
XCloseth efuel filler cap .
If th efuel filler cap is correctl yclosed :
XVisitaqualified specialist workshop .
296Display messages
On-board computer and displays
Page 350 of 438

door opener, contact an authorized Mercedes-
Benz Center.
Alternatively, you can call the following tele-
phone assistance services:
RUSA:Mercedes-Benz Customer Assistance
Center at 1-800-FOR-MERCedes
RCanada: Customer Service at
1-800-387-0100
RHomeLink®hotline 1-800-355-3515 (free of
charge)
More information on HomeLink
®and/or com-
patible products is also available online at
http://www.homelink.co m.
Notes on the declaration of conformity
(
Ypage 28).
USA: FCC ID: CB2HMIHL4
Canada: IC: 279B-HMIHL4
Important safety notes
GWARNING
When you operate or program the garage door
with the integrated garage door opener, per-
sons in the range of movement of the garage
door can become trapped or struck by the
garage door. There is a risk of injury.
When using the integrated garage door
opener, always make sure that nobody is
within the range of movement of the garage
door.
GWARNING
Combustion engines emit poisonous exhaust
gases such as carbon monoxide. Inhaling
these exhaust gases leads to poisoning. There
is a risk of fatal injury. Therefore never leave
the engine running in enclosed spaces with-
out sufficient ventilation.
Programming
Programming buttons
Pay attention to the "Important safety notes"
(Ypage 348).
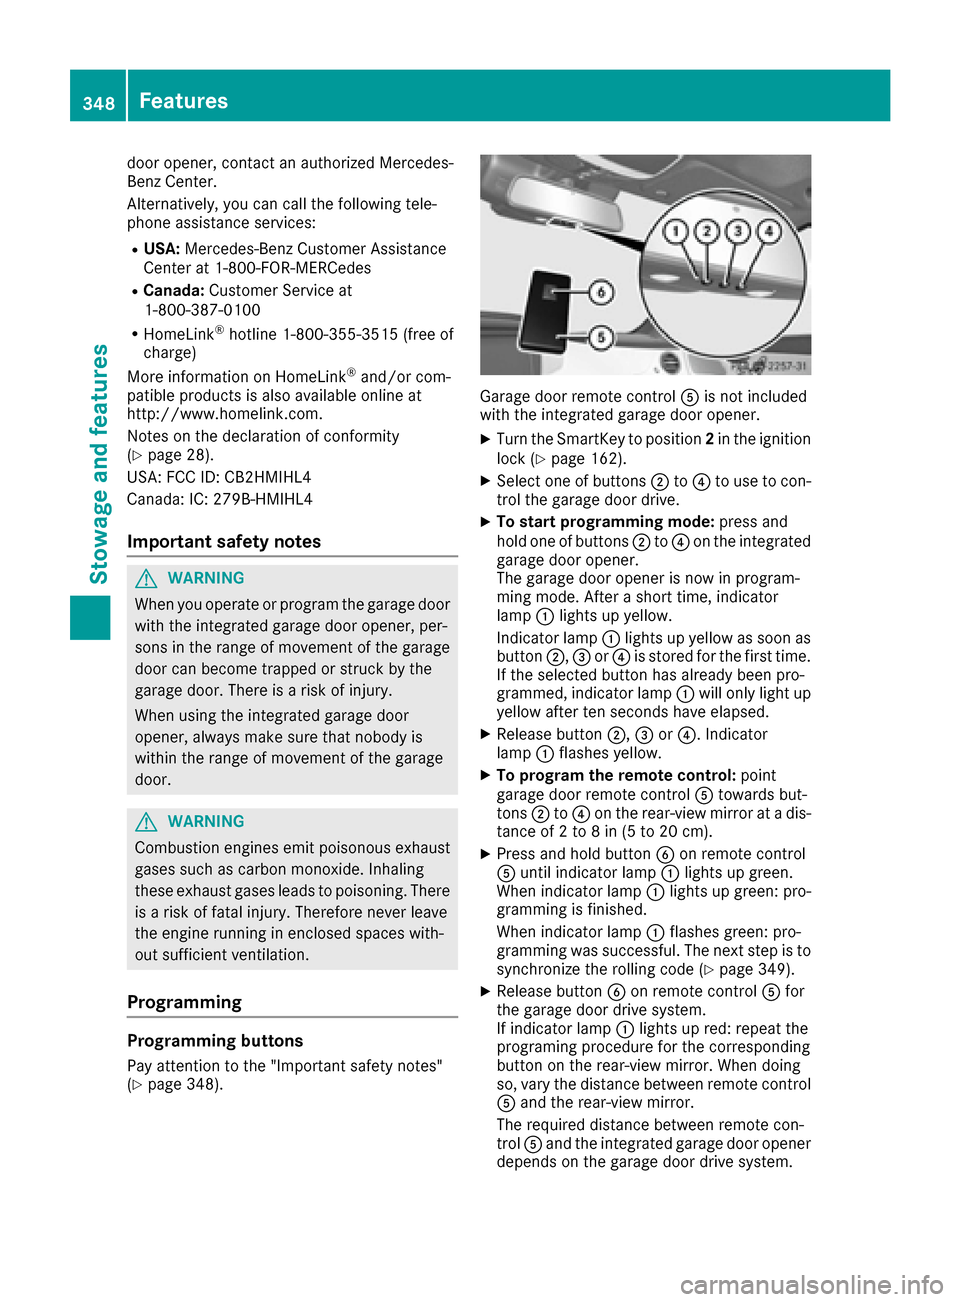
Garage door remote control Ais not included
with the integrated garage door opener.
XTurn the SmartKey to position 2in the ignition
lock (Ypage 162).
XSelect one of buttons ;to? to use to con-
trol the garage door drive.
XTo start programming mode: press and
hold one of buttons ;to? on the integrated
garage door opener.
The garage door opener is now in program-
ming mode. After a short time, indicator
lamp :lights up yellow.
Indicator lamp :lights up yellow as soon as
button ;,=or? is stored for the first time.
If the selected button has already been pro-
grammed, indicator lamp :will only light up
yellow after ten seconds have elapsed.
XRelease button ;,=or?. Indicator
lamp :flashes yellow.
XTo program the remote control: point
garage door remote control Atowards but-
tons ;to? on the rear-view mirror at a dis-
tance of 2 to 8 in (5 to 20 cm).
XPress and hold button Bon remote control
A until indicator lamp :lights up green.
When indicator lamp :lights up green: pro-
gramming is finished.
When indicator lamp :flashes green: pro-
gramming was successful. The next step is to synchronize the rolling code (
Ypage 349).
XRelease button Bon remote control Afor
the garage door drive system.
If indicator lamp :lights up red: repeat the
programing procedure for the corresponding
button on the rear-view mirror. When doing
so, vary the distance between remote control
A and the rear-view mirror.
The required distance between remote con-
trol Aand the integrated garage door opener
depends on the garage door drive system.
348Features
Stowage and features