2016 MERCEDES-BENZ S-Class SEDAN air condition
[x] Cancel search: air conditionPage 150 of 438
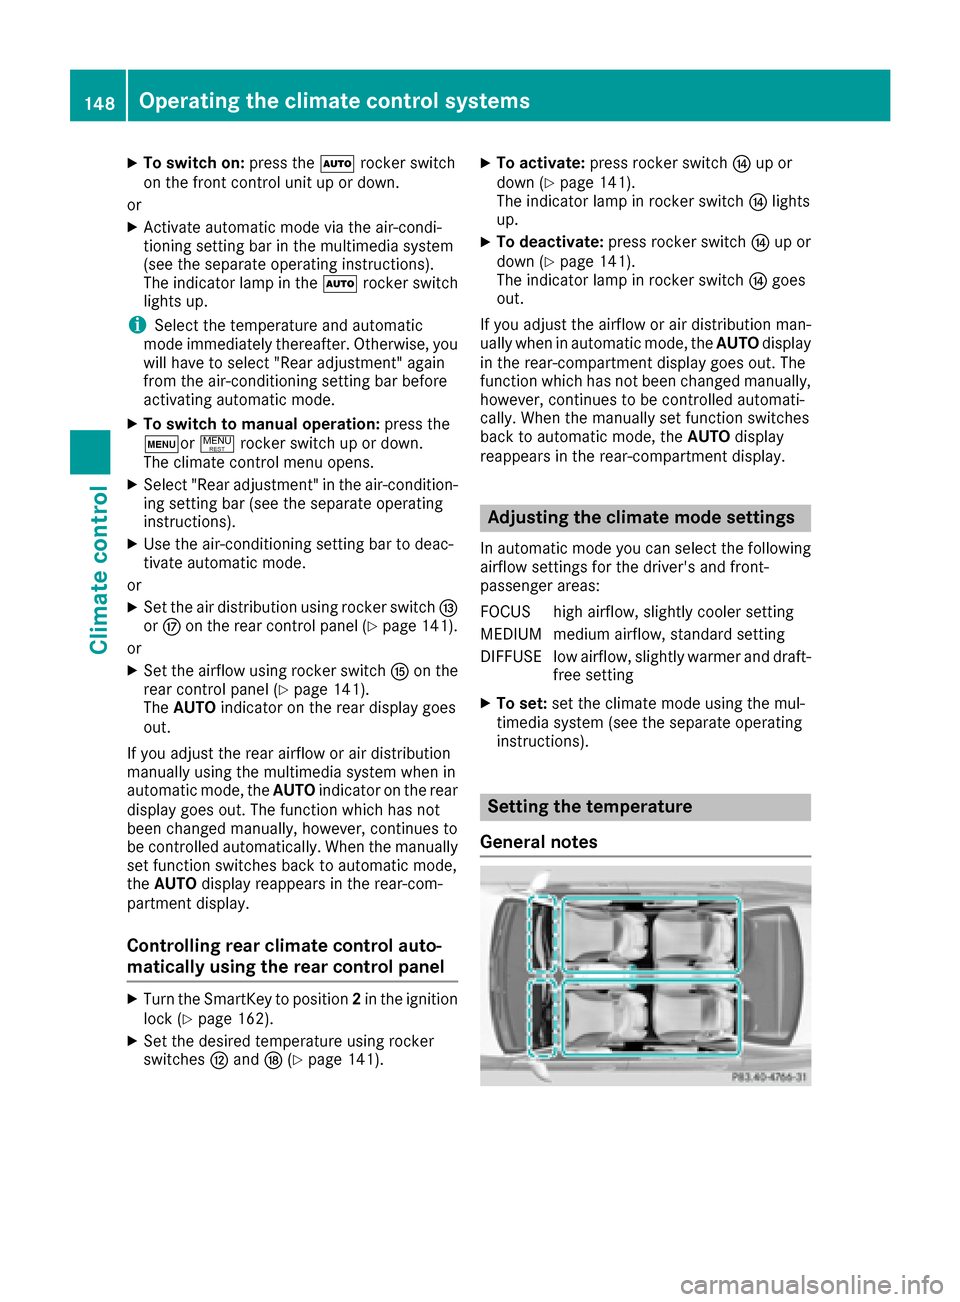
XTo switch on:press theÃrocker switch
on the front control unit up or down.
or
XActivate automatic mode via the air-condi-
tioning setting bar in the multimedia system
(see the separate operating instructions).
The indicator lamp in the Ãrocker switch
lights up.
iSelect the temperature and automatic
mode immediately thereafter. Otherwise, you
will have to select "Rear adjustment" again
from the air-conditioning setting bar before
activating automatic mode.
XTo switch to manual operation: press the
tor !rocker switch up or down.
The climate control menu opens.
XSelect "Rear adjustment" in the air-condition-
ing setting bar (see the separate operating
instructions).
XUse the air-conditioning setting bar to deac-
tivate automatic mode.
or
XSet the air distribution using rocker switch I
or M on the rear control panel (Ypage 141).
or
XSet the airflow using rocker switch Kon the
rear control panel (Ypage 141).
The AUTO indicator on the rear display goes
out.
If you adjust the rear airflow or air distribution
manually using the multimedia system when in
automatic mode, the AUTOindicator on the rear
display goes out. The function which has not
been changed manually, however, continues to
be controll ed a
utomatically. When the manually
set function switches back to automatic mode,
the AUTO display reappears in the rear-com-
partment display.
Controlling rear climate control auto-
matically using the rear control panel
XTurn the SmartKey to position 2in the ignition
lock (Ypage 162).
XSet the desired temperature using rocker
switches Hand N(Ypage 141).
XTo activate: press rocker switch Jup or
down (Ypage 141).
The indicator lamp in rocker switch Jlights
up.
XTo deactivate: press rocker switch Jup or
down (Ypage 141).
The indicator lamp in rocker switch Jgoes
out.
If you adjust the airflow or air distribution man-
ually when in automatic mode, the AUTOdisplay
in the rear-compartment display goes out. The
function which has not been changed manually,
however, continues to be controlled automati-
cally. When the manually set function switches
back to automatic mode, the AUTOdisplay
reappears in the rear-compartment display.
Adjusting the climate mode settings
In automatic mode you can select the following
airflow settings for the driver's and front-
passenger areas:
FOCUS high airflow, slightly cooler setting
MEDIU Mmedium airflow, standard setting
DIFFUSEl ow airflow, slightly warmer and draft-
free setting
XTo set: set the climate mode using the mul-
timedia system (see the separate operating
instructions).
Setting the temperature
General notes
148Operating the climate control systems
Climate control
Page 151 of 438
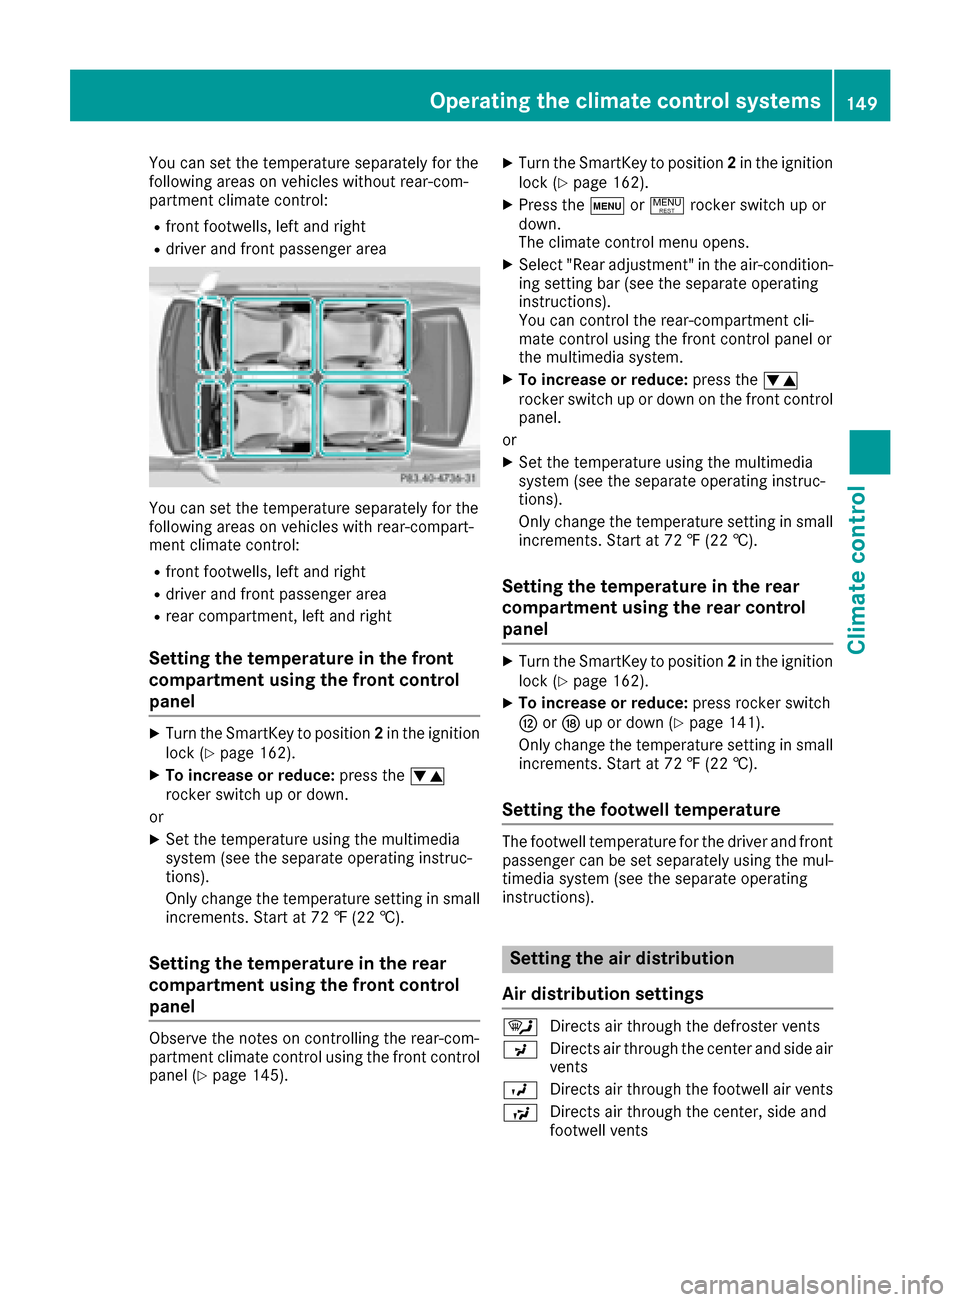
You can set the temperature separately for the
following areas on vehicles without rear-com-
partment climate control:
Rfront footwells, left and right
Rdriver and front passenger area
You can set the temperature separately for the
following areas on vehicles with rear-compart-
ment climate control:
Rfront footwells, left and right
Rdriver and front passenger area
Rrear compartment, left and right
Setting the temperature in the front
compartment using the front control
panel
XTurn the SmartKey to position2in the ignition
lock (Ypage 162).
XTo increase or reduce: press thew
rocker switch up or down.
or
XSet the temperature using the multimedia
system (see the separate operating instruc-
tions).
Only change the temperature setting in small
increments. Start at 72 ‡ (22 †).
Setting the temperature in the rear
compartment using the front control
panel
Observe the notes on controlling the rear-com-
partment climate control using the front control
panel (
Ypage 145).
XTurn the SmartKey to position 2in the ignition
lock (Ypage 162).
XPress the tor! rocker switch up or
down.
The climate control menu opens.
XSelect "Rear adjustment" in the air-condition-
ing setting bar (see the separate operating
instructions).
You can control the rear-compartment cli-
mate control using the front control panel or
the multimedia system.
XTo increase or reduce: press thew
rocker switch up or down on the front control
panel.
or
XSet the temperature using the multimedia
system (see the separate operating instruc-
tions).
Only change the temperature setting in small
increments. Start at 72 ‡ (22 †).
Setting the temperature in the rear
compartment using the rear control
panel
XTurn the SmartKey to position 2in the ignition
lock (Ypage 162).
XTo increase or reduce: press rocker switch
H orN up or down (Ypage 141).
Only change the temperature setting in small increments. Start at 72 ‡ (22 †).
Setting the footwell temperature
The footwell temperature for the driver and front
passenger can be set separately using the mul-
timedia system (see the separate operating
instructions).
Setting the air distribution
Air distribution settings
¯ Directs air through the defroster vents
P Directs air through the center and side air
vents
O Directs air through the footwell air vents
S Directs air through the center, side and
footwell vents
Operating the climate control systems149
Climate control
Page 152 of 438
aDirects air through the defroster and
footwell vents
W Sets the air distribution to automatic
Setting the air distribution in the front/
rear compartments using the multime-
dia system
The air distribution for the left and right sides of
the front and rear compartment can be adjusted
using the multimedia system (see the separate
operating instructions).
Setting the air distribution in the rear
compartment using the rear control
panel
XTurn the SmartKey to position 2in the ignition
lock (Ypage 162).
XPress rocker switch IorM up or down
repeatedly (Ypage 141) until the desired air
distribution symbol is shown in the display.
Setting the airflow
General notes
You can select different airflow settings for the
driver's and front-passenger sides as well as for
the rear compartment (only vehicles with rear
compartment climate control).
Observe the notes on controlling the rear-com-
partment climate control using the front control
panel (
Ypage 145).
Setting the front-compartment airflow
using the front control panel
XTurn the SmartKey to position 2in the ignition
lock (Ypage 162).
XTo increase or reduce: press theK
rocker switch up or down.
or
XSet the airflow using the multimedia system
(see the separate operating instructions).
Setting the rear-compartment airflow
using the front control panel
XTurn the SmartKey to position 2in the ignition
lock (Ypage 162).
XPress the tor! rocker switch up or
down.
The climate control menu opens.
XSelect "Rear adjustment" in the air-condition-
ing setting bar (see the separate operating
instructions).
You can control the rear-compartment cli-
mate control using the front control panel or
via the multimedia system.
XTo increase or reduce: press theK
rocker switch up or down on the front control
panel.
or
XSet the airflow using the multimedia system
(see the separate operating instructions).
Setting the rear compartment airflow
using the rear control panel
XTurn the SmartKey to position 2in the ignition
lock (Ypage 162).
XTo increase or reduce: press rocker switch
K up or down (Ypage 141).
Activating or deactivating the syn-
chronization function
Climate control can be set centrally using the
synchronization function. The settings for tem-
perature, air distribution and airflow on the driv-
er's side are adopted for the front-passenger
side and the rear compartment (vehicles with
rear-compartment air conditioning).
XTo activate or deactivate: activate or deac-
tivate the synchronization function using the
multimedia system (see the separate operat-
ing instructions).
Vehicles with rear-compartment air condi-
tioning: the SYNCdisplay appears on the
rear-compartment display.
The synchronization function is deactivated:
Rif the settings for the front-passenger side are
changed
Rvehicles with rear-compartment air condition-
ing: the settings for the rear compartment are
changed
150Operating the climate control systems
Climate control
Page 156 of 438
The following conditions can affect your percep-
tion of the perfume intensity:
Roperating mode of the climate control system
Rinterior temperature
Rtime of year or day
Rair humidity
Rphysiological condition of occupants, e.g. fati-
gue or hunger
The perfume atomizer can only be operated
when the climate control system is switched on
and is only active when the glove box is closed.
The perfume atomizer is provided with a pre-fil-
led vial. You can also choose from a variety of
filled perfume vials and an empty vial which you can fill yourself.
If you refill an empty perfume vial, observe the
separate information sheet attached to the vial.
!If you do not use genuine Mercedes-Benz
interior perfumes, observe the manufactur-
ers' safety notices on the perfume packaging.
Do not refill the pre-filled perfume vial when it is
empty. Dispose of the used vial after use.
XTo insert the perfume vial: open the glove
box (Ypage 326).
XSlide the perfume vial into the holder as far as
it will go.
XTo remove the perfume vial: pull out the
perfume vial.
XTo refill the perfume vial: unscrew the lid of
the empty perfume vial to refill it yourself.
XFill the perfume vial with a maximum of
0.5 fl. oz. (15 ml) of the desired liquid per-
fume.
XScrew the lid back on to the vial.
!Only refill the vial when you are outside the
vehicle. Otherwise, liquid perfume could drip
into the interior and contaminate it.
Always refill the empty refillable vial with the
same perfume. Otherwise, you might not ach-
ieve optimum results from the perfume atom-
izer.
154Operating the climate control systems
Climate control
Page 168 of 438
Therefore, quickly move your foot from the
brake pedal to the accelerator pedal. Never
leave the vehicle when it is held by hill start
assist.
Hill start assist is not active if:
Ryou are pulling away on a level road or on a
downhill gradient.
Rthe transmission is in position N.
Rthe electric parking brake is applied.
RESP®is malfunctioning.
ECO start/stop function (all vehicles
except PLUG‑IN HYBRID)
Introduction
This section describes the ECO start/stop func- tion for all vehicles except PLUG-IN HYBRID
vehicles. Information on the ECO start/stop
function on PLUG-IN HYBRID vehicles
(
Ypage 252).
The ECO start/stop function switches the
engine off automatically if the vehicle is stopped
under certain conditions.
The engine starts automatically when the driver
wants to pull away again. The ECO start/stop
function thereby helps you to reduce the fuel
consumption and emissions of your vehicle.
Important safety notes
GWARNING
If the engine is switched off automatically and
you exit the vehicle, the engine is restarted
automatically. The vehicle may begin moving.
There is a risk of accident and injury.
If you wish to exit the vehicle, always turn off
the ignition and secure the vehicle against
rolling away.
General notes
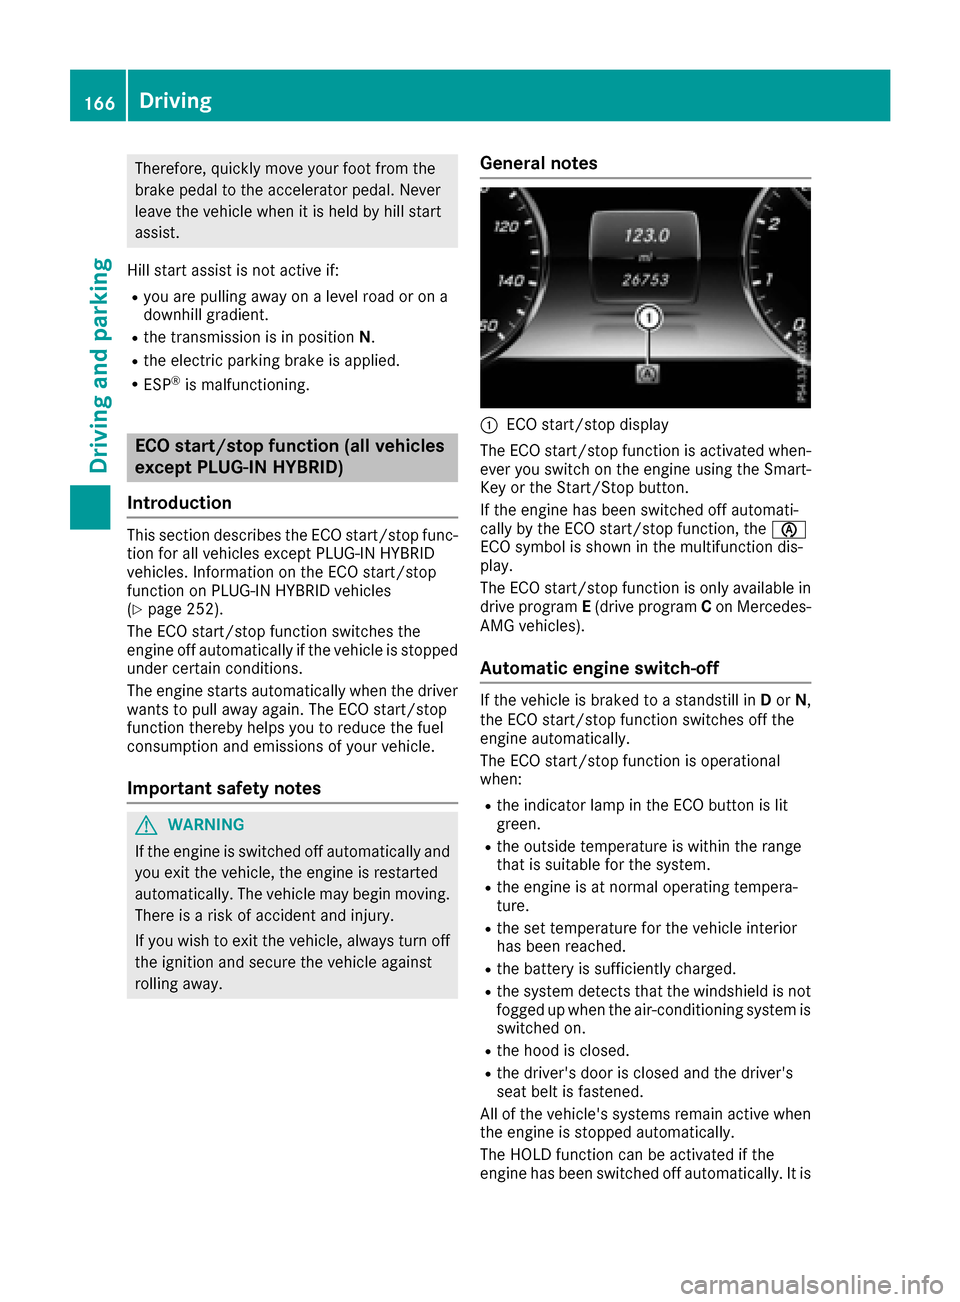
:ECO start/stop display
The ECO start/stop function is activated when-
ever you switch on the engine using the Smart-
Key or the Start/Stop button.
If the engine has been switched off automati-
cally by the ECO start/stop function, the è
ECO symbol is shown in the multifunction dis-
play.
The ECO start/stop function is only available in drive program E(drive program Con Mercedes-
AMG vehicles).
Automatic engine switch-off
If the vehicle is braked to a standstill in Dor N,
the ECO start/stop function switches off the
engine automatically.
The ECO start/stop function is operational
when:
Rthe indicator lamp in the ECO button is lit
green.
Rthe outside temperature is within the range
that is suitable for the system.
Rthe engine is at normal operating tempera-
ture.
Rthe set temperature for the vehicle interior
has been reached.
Rthe battery is sufficiently charged.
Rthe system detects that the windshield is not
fogged up when the air-conditioning system is
switched on.
Rthe hood is closed.
Rthe driver's door is closed and the driver's
seat belt is fastened.
All of the vehicle's systems remain active when
the engine is stopped automatically.
The HOLD function can be activated if the
engine has been switched off automatically. It is
166Driving
Driving and parking
Page 169 of 438
then not necessary to continue applying the
brakes during the automatic stop phase. When
you depress the accelerator pedal, the engine
starts automatically and the braking effect of
the HOLD function is deactivated.
All vehicles (except Mercedes-AMG vehi-
cles):automatic engine switch-off can take
place a maximum of four times in a row (initial
stop, then three subsequent stops).
Mercedes-AMG vehicles: the number of con-
secutive automatic engine switch-offs is unlimi-
ted.
Automatic engine start
The engine starts automatically if:
Ryou switch off the ECO start/stop function by pressing the ECO button
Ryou switch to drive program Sor M
Rin transmission position Dor Nthe brake
pedal is released and the HOLD function is not
active
Ryou depress the accelerator pedal
Ryou engage reverse gear R
Ryou move the transmission out of position P
Ryou unfasten your seat belt or open the driv-
er's door
Rthe vehicle starts to roll
Rthe brake system requires this
Rthe temperature in the vehicle interior devi-
ates from the set range
Rthe system detects moisture on the wind-
shield when the air-conditioning system is
switched on
Rthe battery's condition of charge is too low
Shifting the transmission to position Pdoes not
start the engine.
Deactivating or activating the ECO
start/stop function
All vehicles (except Mercedes-AMG vehi-
cles)
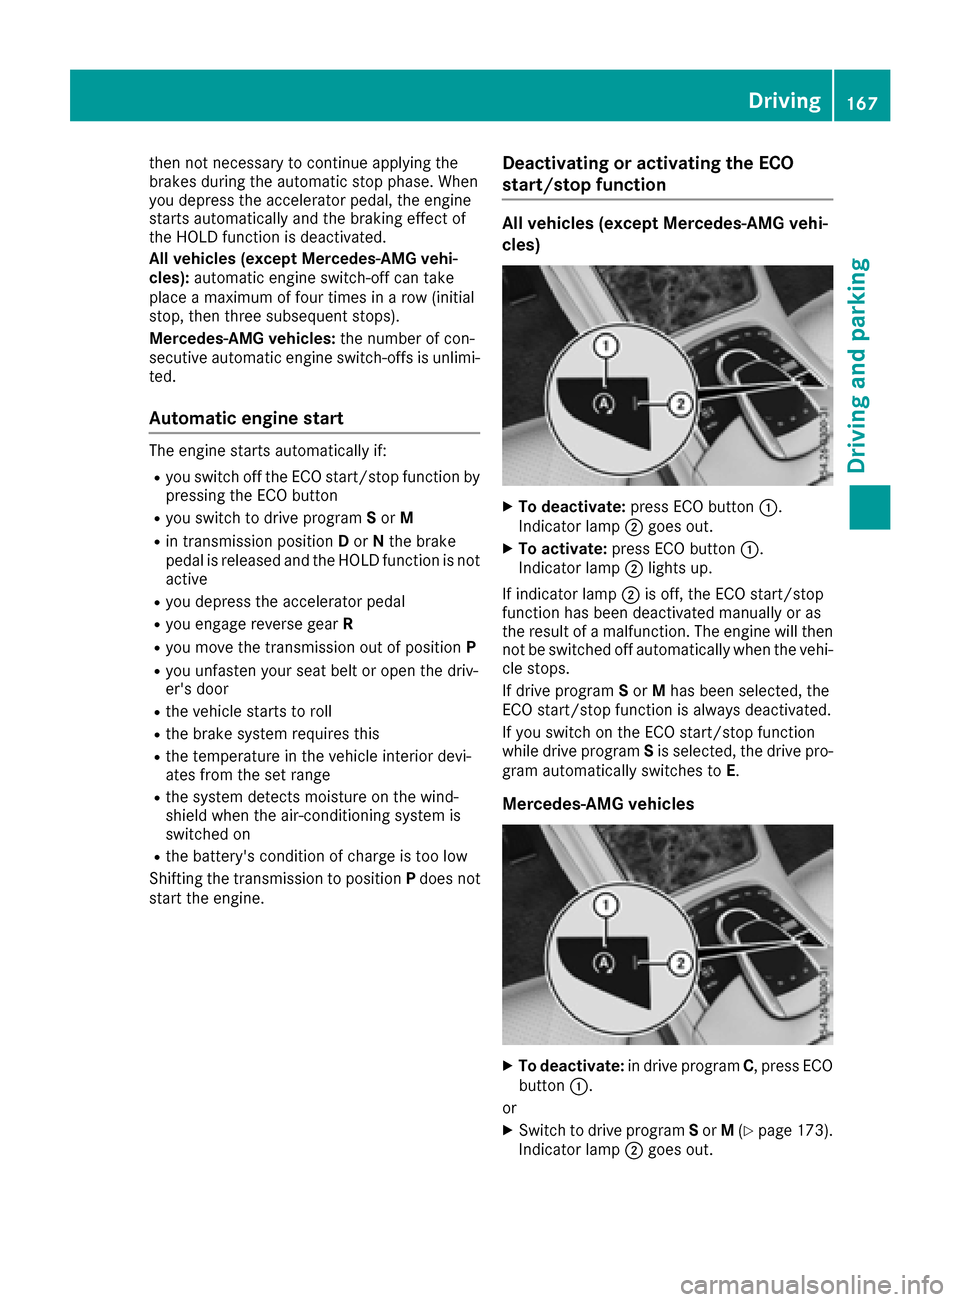
XTo deactivate: press ECO button :.
Indicator lamp ;goes out.
XTo activate: press ECO button :.
Indicator lamp ;lights up.
If indicator lamp ;is off, the ECO start/stop
function has been deactivated manually or as
the result of a malfunction. The engine will then
not be switched off automatically when the vehi- cle stops.
If drive program Sor Mhas been selected, the
ECO start/stop function is always deactivated.
If you switch on the ECO start/stop function
while drive program Sis selected, the drive pro-
gram automatically switches to E.
Mercedes-AMG vehicles
XTo deactivate: in drive program C, press ECO
button :.
or
XSwitch to drive program Sor M(Ypage 173).
Indicator lamp ;goes out.
Driving167
Driving an d parking
Z
Page 196 of 438
RAccel.(evaluation of all acceleration pro-
cesses)
-The bar fills up: moderate acceleration,
especially at higher speeds
-The bar empties: sporty acceleration
RConstant(assessment of driving behavior at
all times)
-The bar fills up: constant speed and avoid-
ance of unnecessary acceleration and
deceleration
-The bar empties: fluctuations in speed
RCoasting(assessment of all deceleration
processes)
-The bar fills up: anticipatory driving, keep-
ing your distance and early release of the
accelerator. The vehicle can coast without
use of the brakes.
-The bar empties: frequent braking
An economical driving style specially requires
driving at moderate engine speeds.
To achieve a higher value in the categories
Accel.
and Constant,
Robserve the gearshift recommendations.
Rdrive in drive program E
On long journeys at a constant speed, e.g. on the
highway, only the bar for Constant
will change.
The ECO display summarizes the driving char-
acteristics from the start of the journey to its
completion. For this reason, the bars change
dynamically at the beginning of the journey. On
longer journeys, there are fewer changes. For
more dynamic changes, carry out a manual
reset.
For further information on the ECO display, see
(
Ypage 262).
Brakes
Important safety notes
GWARNING
If you shift down on a slippery road surface in an attempt to increase the engine's braking
effect, the drive wheels could lose their grip.
There is an increased danger of skidding and
accidents.
Do not shift down for additional engine brak-
ing on a slippery road surface.
Downhill gradients
!On long and steep gradients, you must
reduce the load on the brakes by shifting to a
lower gear in good time. This allows you to
take advantage of the engine's braking effect.
This helps you to avoid overheating the
brakes and wearing them out excessively.
When you take advantage of engine braking, a
drive wheel may not turn for some time, e.g.
on a slippery road surface. This could cause
damage to the drive train. This type of damage
is not covered by the Mercedes-Benz war-
ranty.
Heavy and light loads
GWARNING
If you rest your foot on the brake pedal while
driving, the braking system can overheat. This increases the stopping distance and can even
cause the braking system to fail. There is a
risk of an accident.
Never use the brake pedal as a footrest. Never
depress the brake pedal and the accelerator
pedal at the same time.
!Depressing the brake pedal constantly
results in excessive and premature wear to
the brake pads.
If the brakes have been subjected to a heavy
load, do not stop the vehicle immediately. Drive
on for a short while. This allows the airflow to
cool the brakes more quickly.
Wet roads
If you have driven for a long time in heavy rain
without braking, there may be a delayed reac-
tion from the brakes when braking for the first
time. This may also occur after the vehicle has
been washed or driven through deep water.
You have to depress the brake pedal more
firmly. Maintain a greater distance from the
vehicle in front.
After driving on a wet road or having the vehicle
washed, brake firmly while paying attention to
the traffic conditions. This will warm up the
brake discs, thereby drying them more quickly
and protecting them against corrosion.
194Driving tips
Driving and parking
Page 198 of 438
sponds to an equivalent quality standard. Brake
fluid which has not been approved for
Mercedes-Benz vehicles or which is not of an
equivalent quality could affect your vehicle's
operating safety.
AMG high-performance and ceramic
brakes
The high-performance brake system is only
available on Mercedes-AMG vehicles.
The AMG brake systems are designed for heavy
loads. This may lead to noise when braking. Thiswill depend on:
RSpeed
RBraking force
REnvironmental conditions, such as tempera-
ture and humidity
The wear of individual components of the brake
system, such as the brake pads/linings or brake
discs, depends on the individual driving style
and operating conditions.
For this reason, it is impossible to state a mile-
age that will be valid under all circumstances. An
aggressive driving style will lead to high wear.
You can obtain more information on this from a
qualified specialist workshop.
New and replaced brake pads and discs only
reach their optimum braking effect after several
hundred kilometers of driving. Compensate for
this by applying greater force to the brake pedal.
Keep this in mind, and adapt your driving and
braking accordingly during this break-in period. Excessive heavy braking results in correspond-
ingly high brake wear. Observe the brake wear
warning lamp in the instrument cluster and note
any brake status messages in the multifunction
display. Especially for high performance driving,
it is important to maintain and have the brake
system checked regularly.
Driving on wet roads
Hydroplaning
If water has accumulated to a certain depth on
the road surface, there is a danger of hydro-
planing occurring, even if:
Ryou drive at low speeds
Rthe tires have adequate tread depth For this reason, in the event of heavy rain or in
conditions in which hydroplaning may occur,
you must drive in the following manner:
Rlower your speed
Ravoid ruts
Ravoid sudden steering movements
Rbrake carefully
Driving on flooded roads
!Do not drive through flooded areas. Check
the depth of any water before driving through
it. Drive slowly through standing water. Oth-
erwise, water may enter the vehicle interior or
the engine compartment. This can damage
the electronic components in the engine or
the automatic transmission. Water can also
be drawn in by the engine's air suction nozzles
and this can cause engine damage.
Winter driving
GWARNING
If you shift down on a slippery road surface in an attempt to increase the engine's braking
effect, the drive wheels could lose their grip.
There is an increased danger of skidding and
accidents.
Do not shift down for additional engine brak-
ing on a slippery road surface.
GDANGER
If the exhaust pipe is blocked or adequate
ventilation is not possible, poisonous gases
such as carbon monoxide (CO) may enter the vehicle. This is the case, e.g. if the vehicle
becomes trapped in snow. There is a risk of
fatal injury.
If you leave the engine or the auxiliary heating
running, make sure the exhaust pipe and area
around the vehicle are clear of snow. To
ensure an adequate supply of fresh air, open a
window on the side of the vehicle that is not
facing into the wind.
Have your vehicle winter-proofed at a qualified
specialist workshop at the onset of winter.
196Driving tips
Driving and parking