2016 MERCEDES-BENZ GLE-CLASS SUV keyless
[x] Cancel search: keylessPage 150 of 450
iVehicles with a diesel engine:you can
start the engine without preglow if the engine
is warm.
Using KEYLESS-GO to start the engine
The Start/Stop button can be used to start the
vehicle without inserting the SmartKey into the
ignition lock. The Start/Stop button must be
inserted in the ignition lock and the SmartKey
must be in the vehicle. This mode for starting the
engine operates independently of the ECO
start/stop automatic engine start function.
XDepress the brake pedal and keep it
depressed.
XPress the Start/Stop button once
(Ypage 146).
Vehicles with a gasoline engine: the engine
starts.
Vehicles with a diesel engine: preglow is
activated and the engine starts.
Starting procedure via smartphone
Observe the important safety notes on starting
the engine (Ypage 147).
You can also start your engine via your smart-
phone from outside the vehicle. In this case, the
previously selected climate control setting is
activated. In this way you can cool or heat the
interior of the vehicle before starting the jour-
ney.
Only start the engine via your smartphone if it is
safe to start and run the engine where your vehi-
cle is parked.
Observe the legal stipulations in the area where your vehicle is parked. Engine start via smart-
phone may be limited to certain countries or
regions.
You can execute a maximum of two consecutive
starting attempts via your smartphone. If you
insert the key into the ignition lock, you can
carry out two more starting attempts.
Once you have started the engine, you can
switch the engine off via your smartphone at any
time.
You can only start the engine via your smart-
phone if:
Rthe key is in the ignition lock
Rpark position Pis selected
Rthe accelerator pedal is not depressed
Rthe anti-theft alarm system is not activated
Rthe panic alarm is not activated
Rthe hazard warning lamps are switched off
Rthe hood is closed.
Rthe doors are closed and locked
Rthe windows and sliding sunroof are closed
Also make sure that:
Rthe fuel tank is sufficiently filled
Rthe starter battery is sufficiently charged
GWARNING
Limbs could be crushed or trapped if the
engine is started unintentionally during ser-
vice or maintenance work. There is a risk of
injury.
Always secure the engine against uninten-
tional starting before carrying out mainte-
nance or repair work.
Make sure that the engine cannot be started via
your smartphone before carrying out mainte-
nance or repairs. You can prevent an engine
start via your smartphone, for example, if you:
Rswitch on the hazard warning lamps
Rdo not lock the doors
Ropen the hood
Pulling away
General notes
GWARNING
If the engine speed is above the idling speed
and you engage transmission position Dor R,
the vehicle could pull away suddenly. There is
a risk of an accident.
When engaging transmission position Dor R,
always firmly depress the brake pedal and do not simultaneously accelerate.
Depress the accelerator carefully when pulling
away.
The vehicle locks centrally once you have pulled
away. The locking knobs in the doors drop down.
You can open the doors from the inside at any
time.
You can also deactivate the automatic locking
feature (
Ypage 275).
148Driving
Driving and parking
Page 166 of 450

The position of the fuel filler cap is displayed
8in the instrument cluster. The arrow next
to the filling pump indicates the side of the vehi-
cle.
Preparing to refuel
XSwitch off the engine.
XRemove the SmartKey from the ignition lock.
or, on vehicles with KEYLESS‑GO:
XOpen the driver's door.
The on-board electronics now have status 0.
This is the same as the SmartKey having been
removed.
The driver’s door can be closed again.
Opening the fuel filler flap (except
PLUG-IN HYBRID vehicles)
:To open the fuel filler flap
;To insert the fuel filler cap
=Instruction label for fuel type to be refueled
?Tire pressure table
XPress the fuel filler flap in the direction of
arrow :.
The fuel filler flap swings up.
XTurn the fuel filler cap counterclockwise and
remove it.
XInsert the fuel filler cap into the holder on the
inside of the fuel filler flap.
XCompletely insert the filler neck of the fuel
pump nozzle into the tank, hook in place and
refuel.
XOnly fill the tank until the pump nozzle
switches off.
Do not add any more fuel after the pump stops
filling for the first time. Otherwise, fuel may
leak out. Vehicles with a diesel engine:
the filler neck is
designed for refueling at diesel filling pumps.
Opening the fuel filler flap (PLUG-IN
HYBRID vehicles)
XPull switch ;.
Indicator lamp :flashes and the Please
Wait Depressurizing Tankmessage
appears in the multifunction display.
If the fuel filler cap is unlocked, indicator
lamp :lights up.
The Tank is Depressurized Ready for
Refuelingmessage appears in the multi-
function display.
Please be sure to observe the information on
refueling on the fuel filler flap.
There is a malfunction if:
Rindicator lamp :first flashes and then goes
out
Rthe yellow engine diagnostics warning lamp
lights up
iFrom a speed of 1 mph (2 km/h), the fuel
filler flap can no longer be opened.
iThe unlocking process for the fuel filler cap
may take up to 15 minutes.
164Refueling
Driving and parking
Page 168 of 450
Problems with fuel and the fuel tank
ProblemPossible causes/consequences andMSolutions
Fuel is leaking from the
vehicle.GWARNING
The fuel line or the fuel tank is faulty.
Risk of explosion or fire.
XApply the electric parking brake.
XSwitch off the engine.
XRemove the SmartKey from the ignition lock.
or, in vehicles with KEYLESS-GO start-function or KEYLESS ‑GO
XOpen the driver's door.
The on-board electronics now have status0. This is the same as the
SmartKey having been removed.
XDo not restart the engine under any circumstances.
XConsult a qualified specialist workshop.
The engine does not
start.The fuel tank of a vehicle with a diesel engine has been run completely
dry.
XRefuel the vehicle with at least 5.3 US qt (5 liters) of diesel.
XTurn the ignition on for approximately ten seconds (Ypage 145).
XStart the engine continuously for up to ten seconds until it runs
smoothly.
If the engine does not start:
XTurn the ignition on again for approximately ten seconds
(Ypage 145).
XStart the engine again continuously for up to ten seconds until it
runs smoothly.
If the engine does not start after three attempts:
XConsult a qualified specialist workshop.
The fuel filler flap cannot
be opened.The fuel filler flap is not unlocked.
XUnlock the vehicle (Ypage 78).
XPLUG-IN HYBRID Vehicles: depressurize the fuel tank
(Ypage 163).
The SmartKey battery is discharged or nearly discharged.
XUnlock the vehicle using the mechanical key (Ypage 80).
The fuel filler flap is unlocked, but the opening mechanism is jammed.
XConsult a qualified specialist workshop.
166Refueling
Driving and parking
Page 170 of 450
and cold water to clean it. DEF residues crys-
tallize after time and contaminate the affec-
ted surfaces.
!DEF is not a fuel additive and must not be
added to the fuel tank. If DEF is added to the
fuel tank, this can lead to engine damage.
For further information on DEF, see
(
Ypage 436).
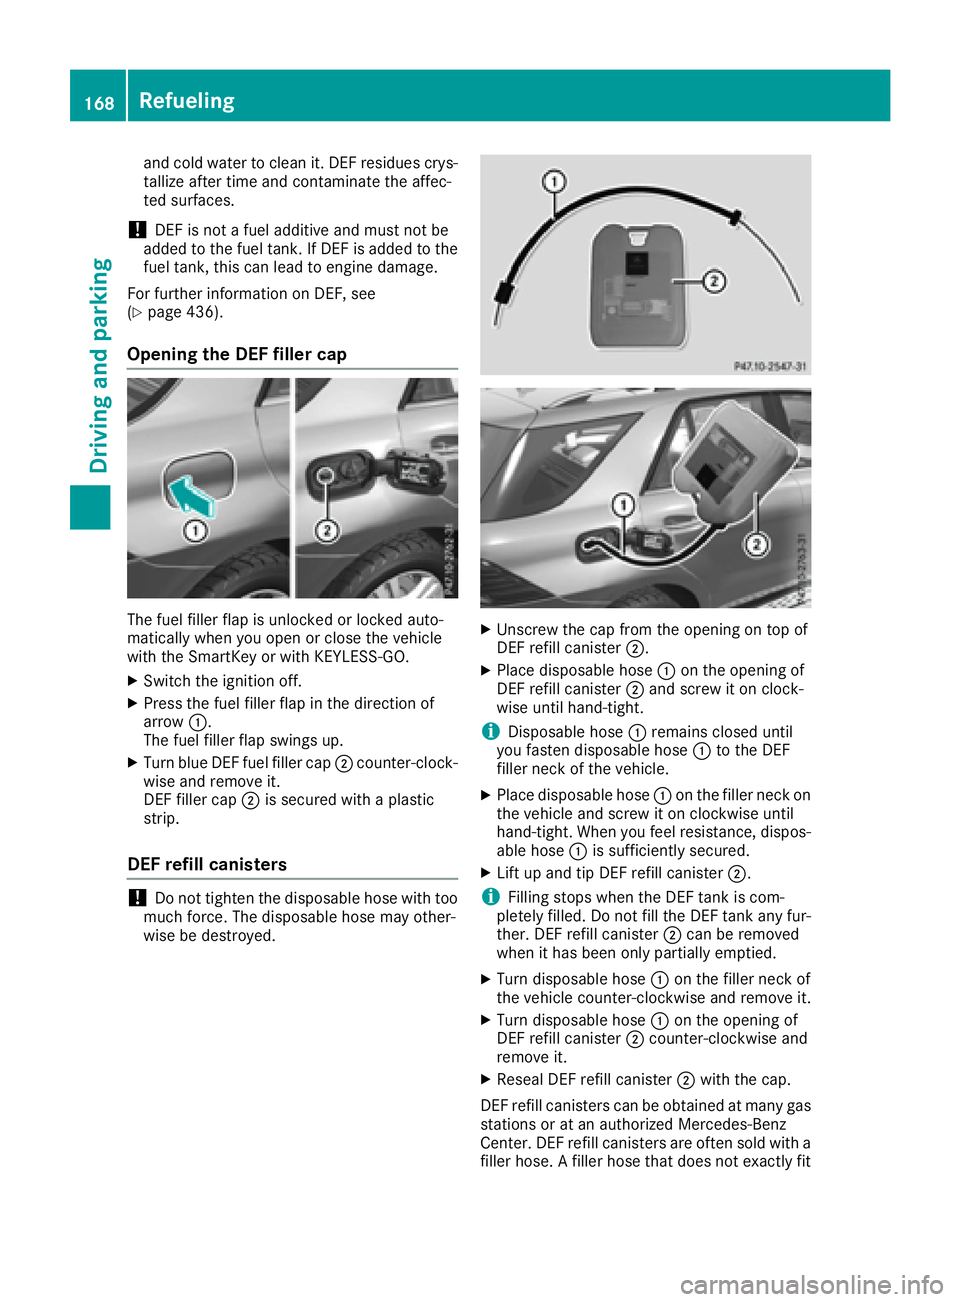
Opening the DEF filler cap
The fuel filler flap is unlocked or locked auto-
matically when you open or close the vehicle
with the SmartKey or with KEYLESS-GO.
XSwitch the ignition off.
XPress the fuel filler flap in the direction of
arrow :.
The fuel filler flap swings up.
XTurn blue DEF fuel filler cap ;counter-clock-
wise and remove it.
DEF filler cap ;is secured with a plastic
strip.
DEF refill canisters
!Do not tighten the disposable hose with too
much force. The disposable hose may other-
wise be destroyed.
XUnscrew the cap from the opening on top of
DEF refill canister ;.
XPlace disposable hose :on the opening of
DEF refill canister ;and screw it on clock-
wise until hand-tight.
iDisposable hose :remains closed until
you fasten disposable hose :to the DEF
filler neck of the vehicle.
XPlace disposable hose :on the filler neck on
the vehicle and screw it on clockwise until
hand-tight. When you feel resistance, dispos-
able hose :is sufficiently secured.
XLift up and tip DEF refill canister ;.
iFilling stops when the DEF tank is com-
pletely filled. Do not fill the DEF tank any fur-
ther. DEF refill canister ;can be removed
when it has been only partially emptied.
XTurn disposable hose :on the filler neck of
the vehicle counter-clockwise and remove it.
XTurn disposable hose :on the opening of
DEF refill canister ;counter-clockwise and
remove it.
XReseal DEF refill canister ;with the cap.
DEF refill canisters can be obtained at many gas
stations or at an authorized Mercedes-Benz
Center. DEF refill canisters are often sold with a
filler hose. A filler hose that does not exactly fit
168Refueling
Driving and parking
Page 181 of 450

Switching off the engine
Important safety notes
GWARNING
The automatic transmission switches to neu-
tral position Nwhen you switch off the engine.
The vehicle may roll away. There is a risk of an
accident.
After switching off the engine, always switch
to parking position P. Prevent the parked vehi-
cle from rolling away by applying the parking
brake.
Using the SmartKey
XApply the electric parking brake.
XShift the transmission to position P.
XTurn the SmartKey to position0in the ignition
lock and remove it.
The immobilizer is activated.
If you switch the engine off with the transmis-
sion in position Ror D, the automatic transmis-
sion shifts to Nautomatically.
If you then open the driver's door or the front-
passenger door or remove the SmartKey from
the ignition, the automatic transmission shifts
to Pautomatically.
If you want the automatic transmission to
remain in neutral N, e.g. when having the vehicle
cleaned in an automatic car wash with a towing system:
XSwitch on the ignition.
XDepress the brake pedal and keep it
depressed.
XShift to neutral N.
XRelease the brake pedal.
XRelease the electric parking brake.
XSwitch off the ignition and leave the SmartKey
in the ignition lock.
Using KEYLESS-GO
XApply the electric parking brake.
XShift the transmission to position P.
XPress the Start/Stop button (Ypage 146)
The engine stops and all the indicator lamps in
the instrument cluster go out. If you switch the engine off with the transmis-
sion in position
Ror D, the automatic transmis-
sion shifts to Nautomatically.
If you then open the driver's or front-passenger door, the automatic transmission shifts to P
automatically.
If you want the automatic transmission to
remain in neutral N, e.g. when having the vehicle
cleaned in an automatic car wash with a towing
system:
XRemove the Start/Stop button from the igni-
tion lock.
XInsert the SmartKey into the ignition lock.
XSwitch on the ignition.
XDepress the brake pedal and keep it
depressed.
XShift to neutral N.
XRelease the brake pedal.
XRelease the electric parking brake.
XSwitch off the ignition and leave the SmartKey
in the ignition lock.
iThe engine can be switched off in an emer-
gency while the vehicle is in motion by press-
ing and holding the Start/Stop button for
three seconds.
Electric parking brake
General notes
GWARNING
If you leave children unsupervised in the vehi-
cle, they could set it in motion by, for example:
Rrelease the parking brake.
Rshift the automatic transmission out of the
parking position P.
Rstart the engine.
In addition, they may operate vehicle equip-
ment and become trapped. There is a risk of
an accident and injury.
When leaving the vehicle, always take the
SmartKey with you and lock the vehicle. Never
leave children unsupervised in the vehicle.
Parking179
Driving and parking
Z
Page 286 of 450
Display messagesPossible causes/consequences andMSolutions
F(USA
only)
!( Canada
only)
Tur nOn the Igni‐
tio ntoReleas etheParkingBrake
The red F(USAonly) or !(Canada only) indicator lamp lights
up.
You attempte dto release th eelectric parking brak ewhile th eignition
was switched off .
XSmartKey:tur nth eSmartKey to position 1in th eignition lock.
XKEYLESS-GO: switch on theignition .
F(USA
only)
!( Canada
only)
Please
Releas ePark‐ing Brake
The red F(USAonly) or !(Canada only) indicator lamp flashes
and awarning tone sounds. Acondition for automatic release of th e
electric parking brak eis no tfulfilled (
Ypage 179).
You are drivin gwit hth eelectric parking brak eapplied.
XReleas eth eelectric parking brak emanually.
The red F(USAonly) or !(Canada only) indicator lamp flashes
and awarning tone sounds.
You are usin gth eelectric parking brak efor emergenc ybraking
(
Ypage 179).
F(USA
only)
!( Canada
only)
Parkin gBrake See
Operator' sManual
The yellow !warning lamp lights up.
The electric parking brak eis malfunctioning .
To apply :
XSwitchth eignition off .
XPress theelectric parking brak ehandle for at least te nseconds.
XShift th etransmission to position P.
XConsultaqualified specialist workshop .
The yellow!warning lamp and th ered F (USAonly) or !
(Canada only) indicator lamp ligh tup.
The electric parking brak eis malfunctioning .
To release:
XSwitc hoff th eignition and tur nit bac kon .
XReleas eth eelectric parking brak emanually.
or
XReleas eth eelectric parking brak eautomatically (Ypage 179).
If th eelectric parking brak estill canno tbe released:
XDo no tdrive on .
XConsult aqualified specialist workshop .
284Display messages
On-board computer and displays
Page 341 of 450
An incorrectly secured roof carrier or roof load
may become detached from the vehicle. You
must therefore ensure that you observe the roof
carrier manufacturer's installation instructions.
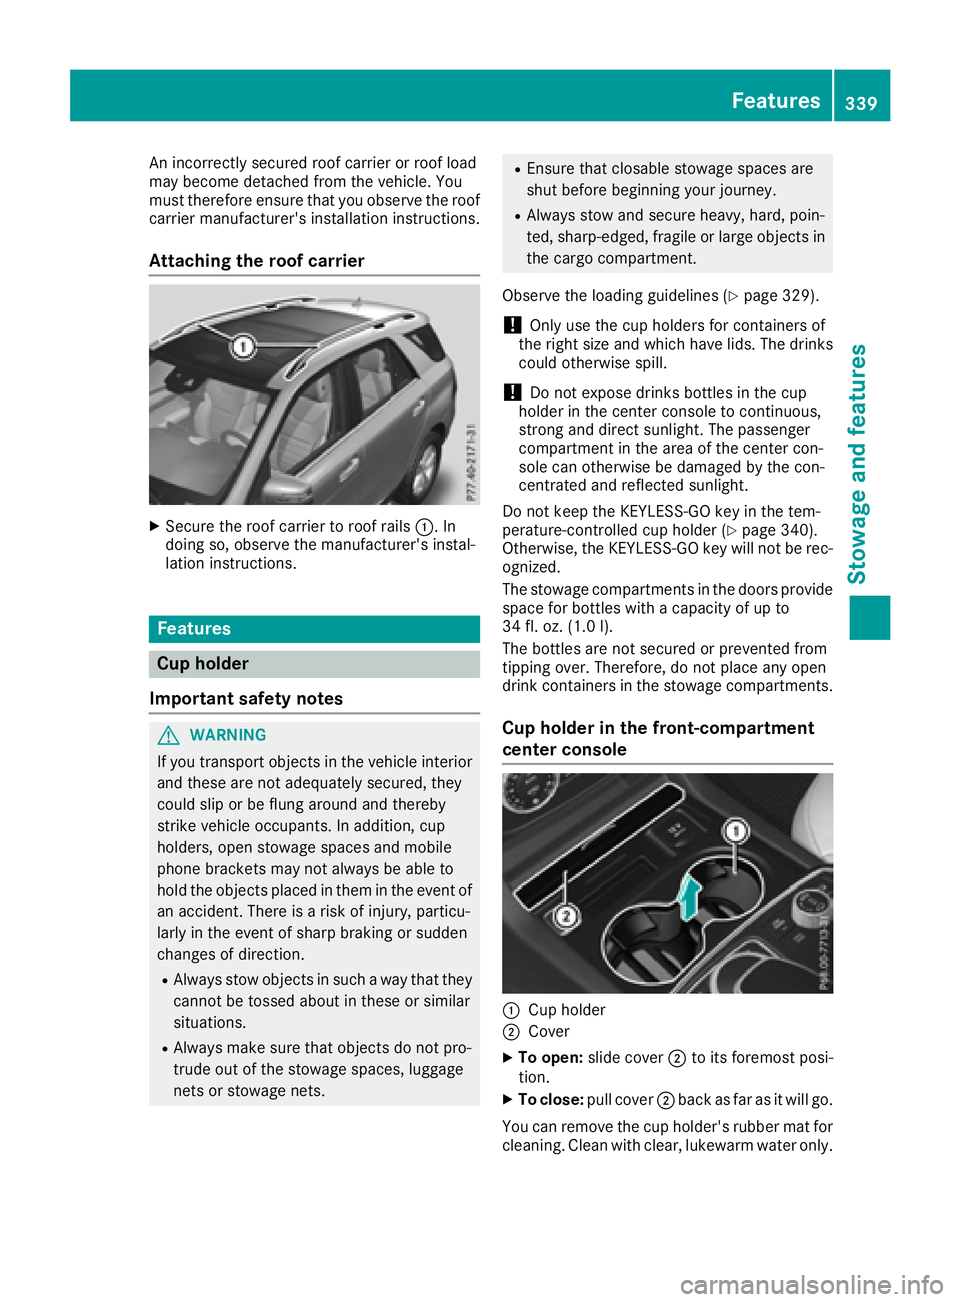
Attaching the roof carrier
XSecure the roof carrier to roof rails:. In
doing so, observe the manufacturer's instal-
lation instructions.
Features
Cup holder
Important safety notes
GWARNING
If you transport objects in the vehicle interior
and these are not adequately secured, they
could slip or be flung around and thereby
strike vehicle occupants. In addition, cup
holders, open stowage spaces and mobile
phone brackets may not always be able to
hold the objects placed in them in the event of
an accident. There is a risk of injury, particu-
larly in the event of sharp braking or sudden
changes of direction.
RAlways stow objects in such a way that they cannot be tossed about in these or similar
situations.
RAlways make sure that objects do not pro-
trude out of the stowage spaces, luggage
nets or stowage nets.
REnsure that closable stowage spaces are
shut before beginning your journey.
RAlways stow and secure heavy, hard, poin-
ted, sharp-edged, fragile or large objects in
the cargo compartment.
Observe the loading guidelines (
Ypage 329).
!Only use the cup holders for containers of
the right size and which have lids. The drinks
could otherwise spill.
!Do not expose drinks bottles in the cup
holder in the center console to continuous,
strong and direct sunlight. The passenger
compartment in the area of the center con-
sole can otherwise be damaged by the con-
centrated and reflected sunlight.
Do not keep the KEYLESS-GO key in the tem-
perature-controlled cup holder (
Ypage 340).
Otherwise, the KEYLESS-GO key will not be rec-
ognized.
The stowage compartments in the doors provide space for bottles with a capacity of up to
34 fl. oz. (1.0 l).
The bottles are not secured or prevented from
tipping over. Therefore, do not place any open
drink containers in the stowage compartments.
Cup holder in the front-compartment
center console
:Cup holder
;Cover
XTo open: slide cover ;to its foremost posi-
tion.
XTo close: pull cover ;back as far as it will go.
You can remove the cup holder's rubber mat for
cleaning. Clean with clear, lukewarm water only.
Features339
Stowag ean d features
Z
Page 361 of 450
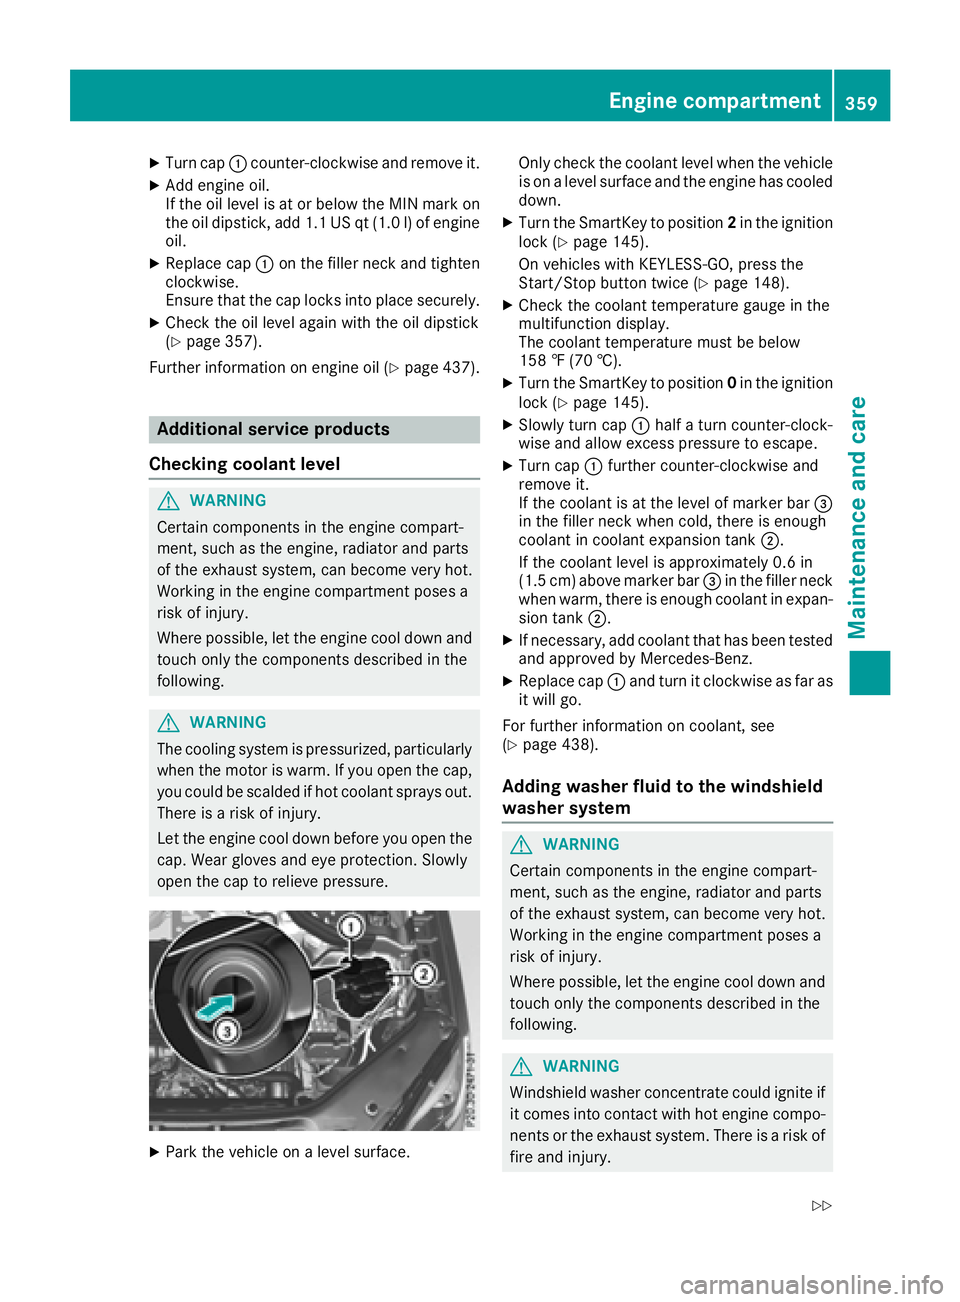
XTurn cap:counter-clockwise and remove it.
XAdd engine oil.
If the oil level is at or below the MIN mark on
the oil dipstick, add 1.1 US qt (1.0 l)of engine
oil.
XReplace cap :on the filler neck and tighten
clockwise.
Ensure that the cap locks into place securely.
XCheck the oil level again with the oil dipstick
(Ypage 357).
Further information on engine oil (
Ypage 437).
Additional service products
Checking coolant level
GWARNING
Certain components in the engine compart-
ment, such as the engine, radiator and parts
of the exhaust system, can become very hot.
Working in the engine compartment poses a
risk of injury.
Where possible, let the engine cool down and touch only the components described in the
following.
GWARNING
The cooling system is pressurized, particularly
when the motor is warm. If you open the cap,
you could be scalded if hot coolant sprays out.
There is a risk of injury.
Let the engine cool down before you open the
cap. Wear gloves and eye protection. Slowly
open the cap to relieve pressure.
XPark the vehicle on a level surface. Only check the coolant level when the vehicle
is on a level surface and the engine has cooled
down.
XTurn the SmartKey to position 2in the ignition
lock (Ypage 145).
On vehicles with KEYLESS-GO, press the
Start/Stop button twice (
Ypage 148).
XCheck the coolant temperature gauge in the
multifunction display.
The coolant temperature must be below
158 ‡ (70 †).
XTurn the SmartKey to position 0in the ignition
lock (Ypage 145).
XSlowly turn cap :half a turn counter-clock-
wise and allow excess pressure to escape.
XTurn cap :further counter-clockwise and
remove it.
If the coolant is at the level of marker bar =
in the filler neck when cold, there is enough
coolant in coolant expansion tank ;.
If the coolant level is approximately 0.6 in
(1.5 cm) above marker bar =in the filler neck
when warm, there is enough coolant in expan-
sion tank ;.
XIf necessary, add coolant that has been tested
and approved by Mercedes-Benz.
XReplace cap :and turn it clockwise as far as
it will go.
For further information on coolant, see
(
Ypage 438).
Adding washer fluid to the windshield
washer system
GWARNING
Certain components in the engine compart-
ment, such as the engine, radiator and parts
of the exhaust system, can become very hot.
Working in the engine compartment poses a
risk of injury.
Where possible, let the engine cool down and touch only the components described in the
following.
GWARNING
Windshield washer concentrate could ignite if it comes into contact with hot engine compo-
nents or the exhaust system. There is a risk of
fire and injury.
Engine compartment359
Maintenance and care
Z