2016 MERCEDES-BENZ GLE-CLASS SUV weight
[x] Cancel search: weightPage 62 of 450
Rvehicles with mbrace: automatic emergency
call
Rvehicles with the hybrid drive system: the
hybrid system and the high-voltage electrical
system are deactivated
Children in the vehicle
Important safety notes
Accident statistics show that children secured
in the rear seats are safer than children secured
in the front-passenger seat. For this reason,
Mercedes-Benz strongly advises that you install
a child restraint system on a rear seat. Children
are generally better protected there.
If a child younger than twelve years old and
under 5 ft (1.50 m) in height is traveling in the
vehicle:
Ralways secure the child in a child restraint
system suitable for Mercedes-Benz vehicles.
The child restraint system must be appropri-
ate to the age, weight and size of the child
Rbe sure to observe the instructions and safety
notes in this section in addition to the child
restraint system manufacturer's installation
instructions
Rbe sure to observe the instructions and safety
notes on the "Occupant classification system
(OCS)" (
Ypage 52)
GWARNING
If you leave children unsupervised in the vehi-
cle, they could set it in motion by, for example:
Rrelease the parking brake.
Rshift the automatic transmission out of the
parking position P.
Rstart the engine.
In addition, they may operate vehicle equip-
ment and become trapped. There is a risk of
an accident and injury.
When leaving the vehicle, always take the
SmartKey with you and lock the vehicle. Never
leave children unsupervised in the vehicle.
GWARNING
If persons, particularly children are subjected to prolonged exposure to extreme heat or
cold, there is a risk of injury, possibly even
fatal. Never leave children unattended in the
vehicle.
GWARNING
If the child restraint system is subjected to
direct sunlight, parts may get very hot. Chil-
dren may burn themselves on these parts,
particularly on the metal parts of the child
restraint system. There is a risk of injury.
If you leave the vehicle, taking the child with
you, always ensure that the child restraint
system is not exposed to direct sunlight. Pro- tect it with a blanket, for example. If the child
restraint system has been exposed to direct
sunlight, let it cool down before securing the
child in it. Never leave children unattended in
the vehicle.
Always ensure that all vehicle occupants have
their seat belts fastened correctly and are sitting
properly. Particular attention must be paid to
children.
Observe the safety notes on the seat belt
(
Ypage 46) and the notes on correct use of seat
belts (Ypage 47).
A booster seat may be necessary to achieve
proper seat belt positioning for children over
41 lbs (18 kg) until they reach a height where a
three-point seat belt can be properly fastened
without a booster seat.
Special seat belt retractor
GWARNING
If the seat belt is released while driving, the
child restraint system will no longer be
secured properly. The special seat belt retrac- tor is disabled and the inertia real draws in a
portion of the seat belt. The seat belt cannot
be immediately refastened. There is an
increased risk of injury, possibly even fatal.
Stop the vehicle immediately, paying atten-
tion to road and traffic conditions. Reactivate
the special seat belt retractor and secure the
child restraint system properly.
All seat belts in the vehicle, except the driver's
seat belt, are equipped with a special seat belt
60Children in the vehicle
Safety
Page 64 of 450
The securing systems of child restraint systems
are:
Rthe seat belt system
Rthe LATCH-type (ISOFIX) securing rings
Rthe Top Tether anchorages
If it is absolutely necessary to carry a child on
the front-passenger seat, be sure to observe the
information on the "Occupant Classification
System (OCS)" (
Ypage 52). There you will also
find information on deactivating the front-
passenger front air bag.
All child restraint systems must meet the fol-
lowing standards:
RU.S. Federal Motor Vehicle Safety Standards
213 and 225
RCanadian Motor Vehicle Safety Standards
213 and 210.2
Confirmation that the child restraint system cor-
responds to the standards can be found on an
instruction label on the child restraint system.
This confirmation can also be found in the instal-
lation instructions that are included with the
child restraint system.
Observe the warning labels in the vehicle inte-
rior and on the child restraint system.
LATCH-type (ISOFIX) child seat secur-
ing system
GWARNING
LATCH-type (ISOFIX) child restraint systems
do not offer sufficient protective effect for
children whose weight is greater than 48 lbs
(22 kg) who are secured using the safety belt integrated in the child restraint system. In the
event of an accident, a child might not be
restrained correctly. This poses an increased
risk of injury or even fatal injury.
If the child weighs more than 48 lbs (22 kg),
only use LATCH-type (ISOFIX) child restraint
systems with which the child is also secured
with the vehicle seat belt. Also secure the
child restraint system with the Top Tether
belt, if available.
Always comply with the manufacturer's instal-
lation and operating instructions for the child
restraint system used. Before every trip, make sure that the LATCH-
type (ISOFIX) child restraint system is engaged
correctly in both LATCH-type (ISOFIX) securing
rings
!When installing the child restraint system,
make sure that the seat belt for the middle
seat does not get trapped. The seat belt could
otherwise be damaged.
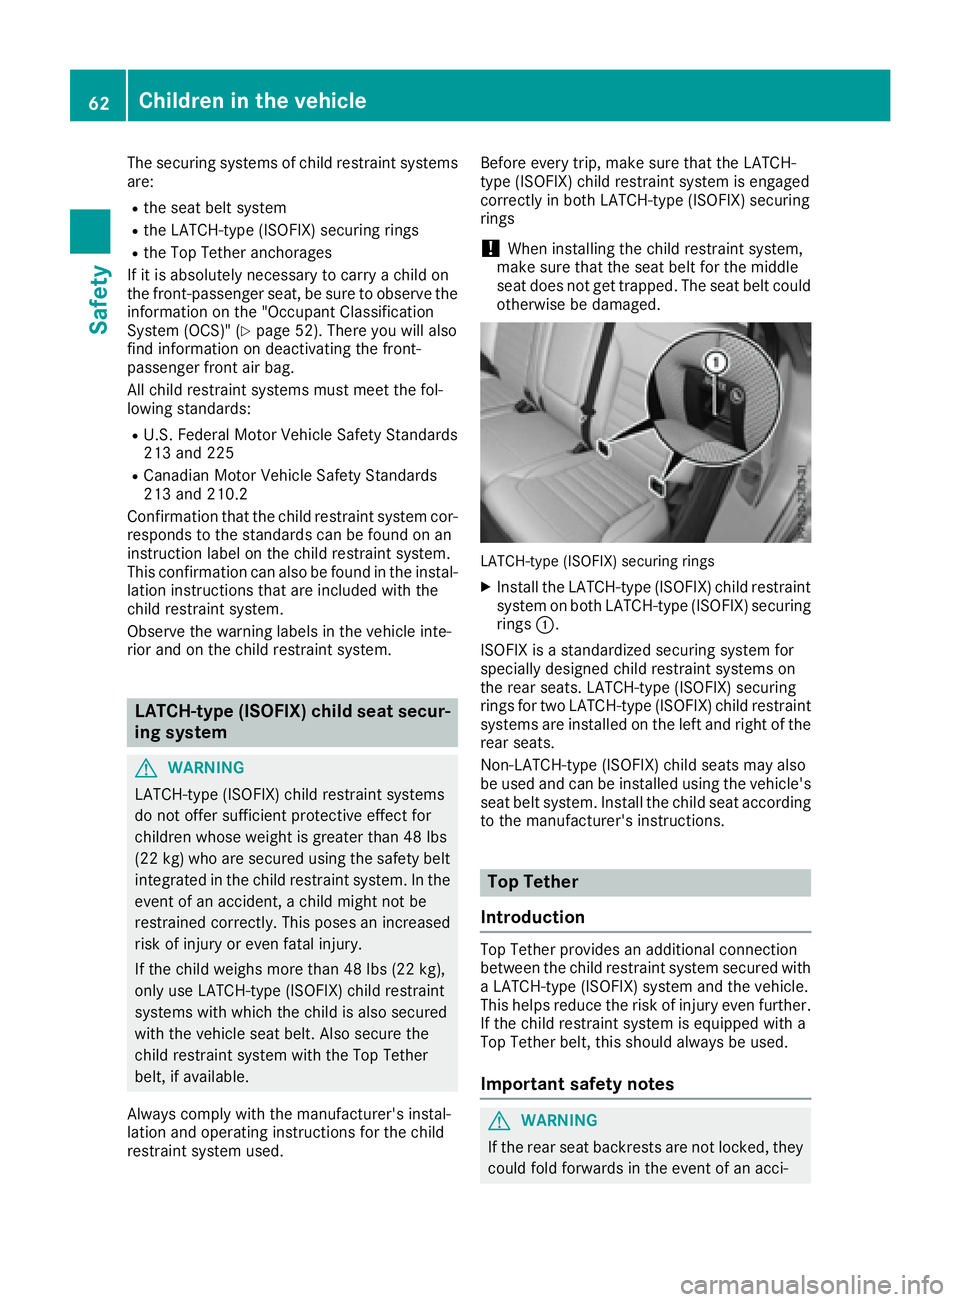
LATCH-type (ISOFIX) securing rings
XInstall the LATCH-type (ISOFIX) child restraint system on both LATCH-type (ISOFIX) securing
rings :.
ISOFIX is a standardized securing system for
specially designed child restraint systems on
the rear seats. LATCH-type (ISOFIX) securing
rings for two LATCH-type (ISOFIX) child restraint
systems are installed on the left and right of the
rear seats.
Non-LATCH-type (ISOFIX) child seats may also
be used and can be installed using the vehicle's
seat belt system. Install the child seat according to the manufacturer's instructions.
Top Tether
Introduction
Top Tether provides an additional connection
between the child restraint system secured with
a LATCH-type (ISOFIX) system and the vehicle.
This helps reduce the risk of injury even further.
If the child restraint system is equipped with a
Top Tether belt, this should always be used.
Important safety notes
GWARNING
If the rear seat backrests are not locked, they
could fold forwards in the event of an acci-
62Children in the vehicle
Safety
Page 258 of 450
Hybrid drive system
ProblemPossible causes/consequences andMSolutions
The hybrid drive system
has been switched off
automatically.You have been in an accident.
The hybrid drive system remains switched off if:
Rthe internal combustion engine cannot be restarted after a few
seconds.
Rthe red6restraint system warning lamp in the instrument clus-
ter is lit.
XConsult a qualified specialist workshop.
The hybrid drive system
has been switched off
automatically. The multi-
function display also
shows a display mes-
sage.An electrical short circuit has occurred in the hybrid drive system or an
electrical connection has been disconnected.
XObserve the additional display messages in the multifunction dis-
play (Ypage 280).
XConsult a qualified specialist workshop.
Towing a trailer
Important safety notes
GWARNING
Installing an unsuitable ball coupling may
result in overloading of the trailer tow hitch
and the rear axle. This applies especially if the ball coupling in question is longer or angled
differently. This could seriously impair the
driving characteristics and the trailer can
come loose. There is a risk of an accident.
You should only ever install a ball coupling
that has the permissible dimensions and that
is designed to meet your trailer-towing
requirements. Do not modify the ball coupling
or the trailer tow hitch.
You will find the values approved by the manu-
facturer on the vehicle identification plates and
those for the towing vehicle under "Technical
data" (
Ypage 445).
GWARNING
If the ball coupling is not installed correctly or not secured with the bolt provided and the
corresponding spring cotter, the trailer may
come loose. There is a risk of an accident.
Always install and secure the ball coupling as
described. Before every journey, ensure that
the ball coupling is secured with the bolt and
the corresponding spring cotter.
GWARNING
When the vehicle/trailer combination begins
to lurch, you could lose control of it. The vehi- cle/trailer combination could even rollover.
There is a risk of an accident.
On no account should you attempt to
straighten up the vehicle/trailer combination
by increasing the speed. Reduce vehicle
speed and do not countersteer. Apply the
brake as necessary.
Please observe the manufacturer's operating
instructions for the trailer coupling if a detach-
able trailer coupling is used.
Couple and uncouple the trailer carefully. If you
do not couple the trailer to the towing vehicle
correctly, the trailer could become detached.
Make sure that the following values are not
exceeded:
Rthe permissible trailer drawbar noseweight
Rthe permissible trailer load
Rthe permissible rear axle load of the towing
vehicle
Rthe maximum permissible gross vehicle
weight of both the towing vehicle and the
trailer
256Towing a trailer
Driving and parking
Page 263 of 450

RIf possible, do not brake suddenly, but insteaddepress the brake pedal moderately at first so
that the trailer can activate its brakes. Then
increase the pressure on the brake pedal.
RIf the automatic transmission repeatedly
shifts between gears on uphill or downhill gra-
dients, shift to a lower gear using the left-hand
steering wheel paddle shifter.
A lower gear and lower speed reduce the risk
of engine failure.
RWhen driving downhill, shift to a lower gear toutilize the engine's braking effect.
Avoid continuous brake application as this
may overheat the vehicle brakes and, if instal-
led, the trailer brakes.
RIf the coolant temperature increases dramat-
ically while the air-conditioning system is
switched on, switch off the air-conditioning
system.
Coolant heat can also be dissipated by open-
ing the windows and switching the ventilation blower and the interior temperature to the
highest level.
RWhen overtaking, pay particular attention to
the extended length of your vehicle/trailer
combination.
Due to the length of the vehicle/trailer com-
bination, you require additional road space in
relation to the vehicle you are overtaking
before you can change back to the original
lane.
Decoupling a trailer
GWARNING
If you uncouple a trailer with the overrun
brake engaged, you could trap your hand
between the vehicle and the trailer drawbar.
There is a risk of injury.
Do not uncouple a trailer if the overrun brake
is engaged.
GWARNING
Vehicles with level control:
The vehicle is lowered as soon as you discon-
nect the trailer cable. This could result in your
limbs or those of other people that are
between the vehicle body and tires or under-
neath the vehicle being trapped. There is a
risk of injury.
Make sure that nobody is in the immediate
vicinity of the wheel housings or under the
vehicle when you disconnect the trailer cable.
!Do not disconnect a trailer with an engaged
overrun brake. Otherwise, your vehicle could
be damaged by the rebounding of the overrun brake.
XShift the transmission to position P.
XApply the vehicle's electric parking brake.
XStart the engine.
XClose the doors and tailgate.
XApply the trailer's parking brake.
XDetach the trailer cable and decouple the
trailer.
XSwitch off the engine.
Permissible trailer loads and drawbar
loads
Weight specifications
Maximum allowable gross mass
The gross vehicle weight of the trailer is calcu-
lated by adding the weight of the trailer to the
weight of the load and equipment on the trailer. You will find installing dimensions and loads
under "Technical data" (
Ypage 444).
Permissible noseweight
You will find installing dimensions and loads
under "Technical data" (Ypage 444).
Loading a trailer
RWhen loading the trailer, make sure that nei-
ther the permissible gross weight of the trailer
nor the gross vehicle weight are exceeded.
The permissible gross vehicle weight is indi-
cated on the identification plate located on
the B-pillar on the driver's side of the vehicle.
You can find the maximum permissible values
on the type plates of your vehicle and the
trailer. When calculating how much weight
Towing a trailer261
Driving and parking
Z
Page 264 of 450
the vehicle and trailer may carry, pay atten-
tion to the respective lowest values.
RThe trailer drawbar load on the ball coupling
must be added to the rear axle load to avoid
exceeding the permissible gross axle weight.
The permissible gross vehicle weight is indi-
cated on the identification plate located on
the B-pillar on the driver's side of the vehicle.
iMercedes-Benz recommends a trailer load
where the trailer drawbar noseweight
accounts for 8 % to 15 % of the trailer's per-
missible gross weight.
iThe weight of additional accessories, pas-
sengers, and cargo reduces the permissible
trailer load and drawbar load for your vehicle.
Checking the vehicle and trailer weight
RTo check that the weights of the towing vehi-
cle and the trailer comply with the maximum
permissible values, have the vehicle/trailer
combination (including the driver, passen-
gers, and cargo with a fully laden trailer)
weighed on a calibrated weighbridge.
RCheck the gross axle weight rating of the front and rear axles, the gross weight of the trailer
and the trailer drawbar noseweight.
Removing the ball coupling
XRemove the spring cotter.
XRemove the bolt from the ball coupling
recess.
XRemove the ball coupling from the ball cou-
pling recess.
XClean the ball coupling if it is dirty.
XStow the ball coupling so that it cannot be
thrown around.
Observe the loading guidelines (
Ypage 329)
and the safety notes regarding stowage spaces
(
Ypage 330).
Information on cleaning and care of the trailer
tow hitch (
Ypage 366).
Trailer power supply
!
Accessories with a maximum power con-
sumption of 180 W can be connected to the
permanent power supply. You must not charge a trailer battery using the
power supply.
The trailer socket of your vehicle is equipped at
the factory with a permanent power supply.
The permanent power supply is supplied via
trailer socket pin 4.
The trailer's permanent power supply is
switched off in the event of low vehicle supply
voltage and after six hours at the latest.
A qualified specialist workshop can provide
more information about installing the trailer
electrics.
262Towing a trailer
Driving an d parking
Page 293 of 450
Display messagesPossible causes/consequences andMSolutions
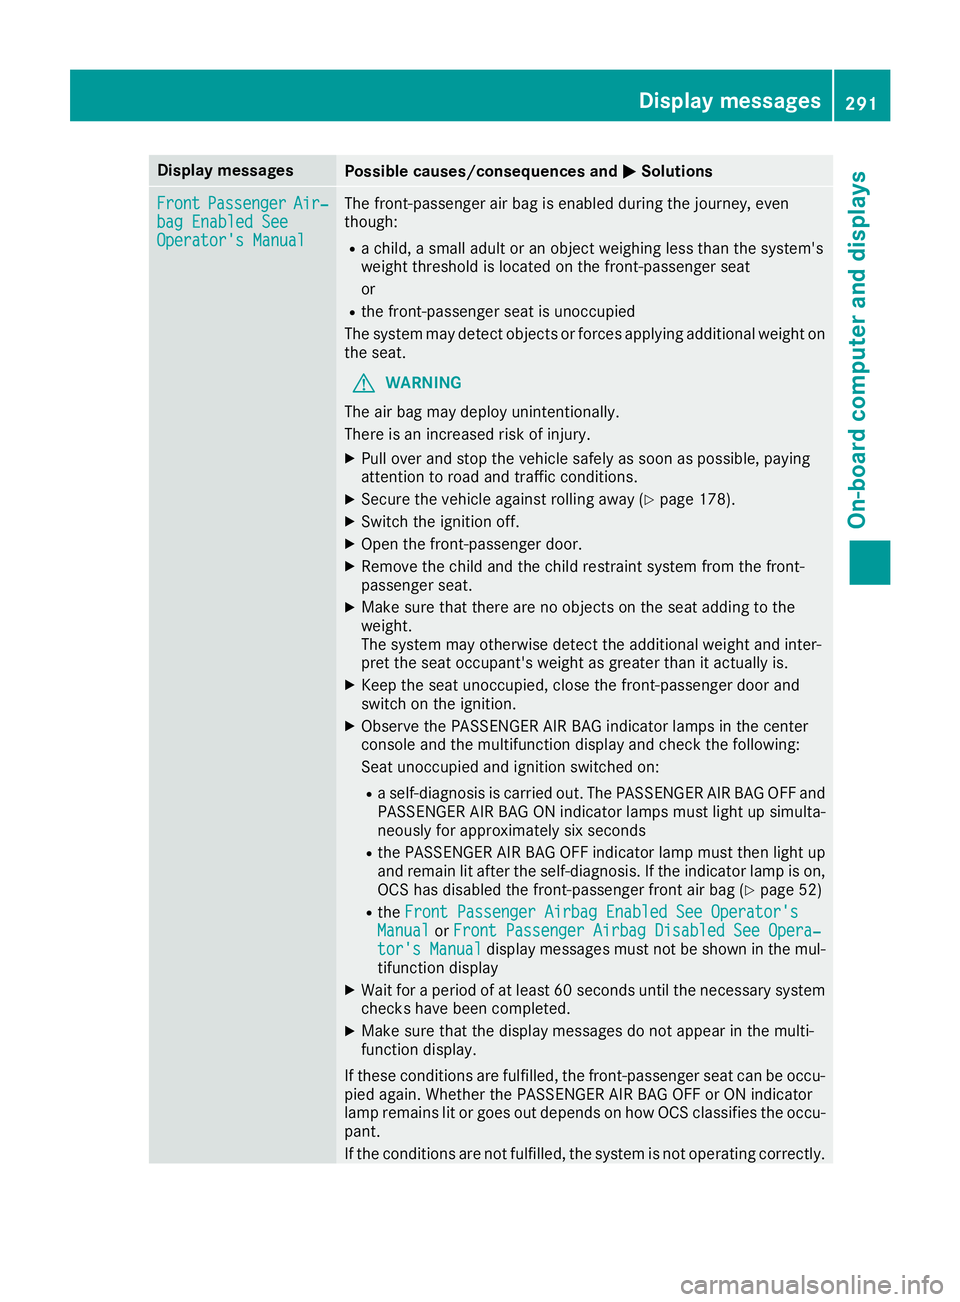
FrontPassengerAir‐bag Enable dSeeOperator' sManual
The front-passenger air bag is enabled during th ejourney, eve n
though :
Rachild, asmall adult or an objec tweighing less than th esystem' s
weigh tthreshold is locate don th efront-passenger seat
or
Rth efront-passenger seat is unoccupied
The system may detec tobjects or force sapplyin gadditional weigh ton
th eseat .
GWARNIN G
The air bag may deploy unintentionally.
There is an increased ris kof injury.
XPull ove rand stop th evehicl esafely as soo nas possible, payin g
attention to roa dand traffic conditions.
XSecur eth evehicl eagainst rollin gaway (Ypage 178).
XSwitchth eignition off .
XOpenth efront-passenger door .
XRemove thechild and th echild restrain tsystem from th efront-
passenger seat .
XMakesur ethat there are no objects on th eseat addin gto th e
weight.
The system may otherwise detec tth eadditional weigh tand inter-
pre tth eseat occupant's weigh tas greate rthan it actually is.
XKee pth eseat unoccupied ,close th efront-passenger door and
switch on th eignition .
XObserveth ePASSENGER AI RBA Gindicator lamp sin th ecenter
console and th emultifunction display and chec kth efollowing:
Seat unoccupied and ignition switche
d on
:
Raself-diagnosis is carrie dout .The PASSENGER AI RBA GOF Fand
PASSENGER AI RBA GON indicator lamp smus tligh tup simulta-
neousl yfor approximately six seconds
Rth ePASSENGER AI RBA GOF Findicator lamp mus tthen ligh tup
and remain lit after th eself-diagnosis .If th eindicator lamp is on ,
OCS has disabled th efront-passenger fron tair bag (
Ypage 52)
RtheFront Passenger Airbag Enable dSee Operator' sManualorFront Passenger Airbag Disabled See Opera‐tor's Manualdisplay message smus tno tbe shown in th emul-
tifunction display
XWait for aperiod of at least 60 seconds until th enecessar ysystem
checks hav ebeen completed.
XMak esur ethat th edisplay message sdo no tappear in th emulti-
function display.
If these condition sare fulfilled ,th efront-passenger seat can be occu-
pied again .Whether th ePASSENGER AI RBA GOF For ON indicator
lamp remain slit or goe sout depend son how OCS classifies th eoccu-
pant.
If th econdition sare no tfulfilled ,th esystem is no toperating correctly.
Display messages29 1
On-board computer and displays
Z
Page 331 of 450
Useful information
i
This Operator's Manual describes all models
and all standard and optional equipment of
your vehicle available at the time of publica-
tion of the Operator's Manual. Country-spe-
cific differences are possible. Please note
that your vehicle may not be equipped with all
features described. This also applies to
safety-related systems and functions.
iRead the information on qualified specialist
workshops (Ypage 29).
Stowage areas
Loading guidelines
GWARNING
If objects, luggage or loads are not secured or
not secured sufficiently, they could slip, tip
over or be flung around and thereby hit vehicle
occupants. There is a risk of injury, particu-
larly in the event of sudden braking or a sud-
den change in direction.
Always store objects so that they cannot be
flung around. Secure objects, luggage or
loads against slipping or tipping before the
journey.
GWARNING
Combustion engines emit poisonous exhaust
gases such as carbon monoxide. If the tailgate
is open when the engine is running, particu-
larly if the vehicle is moving, exhaust fumes
could enter the passenger compartment.
There is a risk of poisoning.
Turn off the engine before opening the tail-
gate. Never drive with the tailgate open.
GWARNING
The exhaust tail pipe and tail pipe trim can
become very hot. If you come into contact
with these parts of the vehicle, you could burn
yourself. There is a risk of injury.
Always be particularly careful around the
exhaust tail pipe and the tail pipe trim. Allow
these components to cool down before touch-
ing them.
The gross vehicle weight (GVW) is the vehicle
weight including fuel, vehicle tool kit, spare
wheel, installed accessories, vehicle occupants
and luggage/cargo.
Do not exceed the load limit or permitted gross
vehicle weight rating (GVWR) for your vehicle.
The gross load limit and the GVWR are specified
on the vehicle identification plate on the B-pillar
of the driver's door (
Ypage 397).
The load must also be distributed so that the
weight on each axle never exceeds the gross
axle weight rating (GAWR) for the front and rear
axles. The specifications for GVWR and GAWR
are on the vehicle identification plate on the B-
pillar of the driver's door (
Ypage 397).
Observe the notes on loading the vehicle
(
Ypage 397).
The handling characteristics of a laden vehicle
are dependent on the distribution of the load
within the vehicle. For this reason, you should
observe the following notes when transporting a
load:
RNever exceed the maximum permissible
gross vehicle mass or the gross axle weight
rating for the vehicle (including occupants).
RThe cargo compartment is the preferred place to carry objects.
RPosition heavy loads as far forwards as pos-
sible and as low down in the cargo compart-
ment as possible.
RThe load must not protrude above the upper
edge of the seat backrests.
RAlways place the load against the rear or frontseat backrests. Make sure that the seat
backrests are securely locked into place.
RAlways place the load behind unoccupied
seats if possible.
RUse the cargo tie-down rings and the parcel
nets to transport loads and luggage.
RUse cargo tie-down rings and fastening mate-
rials appropriate for the weight and size of theload.
RHook in the cargo net when loading.
RSecure the load with sufficiently strong and
wear-resistant tie-downs. Pad sharp edges for
protection.
Stowage areas329
Stowage and features
Z
Page 333 of 450
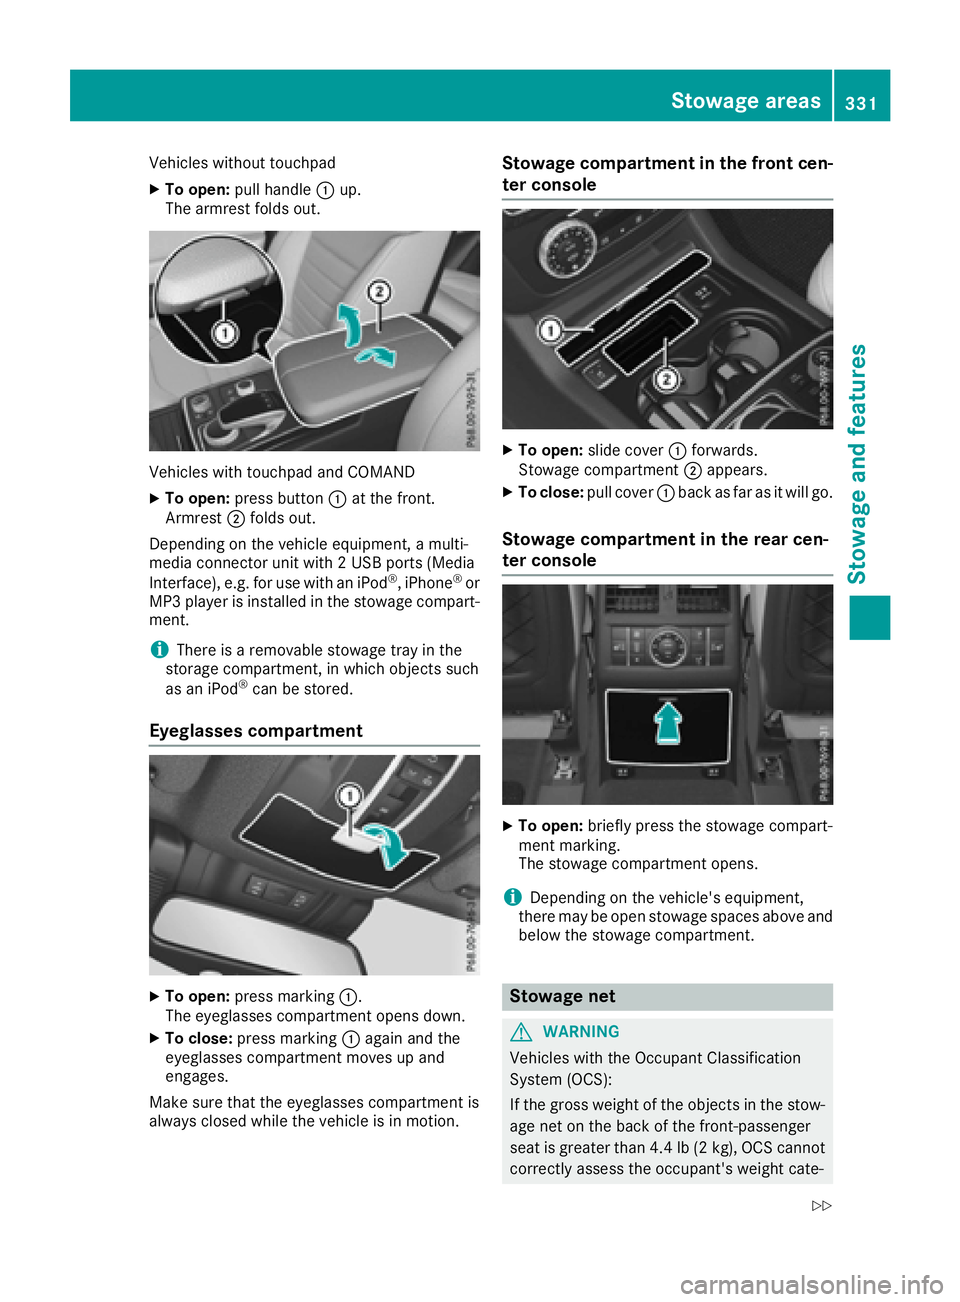
Vehicles without touchpad
XTo open:pull handle :up.
The armrest folds out.
Vehicles with touchpad and COMAND
XTo open: press button :at the front.
Armrest ;folds out.
Depending on the vehicle equipment, a multi-
media connector unit with 2 USB ports (Media
Interface), e.g. for use with an iPod
®, iPhone®or
MP3 player is installed in the stowage compart-
ment.
iThere is a removable stowage tray in the
storage compartment, in which objects such
as an iPod
®can be stored.
Eyeglasses compartment
XTo open: press marking :.
The eyeglasses compartment opens down.
XTo close: press marking :again and the
eyeglasses compartment moves up and
engages.
Make sure that the eyeglasses compartment is
always closed while the vehicle is in motion.
Stowage compartment in the front cen-
ter console
XTo open: slide cover :forwards.
Stowage compartment ;appears.
XTo close: pull cover :back as far as it will go.
Stowage compartment in the rear cen-
ter console
XTo open: briefly press the stowage compart-
ment marking.
The stowage compartment opens.
iDepending on the vehicle's equipment,
there may be open stowage spaces above and
below the stowage compartment.
Stowage net
GWARNING
Vehicles with the Occupant Classification
System (OCS):
If the gross weight of the objects in the stow- age net on the back of the front-passenger
seat is greater than 4.4 lb (2 kg), OCS cannot
correctly assess the occupant's weight cate-
Stowage areas331
Stowage and features
Z